Table of Contents
Advertisement
Advertisement
Table of Contents

Summary of Contents for Hertz HDD Series
- Page 1 HDD - HVD DIRECT DRIVE SERIES 5-75 kW INSTRUCTION MANUAL...
- Page 2 HERTZ KOMPRESSOREN Revision Status R06 – Revision : March 2022 Compilation, Editing & Publications R & D Department...
-
Page 3: Table Of Contents
GENERAL ..............................1 Foreword ............................1 Cautions ............................1 Copyright ............................1 Warranty and Liability ........................1 Type Approval and Genuine Spare Parts ..................2 Technical Service ........................... 2 Descriptions and Warnings ......................2 SAFETY ..............................3 Operating Conditions ........................3 Unauthorized Modifications/Changes .................... - Page 4 OPTIONAL COOLING SYSTEMS......................18 Water Cooled Systems: ....................... 18 4.1.1 Compact Soldered Heat Exchangers (CSHE) ................18 4.1.2 Filters ............................19 4.1.3 Cleaning CSHE..........................19 4.1.4 Storage ............................19 4.1.5 Exchanger Maintenance: ......................19 Heat Recovered Systems ......................20 4.2.1 Heat Recovery in Air Cooled Screw-Type Compressors ............
- Page 5 FAILURES ............................... 48 General ............................48 Failures, Reasons and Solutions ....................49 MAINTENANCE ............................57 Safety during maintenance ......................58 Periodical Maintenance Check List ....................58 9.2.1 Daily Maintenance ........................58 9.2.2 Every 125 hours operation ......................58 9.2.3 Every 2000 hours operation or 6 months ..................59 9.2.4 Every 4000 hours operation or 12 months ..................
- Page 6 FIGURES Figure 1 Safety and Warnings..........................8 Figure 2 HDD Direct Drive Model ........................11 Figure 3 Direct Drive System ........................... 12 Figure 4 Pressure System ..........................13 Figure 5 Intake system ............................. 15 Figure 6 Cooling and Lubricating System ......................17 Figure 7 Water Cooled System ........................
- Page 7 Table 1 Descriptions and Warnings ........................2 Table 2 Main Parts of HDD 22 Direct Drive Model ..................11 Table 3 Technical Specifications of the HDD Series ..................22 Table 4 Technical Specifications of the HVD Series ..................24 Table 5 Schedule of Equivalent Pipe Lengths ....................37 Table 6 HDD-HVD Cable Sections ........................
-
Page 8: General
Copyright All rights of these operating instructions are reserved by HERTZ KOMPRESSOREN. The manual may not be entirely or partially reproduced, changed and distributed in any manner. Warranty and Liability Before installation and operation of the compressor, be sure that this manual has been duly read by the authorized personnel (mechanics, maintenance staff and all users). -
Page 9: Type Approval And Genuine Spare Parts
HERTZ KOMPRESSOREN may not be kept responsible for any possible accidents and damages to arise out of the use of non-approved spare parts. Only Use the HERTZ approved parts and components for your safety and security. Technical Service Please do not hesitate to get contact with our technical service for any problems with your compressor. -
Page 10: Safety
Make sure that the power cables are not connected so that your compressor is not used by third parties. Unauthorized Modifications/Changes ➢ Do not make any modification/change on your compressor without consent of HERTZ KOMPRESSOREN. ➢ Unauthorized changes may cause malfunction and a reduction in the life of your compressor as well as serious injury. -
Page 11: Compressed Air Line Connections
SAFETY Compressed Air Line Connections ➢ To obtain maximum efficiency from compressor; make sure that you are using equipment that comply with the specifications of your compressor. ➢ Ensure that compressed air line elements are connected properly, sealed and that this line is not exposed to high temperatures. -
Page 12: Moving Parts
SAFETY ➢ Do not place combustible materials such as a piece of cloth, sawdust, paper-like solids around your compressor. ➢ Do not operate compressor without creating adequate ventilation condition. ➢ Do not operate your compressor on over-capacity unless modified. Moving Parts ➢... -
Page 13: Combustible And Irritant Substances
SAFETY ➢ While authorized personal is doing any work related to your compressor, wear protective helmets, glasses and gloves. ➢ Always keep a first aid kit in the work area of your compressor and consult a doctor even in the slightest injury. -
Page 14: Important Points Before You Begin
SAFETY Important Points Before You Begin ➢ Thoroughly check your compressor before you start the compressor. If you think that something is wrong with your compressor, do not start the compressor. ➢ Make sure that all protection and security pieces are in place. Do not start your compressor without replacing the damaged parts or completing the missing parts. -
Page 15: Safety And Warnings
SAFETY 2.12 Safety and Warnings Safety precautions are described as "danger-warning" in necessary conditions. Figure 1 Safety and Warnings Safety Sign Description Rotating Parts! Hot Surface! High voltage! Equipment starts automatically... -
Page 16: Recommendations
SAFETY Safety Sign Description Wear earpieces! Rotational direction of Coupling! Please read operating instructions! Read the safety and protection precautions before starting the compressor. ➢ Keep clean any warning signs, and make sure that they are readily visible on the compressor. ➢... -
Page 17: Air Filter
➢ Service warning system ➢ Alarm warning system 2.16 Noise Protection Thanks to the special sound insulated cabinets of HERTZ HDD and HVD Direct Drive Series, the noise level of the compressor in operating condition has been minimized. 2.17 Environmental Conscience Take care of the cleaning for environmental preservation, and act in compliance with the respective laws and regulations. -
Page 18: Compressor Operation
COMPRESSOR OPERATION COMPRESSOR OPERATION General View of HDD 22 Direct Drive Figure 2 HDD Direct Drive Model Table 2 Main Parts of HDD 22 Direct Drive Model PART NAME PART NAME Control Unit Water Separator Oil Filter Fan Housing Min. Pressure Valve Radiator Intake Valve Air Filter... -
Page 19: Compressor Operation
COMPRESSOR OPERATION Compressor Operation HERTZ HDD and HVD Direct Drive Series which is the screw air compressor series of HERTZ that is built with quality components and durability that has been proven for years. 3.2.1 Drive and Control HERTZ HDD and HVD Direct Drive Series compressors are powered by an electric motor which provides the mechanical drive force required for the screw unit to produce the compressed air. -
Page 20: Pressure System
COMPRESSOR OPERATION 3.2.2 Pressure System The pressure system comprises of a screw unit, separator, tank, separator and minimum pressure valve and oil return (scavenge) line circuit. When there is pressure inside the compressor, do not attempt to remove any cover or part. First stop the compressor, and be sure that the entire pressure is eliminated. - Page 21 COMPRESSOR OPERATION ➢ The air-oil mixture in the separator tank goes to the separator filter. The specially designed separator filter keeps the airborne oil particles outside, so that only pure air can enter inside. ➢ In the course of this filtering process, a negligible amount of oil penetrates into the separator, and accumulates under the filter.
-
Page 22: Intake And Control System
COMPRESSOR OPERATION Intake and Control System It filters any harmful dusts that may be sucked by the compressor from the external environment, so that the compressor works at the preset pressure interval. This system comprises of two subassemblies, i.e. the Intake System and the Intake Control System. Figure 5 Intake system 3.3.1 Intake System The abrasives in the air drawn by the compressor enter any point where the oil penetrates in... -
Page 23: Intake Control System
COMPRESSOR OPERATION 3.3.2 Intake Control System The intake control system comprises of an intake regulator, solenoid valves, control airline hoses and safety pressure switch. It uses the pressure switch to be able to obtain the pressure information in systems with electronic control module and inverter. The intake control system aims at operating the compressor in a most cost efficient manner. -
Page 24: Figure 6 Cooling And Lubricating System
COMPRESSOR OPERATION ➢ The air-oil mixture is sprayed from the screw unit into the separator tank. Thanks to the special design of the separator tank, the air flow formed inside the tank ensures that the oil particles in the air-oil mixture become heavier by combining and are diverted onto the inner surface of the tank. In this way, the oil does not entirely attack onto the separator so that the separator smoothly operates for long times. -
Page 25: Optional Cooling Systems
The water cooled systems cool down the compressed air generated by the oil circulating in the oil circuit and the system with the help of an exchanger. These systems are optional in HERTZ screw-type compressors and provide more efficient system cooling with the help of the exchangers designed specially according to the capacity of the machine. -
Page 26: Filters
Remember to wash the heat exchanger thoroughly with clean water after use. Using a 1- 2% sodium hydroxide (NaOH) solution or a sodium bicarbonate (NaHCO3) solution before the final rinse guarantees neutralization of the acid. Clean at regular intervals Contact HERTZ technical service department for more information on cleaning CSHE's. -
Page 27: Heat Recovered Systems
OPTIONAL COOLING SYSTEM Heat Recovered Systems 4.2.1 Heat Recovery in Air Cooled Screw-Type Compressors • In the Air Cooled screw-type compressors, the cooling air entering into the compressor is used for cooling the compressor oil and the compressed air. • During this process, the cooling air entering into the compressor with the ambient temperature rises up to 104°F-122°F (+40 - 50 C ) before leaving the compressor. -
Page 28: Figure 9 Installation Of Heat Recovery System
OPTIONAL COOLING SYSTEM a- Heating the Environments: The simplest way of heat recovery in oil or fluid cooled screw-type compressors is using the cooling air heated by the compressor directly. In this process, the hot air is transferred to the places to be heated through an air duct system. -
Page 29: Technical Data
TECHNICAL DATA TECHNICAL DATA Technical Specifications of the Compressor Table 3 Technical Specifications of the HDD Series 133.1 SMART OIL 230/460/575 (6.9) (3.77) 6000 131.7 SMART OIL 230/460/575 (8.6) (3.73) 6000 3650 3.17 HDD 22 (6200) (12) 107.0 SMART OIL 230/460/575 (10.3) - Page 30 TECHNICAL DATA 374.34 SMART OIL 460/575 (6.9) (10.6) 6000 346.1 SMART OIL 460/575 (9.8) (8.6) 6000 289.6 5665 SMART OIL HDD 55 460/575 7.93 (30) (10.3) (8.20) (9625) 6000 277.2 SMART OIL 460/575 (12) (7.85) 6000 220.9 SMART OIL 230/460 (14.5) (6.25) 6000...
-
Page 31: Table 4 Technical Specifications Of The Hvd Series
TECHNICAL DATA Table 4 Technical Specifications of the HVD Series 30.7 SMART OIL 460/575 (6.9) (0.87) 6000 27.5 SMART OIL 230/460/575 1177 (8.6) (0.78) 6000 HVD 5 1.32 (5) 23.7 (2000) SMART OIL 230/460/575 (10.3) (0.67) 6000 20.13 SMART OIL 230/460/575 (12) (0.57) - Page 32 TECHNICAL DATA 192.5 230/460/575 SMART OIL (6.9) (5.45) 6000 172.3 230/460/575 SMART OIL (4.88) (8.6) 6000 3607 5.28 HVD 30 162.4 230/460/575 (6130) SMART OIL (20) (10.3) (4.60) 6000 230/460/575 147.3 SMART OIL (12) (4.17) 6000 235.9 230/460/575 SMART OIL (6.9) (6.68) 6000...
- Page 33 TECHNICAL DATA MOTOR DIMENSIONS DIMENSIONS AIR OUTPUT PIPE WEIGHT WEIGHT MODEL POWER DxWxH (mm) DxWxH (in) DIAMETER (in) (kg) (Ibs) (kW/HP) 1800x550x1455* 70.9x21.7x57.3* NPT (1/2”) HVD 5 5,5/7 1800x550x1455** 70.9x21.7x57.3** 1025x650x950*** 40.4x25.6x37.4*** 1800x550x1455* 70.9x21.7x57.3* NPT (1/2”) HVD 7 7,5/10 1800x550x1455** 70.9x21.7x57.3** 1025x650x950*** 40.4x25.6x37.4***...
-
Page 34: Plates Located On Your Compressor
TECHNICAL DATA Plates located on your compressor 5.2.1 Plate on the Case Figure 10 Plate on the Case 5.2.2 Plate on the Oil Tank Figure 11.a. Plate on the Oil Tank... -
Page 35: Plate On The Oil Tank (With Asme)
TECHNICAL DATA 5.2.3 Plate on the Oil Tank (with ASME) Figure 11 .b. Plate on the Oil Tank for ASME/CRN... -
Page 36: Label On The Motor Lubricated
TECHNICAL DATA 5.2.4 Label on the Motor Lubricated Figure 12 Label on the Motor... -
Page 37: Hdd-Hvd Series P&Id Diagrams
TECHNICAL DATA HDD-HVD Series P&ID Diagrams... -
Page 38: Transportation, Handling, Installation
➢ Be sure to check the compressor for any possible damage and deficient parts at the time of delivery. ➢ In case of any damage on the compressor package, notify your logistics company first and then HERTZ KOMPRESSOREN. 6.1.2 Handling Figure 13 Transportation of Compressor with Forklift ➢... -
Page 39: Figure 14 Transportation Of Compressor With Forklift
TRANSPORTATION, HANDLING, INSTALLATION Figure 14 Transportation of Compressor with Forklift Figure 15 Transportation of Compressor with Hanger... -
Page 40: Figure 16 Transportation Of Compressor With Hanger
TRANSPORTATION, HANDLING, INSTALLATION Figure 16 Transportation of Compressor with Hanger ➢ While the compressor is carried by forklift, pay attention to carry it not higher than necessary for slow and easy handle(Figure 13). ➢ Before lifting a compressor on pallets by a forklift, be sure that the compressor has been strongly and safely mounted on the pallets. -
Page 41: Storage
The storage area should be dry, covered, shockproof, and resistant to the weather conditions. • HERTZ COMPRESSOREN could be safely stored for maximum 6 months. If you are storing more than 6 months, apply HERTZ COMPRESSOREN long term storage procedure. 6.1.4 Long Term Storage 6.1.4.1 Storage Preparation... -
Page 42: Compressor Placement And Connections
TRANSPORTATION, HANDLING, INSTALLATION 6.1.4.2 Storage • It is preferred that the package be stored in a controlled environment. If this is not possible, as a minimum it should be protected from the elements with an adequate cover which will not allow condensate to collect within it. - Page 43 TRANSPORTATION, HANDLING, INSTALLATION ➢ The compressor should be placed on a straight and smooth surface of adequate capacity to carry the compressor weight. When the compressor is placed on such a surface, even though not necessary, we recommend to anchor the machine to the surface. ➢...
-
Page 44: Table 5 Schedule Of Equivalent Pipe Lengths
TRANSPORTATION, HANDLING, INSTALLATION ➢ The valves, reducers, elbows, T-bar etc. used in the air installation result in pressure loss in the products. Hence, your design of installation must take into account the pressure loss of each connection element. In this context, you can see at the following table of equivalent pipe lengths how many meters of pipe are approximately needed for each element. -
Page 45: Compressor Room Ventilation
TRANSPORTATION, HANDLING, INSTALLATION Compressor Room Ventilation ➢ To keep the operating temperature at a certain value, place the compressor at a place of adequate air flow. The temperature of the compressor operating room should not be less than 35 C), nor higher than 104 F (40 C). -
Page 46: Hdd-Hvd Series Cable Section Table
TRANSPORTATION, HANDLING, INSTALLATION 6.4.1 HDD-HVD Series Cable Section Table ➢ It is however highly recommended to keep the voltage drop over the supply cables at nominal current below 5% of the nominal voltage. ➢ Branch circuit breaker must be installed on site. It is suggested on electrical wiring diagram. ➢... - Page 47 TRANSPORTATION, HANDLING, INSTALLATION CABLE SECTION(AWG) CABLE SECTION(AWG) CABLE SECTION(AWG) MODEL 230V 460V 575V 4 x AWG8 4 x AWG10 4 x AWG10 HVD 5 4 x AWG8 4xAWG10 HVD 7 4xAWG10 4xAWG10 HVD 11 3xAWG6+AWG8 4xAWG8 3 x AWG3 + AWG6 4xAWG8 HVD 15 4xAWG8...
-
Page 48: Compressor Layout Plans
TRANSPORTATION, HANDLING, INSTALLATION Compressor Layout Plans Compressor Model (mm/in) (mm/in) (mm/in) (mm/in) (mm/in) HVD 5 1000(39.37) 370(14.56) HVD 7 1000(39.37) 1000(39.37) 1000(39.37) HVD 11 1015(39.96) 440(17.32) HVD 15 Compressor Model (mm/in) (mm/in) (mm/in) (mm/in) (mm/in) HVD 5 1000(39.37) 370(14.56) HVD 7 1000(39.37) 1000(39.37) 1000(39.37) - Page 49 TRANSPORTATION, HANDLING, INSTALLATION...
- Page 50 TRANSPORTATION, HANDLING, INSTALLATION Compressor Model (mm/inch) (mm/inch) (mm/inch) (mm/inch) (mm/inch) HVD 5 780(30.7) 500(19.68) HVD 7 1000(39.37) 1000(39.37) 1000(39.37) HVD 11 900(35.43) 600(23.62) HVD 15 HVD 18 1000(39.37) 1000(39.37) 1000(39.37) 1440(56.69) 560 (22.04) HVD 22 - HDD 22 HVD 30 - HDD30 1000(39.37) 1000(39.37) 1000(39.37)
-
Page 51: Operation
OPERATION OPERATION General The system has been provided with an electronic control module to easily monitor the operating and setting values of the compressor. Any necessary electrical and mechanical measures have been taken for the operating safety. Following are listed some equipment and components of the compressor for your information. -
Page 52: Start-Up Procedure
OPERATION ➢ Pressure Sensor: It electronically converts the pressure data into the analog signal, and communicates to the control module. ➢ Temperature Sensor: It electronically converts the temperature data into the analog signal, and communicates to the control module. ➢ PTC: It is embedded between the motor windings. It stops the compressor when the windings are over heated and prevents the motor windings from burning. -
Page 53: Daily Start Procedure
OPERATION ➢ Energize the compressor. However, be sure to check if the compressor turns in right direction. The compressor turning direction should be absolutely checked in start-up. Remove any necessary covers. ➢ Visually inspect coupling, and press the “Start” button, and let the compressor works for a short time (1-2 sec), and then immediately press the “Emergency Stop”... -
Page 54: Compressor Start-Up In Cold And After Long Shutdowns
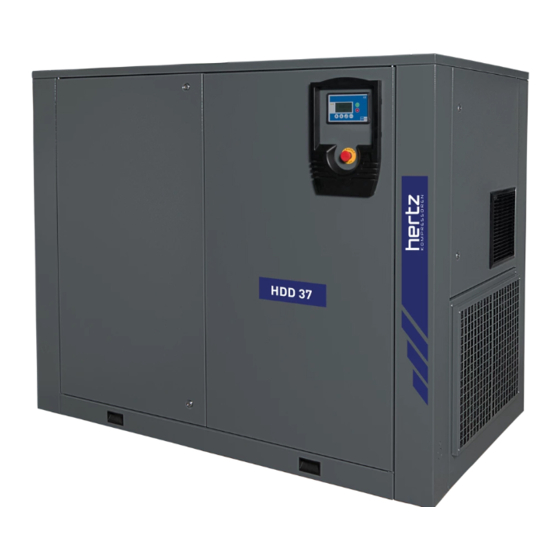
OPERATION Compressor Start-up in cold and after long shutdowns Please contact your authorized service representative. Figure 18 HDD 37 Model Overview... -
Page 55: General
FAILURES FAILURES General The information in this section has been compiled on the experiences gained through field service operations and factory tests. The failure signs, symptoms and causes are listed by the frequency of feedback from the service technicians. As the systems and failures are usually correlated as of the compressor nature, it is a must to clearly understand the actual cause of the failure before attempting any repair or part replacement. -
Page 56: Failures, Reasons And Solutions
FAILURES Failures, Reasons and Solutions Table 7 Failures and Solutions FAULT CAUSE REMEDY No power. Check the voltage at the main fuse input. Control and input fuse blown. Check the fuses. Mains voltage low, imbalanced or the Check the warning message on the control phases are reverse. - Page 57 FAILURES FAULT CAUSE REMEDY Check filter replace Air filter clogged. necessary. The star-delta setting may be changed. Check the setting (4-8 seconds). Turn on the compressor, and follow the contactors Compressor does not shift from star to on the power board. It should release K3 delta contactor and pull K2 contactor at the end of the preset period of time.
- Page 58 FAILURES FAULT CAUSE REMEDY Close the tank outlet valve to see that the compressor reach maximum pressure; and observe that the pressure The system air consumption is higher rises and the compressor STOPS at the set than the compressor capacity. pressure value.
- Page 59 FAILURES FAULT CAUSE REMEDY Check the pressure settings and/or the Operating pressure settings changed. safety pressure switch settings Check the internal pressure gauge while the compressor is running at full load or a value close to it. If the internal-external pressure Separator clogged.
- Page 60 FAILURES FAULT CAUSE REMEDY If cloth or foreign material is slipped into the separator tank during maintenance, this will cause blockage in the oil circuit. Be careful The operation temperature about this during maintenance. As the increases when the Blockage in the oil filter or in the oil structure of the filters other than the original compressor switches to circuit.
- Page 61 FAILURES FAULT CAUSE REMEDY Operating pressure settings changed. Check the pressure settings. Check the internal pressure gauge while the Pressure safety switch compressor is running at full load or a value stops the compressor. close to it. If the internal-external pressure Separator clogged.
- Page 62 FAILURES FAULT CAUSE REMEDY Minimum pressure valve The minimum pressure valve looses the air in the The internal pressure does fails system. Replace the gasket and O-rings. not decrease although the compressor is at idle. Intake regulator is not fully shut. Call the authorized Intake regulator failure.
- Page 63 FAILURES FAULT CAUSE REMEDY Temperature settings changed. Check the temperature settings. Check the ambient temperature in the High ambient temperature. compressor room, and take any necessary measures. In a room with a smaller intake window than the compressor's intake area, the hot air generated by the compressor can't be discharged outside the room efficiently.
-
Page 64: Maintenance
As the compressor is a complicated machine, any maintenance to be carried by the unauthorized and non-trained people would render the entire warranty invalid, and possibly result in damages and injuries. Please call your HERTZ KOMPRESSOREN customer service for the compressor maintenance. HERTZ KOMPRESSOREN USA, Inc. -
Page 65: Safety During Maintenance
MAINTENANCE Safety during maintenance ➢ Before maintenance, make sure that the power supply to the compressor relieve the system of all pressure, is connect, lockout and tag out the power supply to the compressor package before removing valves, caps, plugs, fittings, bolts and filters. Place a warning sign, plate etc. in a visible place on the compressor to show that the maintenance work is in progress. -
Page 66: Every 2000 Hours Operation Or 6 Months
MAINTENANCE 9.2.3 Every 2000 hours operation or 6 months ➢ As indicated by the controller, replace the oil filter element (See, Figure 21). If it does not reach 2000 hours within 6 months, replace it once 6 months at any rate. ➢... -
Page 67: Every 16000 Hours Operation Or 24 Months
➢ Check hoses, replace if necessary. Maintenance Instructions 9.3.1 Compressor Oil Your compressors use HERTZ SMARTOIL 6000 branded full synthetic compressor oil. As can be seen below, these are special lubricants produced in consideration of the compressor operation mode. ➢ As the oils and lubricants of different type and characteristics also differ as of chemical composition and additives, mixing them with each other or use different types of oils in the compressor would cause damages of high cost. - Page 68 Oxidation Resistance: The air compression releases high temperatures. The oil not properly protected against oxidation is rapidly oxidized and starts accumulating some points. It in turn results in lower performance, wears and increased maintenance costs. HERTZ Smartoil 6000 prevents or minimizes the oxidation thanks to its additive contents.
-
Page 69: Oil Replacement
MAINTENANCE 9.3.2 Oil Replacement Replace the oil in the compressor at suitable intervals for the oil type used. Figure 20 Oil Discharge Figure 19 Oil Filling ➢ Shut down the compressor. ➢ If the compressor is cold (not working), first operate it for 5 to 10 minutes to warm the oil, and then switch off it. -
Page 70: Oil Filter Replacement
Restart the compressor and check it for leaks. Figure 21 Oil Filter Replacement Always use the genuine HERTZ spare parts to minimize the risk of damage on the oil filter element and compressor. The other brand filter elements may not have satisfactory... -
Page 71: Panel Filter And Control Box Filter Replacement
MAINTENANCE 9.3.4 Panel filter and control box filter replacement ➢ The ventilation fan of your compressor needs high amount of free air. The operation of this filter causes the compressor to take in the dust of working environment. Depending on the degree of dustiness in the operating space, the panel filter may be rapidly clogged. -
Page 72: Air Filter Replacement
MAINTENANCE 9.3.5 Air filter replacement ➢ The air filter inside the compressor aims at holding the dust before entering the compressor air filter. Apply compressed air outwardly to clean the air filter. ➢ In cases where the air filter is not properly cleaned, the separator filter used in separation of oil and air from each other is rapidly clogged. -
Page 73: Replacement Of Separator Element
MAINTENANCE 9.3.7 Replacement of Separator Element Regularly replace the separator element once a year. It is impossible to clean this filter. To replace the separator element: Spin-On type separators used; • Stop the compressor, and wait for the complete discharge of the internal pressure. •... -
Page 74: Figure 26 Separator Element Replacement
MAINTENANCE In nested type separators used; • Stop the compressor and close the outlet valve. • Check that the inner pressure in the separator tank is released completely. • Remove connections of all equipment connected to the separator cover, cover bolts and the cover itself. -
Page 75: Maintenance Of The Cooling Radiator
MAINTENANCE 9.3.8 Maintenance of the Cooling Radiator ➢ The panel filter should be routinely cleaned to keep the radiator clean. ➢ As the cooling air flows between the cooling radiator slices, some quantity of dust may enter between the slices, and clog the radiator slices like in the panel filter. Apply (from outside to inside) pressurized air between the slices at the back of the radiator for cleaning. -
Page 76: Maintenance Of The Separator Oil Return Line (Scavenge)
MAINTENANCE 9.3.9 Maintenance Of The Separator Oil Return Line (Scavenge) ➢ While the separator filter separates the air from oil, some oil penetrates inside from the filter element. This oil is recycled into the system through the oil return line. ➢... -
Page 77: Intake Valve Maintenance Kit
MAINTENANCE 9.3.10 Intake Valve Maintenance Kit Intake Valve kit replacement is performed every 8000 hours or 12 month whichever occurs first. All parts in the kit must be replaced together. Failure to replace the intake valve repair kit on time can cause permanent damages to the compressor and downtime. - Page 78 MAINTENANCE HDD-HVD 75 models...
-
Page 79: Thermostatic Valve Maintenance Kit And Thermal Element Replacement
MAINTENANCE 9.3.11 Thermostatic Valve Maintenance Kit and Thermal Element Replacement HVD 5-7-11-15 Models HDD-HVD 18-22 Models HDD-HVD 30-37-45 Models HDD-HVD 55-75 Models Thermostatic Valve combination block kit replacement is performed every 8000 hours or 12 month whichever occurs first. The kit contains minimum pressure valve repair kit (K1), thermostatic valve repair kit (K2) and separator tube O-rings. -
Page 80: Minimum Pressure Valve Maintenance Kit Replacement
MAINTENANCE 9.3.12 Minimum Pressure Valve Maintenance Kit Replacement HDD-HVD 30-37-45 Models HDD-HVD 55-75 Models HDD-HVD 18-22 Models Minimum Pressure Valve Maintenance Kit (K) replacement is performed every 8000 hours or 12 month whichever occurs first. For trouble-free operation of your compressor, the kits should be replaced in a timely manner. -
Page 81: Motor Maintenance
MAINTENANCE 9.3.13 Motor Maintenance For the electric motors to have long life and operate in high performance, the following measures should be taken: ➢ Properly ground the compressor. ➢ Do not change the pressure, thermal current and time settings for the compressor operation. In cases where the preset value is exceeded, the load would be increased, so that the motor current would be higher. -
Page 82: Coupling Replacement And Adjustment
MAINTENANCE 9.3.15 Coupling replacement and adjustment ➢ Stop the compressor and turn off the power ➢ Remove the protection cover. ➢ Turn the spindle by hand to bring the coupling screws to dismount position, and then take out the screws. ➢... -
Page 83: Table 8 Periodical Maintenance Schedule
MAINTENANCE Table 8 Periodical Maintenance Schedule Maintenance Table MAINTENANCE TO BE PERFORMED Check Oil Level ... -
Page 84: Table 9 Maintenance Records
MAINTENANCE Table 9 Maintenance Records MAINTENANCE RECORDS Compressor Type Serial No WORKING MAINTENANCE PERFORMED DATE HOURS ACTION...
Need help?
Do you have a question about the HDD Series and is the answer not in the manual?
Questions and answers