
Related Manuals for Miller Digital Infinity Series


Summary of Contents for Miller Digital Infinity Series
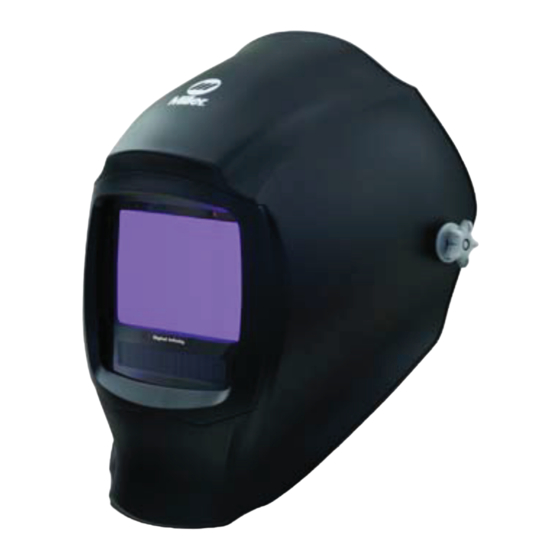
- Page 1 OM-289711C 2023-02 Digital Infinity OM-269681F 2019-06 Series Auto-Darkening Helmets Auto-Darkening Helmets Model: Infinity Series w/Infotrack OWNER’S MANUAL...
-
Page 2: Table Of Contents
TABLE OF CONTENTS SECTION 1 – SAFETY PRECAUTIONS – READ BEFORE USING......1 Symbol Usage ............. 1 Arc Welding Hazards . -
Page 3: Section 1 - Safety Precautions - Read Before Using
SECTION 1 – SAFETY PRECAUTIONS – READ BEFORE USING Protect yourself and others from injury—read, follow, and save these important safety precautions and operating instructions. 1-1. Symbol Usage DANGER! – Indicates a hazardous situation which, if not avoided, will result in death or serious injury. - Page 4 � Before welding, adjust the auto-darkening lens sensitivity setting to meet the application. � Stop welding immediately if the auto-darkening lens does not darken when the arc is struck. NOISE can damage hearing. Noise from some processes or equipment can damage hearing. �...
-
Page 5: California Proposition 65 Warnings
� Do not weld in locations near degreasing, cleaning, or spraying operations. The heat and rays of the arc can react with vapors to form highly toxic and irritating gases. � Do not weld on coated metals, such as galvanized, lead, or cadmium plated steel, unless the coating is removed from the weld area, the area is well ventilated, and while wearing an air- supplied respirator. -
Page 6: Principal Safety Standards
1-5. Principal Safety Standards Safety in Welding, Cutting, and Allied Processes, American Welding Society standard ANSI Standard Z49.1. Website: http://www.aws.org. Safe Practice For Occupational And Educational Eye And Face Protection, ANSI Standard Z87.1, from American National Standards Institute. Website: www.ansi.org. Safety in Welding, Cutting, and Allied Processes, CSA Standard W117.2 from Canadian Stand- ards Association. -
Page 7: Section 2 - Consignes De Sécurité - Lire Avant Utilisation
SECTION 2 – CONSIGNES DE SÉCURITÉ - LIRE AVANT UTILISATION Pour écarter les risques de blessure pour vous-même et pour autrui — lire, appliquer et ranger en lieu sûr ces consignes relatives aux précautions de sécurité et au mode opératoire. 2-1. - Page 8 � Avoir recours à des écrans protecteurs ou à des rideaux pour protéger les autres contre les rayonnements les éblouissements et les étincelles ; prévenir toute personne sur les lieux de ne pas regarder l’arc. � Porter une protection corporelle en cuir ou des vêtements ignifuges (FRC). La protection du corps comporte des vêtements sans huile, comme des gants de cuir, une chemise solide, des pantalons sans revers, des chaussures hautes et une casquette.
-
Page 9: Proposition Californienne 65 Avertissements
LES FUMÉES ET LES GAZ peuvent être dangereux. Le soudage génère des fumées et des gaz. Leur inhalation peut être dange- reux pour votre santé. � Eloigner votre tête des fumées. Ne pas respirer les fumées. � À l’intérieur, ventiler la zone et/ou utiliser une ventilation forcée au niveau de l’arc pour l’éva- cuation des fumées et des gaz de soudage. -
Page 10: Tableau De Sélection Du Vignettage
2-4. Tableau de sélection du vignettage Classe de N° de classe Taille d'électrode Courant d'arc protection Procédé de protection in. (mm) en ampères suggérée minimum (Comfort)* Moins de 3/32 (2,4) Moins de 60 Soudage à l'arc 3/32-5/32 (2,4-4,0) 60–160 métallique avec électrode enro- 5/32-1/4 (4,0-6,4) 160–250... - Page 11 Industrial Head Protection, ANSI/ISEA Standard Z89.1 from American National Standards Insti- tute. Website: www.ansi.org. Australian National Work Health Safety Policy from Safe Work Australia. Website: www.safewor- kaustralia.com. Safety in Welding and Allied Processes, AS1674.1 and AS1674.2 part 1 and 2 from SAI Global. Website: www.saiglobal.com.
-
Page 12: Section 3 - Definitions
SECTION 3 – DEFINITIONS 3-1. Additional Safety Symbol Definitions Warning! Watch Out! There are possible haz- ards as shown by the symbols. Accidental ingestion prevention. Keep battery away from children. Battery is harmful if swallowed. 3-2. Miscellaneous Symbols And Definitions Information Positive Navigational... -
Page 13: Section 4 - Specifications
Shuts Lens Off 45 Minutes After Last Arc Is Struck Low Battery Light Red Led Illuminates To Indicate 2-3 Days Remaining Battery Life Power Supply Panasonic CR2450 Lithium Batteries (Miller Part No. 217043) Sensors Independent/Redundant (Four) Operating 14°F to 131°F / -10°C to +55°C Temperature �... -
Page 14: Section 5 - Operating Instructions
SECTION 5 – OPERATING INSTRUCTIONS 5-1. Helmet Controls MEMO(B) TIME COUNT MEMO The auto-darkening lens turns on (darkens) � Use adjustment buttons to change automatically when welding begins and shade, delay, and sensitivity settings turns off when welding stops. when lens is in Mode function. Use ad- justment buttons to change arc time, 1 Mode Control Button (Section 5-2) clock, timer, alarm, language, and help... -
Page 15: Mode Control Button And Low Battery/Grind/Memory Function Light
If battery power is low, replace with Pana- pressed, the LCD control panel will turn On. sonic CR2450 lithium batteries (2 required, Miller Part No. 217043). See Section 8-1. Press and hold the Auto On/Off button to turn the LCD control panel Off. Lens is on and will function properly. -
Page 16: Mode Control
5-3. Mode Control MEMO(B) TIME COUNT MEMO MEMO(B) TIME COUNT MEMO MEMO(B) TIME COUNT MEMO MEMO(B) TIME COUNT MEMO 4 Grind Mode 1 Mode Control Button Used for metal grinding applications. In this Press Mode button to select the mode ap- mode the lens is fixed at shade No. -
Page 17: Variable Shade Control
5-4. Variable Shade Control 1 Variable Shade Adjust- ment Buttons 2 Mode Control Button Use the LTR and DKR adjust- ment buttons to adjust the lens shade in the darkened state. Use the table in Section 1-4 to select proper shade control setting based on your welding process. -
Page 18: Lens Delay Control
5-5. Lens Delay Control MEMO(B) TIME COUNT MEMO Weld, Cut, And X-Modes - No. 0–No. 10 1 Lens Delay Adjustment Buttons Grind Mode - No delay adjustment 2 Mode Control Button � There is no lens delay adjustment in Use the Lens Delay Short and Long buttons the Grind mode. -
Page 19: Sensitivity Control
5-6. Sensitivity Control MEMO(B) TIME COUNT MEMO � Face the helmet in the direction of use, 1 Sensitivity Adjustment Buttons exposing it to the surrounding light 2 Mode Button conditions. Use control to make the lens more respon- � Press sensitivity More button until the sive to different light levels in various welding lens darkens, then press Less button un- processes. -
Page 20: Typical Lens Adjustment Procedure
5-7. Typical Lens Adjustment Procedure � Lens assembly displays MEMO(B) TIME COUNT prior settings when MEMO turned on. Retained set- tings are not shown in example. � In the Grind mode the lens is a fixed shade No. 3. No lens adjustments MEMO(B) TIME COUNT... -
Page 21: Arc Time And Arc Count Controls
5-8. Arc Time And Arc Count Controls MEMO(B) TIME COUNT MEMO The arc time function records the amount of Arc Time/Count Procedure time the lens assembly is dark (exposed to an arc). The arc count function records the � Press Mode (On/Off) button to turn hel- number of times the lens darkens. -
Page 22: Memory Control
5-9. Memory Control MEMO(B) TIME COUNT MEMO The memory function saves two preset Memory Function Procedure modes with the desired shade setting, delay, � Adjust helmet mode, shade, delay, and and sensitivity. sensitivity to desired settings for memo- 1 Memory One Button ry one. -
Page 23: Section 6 - Adjusting Headgear
SECTION 6 – ADJUSTING HEADGEAR 6-1. Adjusting Headgear There are four hea adjustments: head top, tightness, a and distance. Headgear Top Adjusts headgear for p depth on the head to e correct balance and sta Headgear Tightnes To adjust, turn the adju knob located on the ba the headgear left or rig desired tightness. -
Page 24: Section 7 - Replacing Lens Covers
SECTION 7 – REPLACING LENS COVERS 7-1. Replacing The Lens Covers 804814 / 804816 Never use the auto-darkening lens 5 Inside Lens Cover without the inside and outside lens Remove the inside lens cover by pulling top covers properly installed. Welding center of lens cover from lens holding spatter will damage the auto-darken- channels. -
Page 25: Section 8 - Replacing The Batteries
TIME COUNT MEMO Replace with Panasonic CR2450 lithium To replace the batteries, remove the auto- batteries (2 required, Miller Part No. darkening lens assembly (see Section 7-1). 217043). 1 Battery Tray � Be sure Positive (+) side of the battery faces up (toward inside of helmet). -
Page 26: Section 9 - Installing Optional Magnifying Lens
SECTION 9 – INSTALLING OPTIONAL MAGNIFYING LENS Optional Magnifying Lens 9-1. Installing Optional Magnifying Lens Magnifying Lens Adapter Frame To install optional magnifying lens, a magnifying lens adapter frame is nec- essary. 1 Optional Magnifying Lens Install adapter by placing it to- 2 Magnifying Lens Adapter ward the top of the lens and Frame... -
Page 27: Section 10 - Maintenance And Storage
SECTION 10 – MAINTENANCE AND STORAGE 10-1. Maintenance And Storage � Do not use solvents or abrasive cleaning detergents to clean the helmet. Do not im- merse the lens assembly in water. � Keep helmet dry; do not expose helmet to rain or snow. Keep helmet away from fire and other sources of heat. -
Page 28: Section 11 - Troubleshooting
SECTION 11 – TROUBLESHOOTING 11-1. Troubleshooting Trouble Remedy Auto lens not On – au- Check batteries and verify they are in good condition and installed to-lens does not darken properly. momentarily when the Check battery surfaces and contacts, and clean if necessary. On button is pressed. -
Page 29: Section 12 - Parts List
SECTION 12 – PARTS LIST Figure 12-1. Infinity Auto-Darkening Welding Helmet Infinity Auto-Darkening Welding Helmet Item Part No. Description Qty. 280942 Shell, Helmet Relic (Infinity) 271340 Shell, Helmet Black Ops (Infinity) 271335 Shell, Helmet Black (Infinity) 271336 Shell, Helmet Stars & Stripes (Infinity) 271337 Shell, Helmet Camo (Infinity) 271339... - Page 30 —Kit, Adjustment Angle/Stop Hardware 770249 Headband, Fabric 271326 Cushion, Top Headgear 271327 Tray, Battery (Left/Right) (Infinity) 217043 Battery, Lithium (CR2450) 770250 Bag, Helmet (Miller Logo) 271328 Adapter, Magnification Lens (XL) ♦212235 Lens, 0.75 Magnification ♦212236 Lens, 1.00 Magnification ♦212237 Lens, 1.25 Magnification ♦212238 Lens, 1.50 Magnification...
-
Page 31: Section 13 - Limited Warranty
Miller. THIS WARRANTY IS EXPRESSLY IN LIEU OF ALL OTHER WARRANTIES, EXPRESS OR IMPLIED, INCLUDING THE WARRANTIES OF MERCHANT- ABILITY AND FITNESS. - Page 32 For product information, Owner’s Manual translations, and more, visit www.MillerWelds.com ORIGINAL INSTRUCTIONS © Miller Electric Mfg. LLC 2023-02...
Need help?
Do you have a question about the Digital Infinity Series and is the answer not in the manual?
Questions and answers