Table of Contents
Advertisement
Advertisement
Table of Contents
Troubleshooting

Related Manuals for Gorenje WP60S3


Summary of Contents for Gorenje WP60S3
- Page 1 DETAILED INSTRUCTIONS FOR USE OF WASHING MACHINE www.gorenje.com...
- Page 2 Life is complicated today. Let's make laundry care simple! Your new WaveActive washing machine uses innovative technology and latest achievements in laundry care to help you simplify your daily household chores. WaveActive technology offers the gentlest care for any garment, with minimum creasing. At the same time, your washing machine will be easy on the environment, owing to its highly efficient use of power, water and detergent.
-
Page 3: Table Of Contents
CONTENTS SAFETY PRECAUTIONS INTRODUCTION 10 WASHING MACHINE DESCRIPTION 11 Technical specifications 12 Control unit 14 INSTALLATION AND CONNECTION PREPARING THE WASHING 14 Removing the blocking rods MACHINE 15 Moving and transport after installation BEFORE FIRST 16 Selecting the room 16 Adjusting the washing machine feet 17 Washing machine placement 19 Connecting to water supply 20 Aqua - stop... -
Page 4: Safety Precautions
Keep the instruction manual handy, near the washing machine. Instructions for use are available on our website at www.gorenje.com. Your washing machine is intended solely for household use. If the washing machine is used for professional,... - Page 5 Follow the instructions for correct installation of the Gorenje washing machine and connection to the water and power mains (see chapter »INSTALLATION AND CONNECTION«). Connection to water and power supply has to be executed by an adequately trained technician or expert.
- Page 6 Do not connect the washing machine to an electrical outlet intended for an electric shaver or hair dryer. Do not install the washing machine in a room where the temperature can drop to below 5°C, as washing machine parts may be damaged in case of water freezing. Place the washing machine on a level and stable solid (concrete) base.
- Page 7 Before the start of the washing cycle, press the door on the indicated spot until it locks into place. The door cannot be opened during washing machine operation. We recommend removing any impurities from the washing machine drum before the first wash using the Cotton 90°C programme (see PROGRAMME TABLE).
- Page 8 No silver ions are released during the washing programme. The washing machine is not intended for use by persons (including children) with physical or mental impairments, or persons with lacking experience and knowledge. These persons should be instructed about the use of the washing machine by a person responsible for their safety.
- Page 9 sensory or mental capabilities or lack of experience and knowledge, but only if they are supervised during the use of the washing machine, if they have been provided relevant instructions regarding safe use of the washing machine, and if they understand the hazards of inappropriate use. Make sure children do not play with the appliance.
-
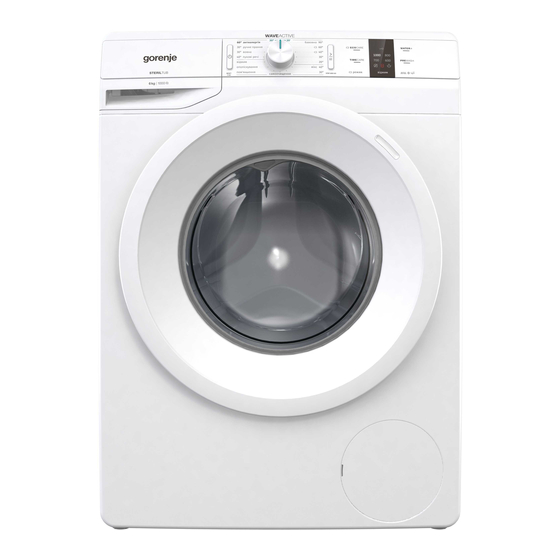
Page 10: Washing Machine Description
WASHING MACHINE DESCRIPTION FRONT Control unit Start/pause button Programme selector knob On/off/reset button Dispenser tray Door Rating plate Pump filter BACK Water supply hose Power cord Water discharge hose Adjustable feet... -
Page 11: Technical Specifications
TECHNICAL SPECIFICATIONS (DEPENDING ON THE MODEL) Rating plate with basic information about the washing machine is fitted on the front wall of the washing machine door opening (see chapter »WASHING MACHINE DESCRIPTION«). Maximum load See rating plate Width 600 mm 600 mm 600 mm Height... -
Page 12: Control Unit
CONTROL UNIT ON/OFF/RESET PROGRAMME START/PAUSE BUTTON BUTTON SELECTOR KNOB Use this button to start or Use this button to turn the pause a programme. washing machine on and off, and to reset the washing Upon start-up or during pause, programme. the button backlight will flash;... - Page 13 MODE CLEAN THE PUMP EXTRAS (ADDITIONAL (WASHING MODE) FILTER symbol lighting FUNCTIONS) 4a TIMECARE 8a PREWASH POWERCARE 8b WATER+ (HIGH WATER LEVEL) CHILD LOCK symbol lighting SPIN (SPINNING RATE Press the positions 4+8 and 1400/DRAIN /PUMP hold them for 3 seconds. STOP Option to set the spinning rate...
-
Page 14: Installation And Connection
INSTALLATION AND CONNECTION Remove all packaging. When removing the packaging, make sure not to damage the appliance with a sharp object. REMOVING THE BLOCKING RODS Before the first use of the appliance, transport rods must be removed. A blocked washing machine may be damaged when it is switched on for the first time. -
Page 15: Moving And Transport After Installation
MOVING AND TRANSPORT AFTER INSTALLATION If you wish to move the washing machine after it has been installed, the angular pieces and at least one blocking rods have to be re-installed to prevent vibration damage to the washing machine during transport (see chapter »INSTALLATION AND CONNECTION/Removing the blocking rods«). If you lost the angular pieces and the blocking rods, they can be ordered from the manufacturer. -
Page 16: Selecting The Room
SELECTING THE ROOM Floor on which the washing machine is placed must have a concrete base. It should be clean and dry; otherwise, the washing machine may slide. Also, clean the bottom surface of adjustable feet. The washing machine must stand level and stable on a solid base. ADJUSTING THE WASHING MACHINE FEET Use a water scale and spanner No. -
Page 17: Washing Machine Placement
WASHING MACHINE PLACEMENT If you also have a Gorenje dryer of corresponding (same) dimensions, it can be placed on top of the Gorenje washing machine (in this case, vacuum feet must be used) or next to it (figures 1 and 3). - Page 18 Washing machine installation clearances 25 mm The washing machine may not be in contact with a wall or adjacent furniture. For optimum washing machine operation, we recommend observing the clearances from the walls as indicated in the figure. In case of failure to observe the minimum required clearances, safe and correct washing machine operation cannot be ensured.
-
Page 19: Connecting To Water Supply
CONNECTING TO WATER SUPPLY Attach the hose to the water tap by screwing it onto the thread. AQUA - STOP TOTAL AQUA - STOP REGULAR CONNECTION For normal washing machine operation, the pressure in the water mains should be between 0.05 and 0.8 MPa (0,5 - 8 bar). -
Page 20: Aqua - Stop
AQUA - STOP (ONLY WITH SOME MODELS) If an internal tube or hose is damaged, a shut-off system is activated that cuts the water supply to the washing machine. In such case, the control glass (a) will turn red. Replace the water supply hose. -
Page 21: Connecting And Securing The Water Discharge Hose
CONNECTING AND SECURING THE WATER DISCHARGE HOSE Feed the water discharge hose into a washbasin or a bathtub, or connect it directly to a drain (discharge hose minimum diameter 4 cm). The vertical distance from the floor to the end of the discharge hose may be no more than 100 cm and no less than 60 cm. - Page 22 The discharge hose has to be attached and affixed to the pin on the back of the washing machine, as shown in the figure. If the discharge hose is not correctly attached, safe and correct washing machine operation cannot be ensured.
-
Page 23: Connecting The Appliance To The Power Mains
CONNECTING THE APPLIANCE TO THE POWER MAINS Before connecting the washing machine to the power mains, wait for at least 2 hours until it reaches room temperature. Connect the washing machine to a grounded power outlet. After installation, the wall outlet should be freely accessible. -
Page 24: Before Using The Appliance For The First Time
BEFORE USING THE APPLIANCE FOR THE FIRST TIME Make sure the washing machine is disconnected from the power mains; then, open the door towards you (figures 1 and 2). Before first use, clean the washing machine drum with a soft moist cotton cloth and water, or use the Cotton 90°C programme. -
Page 25: Washing Process, Step By Step
WASHING PROCESS, STEP BY STEP (1–7) STEP 1: HEED THE LABELS ON THE LAUNDRY Normal wash; Max. Max. Max. Max. Hand wash Do not Sensitive laundry washing washing washing washing only wash temp. temp. temp. temp. 95°C 60°C 40°C 30°C Bleaching Bleaching in cool water Bleaching not allowed... -
Page 26: Step 2: Preparing The Washing Process
STEP 2: PREPARING THE WASHING PROCESS Sort the laundry by type of fabric, colour, soiling, and allowed washing temperature (see PROGRAMME TABLE). Wash the laundry that sheds a lot of fibre or lint separately from other laundry. Close the buttons and zippers, tie any ribbons, and turn the pockets inside out; remove any metal clips that could damage the laundry and washing machine interior, or clog the drain. - Page 27 SWITCHING ON THE WASHING MACHINE Use the power cord to connect the washing machine to power mains, and connect the washing machine to water supply. Press the (1) ON/OFF/RESET button to switch on the washing machine (figures 1 and 2). LOADING THE WASHING MACHINE Open the washing machine door by pulling the handle towards you (figure 1).
-
Page 28: Step 3: Choosing The Washing Programme
STEP 3: CHOOSING THE WASHING PROGRAMME Choose the programme by rotating the programme selector knob (2) to the left or to the right (depending on the type of laundry and how heavily soiled it is). See PROGRAMME TABLE. During operation, the programme selector knob (2) will not rotate automatically. Washing programmes are comprehensive programmes that include all washing stages, including softening and spinning (this does not apply to Partial programmes). - Page 29 PROGRAMME TABLE Programme (depending on the model) Programme description Cotton * MAX Washing programme for normally or heavily soiled 20°C - 90°C laundry, white or coloured. The temperature can be set separately; therefore, observe the instructions indicated on the clothing. Choose 40°C if the laundry is only lightly dirty.
- Page 30 Programme (depending on the model) Programme description 1400 Spin/Drain Use the programme when you only wish to spin the (Spinning rate/ laundry. Drain) If you only wish to pump out the water from the (Partial programme) washing machine, press the SPIN (5) button to select (drain) Eco 40-60...
- Page 31 Add powder or liquid detergents according to the manufacturer's instructions, considering the washing temperature, washing program, how soiled the laundry is, and water hardness. Maximum amount of laundry in kg (for the cotton programme) is indicated on the rating plate fitted under the washing machine door (see chapter »WASHING MACHINE DESCRIPTION/ Technical information«).
-
Page 32: Step 4: Choosing The Settings
STEP 4: CHOOSING THE SETTINGS Most programmes feature basic settings, but these settings can be changed. Adjust the settings by pressing the relevant function button (before pressing the (3) START/PAUSE button). Functions that cannot be changed with the selected washing programme are partly lit (dimmed). Certain settings cannot be selected with some programmes. - Page 33 SPIN (SPINNING RATE/DRAIN/PUMP STOP) For changing the spinning rate, only draining, and stop pump (5). With preset or selected spinning rate, (5a) will be lit on the display unit. If you select draining without spinning, the symbol (5b) will appear on the display unit.
- Page 34 CHILD LOCK A safety feature. To activate the child lock, simultaneously press the (4) MODE (WASHING MODE) and (8) EXTRAS (ADDITIONAL FUNCTIONS) positions and hold them for at least three seconds. The signal light (symbol (7) will light up) will be lit to confirm the selection. Follow the same procedure to deactivate the child lock.
-
Page 35: Step 5: Selecting Additional Functions
STEP 5: SELECTING ADDITIONAL FUNCTIONS Activate/deactivate the functions by pressing the (8) EXTRAS (ADDITIONAL FUNCTIONS) position (before pressing the (3) START/PAUSE button). Some settings cannot be selected with certain programmes. With such settings, the light on the button will not be lit or it will flash when pressed (see FUNCTION TABLE). - Page 36 FUNCTION TABLE Programmes (depending on the model) Cotton • • • • • • • • • • • • • • • • • • • • • • • • • • • • • • • • •...
-
Page 37: Step 6: Starting The Washing Programme
STEP 6: STARTING THE WASHING PROGRAMME Press the (3) START/PAUSE button. Symbols for the selected functions will be lit. After pressing the (3) START/PAUSE button, the spinning rate can be adjusted (except in the case of the Steril tub (Self-cleaning programme) and SPIN (SPINNING RATE/DRAIN/PUMP STOP)) and child lock can be activated or deactivated, while other settings cannot be changed. -
Page 38: Step 7: Change Of Washing Programme Or Manual (Physical) Cancellation
STEP 7: CHANGE OF WASHING PROGRAMME OR MANUAL (PHYSICAL) CANCELLATION To stop and cancel a washing programme, press the (1) ON/OFF/RESET button and hold it for more than 3 seconds. The washing 1400 1200 programme is 1000 temporarily paused when the spinning rate settings symbols alternate between on and off on the display... -
Page 39: Step 8: End Of The Washing Programme
STEP 8: END OF THE WASHING PROGRAMME Lights on additional functions will flash until the washing machine is switched to low standby mode or until it is switched off. After 5 minutes, the lights on additional functions will be switched off. Open the washing machine door. -
Page 40: Interruptions And Changing The Programme
INTERRUPTIONS AND CHANGING THE PROGRAMME MANUAL INTERRUPTION To stop and cancel a washing programme, press the (1) ON/OFF/RESET button and hold it for more than 3 seconds. Signal lights will flash on the display. At the same time, the washing machine pumps the water out of the washing machine drum. - Page 41 In order to add or remove laundry from the washing machine during programme operation, proceed as follows: Press the (3) START/PAUSE button. If all conditions for release of electronic door lock are met, then you can open the washing machine door and add or remove laundry from the drum. Close the washing machine door! Press the (3) START/PAUSE button.
- Page 42 OPENING THE DOOR MANUALLY IN CASE OF A POWER OUTAGE - IN CASE OF A PROGRAM PAUSE (ONLY WITH SOME MODELS) When the program is paused or interrupted, open the filter cap using a suitable tool (flat screwdriver or a similar tool).
-
Page 43: Maintenance & Cleaning
MAINTENANCE & CLEANING Before cleaning, unplug the washing machine from the power mains. Children should not clean the washing machine or perform maintenance tasks without proper supervision! CLEANING THE DISPENSER TRAY The dispenser tray should be cleaned at least twice per month. To remove the dispenser tray from the housing,... -
Page 44: Cleaning The Water Supply Hose, Detergent Dispenser Housing, And Rubber Door Gasket
CLEANING THE WATER SUPPLY HOSE, DETERGENT DISPENSER HOUSING, AND RUBBER DOOR GASKET Clean the net filter often under running water. Use a brush to clean the entire washing machine rinsing section, especially the nozzles on the upper side of the rinsing chamber. After every wash, wipe the rubber door seal to extend its... -
Page 45: Cleaning The Pump Filter
CLEANING THE PUMP FILTER During cleaning, some water may be spilled. It is therefore recommended to place an absorbent cloth on the floor. Open the pump filter cap using a suitable tool (flat screwdriver or a similar tool). Pull out the water outlet funnel before cleaning the pump filter. -
Page 46: Cleaning The Washing Machine Exterior
CLEANING THE WASHING MACHINE EXTERIOR Always disconnect the washing machine from the power mains before cleaning. Clean the washing machine exterior and display unit using a soft damp cotton cloth and water. Do not use any solvents or cleaning agents that could damage the washing machine (please observe the recommendations and warnings provided by the cleaning agent manufacturers). -
Page 47: Troubleshooting
TROUBLESHOOTING WHAT TO DO ...? The washing machine will automatically control the operation of particular functions during the washing cycle. In case of error, the error is indicated by signal lights constantly lit or flashing in a particular rhythm on the display unit. The washing machine will report the error until it is switched off. -
Page 48: Troubleshooting And Error Table
TROUBLESHOOTING AND ERROR TABLE Problem/ Indication on the display unit and What to do? error problem description Incorrect settings Restart the programme. If the error reoccurs, The spinning rate settings symbols call a service technician. on the display unit are lit. Temperature sensor error Inlet water too cold. - Page 49 Problem/ Indication on the display unit and What to do? error problem description Water detected at the bottom of Turn off the appliance and turn it back on. the washing machine (Total Aqua If the error reoccurs, call a service technician. Stop system) Water level sensor error Unplug the power cord from the outlet;...
- Page 50 Problem/ Indication on the display unit and What to do? error problem description Unresponsive display unit and all Manually (physically) stop the programme by buttons pressing the button (1) ON/OFF/RESET and hold it for more than 3 seconds. Unplug the power cord from the outlet; then, plug the power cord back into the outlet and switch on the washing machine.
-
Page 51: Servicing
TYPE: PS15/XXXXX MODEL: XXXXXX.X IPX4 Art.No.: XXXXXX Ser.No.: XXXXXXXX 220-240 V ~ XX Hz XX A Pmax.: XXXX W XXXX W XXXX/min X kg 0,05-0,8 MPa Additional equipment and accessories for maintenance can be viewed on our website at: www.gorenje.com... -
Page 52: Recommendations For Washing And Economic Use Your Washing Machine
RECOMMENDATIONS FOR WASHING AND ECONOMIC USE YOUR WASHING MACHINE Wash new coloured garments separately the first time. Wash heavily soiled laundry in smaller amounts, with more powder detergent or with a pre-wash cycle. Apply a special stain remover on stubborn stains before the wash. We recommend referring to STAIN REMOVAL TIPS. - Page 53 When using thick liquid laundry care products, we recommend diluting them with water to prevent clogging the dispenser tray drain. Liquid detergents are intended for washing programmes without a prewash cycle. At higher spinning rates, there will be less residual moisture in the laundry. As a result, drying in a tumble dryer will be more economical and faster.
- Page 54 Hardness levels Water hardness °dH (°N) m mol/l °fH(°F) p.p.m. 1 – soft < 8,4 < 1,5 < 15 < 150 2 – normal 8,4 - 14 1,5 - 2,5 15 - 25 150 - 250 3 – hard > 14 >...
- Page 55 We recommend adding powder detergent immediately before the washing cycle. If you add it sooner, make sure the detergent compartment in the dispenser tray is completely dry before adding the powder detergent: otherwise, the powder detergent may cake before the start of the washing process.
-
Page 56: Stain Removal Tips
STAIN REMOVAL TIPS Before using special-purpose stain removers, try using the natural methods that do not harm the environment on less stubborn stains. However, prompt action is required! Soak the stain with an absorbent sponge or a paper towel; then, rinse with cold (lukewarm) water – but never with hot water! Stains Stain removal When the stain is dry, first scrape it off the garment before washing... - Page 57 Stains Stain removal Glue, chewing gum Place the garment in a bag and put it in the freezer until the stain hardens. Then, remove it with a blunt knife. Then, dilute the stain with a prewash stain remover and rinse thoroughly. Then, wash the laundry as usual.
-
Page 58: Disposal
DISPOSAL Packaging is made of environmentally friendly materials that can be recycled, disposed of, or destroyed without any hazard to the environment. To this end, packaging materials are labelled appropriately. The symbol on the product or its packaging indicates that the product should not be treated as normal household waste. -
Page 59: Program Duration And Spinning Rate Table
PROGRAM DURATION AND SPINNING RATE TABLE NORMALCARE SPIN (basic/default setting) (SPINNING RATE) Temp. [°C] Programmes Washing time [rpm] (depending on the model) [minutes] Cotton * 1200 ** 1000 (Mixed laundry/Synthetics) Steril tub (Self-cleaning programme) Softening * 1200 (Partial programme) Rinse * 1200 (Partial programme) 1400... - Page 60 LOW STANDBY MODE If you do not run any program or choose any settings after switching on the washing machine (ON/ OFF/RESET button (1)), the display unit will be switched off after 5 minutes and switched to stand- by mode in order to save energy. The display unit will be reactivated if you rotate the programme selector knob (2) or press the (1) ON/OFF/RESET button.
- Page 61 We reserve the right to any changes and errors in the instructions for use.
- Page 62 PRODUCT INFORMATION SHEET According to EU-Regulation No. 2019/2014 (depending on the model) Supplier’s name or trade mark: Supplier’s adress ( Model identifier: General product parameters: Parameter Value Parameter Value Height Rated capacity ( ) (kg) Dimensions in cm Width Depth Energy efficiency class ( [A/B/C/D/E/F/G] ( Washing efficiency index (...
- Page 63 Additional information: Weblink to the supplier's website, where the information from point 9 Anex II to Commition Regulation (EU) 2019/2023 ( ) is found: for the »eco 40-60« programme. changes to these items shall not be considered relevant for the purposes of paragraph 4 of Article 4 of Regulation (EU) 2017/1369.
- Page 64 PS15 LP PRIMARY en (02-21)
Need help?
Do you have a question about the WP60S3 and is the answer not in the manual?
Questions and answers