Table of Contents
Advertisement
Advertisement
Table of Contents

Related Manuals for Redliro JK1608L


Summary of Contents for Redliro JK1608L
- Page 1 REDLIRO TREADMILL JK1608L MODEL PRODUCT USE GUIDE...
-
Page 2: Table Of Contents
SERVICE CONTENT Thank you for purchasing this Redliro product. Questions, problems, missing parts? Before returning to your retailer, contact our Customer Service Department to receive more complete service, please email your order number to: service@redliro.com Response Time Service Safety Information... -
Page 3: Safety Information
SAFETY INFORMATION TECHNICAL PARAMETERS Product configuration Technical parameters TO REDUCE THE RISK OF INJURY, PLEASE READ INSTRUCTIONS IN FULL BEFORE USE. Input voltage 110 v Speed range 0.5-5.5 mph Maximum load bearing 300 lbs Package size 51.2x27.4x8.7 inches... -
Page 4: Package List
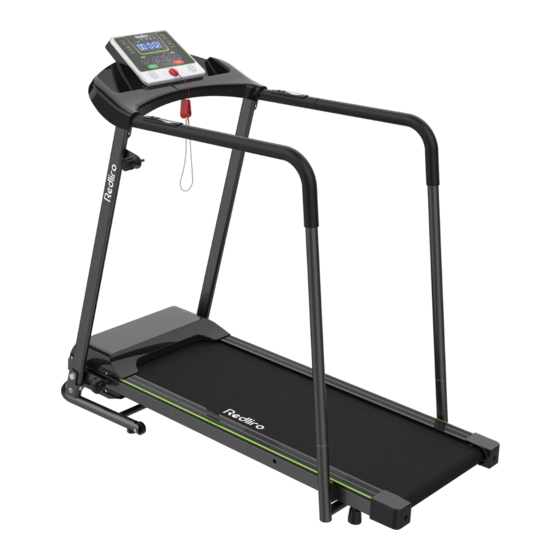
PACKAGE LIST PRODUCT STRUCTURE Display Panel Instrument & Buttons Safety Key Handrail Button Armrest Folding Lock Button Column Tube Motor Upper Cover Foot Edge Strip Locking Switch Running Belt Motor Lower Cover Rear Shield (Right) SERIAL NO. DESCRIPTION... -
Page 5: Assembly
ASSEMBLY STEP 2 Remove the pre-locking screw as shown in the expanded view. Connect the communication cable between the right support bar and control console. Then reinstall the control console and support bar using the pre- locking screw previously removed. - Page 6 STEP 4 STEP 6 Remove the pre-installed M5x25 screws on the armrest bar base (No.3). Then insert the armrest (No.4) bars Tighten the M16 knob (No.9). Secure the safety key (No.10). into the armrest bar base (No.3), and reinstall the M5x25 screws.
-
Page 7: Console Command Description
CONSOLE COMMAND DESCRIPTION In preset/custom mode, press the button and the treadmill will start, run at preset values and accumulate data. When the machine is paused, pressing the START button will continue the program set before pause. START button on the handrail has the same function. -
Page 8: Instructions For Using The Treadmill
INSTRUCTIONS FOR USING THE TREADMILL HOW TO USE THE TREADMILL IN PRESET MODE 1. How to choose a program In standby mode, you can select from 12 preset automatic programs (P1-P12) by pressing the PROG button PREPARATION BEFORE USE: on the console. -
Page 9: Product Maintenance
PRODUCT MAINTENANCE Distance setting: In standby mode, press the MODE button on the console twice and then adjust the distance by pressing the +/- buttons on the console or handrail. Hold for more than 0.5 seconds for counter to roll quickly. The selectable distance range is 0.5-99 miles. -
Page 10: Routine Maintenance
If the deviation is due to issues 2 and 3 above, the treadmill can be returned to normal after 3 minutes of Note: Search “REDLIRO” on YouTube to find videos on how to adjust the running belt. rotation with no weight on the running belt . -
Page 11: Troubleshooting And Handling
TROUBLESHOOTING AND HANDLING the metal contact pins in the terminal are neatly arranged. There are buckles at the terminals and these buckles should not be able to be pulled out of place if you pull lightly. If they move, please insert firmly. -
Page 12: Workout Guide
WORKOUT GUIDE Issue 12: Fault code on display. • E05: Over current protection. (1) Please confirm whether your weight is within the load bearing range of the product. (2) Please confirm whether the treadmill is placed on a level ground. -
Page 13: Warranty
6. Improper Operation, modification, handling, storage, misuse or neglect of the product. 7. Redliro will, at its sole discretion, repair or replace, any part that proves to be defective in normal household use. Any repairs or replacements will not renew the warranty period. This warranty is provided only to the original purchaser and is non- transferable. - Page 14 If you have any problem, please feel free contact us, within 24 hours we will replay ASAP JK1608L Find Assembly Tutorial on Redliro YouTube Email: service@redliro.com Company: MIXDOLLAR INC Address: 4975 Miller ST, Wheat Ridge CO, 80033, United States @Redliro...
Need help?
Do you have a question about the JK1608L and is the answer not in the manual?
Questions and answers
I have a Redliro Treadmill Mod. #JK1608L and want to know if there's anyway to create and save my own preset program - or do I have to reset it every time I start again? Right now I don't want to use any of the pre-programmed choices. Or do you have a newer better display console that could be swapped out for the one I have?
Can the incline be set to a zero incline on MODEL: JK1608L-T?