JVC KD-S1501 Instructions Manual
Hide thumbs
Also See for KD-S1501:
- Instructions manual (46 pages) ,
- Service manual (79 pages) ,
- Schematic diagrams (22 pages)
Table of Contents
Advertisement
Quick Links
CD RECEIVER
RECEPTEUR CD
KD-S1501/KD-G153/
KD-G152/KD-G151
For canceling the display demonstration, see page 7.
Pour annuler la démonstration des affichages, référez-vous à la page 7.
For installation and connections, refer to the separate manual.
Pour l'installation et les raccordements, se référer au manuel séparé.
INSTRUCTIONS
MANUEL D'INSTRUCTIONS
GET0287-003B
[EX/EU]
Advertisement
Table of Contents

Related Manuals for JVC KD-S1501


Summary of Contents for JVC KD-S1501
- Page 1 CD RECEIVER RECEPTEUR CD KD-S1501/KD-G153/ KD-G152/KD-G151 For canceling the display demonstration, see page 7. Pour annuler la démonstration des affichages, référez-vous à la page 7. For installation and connections, refer to the separate manual. Pour l’installation et les raccordements, se référer au manuel séparé.
-
Page 2: How To Reset Your Unit
Thank you for purchasing a JVC product. Please read all instructions carefully before operation, to ensure your complete understanding and to obtain the best possible performance from the unit. IMPORTANT FOR LASER PRODUCTS 1. CLASS 1 LASER PRODUCT 2. CAUTION: Do not open the top cover. There are no user serviceable parts inside the unit; leave all servicing to qualified service personnel. -
Page 3: Table Of Contents
How to read this manual ......Selecting the playback modes ....14 How to use the MODE button ....Sound adjustments ....15 Control panel — KD-S1501/ Selecting preset sound modes ..5 KD-G153/KD-G152/KD-G151 (C-EQ: custom equalizer) ....15 Parts identification ......... -
Page 4: How To Read This Manual
How to read this manual How to use the MODE button The following methods are used to make the If you press MODE, the receiver goes into explanations simple and easy-to-understand: functions mode, then the number buttons work • Some related tips and notes are explained in as different function buttons. -
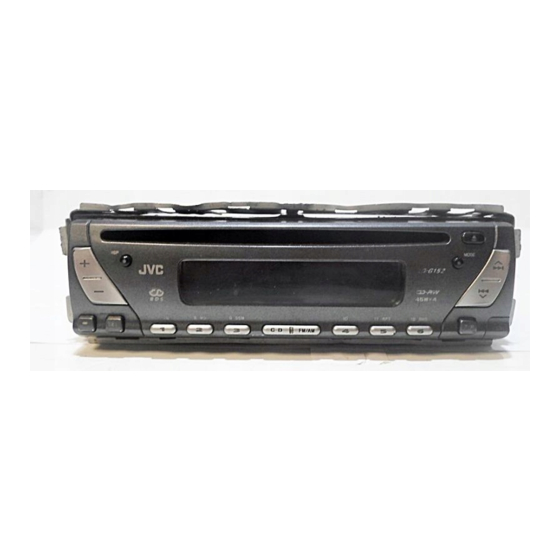
Page 5: Control Panel - Kd-S1501
Control panel — KD-S1501/KD-G153/KD-G152/KD-G151 Parts identification Display window Display window 1 +/– buttons 2 DISP (display) button ; Tuner reception indicators 3 Loading slot MO (monaural), ST (stereo) 4 Display window a RDS indicators 5 MODE button TP, PTY, AF, REG... -
Page 6: Getting Started
Getting started Basic operations To drop the volume in a moment (ATT) To restore the sound, press it again. Ÿ To turn off the power You cannot select “CD” as the playback source if there is no disc in the loading Caution on volume setting: slot. -
Page 7: Canceling The Display Demonstrations
Canceling the display Setting the clock demonstrations If no operations are done for about 20 seconds, display demonstration starts. [Initial: DEMO ON]—see page 17. Set the hour, minute, and clock system. 1 Select “CLOCK H” (hour), then adjust the hour. 2 Select “CLOCK M”... -
Page 8: Radio Operations
Radio operations Listening to the radio 2 Select the desired station frequencies. Lights up when receiving an FM stereo broadcast with sufficient signal strength. When an FM stereo broadcast is hard to receive Selected band appears. Ÿ Start searching for a station. When a station is received, searching Lights up when monaural mode is activated. -
Page 9: Storing Stations In Memory
Storing stations in memory You can preset six stations for each band. FM station automatic presetting — SSM (Strong-station Sequential Memory) Select the FM band (FM1 – FM3) you want to store into. Preset number flashes for a while. Listening to a preset station Select the preset station (1 –... -
Page 10: Fm Rds Operations
FM RDS operations Searching for your favorite FM RDS programme You can tune in to a station broadcasting your Start searching for your favorite favorite programme by searching for a PTY code. programme. The last selected PTY code appears. If there is a station broadcasting a Ÿ... -
Page 11: Storing Your Favorite Programmes
Repeat steps to store What you can do with RDS other PTY codes into other preset RDS (Radio Data System) allows FM numbers. stations to send an additional signal along with their regular programme signals. By receiving the RDS data, this receiver can Finish the procedure. -
Page 12: Tracking The Same Programme-Network-Tracking Reception
PTY Standby Reception Tracking the same programme— PTY Standby Reception allows the receiver Network-Tracking Reception to switch temporarily to your favorite PTY programme from any source other than AM. When driving in an area where FM reception is not sufficient enough, this receiver To activate and select your favorite PTY automatically tunes in to another FM RDS code for PTY Standby Reception, see page... -
Page 13: Disc Operations
Disc operations Playing a disc To fast-forward or reverse the track All tracks will be played repeatedly until you change the source or eject the disc. Fast-forwards. Reverses. To go to the next or previous tracks To the following Total playing time of Total track number tracks. -
Page 14: Selecting The Playback Modes
Prohibiting disc ejection To check the current clock time while listening to a disc You can lock a disc in the loading slot. To cancel the prohibition, repeat the same procedure. Selecting the playback modes You can use only one of the following playback modes at a time. Select your desired playback mode. -
Page 15: Sound Adjustments
Sound adjustments Selecting preset sound modes (C-EQ: custom equalizer) You can select a preset sound mode suitable to Preset values Indication For: the music genre. BAS * TRE * LOUD * USER (Flat sound) ROCK Rock or disco music CLASSIC Classical –02 music Ÿ... -
Page 16: Adjusting The Sound
Indication To do: Range Adjusting the sound BAS* Adjust the bass. –06 (min.) You can adjust the sound characteristics to your (bass) preference. +06 (max.) TRE* Adjust the treble. –06 (min.) (treble) +06 (max.) FAD* Adjust the front R06 (Rear (fader) and rear speaker only) -
Page 17: General Settings - Psm
General settings — PSM Adjust the PSM item selected. Basic procedure You can change PSM (Preferred Setting Mode) items listed on the table that follows. Repeat steps to adjust the other PSM items if necessary. Finish the procedure. Select a PSM item. Ex.: When you select “AMP GAIN”... - Page 18 LOW PWR: VOL 00 – VOL 30 (Select this if the maximum Amplifier gain control power of the speaker is less than 45 W to prevent them from damaging the speaker.) HIGH PWR: [Initial]; VOL 00 – VOL 50 Depends on the amplifier gain control. Only for KD-S1501.
-
Page 19: Detaching The Control Panel
Detaching the control panel Attaching the control panel When detaching or attaching the control panel, be careful not to damage the connectors on the back of the control panel and on the panel holder. Detaching the control panel Before detaching the control panel, be sure to turn off the power. -
Page 20: Maintenance
Maintenance How to clean the connectors To keep discs clean Frequent detachment will deteriorate the A dirty disc may not play correctly. connectors. If a disc does become dirty, wipe To minimize this possibility, periodically wipe it with a soft cloth in a straight line the connectors with a cotton swab or cloth from center to edge. -
Page 21: More About This Receiver
More about this receiver Basic operations Playing a CD-R or CD-RW Turning on the power • Use only “finalized” CD-Rs or CD-RWs. • This receiver can play back multi-session • By pressing CD or FM/AM on the receiver, discs; however, unclosed sessions will be you can also turn on the power. -
Page 22: Troubleshooting
Troubleshooting What appears to be trouble is not always serious. Check the following points before calling a service center. Symptoms Causes Remedies • Sound cannot be heard The volume level is set to Adjust it to the optimum from the speakers. the minimum level. -
Page 23: Specifications
Specifications AUDIO AMPLIFIER SECTION CD PLAYER SECTION Maximum Power Output: Type: Compact disc player Front: 45 W per channel Signal Detection System: Non-contact optical Rear: 45 W per channel pickup (semiconductor laser) Continuous Power Output (RMS): Number of channels: 2 channels (stereo) Front: 17 W per channel into 4 Ω, 40 Hz Frequency Response: 5 Hz to 20 000 Hz to 20 000 Hz at no more than 0.8%... - Page 24 Having TROUBLE with operation? Please reset your unit Refer to page of How to reset your unit Vous avez des PROBLÈMES de fonctionnement? Réinitialisez votre appareil Référez-vous à la page intitulée Comment réinitialiser votre appareil EN, FR © 2005 Victor Company of Japan, Limited 0405DTSMDTJEIN...
- Page 25 L’illustration suivante est un exemple d’installation typique. Si vous avez des questions ou avez besoin information regarding installation kits, consult your JVC IN-CAR ENTERTAINMENT dealer or a d’information sur des kits d’installation, consulter votre revendeur d’autoradios JVC ou une compagnie company supplying kits.
- Page 26 Notes: Remarques: • Replace the fuse with one of the specified rating. If the fuse blows frequently, consult your JVC • Remplacer le fusible par un de la valeur précisée. Si le fusible saute souvent, consulter votre revendeur IN-CAR ENTERTAINMENT dealer.
- Page 27 This file has been downloaded from: www.UsersManualGuide.com User Manual and User Guide for many equipments like mobile phones, photo cameras, monther board, monitors, software, tv, dvd, and othes.. Manual users, user manuals, user guide manual, owners manual, instruction manual, manual owner, manual owner's, manual guide, manual operation, operating manual, user's manual, operating instructions, manual operators, manual operator, manual product, documentation manual, user maintenance, brochure, user reference, pdf manual Downloaded from:...