Panasonic Lumix DMC-TZ2 Operating Instructions Manual
Panasonic lumix dmc-tz2: user guide
Hide thumbs
Also See for Lumix DMC-TZ2:
- Operating instructions manual (50 pages) ,
- Instrucciones de funcionamiento (32 pages) ,
- Operating instructions manual (49 pages)
Table of Contents
Advertisement
Before connecting, operating or adjusting this product, please read
the instructions completely.
This manual is based on the DMC-TZ3 model. Product illustrations
and screens may vary.
For USA assistance, please call: 1-800-272-7033 or send e-mail to : digitalstillcam@us.panasonic.com
For Canadian assistance, please call: 1-800-99-LUMIX (1-800-995-8649) or
P
PC
Operating Instructions
send e-mail to: lumixconcierge@ca.panasonic.com
Digital Camera
DMC-TZ2
Model No.
DMC-TZ3
VQT1B61-1
Advertisement
Table of Contents

Related Manuals for Panasonic Lumix DMC-TZ2


Summary of Contents for Panasonic Lumix DMC-TZ2
-
Page 1: Operating Instructions
This manual is based on the DMC-TZ3 model. Product illustrations and screens may vary. For USA assistance, please call: 1-800-272-7033 or send e-mail to : digitalstillcam@us.panasonic.com For Canadian assistance, please call: 1-800-99-LUMIX (1-800-995-8649) or send e-mail to: lumixconcierge@ca.panasonic.com... - Page 2 Dear Customer, THE SOCKET OUTLET SHALL BE Thank you for choosing Panasonic! INSTALLED NEAR THE EQUIPMENT You have purchased one of the most AND SHALL BE EASILY ACCESSIBLE. sophisticated and reliable products on the market today. Used properly, we’re sure...
-
Page 3: Before Use
-If you see this symbol- About the battery charger Information on Disposal in other CAUTION! Countries outside the European DO NOT INSTALL OR PLACE THIS Union UNIT IN A BOOKCASE, BUILT- This symbol is only valid in the IN CABINET OR IN ANOTHER European Union. -
Page 4: Motion Pictures
Record, view, save those precious moments. Record (P.24) Zoomed-in pictures Close-up pictures of people in distance [10x optical zoom] (P.27) Clear pictures Prevents blurring from shaky hands [Optical Image Stabilizer] (P.39) Beautiful pictures Dark places, moving subjects [Intelligent ISO] (P.46) Motion pictures Capture moving scenes [Motion Picture Mode] (P.47) -
Page 5: Table Of Contents
Limited Warranty (For USA Only) ... 99 Optional accessories ... 96 Customer Services Directory (For USA Only) ... 101 Digital Camera Accessory Order Form (For USA Customers) ... 97 Index ... 104 Request for Service Notice (For USA Only) ... 98... -
Page 6: Standard Accessories
(P.26) If any accessories are lost, customers in the USA should contact Panasonic’s parts department at 1 800 833-9626 and customers in Canada should contact 1 800 99-LUMIX (1-800-995- 8649) for further information about obtaining replacement parts. -
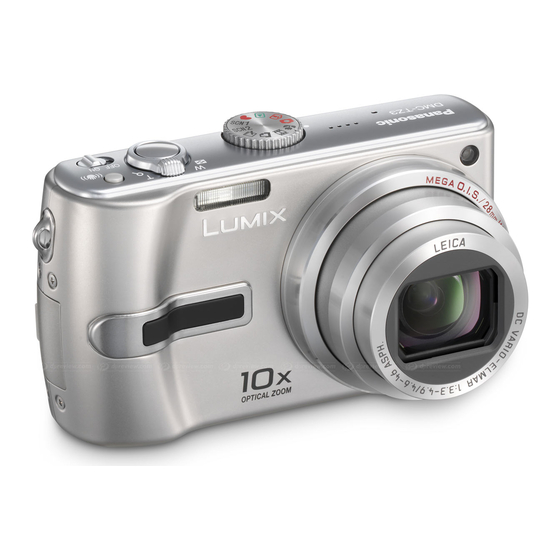
Page 7: Names Of Parts
(P.33, 34) FUNC (Quick setting P.57)/ delete (P.32) button DIGITAL/AV OUT socket (P.74, 76, 79) DC IN socket (P.74, 76) Always use a genuine Panasonic AC adaptor (DMW-AC5PP: optional). VQT1B61 Tripod receptacle Align to correct mode Card/Battery door (P.15) -
Page 8: Preparations
Card (check orientation) Do not touch connector plug Status indicator Compatible memory cards (sold separately) The following SD standard-based cards (Panasonic brand recommended) ] mins) ● SD memory cards, 8MB-2GB ● SDHC memory cards (4GB) → (P.96) (4GB (or greater) cards without the SDHC logo are not of SD standard.) →... -
Page 9: Setting The Clock And Language
Setting the clock and language Preparations Set mode dial (P.13) to NORMAL PICTURE mode ‘PLEASE SET THE CLOCK’ will be displayed when power is turned on for the first time. While this message is displayed Adjust year, month, date, time Power Turn on power again and check time display. -
Page 10: Using Menus
Using menus Preparations Here is explained an example of changing the ‘POWER SAVE’ setting from ‘5 MIN.’ to ‘2 MIN.’ from SETUP menu. (‘POWER SAVE’ is a function to extend battery life by automatically turning the camera off if no operations are performed for a certain period.) Turn on the power Zoom lever Set to... -
Page 11: Using Setup Menu
Using SETUP menu Preparations ‘CLOCK SET’, ‘AUTO REVIEW’, ‘POWER SAVE’ and ‘ECONOMY’ are important for clock setting and battery life. Be sure to check these before use. Item Uses, operations CLOCK SET 1, 2 Set the date and time. WORLD TIME 1, 2 Set the local time at an overseas destination (P.49) MONITOR... - Page 12 Using SETUP menu Preparations Item Uses, operations BEEP 1, 2 Change or mute beep sounds. SHUTTER 1, 2 Change or mute shutter sounds. VOLUME Adjust volume of sound from speakers (7 levels). Reset image file numbers and start again from ‘0001’. NO.
-
Page 13: Basics
Taking pictures Basics Turn on the power Set to Adjust the focus Take a picture Zoom lever Status indicator Press fully Holding the camera Horizontally Vertically ● Do not block the flash or the lamp Flash Lamp (P.12). Do not look at them from close range. -
Page 14: Taking Pictures With Zoom
Taking pictures Basics Picture save destination Pictures will be saved to a card if one is inserted, or to the built-in memory When in operation Card Built-in memory This means that an operation is in progress, such as the recording, reading, or deleting of pictures. Do not turn off the Card power or remove the battery, card, or AC adaptor (DMW- AC5PP, sold separately) (this may cause damage to or loss... - Page 15 Taking pictures with SIMPLE Basics MODE Set to Adjust the focus Press halfway Take a picture Backlight compensation MENU/SET Press fully The settings for the following functions are The following functions cannot be used. fixed. Item Setting SELFTIMER (P.35) OFF/10 SEC. BURST mode (P.54) POWER SAVE (P.20) 5 MIN.
-
Page 16: Viewing Your Pictures
Viewing your pictures instantly Basics (REVIEW) Pictures can be checked while still in a recording mode ( Display picture Most recently taken picture will be displayed for about 10 seconds. To close: Press ▼ or press the shutter button halfway. To view previous/next picture: ◄►... -
Page 17: Deleting Pictures
Deleting pictures Basics Basics Basics Set to PLAYBACK mode . Pictures deleted will be from card if card is inserted, or from built-in memory if not. To delete clipboard pictures, set to CLIPBOARD mode To delete 1 picture While picture is Select ‘YES’... -
Page 18: Making Lcd Monitor Easier To See
Making LCD monitor easier to Applications (Record) Make it easier to see the LCD monitor when taking pictures from high positions or in bright outdoor conditions. Display ‘LCD MODE’ Select mode LCD monitor POWER LCD Makes screen brighter than normal (for outdoor use). -
Page 19: Taking Pictures With Flash
Applications Taking pictures with flash (Record) Display ‘FLASH’ Select the desired type Flash Do not cover with hand. Do not look at from close range (few cm). Can also be selected with ►. Do not bring objects close (heat and light may damage object). Types Type, operations AUTO... -
Page 20: Taking Pictures With Exposure Compensation
Taking pictures with exposure Applications (Record) compensation Corrects exposure when adequate exposure cannot be obtained (if difference between brightness of object and background, etc). Depending on the brightness, this may not be possible in some cases. Display ‘EXPOSURE’ Select a value ‘0’... -
Page 21: Taking Pictures According To The
Taking pictures according to the Applications (Record) scene Set to ‘SCN1’ or ‘SCN2’ The same selection of 20 scenes is available for each. Select scene DISPLAY MENU/SET To see description of each scene: Select scene, and press ‘DISPLAY’. SCN1 and SCN2 When using SCENE MODE, the camera remembers the previously selected scene. - Page 22 Taking pictures according to the Applications (Record) scene (Continued) Scene Uses, functions Improves the skin tone of subjects for a healthier appearance in bright PORTRAIT daylight conditions. Smooths skin colors in bright, outdoor daylight conditions (portraits from SOFT SKIN chest upwards). Clarity of effect may vary depending on brightness.
- Page 23 Taking pictures according to Applications (Record) the scene (Continued) Scene Uses, functions Date of birth will be displayed as ‘0 month 0 day’. BABY To reset: Select ‘RESET’ from SETUP menu (P.22). Record pet’s age when taking pictures. Settings method same as for ‘BABY’ (P.42-45). SUNSET Take clear pictures of scenes such as sunsets.
-
Page 24: Taking Motion Pictures
Avoiding subject Applications blurring (Record) (Intelligent ISO) Avoiding subject blurring in darker conditions or with fast- moving subjects Detects movement of the subject and sets the optimum ISO sensitivity and shutter speed according to the brightness. Set to For moving subjects indoors… For stationary subjects indoors…... -
Page 25: Useful Features For Travel
Useful features for travel Applications (Record) (TRAVEL DATE, WORLD TIME) Recording holiday duration (TRAVEL DATE) Select ‘TRAVEL DATE’ from SETUP menu (P.18, 20) Select ‘SET’ SETUP CLOCK SET WORLD TIME MONITOR ± 0 GUIDE LINE TRAVEL DATE SELECT Set departure date Displayed for approx. -
Page 26: Using Rec Menu
Applications Using REC menu (Record) REC menu settings (P.18) Default setting outlined: W.BALANCE SENSITIVITY AUTO ‘Quick setting’ (P.57) is useful to easily call up frequently-used menus. ASPECT RATIO PICT.SIZE QUALITY SELECT EXIT W.BALANCE The same color may appear more blue or more red depending on the light source (sun, lamps, etc). - Page 27 Applications Using REC menu (Record) PICT.MODE Set picture quality for motion pictures (P.47). Applicable modes: Settings: Aspect ratio : 30fps VGA / 10fps VGA / 30fps QVGA / 10fps QVGA (P.51) : 30fps 16:9 / 10fps 16:9 ‘30fps’: smoother movement; ‘10fps’: longer recording time PICT.SIZE Set size of picture.
- Page 28 Applications Using REC menu (Record) AF MODE Method of aligning focus can be changed according to position and number of subjects. Applicable modes: Settings: : High-speed focus) Subject not in center of picture (AF area displayed after focuses completely aligned) 9-area-focusing Automatically focuses on any of 9 points...
- Page 29 Applications Using REC menu (Record) AF ASSIST LAMP Illuminates lamp when dark to facilitate focus alignment. Applicable modes: Settings: OFF : Lamp off (taking pictures of animals in dark, etc) ON : Lamp illuminated with halfway press of shutter button and larger AF area displayed) Do not cover or look at lamp from close range Fixed to ‘ON’...
- Page 30 Taking/viewing clipboard Applications (Record) pictures (CLIPBOARD) Taking clipboard pictures Set to Select ‘REC’ MENU/SET Functions unavailable: BURST, D.ZOOM, AUTO BRACKET(DMC-TZ3 only), WB ADJUST, CONT.AF The settings for the following Take a clipboard picture functions are fixed. ASPECT RATIO: QUALITY: SELFTIMER: OFF/2SEC. Press halfway SENSITIVITY: AUTO (align focus)
-
Page 31: Viewing As List
Taking/viewing clipboard Applications pictures (Record) (Continued) CLIPBOARD menu Press ‘MENU/SET’ while recording or viewing to display menu. REC ON CLIPBOARD menu Select item REC ON CLIPBOARD GO TO PLAY PICT.SIZE AUDIO REC. INITIAL DISP. CLOCK SET SELECT EXIT GO TO PLAY: View clipboard pictures. PICT.SIZE: Change picture size. -
Page 32: Viewing Motion Pictures
Viewing motion pictures/ Applications (View) pictures with audio Set to Select and play picture Operations during motion picture playback Pause (play, when already paused) Hold to rewind Hold to fast (single frame step forward (single while paused) frame step while paused) Stop To adjust volume... -
Page 33: Dual Display
Applications Using PLAY menu (View) PLAY menu settings (P.18) PLAY Pictures will be selected from built-in memory (not clipboard) if no DUAL DISPLAY SLIDE SHOW card is inserted. FAVORITE ROTATE DISP. ROTATE SELECT EXIT (Screen example: DMC-TZ3) DUAL DISPLAY (DMC-TZ3 only) Displays 2 pictures vertically. -
Page 34: Rotate Disp
Applications Using PLAY menu (View) ROTATE DISP. Automatically rotate portrait pictures, manually rotate pictures by 90°. ROTATE DISP. Display with automatic rotation Display with manual rotation Select ‘ROTATE DISP.’ from Select ‘ROTATE’ from PLAY PLAY menu (P.17, 18) menu (P.17, 18) Select ‘ON’... -
Page 35: Dpof Print
Picture/picture no./date printing settings can be made for when printing with DPOF print- compatible shops or printers. (Ask at shop to check compatibility) For more information visit: http://panasonic.jp/dc/dpof_110/white_e.htm Select ‘DPOF PRINT’ from PLAY menu (P.17, 18) Select ‘SINGLE’ or ‘MULTI’... -
Page 36: Audio Dub
Applications Using PLAY menu (View) AUDIO DUB. Add audio to previously taken pictures. Select ‘AUDIO DUB.’ from PLAY menu (P.17, 18) Select image and start recording For files already with audio, select whether or not to AUDIO DUB. 100-0001 overwrite existing audio with ▲▼, and press ‘MENU/ 1/13 SET’. -
Page 37: Aspect Conv
(all pictures will still be deleted). Consult your nearest Service Center if format cannot be successfully completed. For USA assistance, please call: 1-800-272-7033 or send e-mail to : digitalstillcam@us.panasonic.com For Canadian assistance, please call: 1-800-99-LUMIX (1-800-995-8649) or Select ‘YES’ (Screen shown is example) -
Page 38: Connecting With Other Devices
Connecting Using with computer with other devices Preparations: Ensure that you have a sufficiently-charged battery, or an AC adaptor attached (DMW-AC5PP, sold separately). Remove memory card if wishing to use built-in memory. Turn on power of both camera and computer Set to any mode except (Do not move the mode dial while connected to computer.) Displayed... -
Page 39: Multi Select
Connecting Printing with other devices Preparations: Ensure that you have a sufficiently-charged battery, or an AC adaptor (DMW-AC5PP, sold separately). Remove memory card to use pictures in built-in memory. Adjust settings on your printer (print quality, etc) as required. Turn on power of both camera and printer Set to Connect camera to printer Operate camera to print pictures... -
Page 40: Viewing On Tv Screen
Connecting Printing with other (Continued) devices Print settings Item PRINT WITH DATE OFF/ON NUM. OF PRINTS Set number of pictures (printer takes priority) L/3.5”×5” (89 × 127 mm) 2L/5”×7” (127 × 178 mm) POSTCARD (100 × 148 mm) (210 × 297 mm) PAPER SIZE CARD SIZE (54 ×... -
Page 41: Others
List of LCD monitor displays Others In recording 9 Travel date (P.48) Aperture value (P.25) Shutter speed (P.25) Intelligent ISO mode (P.46) Elapsed recording time (P.47) 11 Current date/time Zoom (P.27) High angle mode (P.34) Power LCD (P.34) Metering mode (P.53) F3.3 1/30 Slow shutter (P.56) -
Page 42: Message Displays
Message displays Others THIS MEMORY CARD IS LOCKED Release using the write-protect switch on the SD memory card or SDHC memory card. (P.26) NO VALID PICTURE TO PLAY Take pictures, or insert a different card already containing pictures. THIS PICTURE IS PROTECTED Release the protection before deleting, etc. -
Page 43: Q&A Troubleshooting
Troubleshooting Memory Card Which cards can I use? See (P.15) for types, and (P.92) for recording capacities. Using Panasonic cards is recommended. Pictures How can I easily send pictures to my computer? Connect the camera to your computer using the supplied USB cable (P.74) to copy (drag &... - Page 44 Q&A Others Troubleshooting (Continued) Recording (continued) Recorded pictures appear coarse, or there is interference. ISO sensitivity is high, or shutter speed is low. (Default SENSITIVITY setting is ‘AUTO’ – interference may appear with indoor pictures.) → Lower ‘SENSITIVITY’ (P.51). → Set ‘COL. MODE’ to ‘NATURAL’ (P.57) →...
- Page 45 Q&A Others Troubleshooting (Continued) TV, computer, printer No image appears on TV. Image blurred or not colored. Not connected correctly (P.79). TV input setting not set to auxiliary input. ‘VIDEO OUT’ not set to ‘NTSC’ (P.22). TV screen display different to LCD monitor. Aspect ratio may be incorrect or edges may be cut off with certain televisions.
-
Page 46: Usage Cautions And Notes
CIPA standards: ● Using Panasonic SD memory card (16MB) ●Temperature 23 °C (73.4 °F), humidity 50 % ●NORMAL PICTURE mode ●LCD monitor ON ●STABILIZER (MODE1) ●First picture taken 30 sec after power turned on ●1 picture taken per 30 sec ●Full flash used for every other picture ●Zoom operation for each picture (max. -
Page 47: Recording Picture/Time Capacity
Recording picture/time capacity Others Recording picture capacity (still pictures) Varies according to following settings. ASPECT RATIO 7M ∗ 6M ∗ 5M EZ ∗ 3M EZ PICT.SIZE (3072 × 2304) (2816 × 2112) (2560 × 1920) (2048 × 1536) QUALITY Built-in memory 16 MB 32 MB 64 MB... -
Page 48: Specifications
Motion pictures Interface Terminal Dimensions (excluding the projection part) Mass Operating temperature Operating humidity Battery charger (Panasonic DE-A45B): Information for your safety Output Input Equipment mobility: Movable Battery Pack (lithium-ion) (Panasonic CGA-S007A): Information for your safety Voltage/capacity Monaural Monaural Built-in Memory (Approx. 12.7 MB)/SD Memory Card/SDHC Memory Card/... -
Page 49: Optional Accessories
Mrs. First Street Address City TO OBTAIN ANY OF OUR DIGITAL CAMERA ACCESSORIES YOU CAN DO ANY OF CALL PANASONIC’S ACCESSORY ORDER LINE AT 1-800-332-5368 In CANADA, please contact your local Dealer for more information about accessories. Description Price Each... -
Page 50: Request For Service Notice (For Usa Only)
Limited Warranty Coverage If your product does not work properly because of a defect in materials or workmanship, Panasonic Consumer Electronics Company or Panasonic Puerto Rico, Inc. (collectively referred to as “the warrantor”) will, for the length of the period indicated on the chart below, which starts with the date of original purchase (“warranty period”), at its option either (a) repair your product with... -
Page 51: Customer Services Directory (For Usa Only)
Carry-In or Mail-In Service For Carry-In or Mail-In Service in the United States call 1-800-272-7033. For assistance in Puerto Rico call Panasonic Puerto Rico, Inc. (787)-750-4300 or fax (787)-768-2910. This warranty ONLY COVERS failures due to defects in materials or workmanship, and DOES NOT COVER normal wear and tear or cosmetic damage. - Page 52 Utilisez toujours une batterie de marque À LA PLUIE, À L’HUMIDITÉ, Panasonic. À L’ÉGOUTTEMENT OU AUX Si une batterie autre que Panasonic est ÉCLABOUSSEMENTS, ET NE utilisée, nous ne pouvons garantir le bon PLACEZ SUR L’APPAREIL AUCUN fonctionnement de l’appareil.
-
Page 53: Deleting Pictures
Index List of LCD monitor displays (P.80) AC Adaptor ... 74, 76, 90 Economy Mode... 20 Aerial Photo Mode ... 44 Exposure Compensation ... 38 AF Assist Lamp... 56 EZ ... 27 AF Lock ... 44 AF Mode ... 54 Aspect Ratio ... - Page 54 MEMO MEMO VQT1B61 VQT1B61...
- Page 55 QuickTime and the QuickTime logo are trademarks or registered trademarks of Apple Computer, Inc., used under license therefrom. Panasonic Consumer Electronics Company, Division of Panasonic Corporation of North America One Panasonic Way, Secaucus, NJ 07094 Panasonic Puerto Rico, Inc. Ave. 65 de Infantería, Km. 9.5, San Gabriel Industrial Park, Carolina, Puerto Rico 00985 Panasonic Canada Inc.
Need help?
Do you have a question about the Lumix DMC-TZ2 and is the answer not in the manual?
Questions and answers
why can i not see the object i **** shooting on the screen
The screen of your Panasonic Lumix DMC-TZ2 may not display the object you are shooting if the AV cable is connected to the camera. When the AV cable is connected, the display may be directed to an external device instead of the camera's screen. Disconnect the AV cable to restore the display on the camera's screen.
This answer is automatically generated
why is my camera not taking pictures......
Your Panasonic Lumix DMC-TZ2 camera may not be taking pictures due to the following reasons:
1. Battery Issues: The battery may need recharging. Ensure it is fully charged before use.
2. Mode Dial: The mode dial may not be set to a recording mode. Adjust it to a valid recording mode.
3. Memory Full: The built-in memory or SD card may be full. Delete unwanted pictures to free up space.
4. Lens Issues: The lens may be dirty or foggy. Clean it with a soft, dry cloth.
5. Power Save Mode: If the camera is left on, it may enter ‘POWER SAVE’ or ‘ECONOMY’ mode. Try turning it off and on again.
If the issue persists after checking these factors, there may be a hardware defect.
This answer is automatically generated