Advertisement
Available languages
Available languages
Table of Contents
- 1 Table of Contents
- 2 Aperçu de L'appareil
- 3 Utilisation de L'appareil
- 4 Installation
- 5 Préparation du Linge
- 6 Utilisation du Sèche-Linge
- 7 Nettoyage et Entretien
- 8 Dépannage
- 9 Messages D'erreur Automatiques et Solutions
- 10 Informations Sur la Protection de
- 11 Efficacité Énergétique
- Download this manual
WARRANTY CONDITION
This product has a 2-year warranty as of the date of purchase*, covering any fault resulting from
EN
a manufacturing or material defect. This warranty does not cover defects or damage resulting
from incorrect installation, improper use or abnormal wear of the appliance.
*upon presentation of the sales receipt.
CONDITION DE GARANTIE
Ce produit est garanti pour une période de 2 ans à partir de la date d'achat*, contre toute
défaillance résultant d'un vice de fabrication ou de matériau. Cette garantie ne couvre pas les
FR
vices ou les dommages résultant d'une mauvaise installation, d'une utilisation incorrecte ou
de l'usure anormale du produit.
*sur présentation du ticket de caisse.
Made in TÜRKIYE
ELECTRO DEPOT
1 route de Vendeville
59155 FACHES-THUMESNIL
FRANCE
Advertisement
Table of Contents

Subscribe to Our Youtube Channel
Related Manuals for VALBERG DHP 8 A++ W701T


Summary of Contents for VALBERG DHP 8 A++ W701T
- Page 1 WARRANTY CONDITION This product has a 2-year warranty as of the date of purchase*, covering any fault resulting from a manufacturing or material defect. This warranty does not cover defects or damage resulting from incorrect installation, improper use or abnormal wear of the appliance. *upon presentation of the sales receipt.
- Page 2 11/2022 - V1 Tumble Dryer Sèche-linge 976048 - DHP 8 A++ W701T INSTRUCTIONS FOR USE .....02 CONSIGNES D'UTILISATION .....36...
- Page 4 Thanks! T h a n k y o u f o r c h o o s i n g t h i s VA L B E R G p ro d u c t . Chosen, tested and recommended by ELECTRO DEPOT, t h e p ro d u c t s o f t h e VA L B E R G b r a n d a re e a s y t o u s e , re l i a b le a n d o f a n i m p e c c a b le s t a n d a rd .
- Page 5 Table of contents Description of the appliance Preview of the appliance Installation Using the appliance Preparing the laundry Using the tumble dryer Cleaning and care Useful information Machine sound Troubleshooting Automatic fault warnings and what to do Environmental protection and packaging information Energy Efficiency...
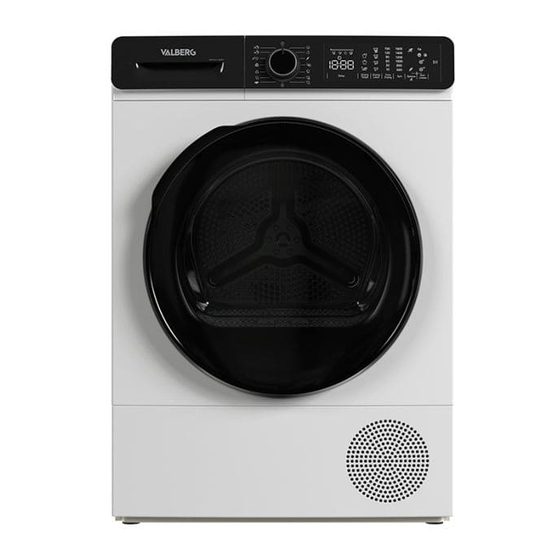
- Page 6 Preview of the appliance Description of the appliance Upper tray Adjustable feet Control panel Plinth cover Loading door Type plate Plinth Lint filter Plinth opening slot Drawer Cover Ventilation grills...
- Page 7 Using the appliance Installation Connection to Water Outlet (with optional drain hose) In products with a heat pump unit, water accumulates in the water tank during the drying process. You must empty the accumulated water after each drying process. Instead of periodically emptying the water tank, you can also use the water drain hose provided with the product to directly drain the water outside.
- Page 8 Using the appliance IMPORTANT: • The water discharge house must be installed at a height of 80 cm maximum. • The water discharge hose must not be bent between the outlet and the product, folded or stepped over. Adjusting the Feet •...
- Page 9 Using the appliance IMPORTANT: Operating your machine at low voltage values will shorten the service life and decrease the performance of your machine. Under Counter Installation • Leave at least 3 cm of space between the side and rear walls of the product and the underside of the worktop when installing your product under a counter.
- Page 10 Using the appliance Preparing the laundry Sorting the Laundry to be Dried Follow the instructions on the labels of the laundry to be dried. Only dry items that have a statement/symbol that indicates «they can be dried in a dryer». •...
- Page 11 Using the appliance IMPORTANT: Delicate fabrics, embroided fabrics, woolen/silk fabrics, clothes made of delicate and expensive fabrics, airtight clothes and tulle curtains are not suitable for drying in the dryer. Preparing the Laundry to be Dried ATTENTION: • Risk of explosion and fire! Remove all objects from pockets such as lighters and matches.
- Page 12 Using the appliance Load Capacity Follow the instructions in the «Programme selection and consumption table». (See Programme selection and consumption table). Do not load the product with more laundry than the capacity values specified in the table. IMPORTANT: It is not recommended to load the dryer with more laundry than the amount shown in the figure.
- Page 13 Using the appliance Laundry Dry load weight (gr) Bedsheet (double) Pillowcase Bath Towel Hand Towel Shirt Cotton Shirt Jean Fabric - Gabardine Trousers T-shirt...
- Page 14 Using the appliance Using the tumble dryer Control Panel Programme Selection Knob Electronic indicator and additional functions Programme Selection Knob Use the programme selection knob to select the desired drying programme Electronic Indicator and Additional Functions...
- Page 15 Using the appliance Display symbols Water tank warning indicator Lint filter cleaning warning indicator Heat exchanger cleaning warning indicator Extra Dry Cupboard Dry Iron Dry Drying level 1 Drying level 2 Drying level 3 Drying level 4 Delay Timer Anti-crease 60‘ Anti-crease 120‘...
- Page 16 Using the appliance Drying Step Display Drying Iron dry Cupboard dry The electronic display shows the drying steps throughout the program. Every time a program step starts, the relevant drying step light turns on. Once the drying step is complete, the relevant drying step light turns off.
- Page 17 Using the appliance Programme Selection and Consumption Table Press the Start/Pause button to start the programme. The Start/Pause LED that indicates that the programme has started and the remaining the of the program is seen on the display. Approximate Washing amount of Duration Programme...
- Page 18 Using the appliance Approximate Washing amount of Duration Programme Load (kg) machine remaining (minutes) spin speed humidity Wool refresh Refresh 1200 Express 34' 1200 Shirts 20' Energy consumption values Approximate Washing Energy amount of Programme Load (kg) machine consumption remaining spin speed values (kWh) humidity...
- Page 19 Using the appliance *Energy labelling standard programme (EN 61121:2013) All values in the table were determined in accordance with the EN 61121:2013 standard. Consumption values may vary from the values in the table depending on the fabric type, spin speed, environment conditions and voltage values. Auxiliary Functions The table that summarises the options that can be selected in programmes is given below.
- Page 20 Using the appliance Option Description There is a child lock option to avoid changes in the programme flow when keys are pressed during the programme. To activate child lock feature user should press “Options” and “Anticrease” buttons simultaneously for 3 sec. When the child lock activated, all keys will be deactivated.Child lock is not automatically deactivated at the end of the program.
- Page 21 Using the appliance Starting the Programme The Start/Pause LED will flash during programme selection.Press the Start/Pause button to start the programme. The Start/Pause LED that indicates that the programme has started and the drying LED will come on. Option Description This programme dries cotton laundry including bedsheets, pillowcases, pyjamas, underwear, tablecloths etc.
- Page 22 Using the appliance Option Description Use this program for gentle drying of woolen clothes, washed as stated in the washing instructions. Take out the clothes at the end of Wool the drying cycle. Do not use this program to dry acrylic items. Time drying option is selected between 10 minutes and 150 minutes without providing hot air, refresh is done and bad odors can be Refresh...
- Page 23 Using the appliance for a new load. IMPORTANT: • Clean the lint filter after every programme. Empty the water tank after every programme. • If you do not take out the laundry after the programme has ended, the 1-hour Anti Crease phase will automatically be activated.
- Page 24 Using the appliance OPTIONS PROGRAMMES Towels Hygiene Time drying Baby Care Duvet Sport Outdoor Wool refresh Refresh Express 34' Shirts 20' Not selectable Selectable...
- Page 25 Useful information Cleaning and care IMPORTANT: Do not use industrial chemicals to clean your dryer. Do not use a dryer that has been cleaned with industrial chemicals. Cleaning the Lint Filters IMPORTANT: Do not forget to clean the lint filters after each use. To clean the lint filters:...
- Page 26 Useful information Open the loading door. Pull up the lint filters to remove it. Open the outer filter. Clean the outer filter by your hands or using a soft cloth. Open the inner filter. Clean the inner filter by your hands or using a soft cloth. Close the filters and fit the hooks.
- Page 27 Useful information Emptying the Water Tank Pull the drawer cover and carefully take out the tank. Empty the water in the tank. If there is lint accumulated on the discharge cap in the tank, clean it with water. Refit the water tank. IMPORTANT: •...
- Page 28 Useful information Cleaning the Heat Exchanger IMPORTANT: • Clean the heat exchanger when you see the warning “Heat Exchanger Cleaning”. • Even if the “heat exchanger cleaning warning led” is not on: clean the heat exchanger after every 30 drying processes or once a month.
- Page 29 Useful information If the drying process is completed, open the loading door and wait for it to cool down. Open the kick plate cover as shown. Unlock the exchanger cover by turning in the direction shown with arrows. Take out the exchanger cover as shown. Clean the front surface of the exchanger as shown.
- Page 30 Useful information Cleaning the Humidity Sensor • Inside the machine, there are humidity sensors that detect whether the laundry is dry or not. To clean the sensors: Open the loading door of the machine. If the machine is still hot due to the drying process, wait for it to cool down.
- Page 31 Useful information ATTENTION: Due to the risk or fire and explosion, do not use solution agents, cleaning agents or similar products when cleaning the sensors. Cleaning the Inner Surface of the Loading Door IMPORTANT: Do not forget to clean the inner surface of the loading door after each drying process.
- Page 32 Useful information Machine sound SOURCE OF SOUND DEFINITION Pump Sound Pump is activated when the machine starts to work and during the operation at certain intervals. It is normal to hear pump and water sound during this process. Compressor Sound It is normal to hear a metallic sound from the compressor from time to time while the machine is running.
- Page 33 Useful information Troubleshooting Your dryer is fitted with systems that continuously perform checks during the drying process to take the necessary measures and warn you in case of any malfunction. WARNING: If the problem persists even if you have applied the steps in this section, please contact the your dealer or an Authorised Service Provider.
- Page 34 Useful information Problem Reason Solution WARNING: The laundry that comes out hot at the end of the drying process generally feels more humid. Check the care labels on the The programme used might laundry items, select a suitable Laundry comes out not be suitable for the type of programme for the type of damp at the end of...
- Page 35 Useful information Problem Reason Solution Check the care labels on the Clothes have The programme used might laundry items, select a suitable shrunk, felted or not be suitable for the type of programme for the type of deteriorated. laundry. laundry. There might be lint accumulated on the inner surfaces of Clean the inner surfaces of the...
- Page 36 Useful information Automatic fault warnings and what to do Your tumble dryer is equipped with a built-in fault detection system, indicated by a combination of flashing operation lights. The most common failure codes are shown below. ERROR CODE SOLUTION Contact the nearest authorised service agent. Empty the water tank, if problem does not solved, contact the nearest authorised service agent.
- Page 37 Useful information Environmental protection and packaging information Packaging Information The packaging of this product is made of recyclable materials. Do not dispose of the packaging, waste together with household or other waste. Instead, take it to a packaging collection point defined by your local authority. Energy Efficiency •...
- Page 38 Merci ! Nous vous remercions d'avoir choisi ce produit VALBERG. C h o i s i s , t e s t é s e t re co m m a n d é s p a r E L E CT R O D E P OT ,...
-
Page 39: Table Of Contents
Table des matières Description de l’appareil Aperçu de l'appareil Installation Utilisation de Préparation du linge l'appareil Utilisation du sèche-linge Nettoyage et entretien Informations utiles Son de la machine Dépannage Messages d'erreur automatiques et solutions Informations sur la protection de l'environnement et l'emballage Efficacité... -
Page 40: Aperçu De L'appareil
Aperçu de l’appareil Description de l’appareil Plateau supérieur Pieds réglables Panneau de commande Panneau de socle Porte de chargement Plaque signalétique Socle Filtre à peluches Fente d'ouverture du socle Couvercle de tiroir Grilles de ventilation... -
Page 41: Utilisation De L'appareil
Utilisation de l’appareil Installation Raccordement à l’Évacuation d'eau (avec tuyau de vidange en option) Dans les produits équipés d'une unité de pompe à chaleur, l'eau s'accumule dans le réservoir d'eau pendant le processus de séchage. Vous devez vider l'eau accumulée après chaque processus de séchage. - Page 42 Utilisation de l’appareil REMARQUE IMPORTANTE : • Le tuyau d'évacuation d'eau doit être installé à une hauteur de 80 cm maximum. • Le tuyau d'évacuation d'eau ne doit pas être plié entre l’évacuation et le produit, replié ou enjambé. Réglage des pieds •...
- Page 43 Utilisation de l’appareil REMARQUE IMPORTANTE : L'utilisation de votre machine à des valeurs de tension basses réduira sa durée de vie et ses performances. Installation sous un plan de travail • Laissez un espace d'au moins 3 cm entre les parois latérales et arrière du produit et le dessous du plan de travail lorsque vous installez votre produit sous un plan de travail.
-
Page 44: Préparation Du Linge
Utilisation de l’appareil Préparation du linge Tri du linge à sécher Suivez les instructions figurant sur les étiquettes du linge à sécher. Ne séchez que les articles portant un(e) mention/symbole indiquant qu'ils « peuvent être séchés au sèche- linge ». • N’utilisez pas l'appareil avec des quantités de charge et des types de linge autres que ceux indiqués dans la Capacité... - Page 45 Utilisation de l’appareil REMARQUE IMPORTANTE : Les tissus délicats, les tissus brodés, les tissus en laine/soie, les vêtements en tissus délicats et coûteux, les vêtements hermétiques et les rideaux en tulle ne conviennent pas au séchage dans le sèche-linge. Préparation du linge à sécher ATTENTION : •...
- Page 46 Utilisation de l’appareil • Lors du lavage du linge à sécher, ajustez la quantité d'adoucissant en fonction des données du fabricant de la machine à laver. Capacité de charge Suivez les instructions du « Tableau de sélection et de consommation des programmes ». (Voir le Tableau de sélection et de consommation des programmes).
- Page 47 Utilisation de l’appareil Linge Poids de charge à sec (gr) Drap (double) Taie d'oreiller Serviette de bain Serviette essuie-mains Chemise Chemise en coton Jean Tissu - Pantalon en gabardine T-shirt...
-
Page 48: Utilisation Du Sèche-Linge
Utilisation de l’appareil Utilisation du sèche-linge Panneau de commande Bouton de sélection de programme Indicateur électronique et fonctions supplémentaires Bouton de sélection de programme Utilisez le bouton de sélection de programme pour sélectionner le programme de séchage souhaité. Indicateur électronique et fonctions supplémentaires... - Page 49 Utilisation de l’appareil Symboles d'affichage Indicateur d’avertissement du réservoir d'eau Indicateur d’avertissement de nettoyage du filtre à peluches Indicateur d’avertissement de nettoyage de l'échangeur thermique Ultra sec. Prêt à ranger Fer à repasser Niveau de séchage 1 Niveau de séchage 2 Niveau de séchage 3 Niveau de séchage 4 Départ différé...
- Page 50 Utilisation de l’appareil Affichage des étapes de séchage Séchage Fer à repasser Prêt à ranger L'affichage électronique indique les étapes de séchage tout au long du programme. Chaque fois qu'une étape du programme démarre, le voyant de l'étape de séchage correspondante s'allume.
- Page 51 Utilisation de l’appareil Lavage Quantité machine approximative Durée Programme Charge (kg) vitesse de d'humidité (minutes) rotation résiduelle 1000 60 % Cotons 40 % Synthétique 50 % Délicat 1000 60 % Mixte 1000 60 % Serviettes 1000 60 % Hygiène Séchage minuté 1000 60 % Linge de bébé 60 % Couette 40 %...
- Page 52 Utilisation de l’appareil Lavage Quantité machine approximative Durée Programme Charge (kg) vitesse de d'humidité (minutes) rotation résiduelle Rafraîchisse- ment laine 1200 50 % Express 34' 1200 50 % Chemises 20' Valeurs de la consommation énergétique Lavage Quantité Valeurs de la machine approximative consommation Programme Charge (kg)
- Page 53 Utilisation de l’appareil *Programme de normes d'étiquetage énergétique (EN 61121:2013) Toutes les valeurs du tableau ont été déterminées conformément à la norme EN 61121:2013. Les valeurs de consommation peuvent varier par rapport aux valeurs du tableau en fonction du type de tissu, de la vitesse d'essorage, des conditions environnementales et des valeurs de tension.
- Page 54 Utilisation de l’appareil Option Description Si le bouton de programme est tourné sur Time Drying (Séchage minuté), vous pouvez appuyer sur le bouton d'option Time Drying Séchage minuté (Séchage minuté) pour le sélectionner et appuyer sur Start/Pause pour lancer le programme. Il existe une option de sécurité...
- Page 55 Utilisation de l’appareil Lancement du programme Le voyant Start/Pause clignote pendant la sélection du programme. Appuyez sur le bouton Start/Pause pour lancer le programme. Le voyant Start/Pause qui indique que le programme a démarré et le voyant de séchage s'allument. Option Description Ce programme permet de sécher le linge en coton, notamment...
- Page 56 Utilisation de l’appareil Option Description Utilisez ce programme pour sécher en douceur les vêtements en laine, lavés comme indiqué dans les instructions de lavage. Laine Sortez les vêtements à la fin du cycle de séchage. N'utilisez pas ce programme pour sécher des produits en acrylique. En sélectionnant l'option de séchage minuté...
- Page 57 Utilisation de l’appareil Fin du programme Une fois le programme terminé, les voyants lumineux Start/Pause, du niveau du réservoir d'eau, du nettoyage du filtre et du nettoyage de l’échangeur thermique s'allument. En outre, un avertissement sonore sera donné à la fin du programme. Vous pouvez retirer le linge pour que la machine soit prête à...
- Page 58 Utilisation de l’appareil OPTIONS PROGRAMMES réglage Délicat défaut) Mixte Serviettes Hygiène Séchage minuté Linge de bébé Couette Sport Extérieur Rafraîchissement laine Rafraîchissement...
- Page 59 Utilisation de l’appareil OPTIONS PROGRAMMES Express 34' Chemises 20' Non sélectionnable Sélectionnable...
-
Page 60: Nettoyage Et Entretien
Informations pratiques Nettoyage et entretien REMARQUE IMPORTANTE : N'utilisez pas de produits chimiques industriels pour nettoyer votre sèche-linge. N'utilisez pas un sèche-linge qui a été nettoyé avec des produits chimiques industriels. Nettoyage des filtres à peluches REMARQUE IMPORTANTE : N'oubliez pas de nettoyer le filtre à peluches après chaque utilisation. - Page 61 Informations pratiques Pour nettoyer les filtres à peluches : Ouvrez la porte de chargement. Tirez sur les filtres à peluches pour les enlever. Ouvrez le filtre extérieur. Nettoyez le filtre extérieur avec les mains ou un chiffon doux. Ouvrez le filtre intérieur. Nettoyez le filtre intérieur avec les mains ou un chiffon doux.
- Page 62 Informations pratiques • Après un certain temps d'utilisation du sèche-linge, si vous constatez une couche qui provoque une obstruction à la surface du filtre, lavez le filtre à l'eau chaude pour retirer la couche. Séchez complètement le filtre avant de le réinstaller.
- Page 63 Informations pratiques Vidange du réservoir d'eau Tirez le couvercle du tiroir et sortez le réservoir avec précaution. Videz l'eau du réservoir.. Si des peluches se sont accumulées sur le bouchon de vidange du réservoir, nettoyez-le avec de l'eau. Replacez le réservoir d'eau.
- Page 64 Informations pratiques REMARQUE IMPORTANTE : • Ne retirez jamais le réservoir d'eau lorsque le programme est en cours. L'eau condensée dans le réservoir d'eau ne convient pas à la consommation humaine. • N'oubliez pas de vider le réservoir d'eau après chaque utilisation.
- Page 65 Informations pratiques Si le processus de séchage est terminé, ouvrez la porte de chargement et attendez qu'elle refroidisse. Ouvrez le couvercle de la plaque d'appui comme indiqué. Déverrouillez le couvercle de l'échangeur en le tournant dans le sens indiqué par les flèches. Retirez le couvercle de l'échangeur comme indiqué.
- Page 66 Informations pratiques dans le sens indiqué par les flèches. Fermez le couvercle de la plaque d'appui comme indiqué. AVERTISSEMENT : Ne le nettoyez pas à mains nues car les ailettes de l'échangeur sont tranchantes. Elles peuvent vous blesser les mains. Nettoyage du capteur d'humidité •...
- Page 67 Informations pratiques REMARQUE IMPORTANTE : • Nettoyez les surfaces métalliques du capteur 4 fois par • N'utilisez pas d'outils métalliques pour nettoyer les surfaces métalliques du capteur. ATTENTION : En raison du risque d'incendie et d'explosion, n'utilisez pas d'agents de solution, de produits de nettoyage ou de produits similaires pour nettoyer les capteurs.
- Page 68 Informations pratiques...
- Page 69 Informations pratiques Bruit de la machine SOURCE DU BRUIT DÉFINITION Bruit de la pompe La pompe est activée lorsque la machine commence à fonctionner et pendant le fonctionnement à certains intervalles. Il est normal d'entendre le bruit de la pompe et de l'eau pendant ce processus.
-
Page 70: Dépannage
Informations pratiques Dépannage Votre sèche-linge est équipé de systèmes qui effectuent des contrôles continus pendant le processus de séchage pour prendre les mesures nécessaires et vous avertir en cas de dysfonctionnement. AVERTISSEMENT : Si le problème persiste même si vous avez suivi les étapes de cette rubrique, veuillez contacter votre revendeur ou un Prestataire de services agréé. - Page 71 Informations pratiques Problème Raison Solution La surface du filtre à peluches Lavez le filtre à l'eau tiède. est peut-être bouchée. L'échangeur thermique est Nettoyez l’échangeur peut-être bouché. thermique. Les grilles de ventilation situées Ouvrez les portes/fenêtres à l'avant de la machine sont pour éviter que la température peut-être fermées.
- Page 72 Informations pratiques Problème Raison Solution Le sèche-linge n'est peut-être Assurez-vous que la fiche est pas branché. bien insérée dans la prise. Assurez-vous que la porte de Le sèche-linge ne La porte de chargement est chargement est correctement peut pas être ouvert peut-être ouverte.
- Page 73 Informations pratiques Problème Raison Solution Le symbole d'avertissement de nettoyage L'échangeur thermique est Nettoyez l’échangeur de l'échangeur peut-être sale. thermique. thermique est allumé. Le filtre à peluches est peut- Nettoyez le filtre. être sale. Le symbole La trappe du filtre est peut-être d'avertissement de Nettoyez la trappe du filtre.
-
Page 74: Messages D'erreur Automatiques Et Solutions
Informations pratiques Messages d'erreur automatiques et solutions Votre sèche-linge est équipé d'un système intégré de détection des pannes, indiqué par le clignotement de plusieurs témoins lumineux clignotants. Les codes d'erreur les plus courants sont décrits ci-dessous. CODE SOLUTION D'ERREUR Contactez l'agent de service agréé le plus proche. Videz le réservoir d'eau, si le problème n'est pas résolu, contactez l'agent de service agréé... -
Page 75: Informations Sur La Protection De
Informations pratiques Informations sur la protection de l'environnement et l'emballage Informations sur l’emballage L'emballage de ce produit est fait de matériaux recyclables. Ne jetez pas l'emballage et les déchets avec les déchets ménagers ou autres. Apportez-les plutôt à un point de collecte des emballages défini par votre autorité... - Page 76 Notes...
- Page 77 Notes...
- Page 78 Notes...
Need help?
Do you have a question about the DHP 8 A++ W701T and is the answer not in the manual?
Questions and answers