Advertisement
Advertisement
Table of Contents

Summary of Contents for Vivitar VIVAUDMIX-NOC
- Page 1 User’s Manual Item: VIVAUDMIX-NOC...
-
Page 2: Safety Precautions
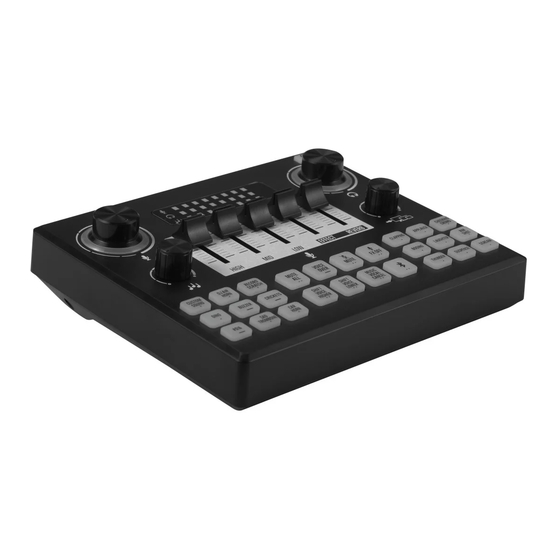
Safety Precautions Before setting up and using the Vivitar Audio Stream Sound Mixer, basic safety precautions should always be followed including: 1. READ ALL INSTRUCTIONS BEFORE USING YOUR SOUND MIXER. 2. This product is not a toy, do not allow children to play with this product. - Page 3 A Quick Look At Your Device Charging/Monitor Port Music Player/Smart Phone Port Headphone Jack 1 Headphone Jack 2 Dynamic Mic Port (for dynamic microphones) Microphone Jack 1 (for condenser mics) Microphone Jack 2 (for condenser mics) Power ON/OFF Button Microphone Volume Control Knob 10.
-
Page 4: Important Warning
Important Warning MICROPHONE WARNING! Your Sound Mixer has 3 microphone ports. Be sure to ONLY insert a dynamic microphone into the Dynamic Mic Port. Be sure to ONLY insert condenser microphones into either Microphone Jack 1 or Microphone Jack 2. If you are unsure what type of microphone you have, consult the microphoneʼs manufacturer for further information. - Page 5 Powering On Before powering on the sound mixer, connect the USB-C power cable (included) into the charging port and plug the other end into a suitable USB charging port, preferably to a computer. Press and hold the Power button until the unit powers on and the Power button illuminates.
- Page 6 Using The Plug-In Ports Connect up to two headsets and three microphones to your device using the jack ports located at the front of your sound mixer. Connect your music player or smart phone using the Music Player Port.
- Page 7 Using Your Sound Mixer Board (1) Adjustment Knobs and Faders -Twist the Volume Control Knobs to control the volume output to the headphones, volume input from the microphone, and volume input from your music player/smart phone. The volume level display will show the volume levels. -Turn the Monitor Volume knob to adjust the mixerʼs input volume to the computer connected through USB.
- Page 8 Using Your Sound Mixer Board (2) Sound Panels Use the sound panel on the right by pressing the buttons to play different reaction sounds such as clapping, applause, a cheering crowd, booing, laughter, a rim shot, thunder, suspense, and a scream. The buttons will emit a back light when activated.
- Page 9 PC Connection To connect your audio mixer to a PC, open the settings menu on your PC and go to the Bluetooth & Devices menu of the computer used to power your audio mixer and make sure the device “Vivaud1” is paired as an audio device. If the device is not paired, then find “Vivaud1”on the list of available devices and click to pair.
-
Page 10: Bluetooth Connection
Bluetooth Connection You can play audio and record on a connected Bluetooth device. - To connect a Bluetooth device to your audio mixer, go to the Bluetooth settings menu of your Bluetooth enabled device and turn on Bluetooth. - Press the Bluetooth button located on the control panel of your sound mixer. - Page 11 Recording and Broadcasting After powering on and getting familiar with your sound mixer, you can now use it to record or broadcast your sound mix. To record your sound mix, open a sound recording software on your connected device. Then start recording. If you do not have a default sound recording software on your device, you can download one.
- Page 12 Operational Setups (1) Recording Music With a Smartphone Smartphone and Computer Duo Live Broadcasting...
- Page 13 Operational Setups (2) Live Broadcast By Computer Recording or Broadcasting with Two Headsets and Microphones...
-
Page 14: Fcc Statement
FCC Statement Changes or modifications not expressly approved by the party responsible for compliance could void the userʼs authority to operate the equipment. This device complies with Part 15 of the FCC Rules. Operation is subject to the following two conditions: (1) this device may not cause harmful interfer- ence, and (2) this device must accept any interference received, including interference that may cause undesired operation. - Page 15 To Obtain Warranty Service and Troubleshooting Information: Call 1-800-592-9541 or visit our website at www.vivitar.com. To receive warranty service along with the name and address of an authorized product service center, the original consumer purchaser must contact us for problem determination and service procedures.
Need help?
Do you have a question about the VIVAUDMIX-NOC and is the answer not in the manual?
Questions and answers
Can you record from a digital PA console