Advertisement
Advertisement
Table of Contents

Related Manuals for Two-Rock Studio Pro 35


Summary of Contents for Two-Rock Studio Pro 35
- Page 1 Two-Rock Studio Pro OWNER’S MANUAL...
- Page 2 Dear Customer, Two-Rock Thank you for your purchase of a amplifier from Two-Rock Amplifiers, LLC. As a discerning guitarist, you know the road to great tone begins with great components. Our Classic Design, carefully selected parts and hand-built approach combine to make an extremely versatile instrument.
-
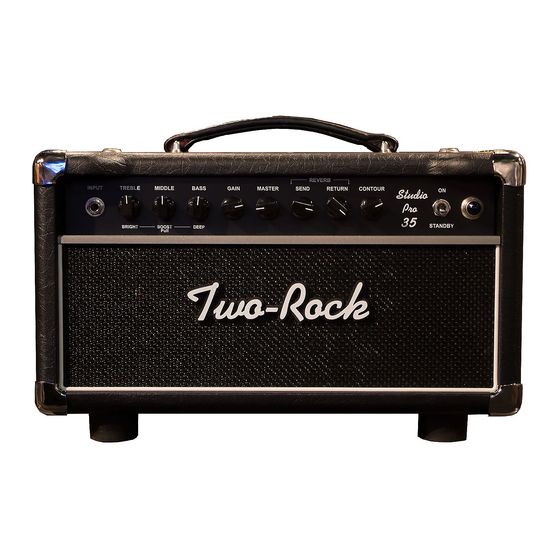
Page 3: Front Panel Functions
Front Panel Functions INPUT - High impedance input to the amplifier. Plug in your instrument here. TREBLE + Push/Pull BRIGHT - Adjusts the high frequency response. At lower settings of this control the tone will be warmer and smoother. As you turn this control up the highs become more prominent and aggressive adding gain to the signal as well. - Page 4 MASTER - Adjusts the overall output level of the amplifier. At lower settings on this control the amp will be much cleaner sounding as well as lower in volume. As this control is turned up the power section of the amp begins to work harder which increases sustain, fullness, and touch dynamics as well as increasing the volume of the amplifier.
-
Page 5: Rear Panel Functions
Be sure to match the impedance of your cabinet with the impedance (output) of the amplifier. Effects Loop – The effects loop on this amplifier is a “half active” type of loop, see FAQ on two-rock.com RETURN LEVEL + Push/Pull BRIGHT – Adjusts the effects loop return level. The loop is active in the circuit even with no effects connected, so the level control also can be used as a additional master volume control. -
Page 6: Fuse Chart
Fuse Chart *All Fuses are 3AG Type 250 Volt, SLO-BLO Export 100V: Domestic 120V: Export 220V, 230V, 240V: 2A – 35 Watt 2A – 35 Watt 1A -- 35 Watt Tube Complement TEST POINT BIAS Pot V1- 12AX7, Input and Gain V2- 12AT7, Reverb Drive V3- 12AX7, Reverb Send &... - Page 7 BIAS ADJUSTMENT PROCEDURE: - Power up amplifier and connect proper speaker load - DO NOT have an instrument connected to the input during the biasing procedure! - Switch the amp out of standby and allow a few seconds for the circuit to stabilize - Set the voltmeter to read DC Volts - With the meter grounded to the chassis and the meter’s positive probe inserted into the test point, measure the voltage...
- Page 8 We know your new Two-Rock amplifier will provide many hours of enjoyment and inspiration in the years to come. This manual is a resource for some of your questions. Please contact us with any other questions or comments that you may have.
- Page 10 Two-Rock Amplifiers, LLC 619 MARTIN AVENUE, SUITE 5 ROHNERT PARK, CA 94928 707-584-8663 www.two-rock.com SERIAL NUMBER: _____________________________...
Need help?
Do you have a question about the Studio Pro 35 and is the answer not in the manual?
Questions and answers