
Related Manuals for flsun V400


Summary of Contents for flsun V400
- Page 1 Flsun V400 User Manual Amazing Speed ! Zhengzhou Chaokuo Electronic Technology Co.,Ltd...
-
Page 2: Table Of Contents
3.3.2 Online Printing 1.3 Packing List......5 3.4 Adjust the nozzle height..22 ......5 4.Slicer software......23 1.3.1 Main Parts List ......6 4.1 Add V400 configuration file..23 1.3.2 Gift Parts List 2. Assembly Instructions....7 4.2 Install Cura ......24 3.First Printing......10 FAQ..........27 3.1 Bed Leveling......11 Mainboard Wiring Diagram..29... -
Page 3: Advance And Guidance
Advice and Guidance Flsun V400 , Amazing Speed! Advice and Guidance 1. Do not operate the printer in ways other than those specified in the manual, to avoid personal safety problems and property damage. The default power input voltage of the printer is 230V. If the local voltage is 115V, make sure to switch the input voltage before starting the printer. - Page 4 10. If you don't use the printer for a long time, please unplug the power cord to ensure safe use of electricity. 11. Flsun V400 do not use other printer's configuration files for slicing to avoid unpredictable situations. 12. The printer has been installed and tested before leaving the factory,It is normal if the printer has been used.
-
Page 5: Printer
Printer Flsun V400 , Amazing Speed! 1.1 Parameter Model Flsun V400 Printing Size Φ300*410mm(Highest Point) Molding Tech Nozzle Diameter 0.4mm Layer Height 0.05-0.3mm Precision ±0.15mm Nozzle Type Single Nozzle Environment Temperature 5-40℃ Nozzle Temperature ≤300℃ Hotbed Temperature ≤110℃ Filament Support... -
Page 6: Introduction
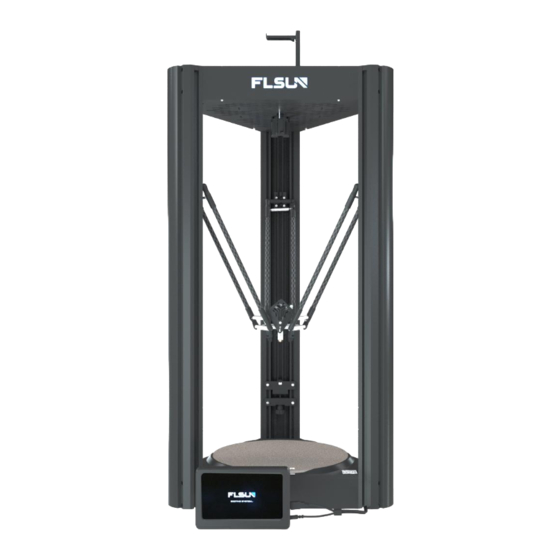
Printer Flsun V400 , Amazing Speed! 1.2 Introduction ②Parallel Arm ③Extruder Cover ④Belt Adjustment Nut ①Axis ⑤PAD ⑥Filament Holder ⑦Top Shell ⑨Nozzle Kit ⑧Slider ⑩PEI ⑪Bottom Shell ⑫PAD power cable ⑬Filament Detector ⑮Liner Guide Rail ⑭LED ⑯Change Voltage ⑰Direct Drive ⑱Air Guide Nozzle... -
Page 7: Packing List
Printer Flsun V400 , Amazing Speed! 1.3 Packing List 1.3.1 Main Part Top Shell Axis Effector Module Parallel Arms Bottom Shell Filament Leveling Switch Filament Holder Power Line Detection sensor... -
Page 8: Gift Parts List
Printer Flsun V400 , Amazing Speed! 1.3.2 Gift Parts List Diagonal Pliers Screwdriver Wrench Set U Disk Heating Rod Thermistor Clean Needle PTFE Tube Screws Grease Brush PAD Holder... -
Page 9: Assembly Instructions
Take out shells and place them vertically on the top shell. Install the 8*M5 screws on both ends of the desktop.The top shell " Flsun" logo and the QR axis . Install the other two axis in the same way. - Page 10 Assembly Instructions Flsun V400 , Amazing Speed! Take out the filament detection sensor, connect the Install the effector module with the extruder hood facing filament detector wire. Snap the bellows into the bracket forward. Plug the cable into the top shell adapter board, the slot.
- Page 11 Assembly Instructions Flsun V400 , Amazing Speed! Take out the filament holder and two M4*8 Install the filament holder on the top of the printer, screws and assemble it. paying attention to the installation direction. Install 3 axis covers. Connect the two cables to Pad, put the pad on the...
-
Page 12: First Printing
First Printing Flsun V400 , Amazing Speed! The default input voltage of the printer is 230V. Please make sure the printer is convert to your local voltage before turning on the power switch for the first time. If you local voltage is 115V,flip the red switch to the... -
Page 13: Bed Leveling
First Printing Flsun V400 , Amazing Speed! 3.1 Bed Leveling Please insert the leveling module firmly! Take out the leveling switch. Install the leveling switch according Insert the leveling switch into the to the direction on the photo. adapter board of the top shell. - Page 14 First Printing Flsun V400 , Amazing Speed! 1. Click "Configuration>Bed Level>Calibrate>Continue",please confirm to insert the leveling module before leveling. After the first leveling is completed, the printer will restart and display the homepage.Data is automatically saved. Please make sure the leveling switch...
- Page 15 First Printing Flsun V400 , Amazing Speed! 2. Then click "Configuration>Bed Level>Bed mesh>Continue" for bed mesh.Data is automatically saved. Please make sure the leveling switch is connected!
- Page 16 First Printing Flsun V400 , Amazing Speed! 3. Remove the leveling switch and disconnect the connector after bed mesh leveling fished.Click "Configuration>Bed Level>Move Z0>Continue". Make sure the leveling switch is removed!
- Page 17 First Printing Flsun V400 , Amazing Speed! 4.Take a piece of A4 paper and place it under the nozzle, click "Z calibration".Use "Z+" or "Z-" to adjust the nozzle height. There is slight friction when pushing and pulling the A4 paper slowly. At this time, the distance between the nozzle and the hot bed is the most suitable.
-
Page 18: Load The Filament
First Printing Flsun V400 , Amazing Speed! 3.2 Load the Filament After replacing different types of filament, please extrude an additional 1 meter of filament to completely extrude the remaining filament to reduce the probability of nozzle being clogged. 1.Use diagonal pliers to cut the 2.Pass the filament through... - Page 19 First Printing Flsun V400 , Amazing Speed! 1. Click "Actions>Extrude>Temperature" on the screen, set the nozzle temperature above 180°C, and return to the "Extrude" interface. Push the filament down while clicking "Extrude or Load " to load the filament.
-
Page 20: U Disk Printing
First Printing Flsun V400 , Amazing Speed! 3.3 Print 3.3.1 U Disk Printing Save the G-code to a U disk, and insert the U disk into the USB port of the Pad.Click the refresh button and select the model to print. -
Page 21: Online Printing
First Printing Flsun V400 , Amazing Speed! 3.3.2 Online Printing Connect to wifi, and an IP address will be generated after connection. Enter the IP address into the web browser 1.Make sure pad Wifi and PC share the same router. - Page 22 First Printing Flsun V400 , Amazing Speed! Save the UFP or G-code file to the computer, upload files to the printer via web. UFP file preview model image.
- Page 23 First Printing Flsun V400 , Amazing Speed! Right-click on the file and click "Start Printing".
-
Page 24: Adjust The Nozzle Height
First Printing Flsun V400 , Amazing Speed! 3.2 Adjust the nozzle height If the nozzle is too low or too high when printing the first layer, you can click "Fine Turning" during printing to adjust the height of the nozzle and the adjustment will be automatically saved. -
Page 25: Slicer Software
③. Place the "flsun_v400_extruder_0.def.json" file in the "resources\extruders" directory in the installation path. ④. Place the "flsun_v400.stl" file under the "resources\meshes" directory in the installation path. 2. After the replacement is complete, open Cura and follow the steps on page 24 of the installation manual to add the V400 printer. -
Page 26: Install Cura
Slicing software Flsun V400 , Amazing Speed! 4.2 Install Cura If you have not installed Cura, follow the prompts to install Cura. The installation package has been saved to a U Disk drive. And follow the steps below to add the printer. - Page 27 Slicing software Flsun V400 , Amazing Speed! 3.Click "Add Printer" 4.Click "Add a non-networked printer".
- Page 28 Slicing software Flsun V400 , Amazing Speed! ⑥ 5.Pull down the slider to "flsun". 6.Select "V400" and click "Add".Then finish.
-
Page 29: Faq
Flsun V400 , Amazing Speed! Q1. The model can’t stick to the hot bed Solution 1: The nozzle is too far from the heated bed, you can re-do the automatic leveling or continue to adjust the distance between the nozzle and the heated bed after printing starts, until the first layer can be well pasted on the heated bed. - Page 30 Flsun V400 , Amazing Speed! Q5. Extruder abnormality Solution 1: The nozzle temperature is insufficient and the filament is not fully melted, so the nozzle temperature needs to be increased. Solution 2: If the extruder is entangled, clean the filament inside.
-
Page 31: Mainboard Wiring Diagram
Mainboard wiring diagram Flsun V400 , Amazing Speed! Driver block X Motor Y Motor Z Motor E0 Motor Cooling fan Screen power Driver blocks Turbo fan X limit switch Y limit switch Cooling fan LOGO Leveling switch Heating rod Z limit switch... -
Page 32: Maintenance
Maintenance Flsun V400 , Amazing Speed! If there is dust or filament on the PEI board, clean the PEI board with water or alcohol before printing, the printed model will adhere better to the PEI board. Apply grease to the contact between the parallel arm and the wide... - Page 33 Suppurt Email:service@flsun3d.com Support Skype:FLSUN_Zhang Official Website:http://www.flsun3d.com/ Official FB Group :https://www.facebook.com/groups/flsunv400 V400 Facebook Group WhatsApp Facebook...
Need help?
Do you have a question about the V400 and is the answer not in the manual?
Questions and answers