GARO Entity Pro Installation And Operations
Hide thumbs
Also See for Entity Pro:
- Installation (2 pages) ,
- Installation (2 pages) ,
- Installation and operation manual (102 pages)
Table of Contents
Advertisement
Quick Links
Advertisement
Table of Contents

Related Manuals for GARO Entity Pro


Summary of Contents for GARO Entity Pro
- Page 1 GAROEntityProinstallationand operation GARO Entity Pro installation and operation...
-
Page 2: Table Of Contents
CONTENTS 1 Introduction....................5 1.1 Document description............... 5 1.2 Product description................5 1.2.1 Feature description ..............5 1.2.2 Definitions ................5 1.3 Intended use..................6 1.4 Contact .................... 6 2 Safety......................9 2.1 Safety definitions................9 2.2 Safety instructions for installation ............. 9 3 Product overview .................. - Page 3 4.12.16 To mount the front cover of the charging unit....38 4.13 GARO Connect................39 4.13.1 The GARO Connect app ........... 39 4.13.2 GARO Connect app process overview......40 4.13.3 GARO Connect app symbols overview ......41 4.13.4 Owner................44 4.13.5 Installer................50 4.14 Dynamic Load Management (DLM)..........62 4.14.1 Dynamic Load Management (DLM) functionality ....
-
Page 5: Introduction
OCPP based charging stations in the (s) with an RFID tag or an app. The EV driver can use the same systems. Entity Pro is a wallbox that is easy to use, GARO Connect app to monitor charging of an EV. -
Page 6: Intended Use
The organization share the same owner(s) and it is possible to create groups of EV drivers to manage access to the charging stations. GARO Electric Ireland Ltd Owner: An owner is a person who owns one or several 19/307 Northwest Business Park, Blanchardstown, IE- charging stations. - Page 7 Introduction GARO Electric Ltd Sales & Customer Service Unit 16 Urban Express Park Aston Hall Road Birmingham, B6 7FH...
-
Page 9: Safety
If a defect is found, speak to the owner of the blinking a slow red light (0,5 Hz). charging station. The owner can be found in the GARO Connect app. Only use charging cables with no visible defects and intended for charging the relevant EV. -
Page 11: Product Overview
E. Protection cover. The protection cover is an accessory that us used for a prepared installation without an attached charging unit. It is possible to purchase different installation packages from GARO. Both as a complete charging station or as individual system components. -
Page 12: Charging Station Packaging Overview
Product overview 3.2 CHARGING STATION PACKAGING OVERVIEW Charging Station (CS) Charging Unit (CU) Front cover Installation bracket - single (IB) Installation bracket - double (IB) Charging station (CS) identity of the physical charging station. The installation bracket is available as single and double. A charging station is a complete kit, packed in a box. -
Page 13: Product Variants
Product overview 3.3 PRODUCT VARIANTS The Entity Pro charging station (and separate charging unit) is available in several product variants. - Page 14 Three-phase or one-phase. • With or without phase balancing. • With or without 4 G (LTE) modem. • With or without ISO 15118 HW support. • With or without SIM, supplied from GARO. • With or without PME protection (UK only).
-
Page 15: Charging Station Overview
Product overview 3.4 CHARGING STATION OVERVIEW A. Power connection terminal (in and out). H. All-pole circuit breaker, manual reset. B. Bracket terminal connector. I. PE disconnection relay (PME protection variant only) (for UK only). C. Charging unit connector. J. 2 port Ethernet switch RJ45. D. -
Page 16: Dimensions
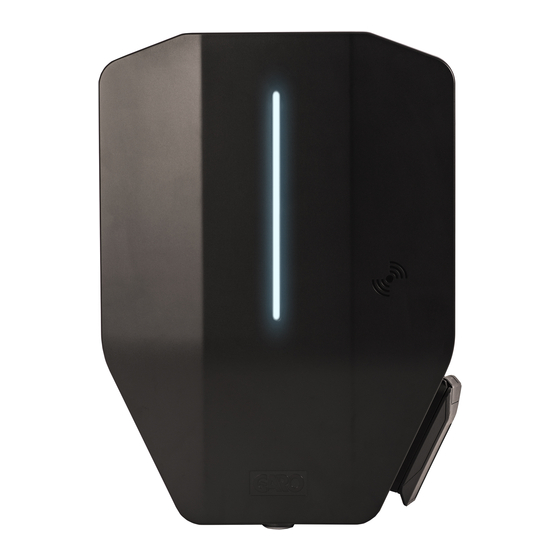
Product overview N. Type 2 outlet. O. Front cover lock. P. Indication light. Q. Optional ID-label placement after installation. R. Label, load interface type. S. Sealing label. T. RFID reader area. 480 mm 3.5 DIMENSIONS 150 mm 340 mm 240 mm 150 mm The fixed cable variant of the charging unit has the cable parking placed here. -
Page 17: Installation
Comply with local requirements. • Only a technically skilled person with the necessary knowledge of the GARO Entity charging station may replace the charging unit. • Protective shoes for electricians. 4.3 PERSONAL PROTECTIVE EQUIPMENT •... -
Page 18: To Do A Plan For The Installation
NOTE expansion. RFID tags are available as accessories at GARO. NOTE D. Plan the power supply and current availability Charging station(s) can be attached to a wall, a stand on all levels of the installation. Plan for the DLM or a pole. -
Page 19: To Generate The Installation Code
However, an installation code can be used by 4.13 GARO Connect, page several installers. However. Only on installer shall be K. Use the GARO Connect app to generate the formal responsible for the installation work. Refer to installation code. The owner normally provides prepare the installation (owner), page the installation code to the installer. -
Page 20: To Ensure The Necessary Tools
Installation 4.8 TO ENSURE THE NECESSARY E. Front cover INSTALLATION MATERIAL • Make sure that the necessary installation materials 4.7 TO ENSURE THE NECESSARY TOOLS are available. • Make sure that the necessary tools for the installation are available. A. Power cable. B. -
Page 21: To Decide Internet Connection Type
Installation 4.9 TO DECIDE INTERNET CONNECTION TYPE type for the master charging station (must!). Refer to To decide internet connection type, page • Decide what internet connection should be used for The system is equipped with a built-in meshed Wi-Fi the installation. -
Page 22: Simple Setup Scenarios
Installation The master charging station unit is the bridge between Scenario 1: If the distance (X) between the charging the mesh Wi-Fi and the ethernet cable. It is not possible stations is short and there are no radio obstacles, it is to switch between Wi-Fi and ethernet without assigning possible to use a mesh Wi-Fi connection between the a charging station as a master unit. -
Page 23: To Decide The Position Of The Charging Station
3. Make sure that the position of the charging station is approved from an accessibility (C) perspective. Comply with local requirements. 4.12 CABLE INSTALLATION The GARO Entity is designed to work with both 400 V Group A:2 TN-S (default) and 230 V IT. Group A:2:1... -
Page 24: To Install The Stickers For It 230 V
Installation 4.12.1 TO INSTALL THE STICKERS FOR IT 230 V 4.12.2 TO PREPARE THE INSTALLATION BRACKET FOR THE CABLE INSTALLATION NOTE 1. Decide the inlet points for the power cable. This instruction is only valid for IT 230 V systems. 1. -
Page 25: To Install The Installation Bracket To A Wall
Installation NOTE NOTE If the top cable entry positions are used, they must be Maximum cable diameter for the break-out is 8 mm. firmly sealed with approved IP54 cable grommets. The Recommendation: Many good fast connection RJ- cable grommets must also secure cable force strain 45 connectors are available. -
Page 26: To Prepare The Power Cable For Installation
Installation 7. Attach the installation bracket to the wall with the screws. 3. Use a spirit level to make sure that the installation bracket is straight. 8. Attach the screw covers to the screws. 4. Use a pen to mark the drill holes on the wall, if needed. - Page 27 Installation B B B 3. Make sure that the cable sheet reaches 2 mm above 1. Dismantle approximately 500 mm of the power the bracket for the cable strain relief. cable. 2 mm ~ 500 mm 4. Install the cable strain relief to fixate the power 2.
-
Page 28: To Connect The Power Cable To The Terminal
Phase loads must be addressed, especially when 18 - 24 mm installing several charging stations in one location. GARO Entity PRO is available with a built-in phase management system, that when using DLM, automatically selects the phase(s) that can be used. This means, that the charging stations involved can be installed as L1 to L1, L2 to L2 and L3 to L3. - Page 29 Installation a. TN system. b. If the wires have cable ferrules (B) or solid conductors (C), push the wires into the terminal. b. IT system. 3. To remove any wire, push a flat screwdriver on the terminal and pull the wire out. 2.
-
Page 30: To Install A Second Power Cable (Daisy-Chaining Method)
Installation 4.12.6 TO INSTALL A SECOND POWER CABLE 2. Secure the ethernet cable(s) from pull-out forces, for (DAISY-CHAINING METHOD) example with a cable strap. 3. Dismantle the ethernet cable(s). If several charging stations are fed by the same power cable in a daisy chain, a second power cable can also be connected to the terminal. -
Page 31: To Prepare The Installation Bracket With A Second Ethernet Cable
The control • Install a second ethernet cable through the outlet logic is configured in the GARO Connect app. By hole in the installation bracket. Refer to 4.12.7 To default, charging is disabled if the contact is closed. The... -
Page 32: To Change The Position Of The Type 2 Outlet Or Fixed Cable
Installation 3. Dismantle the control cable and the wires inside the control cable. OPEN Max 1.5 mm² 10 mm NOTE If wires need to be disconnected, use a flat screwdriver NOTE to push the orange button to open the terminal. The recommended conductor strip length is 10 mm. -
Page 33: To Do A Test Of The Power Connection
Installation 4.12.12 TO DO A TEST OF THE POWER CONNECTION WARNING Electrical power can cause serious personal injury or death. 1. Make sure that the power/voltage is off. I ON I ON I ON I ON 2. Do a visual inspection and make sure that nobody accidentally can access the installation bracket(s). - Page 34 4. Switch the power/voltage to on. 7. Read the QR code on the installation bracket using the Gar Connect App. At this step, it is time to connect the charging station, created in the GARO Connect App to the physical installation bracket. Refer to 4.13 GARO Connect, page 39...
-
Page 35: To Install A Protection Cover
Installation CAUTION If the charging station is set up without any internet connectivity, it will allow charging at maximum current defined by the attached charging unit. The default setting is 16 A. Can be adjusted as parameter. 4.12.13 TO INSTALL A PROTECTION COVER The protection cover is used to protect the installation bracket if a charging unit should not be attached from the start or temporary removed. -
Page 36: To Do A Final Functionality Test Of The Product
If the charging station needs manual internet settings, e. g. if it shall act as master with a local Wi-Fi as the internet connection, then at this time the internet connectivity settings in the GARO Connect app should be made. Refer to Create and setup a load interface, page 4.12.15 TO DO A FINAL FUNCTIONALITY TEST OF... - Page 37 Installation O OFF O OFF O OFF O OFF I ON I ON I ON I ON 2. Do a test of the PE continuity to the Type 2 outlet. 4. Wait for the charging unit to start. This takes approximately 2 minutes and is shown with a green light indication.
-
Page 38: To Mount The Front Cover Of The Charging Unit
Installation 8. Press the test button (A) on the charging unit for 11. If necessary, reset the all-pole circuit breaker. Refer approximately 1 sec, but not more than 5 sec.! 6.5 To do a reset after a minor ground fault, Make sure that the all-pole circuit breaker is page triggered. -
Page 39: Garo Connect
Installation as a new user in the GARO Connect app. Use an e-mail address as usename. NOTE The front cover is supplied with two keys. Both keys should be handed over to the owner of the charging station. 3. After the final testing, the installation of the... -
Page 40: Garo Connect App Process Overview
Installation 4.13.2 GARO CONNECT APP PROCESS OVERVIEW The GARO Connect app is based on a standard/ station, and the installer of the charging station. The startup process for both the owner of the charging illustration shows the process from both perspectives. -
Page 41: Garo Connect App Symbols Overview
Installation 4.13.3 GARO CONNECT APP SYMBOLS OVERVIEW Icon Icon name Icon information Location Click the icon to access the list of available locations. Chosen location The icon is shown beside the selected location. Edit Click the icon to make changes to the settings. - Page 42 Installation Complete The icon shows that the installation is complete. Continue Click the icon to continue the installation process. User manual Click the icon to access the operator and installation manual of the product. Main menu Click the icon to choose action in the main menu; load and use, manage charging stations and users, or install charging stations.
- Page 43 The icon is for the charging cable Type 2 that is connected to the charging station. This means that the charging station has a fixed cable. Only possible for Garo Entity CS. Type 2 outlet The icon is for the Type 2 outlet, which can be...
-
Page 44: Owner
2. Create an organization if it is needed. This is not These instructions are for the owner. To see the whole mandatory for every installation. Add more persons process overview of the GARO Connect app, refer to as owners. 4.13.2 GARO Connect app process overview, page 3. - Page 45 Installation 2. Create a new account in the app. Follow the instructions on the screen. 3. Log on to the app with the provided credentials. 4. Select Manage chargers . 5. Create the charging station or charging stations for the location (default location = “Home”).
- Page 46 Installation 7. Generate an installation code. An e-mail address NOTE can to the installer (not mandatory). The installer can also create charging stations once invited with the installation code from the owner. 6. Go to Location settings and choose Invite installer .
- Page 47 Installation • Enable charging station Charger settings (owner) Under Manage chargers and users , each changing station can be enabled/disabled by the owner. If The features available under Charger settings (owner) the disabled, the charger cannot be used. are not mandatory. •...
- Page 48 Installation The owner can invite EV drivers from the app. Click Charger Settings , select Users and follow the instructions in the app. EV drivers can be added individually or trough an EV driver group. • Charging station access Each charging station can be set to "free use" (default).
- Page 49 Installation • • Cluster EV drivers Advanced owner tools EV drivers can be managed in clusters called EV Additional owners can be added and removed to a driver groups, which makes access management location and organization. However, an easier. EV driver groups are related to the organization and location must always have at least organization, which means they can be used in 1 owner.
-
Page 50: Installer
12-letter code that works like a key to the location. The code can be handed over to an 11. Declare the installation as complete in the GARO installer by mail, paper or any other media. Installer Connect app and hand over the installation to the must have the code to start an installation. - Page 51 Installation 3. Choose Install chargers . 4. Enter the installation code provided by the owner. If the owner has sent an invitation, the invitation screen will automatically show. Go to Step 4.
- Page 52 Installation 5. Click the charging station to be installed and perform the installation, following the guided steps. Start with the master charging station. NOTE To access a location for installation, the owner of the location creates/generates a 12–letter installation code 6.
- Page 53 Installation b. Set the power to on. WARNING Electrical power can cause serious personal injury or death. O OFF O OFF O OFF O OFF c. Wait for the charging unit to start. This takes approximately 2 minutes and is shown with a green light indication.
- Page 54 GARO Connect app. The QR code is scanned via the GARO Connect app. NOTE It is also possible to enter the Wi-Fi credentials as plain text in the GARO Connect app, if the QR code can not be used.
- Page 55 Installation b. Choose preferred internet connection and click c. The Internet icon will turn green connected to the Next . internet. If the ethernet cable is connected to the internet, the charging unit will automatically connect through the cable. If neither ethernet nor Wi-Fi is available the charging unit will automatically connect through 4 G/LTE.
- Page 56 10. Configuration settings There are several configuration settings that are possible to adjust with the GARO Connect app. In the GARO Connect app, information is available as support for each available setting. If it is necessary, speak to the GARO support organization for further assistance.
- Page 57 Installation 12. Declare installation as completed NOTE After final testing, the installation of the charging For information on the different parameters, click the unit can be declared ready in the app by clicking ““I” icon. on Completed. It then becomes available to use and 11.
- Page 58 Installation 4C3I36C1023A0 123456 SSID:GaroCU-4C3B6C1023A0 Key: zt55 -u0yk-m63j DLM settings (installer) The DLM settings are common, but not mandatory. • Create a connection group for the charging stations. Connection group(s) can be created to control maximal current consumption by the charging stations, in order to protect fuses or other electrical system components from overload.
- Page 59 (CS), decide the internet connection type for the master CS. Refer to 4.9 To decide internet 1. Create a unit, add a name for it and select GARO connection type, page Entity Balance. The system is equipped with a built-in meshed Wi-Fi system that contributes to an easy installation.
- Page 60 QR code on the load interface or enter the serial code to confirm the unit and click complete. At this point, the physical DLM is connected to the unit, created in the GARO Connect App.
- Page 61 Wi-Fi group. The connection status is visible in possible to adjust with the GARO Connect app. For the GARO connect app. If a local Wi-Fi is to be information on the different parameters, click the “I” used for internet access, do the following steps: icon.
-
Page 62: Dynamic Load Management (Dlm)
Installation 11. Once the installation is complete you can add it to a connection group. 4.14 DYNAMIC LOAD MANAGEMENT (DLM) 4.14.1 DYNAMIC LOAD MANAGEMENT (DLM) FUNCTIONALITY Dynamic Load Management (DLM) is based on a grouping of loads that share a specific critical equipment, such as a fuse. - Page 63 Multi-Level Load Management The load interface transfers current information to the The Garo Entity system is prepared to work with the DLM system by reading a current transformer or an Load Interface, to support multi-level load management.
- Page 64 Installation By using the GARO Connect-app, any limitation that occurs can be analyzed to see what causes the limitation.
-
Page 65: Dynamic Load Management (Dlm) Installation Overview
Installation 4.14.2 DYNAMIC LOAD MANAGEMENT (DLM) INSTALLATION OVERVIEW GARO Entity Balance Basic PE/GND CT3+ (White) K CT3-/GND(Black) L CT2+ (White) K CT2-/GND(Black) L CT1+ (White) K CT1-/GND (Black) L CT1-3: 0-333 mV output Wi-Fi antenna Indication light Ethernet HAN(RJ12) Connect to charging station,... - Page 66 Installation 3-level Connection group (CG) Power monitoring structure 100A Smart Utility Incomming current/Main fuse energy meter (HAN) Connection group A1 I max = Fuse size (in this case 100A) I monitored = Measured current in fuse by LI 1 through HAN interface.
- Page 67 Installation GARO Connect 3-level Connection group (CG) Communication structure CLOUD 4G SIM CARD INTERNET LOCAL LI 1 Wi-Fi (CG A1) LI 2 ROUTER MASTER CG A1 MASTER (CG A1A) Wi-Fi Wi-Fi Mesh Mesh Ethernet cable Ethernet cable Ethernet cable Wi-Fi...
-
Page 68: To Install The Load Interface In An Electrical Cabinet
GARO Entity Balance BASIC and GARO Entity Balance ADVANCED. NOTE This chapter shows the installation of the GARO Entity Balance BASIC model. The process for the GARO Entity Balance ADVANCED is similar. 1. Turn the power/voltage off by an appropriate insulating main switch. - Page 69 Installation Max 1,5 mm² 8 mm 2-pole 2-10 A 4. Install the load interface unit (C) on the DIN rail. 6. Connect the Load interface to the protection device. 5. Dismantle the wires and connect the Load interface 7. If current is measured using current transformer, to the 230V AC.
- Page 70 CT2-/GND(Black) L GARO recommends the 0-333 mV type when possible. CT1+ (White) K 0–333 mV is only valid for GARO Entity Balance BASIC CT1-/GND (Black) L and 0–5 Ais only valid for GARO Entity Balance ADVANCED. (Take notice: 0-5 A output types of CT clamps must never be exposed to open circuit conditions.)
- Page 71 RJ12 or RJ45 connections. (HAN CT3-/GND(Black) L is only available on GARO Entity Balance BASIC.) 12. The load Interface is a part of the total GARO Entity CT2+ (White) K Charging Station communication network, that could be based on either Ethernet cable or Wi-Fi.
- Page 72 15. The long range, panel-mounted, circular disc Wi-Fi even if Wi-Fi or mesh Wi-Fi is not used. antenna is available as accessory at GARO. It is used when the distance to the Wi-Fi or mesh Wi-Fi node (=other entity unit) is long or obstacles can occur.
- Page 73 Installation 18. Download the GARO app on AppStore or Google Play store. O OFF O OFF O OFF O OFF Connect 17. The light indicator on the front panel turns red at power up. Make sure that the indicator light on the load interface turns green.
-
Page 75: Operation
NOTE It is possible to lock the charging cable to a Type 2 outlet using the Garo Connect app. It is only the EV driver that has locked the charging cable, that can unlock the charging cable or by the owner of the charging station. -
Page 76: Indication Light
Operation 5.1.1 INDICATION LIGHT 100% When Meaning Green solid light. The charging station is available for charging. Green slow blinking light, 1 Hz. The charging station waits for either a connection to or a disconnection of an EV. Yellow solid light. The Type 2 contact is not in correct position. -
Page 77: To Schedule Charging
Only the EV charging. driver that started the charging can stop it. c. Use the GARO Connect app and log in as the EV driver that started the charging. 5.3 TO MONITOR THE CHARGING PROCESS 2. - Page 78 Operation CAUTION Do not leave the Type 2 contact on the ground. Always hang it up or store it in a dry location.
-
Page 79: Maintenance
5. Wait for the device to restart and the light to turn electric power and disable the charging station in the green. GARO Connect app. Contact an authorized service center. 6.4 TO DO AN EARTH FAULT TEST 6.3 TO DO A FACTORY RESET NOTE Do an earth fault test one time each month. -
Page 80: To Do A Reset After A Minor Ground Fault
If it is configured, a notification is sent to the owner and the EV driver that uses the charging station, in the GARO Connect app. The circuit breaker can trip either due to a earth fault, short circuit or overload a short circuit. - Page 81 The cover is available as a GARO Connect app. This also applies to single/ separate part. standalone charging stations. Refer to Create and 5.
-
Page 82: Pme - Protective Multiple Eathing (Uk Versions Only)
Action when triggered: (A red, slow blinking (0.5 Hz) indication on the charging station LED, an error message can be read in the GARO Connect app). A notification is sent to the user and the owner if configured. 1. Disconnect the EV. -
Page 83: Troubleshooting
If the above measures to not help, do not use the charging station. Contact the installer or GARO support. The CS is deactivated by the ower using the Garo The indication light shows a fixed red light. Connect app or a Pro CS is deactivated by a external enable signal. -
Page 85: Technical Data
Technical data 8 TECHNICAL DATA 8.1 CHARGING STATION TECHNICAL DATA Product type GARO Entity Pro Standards/directives IEC 61851-1 IEC 62955 IEC 61439-7 IEC 60898-1 IEC 61008-1 EMC classification 2014/30/EU TBC Installation method Wall in a single and/or double installation bracket. - Page 86 Technical data Weight 3-3.7 kg without cable (depending on product variant) Cable length (fixed cable version) 4.5 m/8 m Size single version charging station, height*width*depth 340*240*150 mm Size double version charging station, 340*495*145 mm height*width*depth Rated current withstand 10 kA Rated short-time withstand current 10 kA Rated conditional short-circuit current of an assembly...
-
Page 87: Load Interface Technical Data
Technical data Warranty 2 years Design product life cycle 10 years installation/30 000 hours charging at 20 C 8.2 LOAD INTERFACE TECHNICAL DATA Standards/directives IEC 12345 EMC Classification 2014/30/EU Installation method DIN rail. Installation environment Indoor/outdoor electrical cabinet. Location type Restricted access. -
Page 88: Accessories
HAN RJ-45 input EN 13757-2 HAN RJ-12 input Current transformer input 333 mV. Current transformer input 0-5 A. M-Bus input Modbus input RS-485 Relay output 12-230 V, 1 A 8.3 ACCESSORIES For available accessories, refer to the GARO website at www.garo.com. -
Page 89: Source Code
GPL-2.0, and GPL-3.0 and other open source licenses. A copy of the licenses are available in a separate document. Source code can be obtained from GARO for a period of 3 years after the final shipment of the product, which may be no earlier than 2025–01–01 for a fee. -
Page 91: Ec Declaration Of Conformity
EC Declaration of conformity EC DECLARATION OF CONFORMITY...
Need help?
Do you have a question about the Entity Pro and is the answer not in the manual?
Questions and answers