SOMFY Eolis / Soliris Sensor RTS Manual
- Installation and operating instructions (2 pages)
Advertisement
Introduction
The Eolis RTS sensor is a wind sensor. The Soliris RTS sensor is a wind and sun sensor. These sensors are compatible with Somfy motors specifically designed for awnings, vertical blinds and outdoor venetian blinds and those with outdoor receivers: motors and receivers must be equipped with Radio Technology Somfy (RTS) and capable of processing Wind and Sun information transmitted by the sensors.
- The Eolis RTS sensor enables the awning to be raised automatically when the wind blows above the pre-set threshold.
- The Soliris RTS sensor enables the awning to be raised automatically when the wind blows above the pre-set Wind threshold and enables the awning to be automatically lowered and raised according to the intensity of the sunshine.

These sensors do not protect the awnings in the event of strong gusts of wind. If weather conditions present this sort of risk, ensure that the awning remains closed.
Safety - Important information
General information
Before installing and using the product, please read the installation guide carefully.
This Somfy product must be installed by a professional motorisation installer, for whom these instructions are intended.
Never begin installing without first checking the compatibility of this product with the associated equipment and accessories.
These instructions describe how to install, commission and operate this product.
Moreover, the installer must comply with current standards and legislation in the country in which the product is being installed, and inform his customers of the operating and maintenance conditions for the product.
Any usage outside of applications defined by Somfy constitutes non-compliance, and is therefore not covered by the guarantee. In this event, as for all usage not consistent with the instructions given herein, Somfy accepts no responsibility for harm or damage.
Special instructions
Somfy accepts no liability in the event of damage to equipment caused by weather conditions not detected by the sensor.
Do not dispose of damaged electrical or electronic products with household waste. Please take them to a collection point or an approved centre to ensure they are recycled correctly.
Contents of the kit and tools required
Contents of the kit
Before beginning installation and commissioning of the sensor, check that all parts listed in the table below are present in the correct quantity (Q):
| Components | Q. | |
| 1 | Eolis RTS Sensor or Soliris RTS Sensor | 1 |
| 2 | Cable (depending on version) | 1 |
| 3 | Screw | 2 |
| 4 | Plugs | 2 |
Tools required
- Drill and drill bit
- Phillips screwdriver
- Flat-blade screwdriver
- Pencil
Additional accessories required
Depending on the sensor version, certain accessories required for installation are not supplied in the kit:
- Cable which complies with the standards in force in the country in which it is being installed (depending on version),
- Category II transformer for 24 V version.
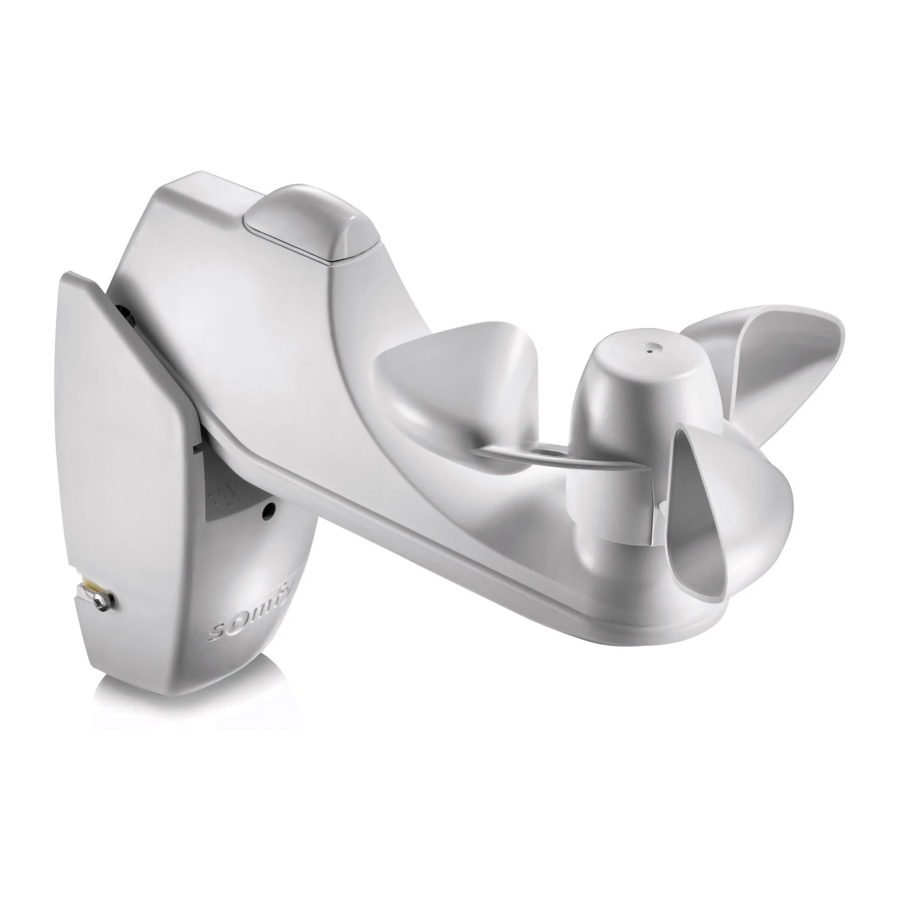
Details of the Eolis RTS - Soliris RTS

| Eolis RTS | |
| a | Anemometer |
| b | PROG button |
| c | Wind LED |
| d | Wind Potentiometer |
| e | Protective housing |
| f | Mounting bracket |
| Soliris RTS | |
| a | Anemometer |
| b | PROG button |
| c | Wind LED |
| d | Wind Potentiometer |
| e | Protective housing |
| f | Mounting bracket |
| g | Sun sensor |
| h | Sun LED |
| i | Sun Potentiometer |
►See Picture A
Wiring and installation

Installation recommendations
- Choose a location with maximum wind detec-tion and which is not hindered by obstacles: install the sensor in a location that is not sheltered from the wind.
- For the Soliris RTS sensor, choose a sunny location where sunshine detection is compatible with wind detection.
- Install the sensor near the product which it controls.
- Never install the sensor under an awning or under artificial lighting.
![]()
The articulated structure of the Eolis RTS sensor enables it to be mounted on walls or roofs with an incline of up to 15°. - Always fit the sensor with the anemometer (a) on top!
►See Picture B
Wiring

Safety instructions - 24 V Version
Only use a compatible 24 V transformer. Install the transformer according to the standards in force in the country in which it is being installed.
If the transformer has already been used and has therefore been connected to the mains power supply, it could still be charged. Do not touch the transformer output cables to avoid any electric shocks.
Sensor wiring
- Cut off the mains power supply.
- Remove the protective housing (e).
- Unscrew the front panel (Z) of the mounting bracket to access the terminal block.
- Unscrew the metal tab (Y).
- Drill a hole in the sealant pad (W).
Caution! Never remove the sealant pad. - Feed the cable (2) through the sealant pad.
- Connect the supply cable (2) to the sensor using the terminal block (V).
- Screw in the metal tab (Y): the cable (2) must be fed under the tab.
- Screw the front panel (Z) back onto the mounting bracket and move to the «Mounting» step.
- Connect the other end of the cable (2) to the 24 V transformer.
►See Picture C
Mounting

- Drill two holes, 35 mm apart and horizontally aligned.
- Insert the plugs (4) provided.
- Fix the mounting bracket (f) of the sensor to the wall using the screws (3) provided.
- Insert the protective housing (e) into the mounting bracket (f) until it clicks into position.
- Fix the protective housing (f) onto the mounting bracket using the screws (Q).
- Connect the cable (2) or the transformer to the mains power supply
- Switch on the power supply.
►See Picture D
Commissioning
Recording the sensor

- Find an RTS control point (A) programmed in the motor.
- Press the PROG button on the RTS control point (A) until the motor makes an up and down movement:
► The programming function is activated for 2 minutes. - Briefly press the PROG button (b) on the sensor (B):
► The motor makes another brief up and down movement,
► The sensor is programmed in the motor. - Turn the Wind potentiometer (d) to any position, except the «Demo» position, and move to the section on «Setting the sensitivity threshold».
The Wind LED remains on during Demonstration mode («Demo»).
If the awning is not raised, refer to the «Tips and recommendations» section.
Never leave the Wind potentiometer set to «Demo» mode.
►See Picture E
Checking

Checking the Wind function
- Lower the awning.
Turn the Wind potentiometer (d) to the «Demo» position:
► The motor makes a brief up and down movement. - Turn the anemometer (a) manually to simulate the wind blowing:
► The awning is raised automatically after 2 seconds.
►See Picture F
Checking the Sun function
- Turn the Sun potentiometer (i) and check the colour of the Sun LED (h) to adjust the sun sensitivity to the current light intensity:
- Sun LED off: the sun sensor cannot yet detect the current light intensity
- Sun LED green and flashing: the sensor detects the current light intensity.
Setting the wind sensitivity threshold

Initial setting
- Turn the Wind potentiometer (d) to set it to the central position.
Adjusting the threshold
The sensitivity threshold setting can be changed according to the actual weather conditions and requirements.
- Turn the potentiometer to the right or left until the Green LED (c) is permanently lit red:
► The wind sensor's sensitivity threshold is set according to the current level of wind.
- Wind LED off: the sensitivity threshold set has not been reached, the wind is blowing below the set threshold: the awning does not move.
- Wind LED permanently lit red: the sensitivity threshold set has been reached, the wind is blowing above the set threshold:
the awning is raised.
Recommendation:
After setting the wind sensitivity threshold, check that the awning raises automatically when the wind is stronger than the threshold set, and that under these conditions the awning does not become damaged.
If the awning does not react as desired, adjust the sensitivity threshold:
- Turn the potentiometer towards the (+) sign to increase the sensitivity threshold: a strong wind will cause the awning to raise.
- Turn the potentiometer towards the (-) sign to decrease the sensitivity threshold: a light wind will cause the awning to raise.
each mark corresponds to a speed of 10 km/h.
Never leave the Wind potentiometer set to «Demo» mode.
►See Picture G
Setting the sun sensitivity threshold

The sensitivity threshold setting can be changed according to the actual weather conditions and requirements.
- Turn the Sun potentiometer until the Sun LED (h) is permanently lit green:
► The sun sensor's sensitivity threshold is set according to the current level of sunshine.
- Sun LED off: the sensitivity threshold set has not been reached, the sun is shining below the set threshold: the awning does not move.
- Sun LED permanently lit green: the sensitivity threshold set has been reached, the sun is shining above the set threshold: the awning is lowered automatically after a few minutes.
►See Picture H
Use and operation
Wind Function
This applies to just a Eolis RTS sensor or a Soliris RTS sensor with the Sun function deactivated.
If the wind begins to blow

- If the wind begins to blow and the speed corresponds to the sensitivity threshold set:
► The Wind LED is permanently lit red,
► The wind sensor automatically raises the awning to protect it.
It is impossible to prevent the awning from being raised and lowered when the wind is blowing at speeds above the threshold set.
►See Picture I
If the wind stops blowing

- When the sensor has not detected any wind for 30 seconds:
► The Wind LED goes off. - The awning can then be lowered by pressing:
► the Down button to reach the lower end limit or
► the STOP/My button to reach the intermediate position (my).
►See Picture J
Wind and Sun Functions
These apply to an Eolis RTS sensor linked to an outdoor Sun sensor (Sunis RTS type sensor) or a Soliris RTS sensor.
Activating the Sun function
- Activate the Sun function using a remote control equipped with the Sun function (refer to the remote control guide for more information):
If there is no wind
- If there is no wind and the sun appears


- If the sun is shining above the sun sensitivity threshold set and the wind sensitivity threshold is not reached
► The Wind LED is off,
► The Sun LED is permanently lit green,
► The sensor will automatically lower the awning after 2 minutes, or
► The awning can be controlled manually using the remote control.
►See Picture K
- If there is no wind and the sun disappears


- When the sun level is below the sun sensitivity threshold set and the wind sensitivity threshold is not reached
► The Wind LED is off,
► The Sun LED goes off,
► The sensor will automatically raise the awning after a delay of 15 to 30 minutes, or
► The awning can be controlled manually using the remote control.
This delay prevents the awning from making unnecessary movements every time a cloud crosses the sun, for example.
►See Picture L
If the wind begins to blow
- If the wind begins to blow and the wind speeds meets the sensitivity threshold set, whatever the level of sun:
► The Wind LED is permanently lit red,
► The sensor automatically raises the awning to protect it.
It is impossible to prevent the awning from being raised and lowered when the wind is blowing at speeds above the threshold set.
►See Picture I
If the wind stops blowing
- When the sensor has not detected any wind for 30 seconds:
► The Wind LED goes off - The awning can then be lowered by pressing:
► the Down button to reach the lower end limit or
► the STOP/My button to reach the intermediate position (my).
►See Picture J
- If the wind dies down and the sun appears


- When the sensor has not detected any wind for 30 seconds and the sun is shining above the sun sensitivity threshold set for at least 12 minutes:
► The Sun LED is permanently lit green,
► The Wind LED remains off,
► The sensor will automatically lower the awning after these 12 minutes, or
► The awning can be controlled manually using the remote control.
►See Picture M
- If there is no wind and the sun disappears
- When the sensor has not detected any wind for 30 seconds and the level of sun is below the sun sensitivity threshold set:
► The Wind LED remains off,
► The Sun LED goes off,
► The sensor will automatically raise the awning after a delay of 15 to 30 minutes, or
► The awning can be controlled manually using the remote control.
This delay prevents the awning from making unnecessary movements every time a cloud crosses the sun, for example.
If the wind is blowing above the maximum wind sensitivity threshold set on the sensor, the awning will no longer react to variations in sunlight.
►See Picture L
Tips and recommendations
Problems with the sensor
| Problems | Possible causes | Solutions | ||
| The sensor cannot be programmed in the motor | The motor is already linked to 3 other RTS sensors. | Delete one of the sensors in order to link the RTS sensor. | ||
| The sensor is mounted to a metal part. | Move the sensor to distance it from the metal part. | |||
| The awning rises once an hour. | The sensor is not operating. | Check the operation of the motor using an RTS control point. Check the operation of the sensor on the motor using the Demo mode. Uninstall the sensor if the sensor is faulty. | ||
| The awning does not rise automatically when the wind comes up. | The sensor does not work because the wiring is faulty. | Check the sensor wiring. | ||
| The sensor is not programmed in the motor. | Modify the sensor. | |||
| The threshold is incorrectly set. | Modify the threshold. | |||
| External radio equipment is interfering with the radio reception (e.g. Hi-Fi radio headphones) | Turn off all radio equipment nearby. | |||
| The awning does not react when the sun appears/ disappears (Eolis RTS linked to a Sunis RTS, or Soliris RTS type outdoor sun sensor). | The Sun function cannot be activated using the remote control. | On the remote control, activate the Sun function - refer to the remote control guide. | ||
| The sun sensitivity threshold is incorrectly set. | Change the sun sensitivity threshold. | |||
| The sensor is not linked to this awning. | Link the sensor to the awning. | |||
| The sun sensor is dirty or blocked with dust, leaves or snow. | Clean the sun sensor with a dry cloth. | |||
| External radio equipment is interfering with the radio reception (e.g. Hi-Fi radio headphones) | Turn off all radio equipment nearby. | |||
| The sensor is detecting wind and inhibiting the Sun function. | Wait until the sensor has not detected any wind and unlock the awning | |||
Deleting the sensor

- Find an RTS control point (A) programmed in the motor.
- Press the PROG button on the RTS control point (A) until the motor makes an up and down movement:
► The programming function is activated for 2 minutes. - Briefly press the PROG button on the sensor (B):
► The motor makes another brief up and down movement to indicate that the sensor (B) is deleted from the motor.
►See Picture N
Deleting all the sensors

- Find an RTS control point (A) programmed in the motor.
- Press the PROG button on the RTS control point (A) until the motor makes an up and down movement:
► The programming function is activated for 2 minutes. - Press the PROG button on the new sensor (B) until the motor performs two brief up and down movements:
► All the sensors have been removed from the motor's memory.
►See Picture O
Technical specifications
Power supply
230 V ~/50-60 Hz
24 V AC/DC (US)
Radio frequency
433.42 MHz
Safety level
Category II
Index protection rating
IP 34 - outdoor installation
Operating temperature
- 20°C to + 50°C
- 4°F to + 122°F
Documents / ResourcesDownload manual
Here you can download full pdf version of manual, it may contain additional safety instructions, warranty information, FCC rules, etc.
Advertisement


Need help?
Do you have a question about the Eolis and is the answer not in the manual?
Questions and answers