Table of Contents
Advertisement
Quick Links
Advertisement
Table of Contents

Summary of Contents for Clockwork DevTerm
- Page 1 DevTerm Assembly Guidelines clockworkpi.com help@clockworkpi.com...
-
Page 4: Table Of Contents
Index & Check List Parts List J. Mount the Battery Module A. Mount the Screen K. Mount the Back Shell B. Mount the Mainboard L. Mount the Keyboard C. Connect the Screen & the Mainboard M. Mount the Front Shell D. - Page 5 Attention! The product is not a toy, and is unsuitable for users under the age Precautions For Use of 11. DevTerm can only be used or stored indoors at a temperature of 0-35 Attention! Users aged between 11 and 16 may only assemble the product degrees Celsius.
- Page 6 Join The Clockwork Online Community Attention! Rechargeable li-ion batteries are NOT included in the package. To discuss and share with DevTerm players and developers, you can visit You need to buy two 18650 batteries by yourself. https://forum.clockworkpi.com. A community of innovative players from across the world and the Clockwork team are waiting for you! Please buy 18650 batteries that are certified in accordance to local laws and...
- Page 7 Achtung! Dieses Produkt ist kein Spielzeug und nicht für Benutzer unter 11 Verwendungshinweise Jahren geeignet. Verwenden oder lagern Sie DevTerm in Innenräumen bei 0–35 Grad Celsius. Achtung! Benutzer im Alter von 11–16 Jahren sollten unter Aufsicht von Verwenden Sie den USB-Anschluss des DevTerm nicht zum Laden anderer Erwachsenen montieren.
- Page 8 Spezifikationen der Bauform 18650 entsprechen. In der DevTerm-Akkuhalterung steht die Markierung "+" für Pluspol und Clockwork Tech LLC behält sich das Recht vor, diese wichtigen Hinweise im "-" für Minuspol. Die 18650 Akkus müssen in der angezeigten Richtung Rahmen der gesetzlichen Möglichkeiten auszulegen.
- Page 9 DevTerm重要提示 警告 有关18650充电锂电池的使用提示 • 窒息危险!产品内含细小零件。 • 请将电子元器件远离静电、潮湿环境、强磁场、室外等区域,以免造成损坏。 • 注意!DevTerm包装中“不含有任何充电锂电池”,您需要自行采购两节18650型电池。 • WI-FI等无线电使用许可请遵循当地法律。 • 请选购经过当地法规认证的,合格的,符合18650型号规格的电池。 • DevTerm 电池盒中的标记“+” 代表正极; “-” 代表负极,标记必须与18650 电池上的标记方向一 组装前提示 致并安装稳妥。 • 注意!本产品不是玩具,不适合11岁以下用户使用。 获得支持 • 注意!11-16岁用户请在成人监护下进行组装。 • 注意!请阅读说明书,请务必按照说明书提示的步骤进行组装。 • 如果您遇到任何产品、组装、使用上的问题,您可以前往 https://forum.clockworkpi.com 或致信 help@clockworkpi.com 描述您遇到的问题或需求,我 组装工具的使用及注意事项 们将及时为您提供支持。 • 模型剪或尺寸适合的剪刀是必要使用的组装工具。 加入 clockwork 在线社区...
- Page 10 • 注意 ! DevTermに 「リチウムイオン充電池は含まれていません」 。 18650型のリチウムイオン充電池2本 • 注意 ! 本製品はおもちゃではありません。 11歳未満のお子さまは使用しないでください。 はご自身でご用意ください。 • 注意 ! 11〜16歳のお子さまは、 保護者の監視のもとで組み立ててください。 • 現地法規の認証を受けた合格製品で、 18650型規格に適合した電池を購入してください。 • 注意 ! この説明書をよくお読みの上、 ここに書かれた手順で組み立ててください。 • DevTermのバッテリーケースにある 「+」 は正極、 「 −」 は負極を表しています。 この向きと18650型電 池の向きを合わせて、 しっかりとはめてください。 組み立てに使用する道具と注意事項 お問い合わせ先 • 組み立てには、 必ずクラフトニッパーまたはサイズの合ったハサミを使用します。 • 飛び散った破片などでケガをしないように、 適切な保護を行ってください。 • 製品、 組み立て、 使用に関する問題がありましたら、 https://forum.clockworkpi.com にアクセスいただ...
-
Page 11: Parts List
PARTS LIST... - Page 12 PARTS LIST CORE MicroSD...
-
Page 13: Mount The Screen
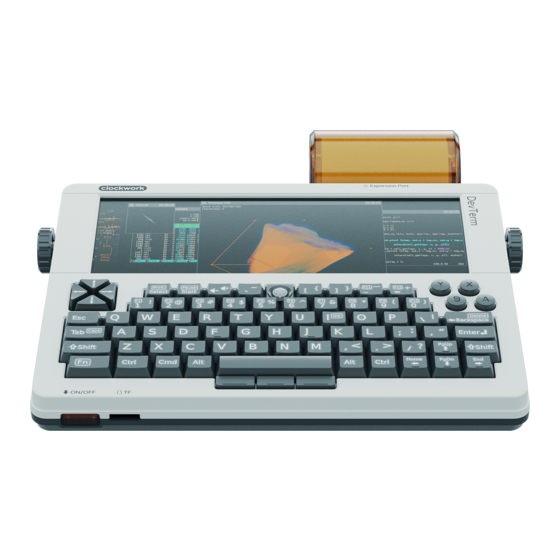
A. Mount the Screen This ultrawide 6.8-inch IPS screen with a full viewing angle has been carefully selected for you. Its aspect ratio has reached an astonishing 16:6 (a typical retro-style proportion). The resolution is 1280x480, which is precisely equal to dual VGA. - Page 14 Ensure the correct position of the connector behind the screen...
- Page 15 SNAP!
- Page 16 CHECK...
- Page 17 CHECK...
-
Page 18: Mount The Mainboard
B. Mount the Mainboard your work and entertainment. Following an easy-to-upgrade modular design of CPU and memory, it allows you to freely choose a suitable "Core" for various application scenarios. clockworkPi v3.14 is compatible with the Raspberry Pi CM3 series, which means that your work on the Raspberry Pi can be "teleported"... -
Page 21: Connect The Screen & The Mainboard
C. Connect the Screen & the Mainboard Parts List: WARNING • FRAGILE! Handle Carefullly. - Page 23 SNAP! SNAP!
-
Page 24: Mount The Core
D. Mount the Core The Core has a variety of models, please refer to https://clockworkpi.com/devterm for details. Parts List: CORE WARNING • Electrostatic-sensitive Device. • FRAGILE! Handle Carefullly. Recommended tools • Screwdriver... - Page 25 CORE...
- Page 26 SNAP! SNAP!
-
Page 28: Install The Antenna
E. Install the Antenna Parts List: WARNING • FRAGILE! Handle Carefullly. - Page 29 Remove the protective layer...
- Page 30 CHECK...
- Page 31 ANTENNA SNAP!
-
Page 32: Paste The Speakers
F. Paste the Speakers Parts List: WARNING • Remove The Protective Layer Before Installation. - Page 33 Remove the protective layers Remove the protective layers...
- Page 34 CHECK...
-
Page 35: Mount The Ext. Module
G. Mount the Ext. Module Parts List: WARNING • Electrostatic-sensitive Device. Recommended tools • Side Cutters... -
Page 38: Assemble The Thermal Printer Module
H. Assemble the Thermal Printer Module Parts List: WARNING • Electrostatic-sensitive Device. - Page 39 Remove...
- Page 40 SNAP!
-
Page 41: Mount The Thermal Printer Module
I. Mount the Thermal Printer Module A 58mm Thermal Printer which supports 200 DPI high-speed monochrome printing. Parts List: WARNING • Electrostatic-sensitive Device. - Page 43 SNAP!
-
Page 45: Mount The Battery Module
J. Mount the Battery Module This battery module is compatible with various 18650 battery sizes: • Diameter: Φ18±0.5mm • Length: 65-69mm Parts List: NOTE: • The 18650 batteries are not included in the package. -
Page 49: Mount The Back Shell
K. Mount the Back Shell Parts List: WARNING • Before turning over, make sure that all modules are securely fixed. Recommended tools • Side Cutters... -
Page 52: Mount The Keyboard
L. Mount the Keyboard Parts List: WARNING • Electrostatic-sensitive device... -
Page 54: Mount The Front Shell
M. Mount the Front Shell Parts List: WARNING • Follow the diagram carefully. Recommended tool • Side Cutters... - Page 57 SNAP!
-
Page 58: Mount The Ext. Port Cover
N. Mount the Exp. Port Cover Parts List: WARNING • Follow the diagram carefully. - Page 61 SNAP!
-
Page 62: Mount The 18650 Batteries
O. Mount the 18650 Batteries Parts List: 18650 WARNING • Please consult the battery supplier for detailed 18650 safe usage rules, and strictly follow them. • Fire Risk! Short circuit (ensuring that positive (+) and negative (-) poles never come into contact) can damage electronic equipment, cause batteries to explode, and even start a fire. - Page 63 18650...
- Page 64 CHECK...
- Page 66 SNAP!
-
Page 67: Insert The Microsd & Power On
P. Insert the MicroSD & Power On Parts List: MicroSD WARNING • The microSD must be inserted before power on. - Page 68 MicroSD...
- Page 69 Power ON - Pressing and holding the "ON/OFF" button for 2 seconds. It may take about 60 seconds to boot up for the first time.
-
Page 70: Assemble The Input Tray
Q. Assemble the Input Tray Parts List: NOTE The 58mm thermal paper is not included. “BPA-FREE” thermal paper is recommended. - Page 71 SNAP!
- Page 72 SNAP! SNAP! MOUNT...
- Page 75 R. Mount/Unmount the Input Tray Parts List: Pre-assembled Input Tray WARNING • Follow the diagram carefully.
- Page 77 SNAP!
- Page 78 SNAP! The sturdy “input tray” provides a storage function, allowing you to carry it freely.
-
Page 79: The Interfaces
The Interfaces USB-A USB-A USB -C Charging Micro-HDMI USB-A 3.5mm Headphone Power Key MicroSD... -
Page 80: Faq
Warranty Make sure that the batteries are fully charged and installed correctly. The DevTerm Kit has a 6-month warranty starting since delivery is made. The DevTerm can be powered by 5V-2A USB-C power supply. Please keep the receipt or screenshot with delivery date. - Page 81 Notes...
- Page 82 Notes...
Need help?
Do you have a question about the DevTerm and is the answer not in the manual?
Questions and answers