Table of Contents
Advertisement
Quick Links
20____
Year of Manufacture:
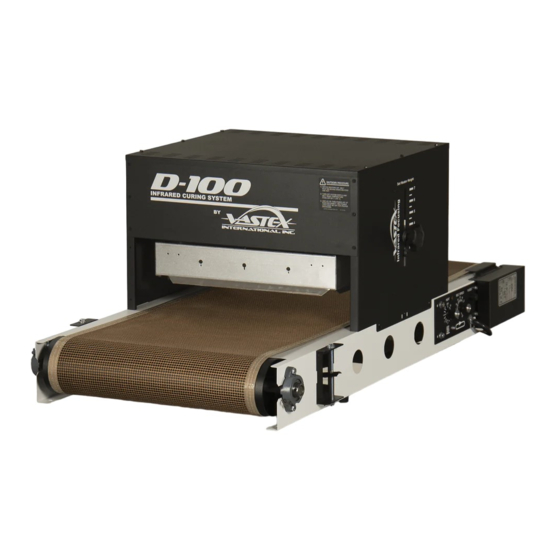
D-100 and D-1000 Series Dryer
Assembly and Operating Instructions
Contents
Electrical Drawing #:
Serial Number:
VTX
(Please log your machine's serial number and date of purchase for future reference.)
Watch Assembly Video Here!
Page#
2
3
4-5
6
7-14
15
16
17
18
19
Rev:______
/
/
Date:____
____
______
Vastex International, Inc.
7 Emery Street
Bethlehem, PA 18015-1982 USA
Phone# 610 625-2702 Fax# 610 625-2775
Web Site www.vastex.com
Authorized Representative in Europe:
Certification Experts BV
Nieuwstad 100 1381 CE Weesp,
The Netherlands
Tel : + 31 (0) 294 - 48 33 55
Fax : + 31 (0) 294 - 41 46 87
Vastex E-mail assistance
Purchasing, product and printing Info:
sales@vastex.com
Electrical Support:
stech@vastex.com
Tech Support, Mechanical Setup, and Operation:
techsupport@vastex.com
Doc. # 01-23-001K
Advertisement
Table of Contents

Related Manuals for VASTEX D-100 Series


Summary of Contents for VASTEX D-100 Series
-
Page 1: Table Of Contents
Contents Page# Safety Information General Information Package Contents Component Identification Vastex International, Inc. Assembly 7-14 7 Emery Street Bethlehem, PA 18015-1982 USA Belt Tracking Phone# 610 625-2702 Fax# 610 625-2775 Electrical Requirements/Controls Web Site www.vastex.com ... -
Page 2: Safety Information
VASTEX has innovated many of the features found in conveyor ovens today from control methods, modular features, air movements and belt tracking. Vastex Infrared Dryer have been Factory tested and burned in for a period of 2-8 hours. All components are tested to be sure they work correctly when the Dryer leaves our factory. -
Page 3: General Information
Allow heater to cool, then shut off machine and disconnect from power as described above in “Safety during adjustment and maintenance.” Follow the troubleshooting chart below If the chart does not resolve the trouble, contact Vastex for additional assistance. Symptom Possible Cause Solution No functions operate... -
Page 4: Package Contents
(2) Heater Hanger Bracket Front Pan- (40) Black #8 Sheet Mtl Screws (1) 1/4” & 7/16” Hex Wrench Heater Hold Knobs Wire Cov- Top Cov- Down Tabs Vastex International Inc. | www.vastex.com | techsupport@vastex.com | sales@vastex.com | 610-625-2702 Pg. 4... - Page 5 (2) Heater Hold Down Tab (2) Heater Hanger Bracket (40) Black #8 Sheet Mtl Screws (1) 1/4” & 7/16” Hex Wrench Heater Hold Knobs Wire Cov- Top Cov- Down Tabs Vastex International Inc. | www.vastex.com | techsupport@vastex.com | sales@vastex.com | 610-625-2702 Pg. 5...
-
Page 6: Component Identification
Pulley The pulleys at either end of the conveyor are made by VASTEX of 4 ½ inch tubing with ¾ inch center shaft. They are mounted on self aligning flange bearing blocks for precision rolling. - Page 7 Fasten the conveyor pieces together with (6) black sheet metal screws. Each section has a connection on both sides of the conveyor. Sheet metal screw Finished conveyor will look as shown. Vastex International Inc. | www.vastex.com | techsupport@vastex.com | sales@vastex.com | 610-625-2702 Pg. 7...
-
Page 8: Assembly
Sheet Mtl Screw Front Panel Side Panel Install the opposite Side Panel to the Front and Rear Panels with (6) sheet metal screws. Sheet Mtl Screw Side Panel Vastex International Inc. | www.vastex.com | techsupport@vastex.com | sales@vastex.com | 610-625-2702 Pg. 8... - Page 9 Heater Hanger. Make sure to have the heater wires on the right side of the chamber. Wires on right side Tabs aligning with openings on hanger Vastex International Inc. | www.vastex.com | techsupport@vastex.com | sales@vastex.com | 610-625-2702 Pg. 9...
- Page 10 Fasten the chamber to the conveyor with (6) black sheet metal screws, (3) per side. Make sure tabs are in the slots of the conveyor Sheet Mtl Screw Vastex International Inc. | www.vastex.com | techsupport@vastex.com | sales@vastex.com | 610-625-2702 Pg. 10...
- Page 11 Make sure to push firmly on the connector until fully seated. The connectors will be hard to push on. Pull gently on each connector to make sure it is securely attached. Vastex International Inc. | www.vastex.com | techsupport@vastex.com | sales@vastex.com | 610-625-2702 Pg. 11...
- Page 12 With the dryer still on its side, pass the belt over the aligner bar and both bottom braces. Braces Aligner Bar Lay the dryer back onto its feet to install the Belt. Align the Alligator Lace together and install the Belt Pin. Alligator Lace Vastex International Inc. | www.vastex.com | techsupport@vastex.com | sales@vastex.com | 610-625-2702 Pg. 12...
- Page 13 Install the wire cover with (2) black sheet metal screws. Sheet Mtl Screw Install Top Cover with (6) or (8) black sheet metal screws. Sheet Mtl Screw Vastex International Inc. | www.vastex.com | techsupport@vastex.com | sales@vastex.com | 610-625-2702 Pg. 13...
- Page 14 Fasten it down with (2) black sheet metal screws. Sheet Mtl Screw Chain Guard Install a Belt Guard on each side of the rear conveyor with (2) black sheet metal screws. Sheet Mtl Screw Vastex International Inc. | www.vastex.com | techsupport@vastex.com | sales@vastex.com | 610-625-2702 Pg. 14...
-
Page 15: Belt Tracking
To move the belt to the Right Turn bolt Clockwise, Raising this side of Aligner Roller Turn bolt Counter Clockwise, Lowering this side of Aligner Roller DO NOT TIGHTEN BOTTOM NUT! Vastex International Inc. | www.vastex.com | techsupport@vastex.com | sales@vastex.com | 610-625-2702 Pg. 15... -
Page 16: Electrical Requirements/Controls
- Fuses Protects belt control circuit, (1) Amp AGC fast blow One (1) fuse for 120 volt. Two (2) fuses for 240 volt. Vastex International Inc. | www.vastex.com | techsupport@vastex.com | sales@vastex.com | 610-625-2702 Pg. 16... -
Page 17: Operation
Skip this step if leaving the conveyor belt speed set for the following shift. Turn off Breaker Turn off the breaker controlling the dryers at the end of each shift and unplug them from their outlets. Vastex International Inc. | www.vastex.com | techsupport@vastex.com | sales@vastex.com | 610-625-2702 Pg. 17... -
Page 18: Chain Drive Adjustment
For Vastex drives, the total movement in the slack span of the chain (up and down total movement) should be .25 to .38 inch. -
Page 19: Warranty
The defective part or parts will be repaired or replaced at the discretion of Vastex International, Inc. If the equipment in question is less than one (1) year old, it will be shipped to the customer at no charge, with an RGA issued by Vastex for the defective part. The defective part must be shipped back to Vastex freight prepaid within 30 days or the account will be billed.
Need help?
Do you have a question about the D-100 Series and is the answer not in the manual?
Questions and answers