Table of Contents
Advertisement
Quick Links
Advertisement
Table of Contents

Related Manuals for AERMEC VMF-E5


Summary of Contents for AERMEC VMF-E5
- Page 1 INSTRUCTIONS FOR THE INSTALLER VMF-E5 6795773 _01/ A5 - Ver. 3.1.6...
-
Page 2: Table Of Contents
Index Precautions and Safety Standards ....................4 HOW TO USE THIS MANUAL ......................5 VMF system - Guidelines for system .................... 6 List of material required to implement system: ..................... 7 VMF System - Material required ..........................7 Hydraulic diagram of VMF system ........................9 VMF System - Implement the technical room ..................... - Page 3 AERMEC S.p.A. I-37040 Bevilacqua (VR) Italy– Via Roma, 996 Tel. (+39) 0442 633111 Telefax 0442 93730 – (+39) 0442 93566 www.aermec.com - info@aermec.com VMF-E5 panel SERIAL NUMBER EC DECLARATION We, the undersigned, hereby declare under our own responsibility that the assembly in question,...
-
Page 4: Precautions And Safety Standards
The appliance warranty does not cover the costs for ladder trucks, scaffolding or other elevation systems that may become necessary for carrying out servicing under warranty. AERMEC S.p.A. declines all responsibility for any damage due to improper use of the machine, partial or hasty reading of the information contained in this manual. -
Page 5: How To Use This Manual
HOW TO USE THIS MANUAL This manual is intended to provide a complete support for installation of VMF systems. These systems are made up of several elements which, once installed correctly, must communicate one with another forming a network of devices which will work automatically. -
Page 6: Vmf System - Guidelines For System
VMF system - Guidelines for system As specifi ed in the introduction, this manual will guide the installer for the correct implementation of a VMF system based on a practical comprehensive example. Management of 5 distinct zones thus divided: A NIGHT zone (composed of two rooms) where a ducted INVERTER unit is installed, making it possible to control the unit by a wall-mounted panel as well as by a centralised panel. -
Page 7: List Of Material Required To Implement System
ATTENTION: some elements of the system are NOT available as AERMEC accessories; the installer is in charge of choosing, dimensioning and adapting material to the VMF system; however, in this example, these components will be listed generically WITHOUT REFERRING TO ANY SPECIFIC SIZE. - Page 8 DHW storage tank All of these parts are NOT supplied by Aermec, but are considered as necessary parts to implement the VMF system; the general connections to insert them in the VMF system will be indicated for them.
-
Page 9: Hydraulic Diagram Of Vmf System
Hydraulic diagram of VMF system NOTE: VMF systems fully manage an air conditioning/heating system and relative domestic hot water production; however before implementing a control system, the loads which will be connected to it must be highlighted. ATTENTION: the installation of the components to implement the system are not taken into consideration in this manual;... -
Page 10: Vmf System - Implement The Technical Room
VMF System - Implement the technical room All the components required to manage the hydronic system for heating/air-conditioning and production of domestic hot water will be installed inside the technical room; in this specifi c case, the elements installed in the technical room are: (1) Heat pump ANLI070HX (this component is installed outside);... - Page 11 Sequence of operations to be performed to install the various components: (1) Install the selected heat pump; the unit must be appropriately installed electrically and hydraulically according to that described in the system design. The heat pump is connected to the MODBUS serial line by means of the MODU-485A accessory (see the relevant documentation to install this accessory).
-
Page 12: Material For Zonea
The fi gure to the left indicates which rooms make up zone A; the master unit installed in this zone is identifi ed on VMF-E5 by the label “NIGHT A”. In this case, the zone is served by one unit alone, and it is therefore managed as master. - Page 13 Sequence of operations to be performed to install the various components: (1) Install the FCXI-P fan coil: this unit is the only fan coil of the zone (MASTER). The unit must be appropriately installed electrically and hydraulically following the instructions provided in the fan coil documentation; the duct must be properly sized based on the features of the fan coil.
-
Page 14: Material For Zoneb
The fi gure to the left indicates which rooms make up zone B; the master unit installed in this zone is identifi ed on VMF-E5 by the label “NIGHT B”. In this case, the zone is served by one unit alone, and it is therefore managed as master. - Page 15 Sequence of operations to be performed to install the various components: (1) Install the Omnia HL fan coil: this unit is the only fan coil of the zone (MASTER). The unit must be appropriately installed electrically and hydraulically following the instructions provided in the fan coil documentation. (2) Install the VMF-E1 thermostat: to be able to manage the fan coil via a VMF network, a VMF-E1 thermostat must be installed on the fan coil, to which the user interface will be linked (in the specifi...
-
Page 16: Material For Zone C
The fi gure to the left indicates which rooms make up zone C; the master unit installed in this zone is identifi ed on VMF-E5 by the label “Bathroom”. In this case, the zone is served by one unit alone (master); the type of unit chosen obliges the installer to use the VMF-E1 thermostat. - Page 17 Sequence of operations to be performed to install the various components: (1) Install the Omnia HL fan coil: this unit is the only fan coil of the zone (MASTER). The unit must be appropriately installed electrically and hydraulically following the instructions provided in the fan coil documentation. (2) Install the VMF-E1 thermostat: to be able to manage the fan coil via a VMF network, a VMF-E1 thermostat must be installed on the fan coil (for detailed information on installation and connection of the thermostat, refer to the specifi...
-
Page 18: Material For Zoned
The fi gure to the left indicates which rooms make up zone D; the master unit installed in this zone is identifi ed on VMF-E5 by the label “Kitchen”. In this case, the zone is served by two units (one master and one slave); the type of unit chosen obliges the installer to use the VMF-E1 thermostat for the master and VMF-E0 for the slave. - Page 19 Sequence of operations to be performed to install the various components: (1) Install the Omnia HL fan coil: this unit is the MASTER fan coil of the zone; the unit must be appropriately installed electrically and hydraulically following the instructions provided in the fan coil documentation. (2) Install the VMF-E1 thermostat: to be able to manage the fan coil via a VMF network, a VMF-E1 thermostat must be installed on the fan coil (for detailed information on installation and connection of the thermostat, refer to the specifi...
-
Page 20: Material For Zone E
The fi gure to the left indicates which rooms make up zone E; the master unit installed in this zone is identifi ed on VMF-E5 by the label “Day”. In this case, the zone is served by three units (one master and two slaves);... - Page 21 (8) Install the advanced VMF-E5 panel: to manage the entire VMF system, the VMF-E5 system control panel must be fi tted (refer to the specifi c documentation to install the panel).
-
Page 22: Complete Vmf System
Complete VMF system The fi gure below describes the air-conditioning system used as a reference in this manual. This section describes in detail the hydraulic connections between the fan coils and the collector in the technical room. ATTENTION: the fi gure only indicates the hydraulic connections of all the indoor units. Unit (3) (Zone master Unit (2) -
Page 23: Vmf Networks Serial Connections
This type of connection is made between the thermostat of a Master unit and the relative control device. The thermostats used as Master can be: • VMF-E0 (only if a supervision system with VMF-E5 is not foreseen); • VMF-E1; • VMF-E18 (only for inverter units);... - Page 24 (max 1000 m) between components of the system. Data transmission is differential: • T+ (terminal 1-A of connector CN11 of VMF-E5 panel); • T- (terminal 2-B of connector CN11 of VMF-E5 panel); • GND (terminal 3-GND of connector CN11 of VMF-E5 panel).
- Page 25 VMF-E1 thermostat has 5 poles; VMF-ACS VMF-E1 3-pole cable + shield 0.34mm (AWG22) the two terminals to power the VMF-E5 are not used in this example. Supplied with VMF-E2H thermostat as per VMF-E1 VMF-E2H 4-pole user interface connection cable (AWG22) standard.
-
Page 26: Vmf System - Software Settings
After the system has been installed and the components connected, the software parameters required to activate the system via interface of the advanced VMF-E5 panel are set; these parameters are contained in a menu protected by a password for the installer. -
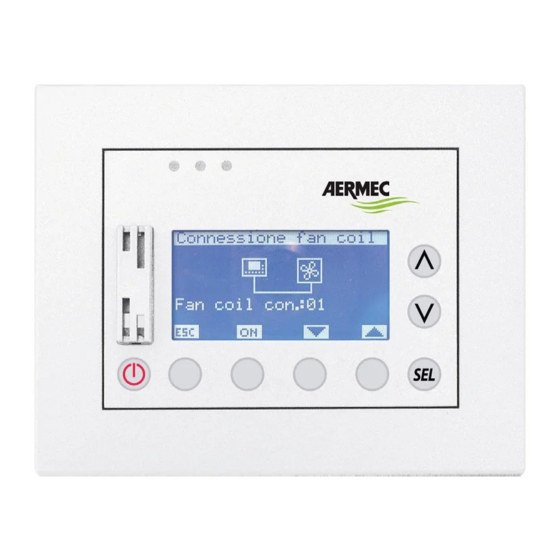
Page 27: Setting Number Of Master Fan Coils Present In System
This function can be enabled or disabled. If disabled, the season of the fan coil refl ects that set in the VMF-E5 panel. In order to set this value it is necessary to: Change over fancoil (1) Enter modifi... -
Page 28: Procedure For Self-Addressing Master Fan Coils Of The System
• Procedure for self-addressing MASTER fan coils of the system The VMF-E5 control panel implements the self-detection procedure which allows each thermostat connected to the MASTER fan coils to automatically be assigned with a univocal address.In order to activate this procedure it is necessary to: (1) Activate the search mode by pressing the key;... -
Page 29: Force Visualization Of An Address
In the proposed system example, this function could be used to test serial com- After having completed the checks or verifi cations possible munication between the VMF-E5 acces- with this function, it will be possible to: sory and the various MASTERS of the... -
Page 30: Visualization Of Systems Status
VMF system; the diagram is created dynamically and represents the status of the serial communications between the VMF-E5 accessory and the other parts of the system; the symbols displayed in the graphic are arranged in several rows;... -
Page 31: Set The Presence Of The Vmf-Acs Accessory Module
• Set the presence of the VMF-ACS accessory module The presence of the VMF-ACS accessory in the system is the fundamental requirement to allow production of domestic hot water. This parameter specifi es whether this accessory is present in the system; to set this value, it is necessary to: (1) Enter modifi... -
Page 32: Set Delay In Switching On Electric Resistance
• Set delay in switching on electric resistance This function allows to set the control of the correct operation in domestic hot water production; once the chiller starts to produce domestic hot water, this control checks the trend of the temperature inside the DHW storage tank;... -
Page 33: Set Loading Priority In Domestic Hot Water Production
• Set loading priority in domestic hot water production The VMF systems can have installations with two electric resistances, one on the heat pump and another in the DHW storage tank; this function allows to establish which of these resistances is used during domestic hot water production; to set this value, it is necessary to: Priority of load (1) Enter modifi... -
Page 34: Set The Type Of System Managed By Vmf-Acs Accessory
• Set the type of system managed by VMF-ACS accessory This function allows to set the type of system on which the VMF-ACS accessory will be used; naturally this parameter is only considered if the system foresees use of this accessory (and therefore management of domestic hot water is included in the system);... -
Page 35: Single Valve System - System 1 Type
Connection Reference chapters for implementation of the connections VMF-ACS power supply. Connect the supplementary electric resistance. RS485 serial connection. VMF-E5 serial connection. DHW probe connection. Connection V3V (1) or DHW pump. SINGLE VALVE system - System 2 type: VMF-ACS VMF-E5... -
Page 36: Single Valve System - System 3 Type
Reference chapters for implementation of the connections VMF-ACS power supply. Connect the supplementary electric resistance. RS485 serial connection. VMF-E5 serial connection. DHW probe connection. Connection V3V (1) or DHW pump. Boiler or V3V (3) or system pump connection. System storage tank probe connection. -
Page 37: Multi-Valve System
Reference chapters for implementation of the connections VMF-ACS power supply. Connect the supplementary electric resistance. RS485 serial connection. VMF-E5 serial connection. DHW probe connection. Connection V3V (1) or DHW pump. Boiler or V3V (3) or system pump connection. System storage tank probe connection. -
Page 38: Set The Multi-Function Output On The Vmf-Acs Accessory
• Set the multi-function output on the VMF-ACS accessory: This allows to set the function to be assigned to the multi- function output available on the VMF-ACS accessory; for further information on this output, refer to the VMF-ACS accessory manual in section “Multi-function output connection“; to set this value it is necessary to: Contact aux DHW (1) Enter modifi... -
Page 39: Set The Band On Heating Setting For Economy Mode
• Set the band on heating setting for ECONOMY mode In VMF systems, if the user sets the Economy mode, the heating work setting will vary dynamically based on the actual thermal load required by the system (maximizing energy-saving); the variation of the heating work setting is included in a band which goes from the work setting to the same setting minus the value specifi... -
Page 40: Set Heating Temperature For Chiller
• Set heating temperature for chiller In winter, the user will set the desired room air temperature by means of the thermostat on the master fan coils. To reach this temperature, the unit will produce hot water at the temperature set by the installer indicated in this parameter (between 30.0 and 70.0°C);... -
Page 41: Set Frequency For Dynamic Variation Of Setting In Economy Mode
• Set frequency for dynamic variation of setting in ECONOMY mode If economy mode has been set in the system, the work setting will be varied dynamically based on the actual system demand; this demand is calculated by checking the status of each thermostat each given time interval and this parameter allows to specify this interval (it can be between 5 and 60 minutes);... -
Page 42: Set The Extent For Increase Of Setting In Economy Mode
• Set the extent for increase of setting in ECONOMY mode If economy mode has been set in the system, the work setting will be varied dynamically based on the actual system demand; this variation is performed every given amount of time, modifying the setting by increasing it or decreasing it by a certain value (while remaining within the limits described by the bands set for Economy mode in heating and cooling);... -
Page 43: Set The Compensation Temperature Setting Based On External Air For Comfort Mode
• Set the compensation temperature setting based on external air for comfort mode If comfort mode has been set in the system, the work setting can be varied automatically based on the external air temperature; this variation will follow a compensation curve (a specifi c curve for each season) defi... -
Page 44: Set The Domestic Hot Water Temperature For The Chiller
• Set the ON/OFF band on the domestic hot water production setting During production of domestic hot water, an activation or deactivation band for the DHW demand can be applied to the work setting; to set this value it is necessary to: (1) Enter modifi... -
Page 45: Set The Type Of Chiller/Heat Pump Board
• GR3 (The VMF system has a chiller that includes a GR3 board); • PCO2 (The VMF system has for a chiller that includes a PCO series board or another Aermec board not included in the previous ones) • PCO5+ (The VMF system has for a chiller that includes a... -
Page 46: Set The Chiller Switch Off Delay After Conclusion Of System Demand
• Set the chiller switch off delay after conclusion of system demand In VMF systems, the chiller is activated when there is a heat output demand by at least one of the thermostats connected to the fan coils; the chiller can be deactivated when all the thermostats have fulfi... -
Page 47: Set The Management Mode Of The Installed Heat Recovery Units
- Hourly program ( ): indicates which hourly program to associate to the recovery unit operation (for further information on hourly programs, refer to the VMF-E5 panel user manual); - Air quality value (VOC) ( ): if selected, it indicates that... -
Page 48: Set The Number Of Pumps Managed By The Vmf System
The VMF system can manage up to 12 pumps. The number of VMF-CRP expansion boards to be installed in the system is calculated automatically by the VMF-E5 application relating to the actual number of pumps present, according to the relation: - from 1 to 4 pumps= (x1) VMF-CRP;... -
Page 49: Associate Each Fan Coil To Its Own Pump
): indicates the label (set by the user on the last page of the fan coil menu; for further information, see the VMF-E5 panel user manual) associated to the master fan coil which the currently displayed data refers to. - Pump number (... - Page 50 BMS UART (1) set the address to assign to the VMF-E5 panel: ADD: (the VMF-E5 panel will be SLAVE with respect to the serial of the BAUD RATE: 19200 supervision system) This parameter specifi es the address with which the BMS can trace the VMF-E5 panel; to set this parameter...
- Page 52 AERMEC S.p.A. si riserva la facoltà di apportare in qualsiasi momento tutte le modifiche ritenute necessarie per il miglioramento del prodotto. Les données mentionnées dans ce manuel ne constituent aucun engagement de notre part. Aermec S.p.A. se réserve le droit de modifier à tous moments les données considérées nécessaires à...
Need help?
Do you have a question about the VMF-E5 and is the answer not in the manual?
Questions and answers
How to reset to auto
To reset the AERMEC VMF-E5 to auto mode for fan coils:
1. Press the C key to enter modification mode.
2. Press the B key to highlight the current setting.
3. Use the A or B key to change the setting to ON (this enables automatic changeover based on the thermostat).
4. Press the C key to confirm the new setting.
This enables the automatic changeover function, allowing the system to switch between heating and cooling based on detected temperature.
This answer is automatically generated