CARDIOSTRONG Aquastream CST-AS Assembly And Operating Instructions Manual
For more information, please visit cardiostrong.com, sport-tiedje.com

Related Manuals for CARDIOSTRONG Aquastream CST-AS


Summary of Contents for CARDIOSTRONG Aquastream CST-AS
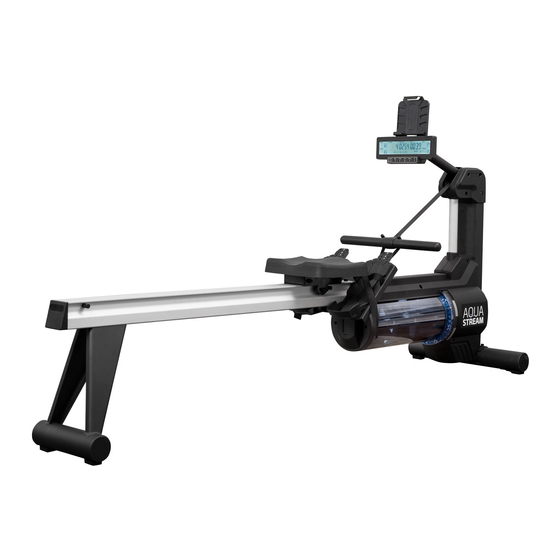
- Page 1 Assembly and Operating Instructions max. 150 kg ~ 60 Min. 35 kg L 206 | W 55 | H 83-128 CSTAS.01.02 Art. No. CST-AS Aquastream...
- Page 2 Aquastream...
-
Page 3: Table Of Contents
Content GENERAL INFORMATION Technical Data Personal Safety Electrical Safety Set-Up Place ASSEMBLY General Instructions Scope of Delivery Assembly OPERATING INSTRUCTIONS Console Display Button Functions Functions Programs 3.4.1 TIME PROGRAM 3.4.2 METERS PROGRAM 3.4.3 CALORIES PROGRAM 3.4.4 STROKES PROGRAM 3.4.5 INTERVAL 20/10 PROGRAM 3.4.6 INTERVAL 20/30 PROGRAM 3.4.7 INTERVAL CUST PROGRAM 3.4.8 SPM PROGRAM... - Page 4 DISPOSAL Error Codes and Troubleshooting Maintenance and Inspection Calendar RECOMMENDED ACCESSORIES ORDERING SPARE PARTS Serial Number and Model Name Parts List Exploded Drawing WARRANTY CONTACT Aquastream...
- Page 5 Train at home no matter what the weather or time of the day. cardiostrong fitness equipment offers training programmes and a variety of equipment for all training levels and all training goals. Further information can be found at www.sport-tiedje.com or www.cardiostrong.de.
- Page 6 ABOUT THIS MANUAL Please carefully read the entire manual before installation and first use. The manual will help you to quickly set up the system and explains how to safely use it. Make sure that all persons exercising with the equipment (especially children and persons with physical, sensory, mental or motor disabilities) are informed about this manual and its contents in advance.
-
Page 7: General Information
GENERAL INFORMATION Technical Data LCD - Display of: Strokes, Strokes per minute Training time in minutes Distance in metres Time/500m: average/current Calorie consumption in kcal Heart rate (when using a chest strap) Watt Resistance system: Water resistance Power supply: DC Addaptor Resistance levels: Micro-Adjustment Capacity of water tank:... -
Page 8: Personal Safety
Personal Safety DANGER ⚠ Before you start using the equipment, you should consult your physician that this type of exercise is suitable for you from a health perspective. Particularly affected are persons who: have a hereditary disposition to high blood pressure or heart disease, are over the age of 45, smoke, have high cholesterol values, are overweight and/or have not exercised regularly in the past year. -
Page 9: Electrical Safety
Electrical Safety DANGER ⚠ In order to reduce the risk of an electric shock, always unplug the equipment from the mains socket immediately after your workout, before assembly or dismantling, and before maintenance or cleaning. Do not pull on the cable. ⚠... -
Page 10: Set-Up Place
Set-Up Place WARNING ⚠ Do not place the equipment in main corridors or escape routes. ⚠ CAUTION Choose a location in which to place the equipment such that there is enough free space/ clearance to the front, the rear and to the sides of the equipment. Make sure that you leave at least 30 cm on each side of the equipment and at least 15 cm in front of and behind the equipment as a training zone. -
Page 11: Assembly
ASSEMBLY General Instructions ⚠ DANGER Do not leave any tools, packaging materials such as foils or small parts lying around, as otherwise there is a danger of suffocation for children. Keep children away from the equipment during assembly. ⚠ WARNING Pay attention to the instructions attached to the equipment in order to reduce the risk of injuries. -
Page 12: Scope Of Delivery
Scope of Delivery The scope of delivery consist of the following parts. At the beginning, check whether all parts and tools belonging to the device are included in the scope of delivery and whether damage has occurred. In the event of complaints, the contractual partner must be contacted directly. CAUTION ⚠... -
Page 13: Assembly
Assembly Before assembly, take a close look at the individual assembly steps shown and carry out the assembly in the order given. NOTICE First loosely screw all parts together and check that they fit properly. Tighten the screws using the tool only when you are instructed to do so. If you have difficulty recognising the graphics, we recommend that you open and/or download the PDF instructions stored in the webshop on your end device (e.g. - Page 14 Step2: Disassembly of Tube for Packaging ⚠ CAUTION Do not set up the main frame by pulling the water tank. Do not let the water tank touch the ground. Set up the main frame (A) together with the polyfoam. Disassemble the two screws. Remove the tube for packaging.
- Page 15 Step 3: Assembly of the Pedal Assemble the pedal (F) on the main frame (A) by using four screws (J1) and four washers (J2).
- Page 16 Step 4: Removing of the Polyfoam and Paper Tube Set up the main frame (A) toghether with the polyfoam and place one polyfoam below the pedal (fig 4-1). Remove the polyfoam from the main frame (A). Remove the strap holder and place the handle bar on the handle bar hanger (fig 4-2). Remove both premounted screws (J3), both washers (J4) and remove the paper tube (fig 4-3).
- Page 17 Step 5: Assembly of the Front Stabilizer Use the two screws (J3) and two washers (J4) from the previous step to assemble the front stabilizer (D) to the main frame (A). Step 6: Assembly of the Rear Stabilizer ࣑ ATTENTION Be aware of the direction of the rear stabilizer.
- Page 18 Step 7: Assembly of the Aluminum Rail ⚠ CAUTION Take care that the sliding basement will slide after the strap is cut off. Cut off the strap holding the sliding basement on the aluminum track. Assemble the aluminum rail (C) on the main frame (A) by using four screws (J3) and four washers (J4).
- Page 19 Step 8: Assembly of the Saddle Remove the four premounted screws (J3) and washers (J4) from the saddle. Assemble the saddle (G) on the sliding basment of the aluminum rail (C) by using the previously removed screws and washers. Lay down the rower. Now tighten the screws from the previous steps.
- Page 20 Step 9: Adjustment of the Pedals You can choose between 7 positions to adjust the pedals. Pull up the two buttons on the pedal at the same time. Move the pedal up or down to the desired position. Release the buttons to let the pedal engage at the desired position. Repeat these steps for the other pedal.
- Page 21 Step 11: Connecting the Equipment to the Mains Supply ࣑ ATTENTION The equipment must not be connected to a multiple socket, otherwise it cannot be guaranteed that the equipment will be supplied with sufficient power. Technical errors can result. Plug the power plug (K) into a wall outlet that complies with the instructions in the chapter on electrical safety.
- Page 22 Step 12: Assembly of the Water Pump Dissammble the two premounted nuts (E1) from the water pump (E). Connect the two water pipes (E2) with the water pump (E). Assemble the water pipes (E2) on the water pump (E) with two nuts (E1). Recommended Water level Please follow the instructions on the water level label to fill the water between the Min and Max level.
- Page 23 Step 13: Fill the Water Tank ⚠ CAUTION The water inside the tank must not be drunk and must be disposed of after use. ࣑ ATTENTION Please use clean and filtered water to fill the water tank. If the water quality is known to be poor, it is recommended to use distilled water. Remove the water tank rear cover, filling cover and the tank plug.
-
Page 24: Operating Instructions
OPERATING INSTRUCTIONS NOTICE Familiarise yourself with all the functions and setting options of the device before starting training. Have the proper use of this product explained to you by a specialist. Console Display Aquastream... -
Page 25: Button Functions
Displays the training time TIME Display range: 0:00 - 99:59 minutes Displays the training time needed to finish 500m of rowing TIME/500M Display range: 0:00 - 99:59 minutes Displays the average training time to finish 500m of rowing TIME/500M AVG Display range: 0:00 - 99:59 seconds Displays the covered rowing distance METERS... -
Page 26: Functions
Functions Switch on the console After connecting the rowing machine to the mains supply or pressing any button when in standby mode the console is switched on. Standby Mode The console gets automatically into standby mode about 60 seconds after the end of the workout. QUICK START Pressing START/STOP or pulling the handle will activate QUICK START. -
Page 27: Meters Program
3.4.2 METERS PROGRAM With the console on: press UP/DOWN untill the training mode turns into METERS PROGRAM. Press ENTER. Press UP/DOWN to adjust the METERS to your desired training distance. Default setting is 1000 meters. Each step with the UP/DOWN button is 100 meters. Once you finish adjusting the METERS, press ENTER. -
Page 28: Calories Program
3.4.3 CALORIES PROGRAM With the console on: press UP/DOWN untill the training mode turns into CALORIES PROGRAM. Press ENTER. Press UP/DOWN to adjust the CALORIE to your desired training calories. Default setting is 150 cals. Each step with the UP/DOWN button is 10 cals. Once you finish adjusting the CALORIES, press ENTER. -
Page 29: Strokes Program
3.4.4 STROKES PROGRAM With the console on: press UP/DOWN untill the training mode turns into STROKES PROGRAM. Press ENTER. Press UP/DOWN to adjust the STROKES to your desired training strokes. Default setting is 300 strokes. Each step with the UP/DOWN button is 10 strokes. Once you finish adjusting the STROKES, press ENTER. -
Page 30: Interval 20/10 Program
3.4.5 INTERVAL 20/10 PROGRAM With the console on: press UP/DOWN untill the training mode turns into INT 20/10 PROGRAM. Press ENTER. Press UP/DOWN to adjust the CYCLE to your desired training cycle. Default setting is 10 cycles. Each step with the UP/DOWN button is 1 cycle. Each CYCLE includes 20-second-train and 10-second-rest. -
Page 31: Interval 20/30 Program
3.4.6 INTERVAL 20/30 PROGRAM With the console on: press UP/DOWN untill the training mode turns into INT 20/30 PROGRAM. Press ENTER. Press UP/DOWN to adjust the CYCLE to your desired training cycle. Default setting is 10 cycles. Each Step with the UP/DOWN button is 1 cycle. Each CYCLE includes 20-second-train and 30-second-rest. -
Page 32: Interval Cust Program
3.4.7 INTERVAL CUST PROGRAM With the console on: press UP/DOWN untill the training mode turns into INT CUST PROGRAM. Press ENTER. Press UP/DOWN to adjust the WORK TIME to your training time of each CYCLE. Default setting is 20 seconds. Each step with the UP/DOWN button is 1 second. Press ENTER and then press UP/DOWN to adjust the REST TIME to your resting time of each CYCLE. -
Page 33: Spm Program
3.4.8 SPM PROGRAM With the console on: press UP/DOWN untill the training mode turns into SPM PROGRAM. Press ENTER. Press UP/DOWN to adjust the SPM to your desired training strokes in 1 minute. Default setting is 30 strokes. Each step with the UP/DOWN button is 1 stroke. Press ENTER and then press START/STOP to start the training. -
Page 34: Race Program
3.4.9 Race Program With the console on: press UP/DOWN untill the training mode turns into RACE PROGRAM. Press ENTER. Press UP/DOWN to adjust the computer’s rowing pace. HIGH-TIME/500M: 02:15 MEDIUM-TIME/500M: 03:00 LOW-TIME/500M: 03:30 CUSTOM-TIME/500M: Set by yourself. Default setting is 3 minutes. Each step is 1 second. Press ENTER and then press UP/DOWN to adjust the distance of the race (METERS). -
Page 35: Heart Rate Controlled Programm
3.4.10 Heart Rate Controlled Programm ⚠ WARNING Your training equipment is not a medical device. The heart rate measurement of this equipment may be inaccurate. Various factors can affect the accuracy of the heart rate measurement. The heart rate measurement serves only as a training aid. With the console on: press UP/DOWN untill the training mode shows TARGET HR PROGRAM. -
Page 36: Recovery Program
3.4.11 Recovery Program Recovery program is activated by pressing the Recovery button. Under Each Program: Press RECOVERY to detect the Heart Rate Recovery Function. After pressing RECOVERY: a 60 seconds countdown is shown. If the console hasn’t received a heart rate signal for 10 seconds, it will turn into REC: FAIL If the console hasn’t received a heart rate signal for 20 seconds, it will stop After 60 seconds countdown, it will show the result: Result... -
Page 37: Bluetooth And Fitness Apps
Bluetooth and fitness apps This console is equipped with a bluetooth interface. To use training apps you will have to connect your equipment with your mobile device (tablet or smart phone). To do this, please activate the bluetooth function on your mobile device. Now choose your equipment. Please take note that your mobile device needs to be compatible with the bluetooth interface of the rowing machine (Bluetooth 4.0). -
Page 38: Notes On Correct Rowing
Notes on correct rowing Body moves towards the handle Wrong At the end of the movement, the body will be pulled forwards towards the handles instead the handles to the body. Right At the end of the movement, the user slightly leans back, holds the legs down, keeps the upper body straight and pulls the handle to the body. - Page 39 Leaning too far forward Wrong The body is bent too far forward. The shins are no longer vertical. The head and shoulders are facing the feet. The body is therefore in a weak position to execute the movement. Right The shins are vertical. The body is pressed against the legs, the arms are completely stretched out in front and the body is slight bent forward.
-
Page 40: Storage And Transport
STORAGE AND TRANSPORT General Instructions ⚠ WARNING The storage location should be chosen so that improper use by third parties or children can be prevented. If your equipment does not have transportation wheels, the equipment must be disassembled before transportation. ࣑... -
Page 41: Troubleshooting, Care And Maintenance
TROUBLESHOOTING, CARE AND MAINTENANCE General Instructions ⚠ WARNING Do not make any improper changes to the equipment. CAUTION ⚠ Damaged or worn components may affect your safety and the life of the equipment. Therefore, immediately replace damaged or worn components. In such a case, contact the contract partner. -
Page 42: Disposal
Error Codes and Troubleshooting The electronics of the equipment continuously carries out tests. In case of deviations, an error code appears on the display and normal operation is stopped for your safety. Please contact Sport-Tiedje for technical support. Maintenance and Inspection Calendar To avoid damage from body sweat, the equipment must be cleaned with a damp towel (no solvents!) after each training session. -
Page 43: Recommended Accessories
RECOMMENDED ACCESSORIES To make your training experience even more efficient and pleasant, we recommend that you add suiting accessories to your fitness equipment. For rowing machines this could for example be a floor mat, which makes your fitness equipment stand more securely and also protects the floor from sweat or silicone spray to keep moving parts in good shape. -
Page 44: Ordering Spare Parts
The serial number of your equipment is unique. It's located on a white sticker. The exact position of this sticker is shown in the following illustration. Enter the serial number in the appropriate field. Serial number: Brand / Category: cardiostrong / rowing machine Model Name: Aquastream Article Number: CST-AS... -
Page 45: Parts List
Parts List Name Qty. FRAME PULLEY COVER (L) PULLEY COVER (R) CHAIN COVER (L) CHAIN COVER (R) HEX SOCKET HEAD CAP SCREW M6x65mm WASHER M6xΦ16x1.5T STRAP PULLEY BEARING 6000ZZ SLEEVE Φ10xΦ6.2x48.8mm C CLIP HANDLEBAR HANGER HEX SOCKET FLAT HEAD CAP SCREW M6X12mm DECORATION TUBE STRAP WHEEL SUPPORT PILLAR Φ15xΦ6x30.5mm A18-1... - Page 46 C CLIP E6 TRUSS HEAD PHILLIPS SCREWS M5x10mm TRUSS HEAD PHILLIPS SCREWS M5x6mm TRUSS HEAD PHILLIPS SCREWS M5x10mm TRUSS HEAD PHILLIPS SCREWS M6x12mm WASHER Φ6xΦ16x1.5T HEX SOCKET HEAD CAP SCREW M6x30mm HEX NUT M6 BEARING 6201ZZ BEARING 6202ZZ SPRING BOX C CLIP S20 STEEL PLATE WASHER AXLE M6...
- Page 47 TRUSS HEAD PHILLIPS SCREWS M4x12mm MAGNET Φ5x3T WATER TANK CAP COVER AXLE Φ25x485mm WATER TANK CONNECTOR PROPELLER A75-1 CONNECTION RING A75-2 CONNECTION RING HEX SOCKET HEAD CAP SCREW M6x10mm BUSHING Φ25xΦ28x20L PLUG O RING Φ177.17x5.33T REAR STABILIZER FIXING PLATE TRUSS HEAD PHILLIPS TAPPING SCREWS M4x12mm SLIDING TRACK REAR COVER OF SLIDING TRACK ROUND HEAD PHILLIPS SCREWS M2x6mm...
- Page 48 COUNTERSUNK PHILIPPS SCREWS M5x10mm SADDLE SADDLE SIDE PLATE WHEEL PROTECTION PLATE AXLE BEARING 608ZZ(BMC) WHEEL WASHER Φ8xΦ12x2mm WASHER M8xΦ16x2.0T HEX CAP NUT M8 SCREW M8x20mm CONSOLE CONSOLE TUBE CONSOLE STAND SMART DEVICE STAND TURNING AXLE COVER AXLE COVER HEX SOCKET HEAD CAP SCREW M6x75mm HEX SOCKET HEAD CAP SCREW M6x30mm WASHER M6xΦ13x1T HEX SOCKET HEAD CAP SCREW M8x16mm...
- Page 49 WATER LEVEL STICKER DECORATION STICKER STICKER FOAM HANDLEBAR FOAM HANDLEBAR COVER (L) HANDLEBAR COVER (R) PLASTIC WASHER SIDE COVER Φ28.6 WIRE 400mm DC LINE 620mm WIRE620mm WIRE300mm SENSOR WIRE 6x25x150mm...
-
Page 50: Exploded Drawing
Exploded Drawing Exploded Drawing Aquastream Aquastream... -
Page 51: Warranty
WARRANTY Training equipment from cardiostrong® is subject to strict quality control. However, if a fitness equipment purchased from us does not work perfectly, we take it very seriously and ask you to contact our customer service as indicated. We are happy to help you by phone via our service hotline. - Page 52 Warranty Conditions For the warranty to be valid, the following steps must be taken: Please contact our customer service by email or phone. If the product under warranty has to be sent in for repair, the seller bears costs. After expiry of the warranty, the buyer bears the costs of transport and insurance.
-
Page 53: Contact
CONTACT TECHNIK TEKNIK OG SERVICE TECHNIQUE & SERVICE �� �� �� +49 4621 4210-900 80 90 16 50 +33 (0) 172 770033 +49 4621 4210-945 +49 4621 4210-933 �� +49 4621 4210-698 �� �� info@fitshop.dk service-france@fitshop.fr �� technik@sport-tiedje.de �� �� Åbningstider kan findes på... - Page 54 LIVE FITNESS WEBSHOP AND SOCIAL MEDIA Sport-Tiedje is Europe’s largest specialist store www.sport-tiedje.co.uk for home fitness equipment with currently over www.sport-tiedje.de/blog 70 stores and one of the world’s most renowned online mail order companies for fitness equipment. Private customers order via the 25 www.facebook.com/SportTiedje web shops in the respective national language or have their desired equpiment assembled on...
- Page 56 Aquastream...
Need help?
Do you have a question about the Aquastream CST-AS and is the answer not in the manual?
Questions and answers