Table of Contents
Advertisement
Advertisement
Table of Contents

Related Manuals for Audient iD24


Summary of Contents for Audient iD24
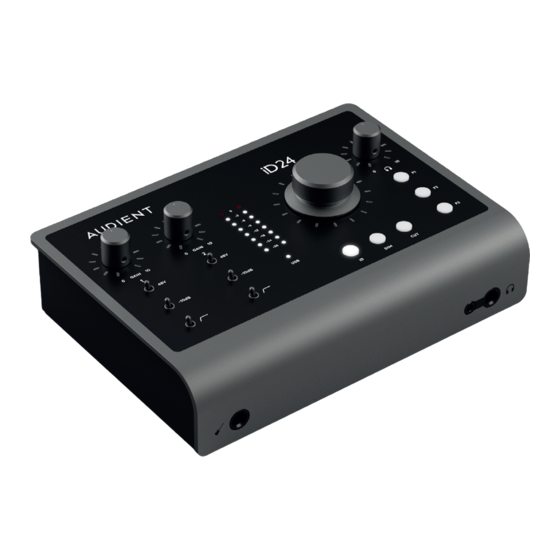
- Page 1 10in | 14out Audio Interface Manual...
- Page 2 Welcome to your new Audient iD24 Audio Interface Features include: To help get you started please visit audient.com/products/iD24 • 2 x Class-A Audient Console Mic to download the latest software Preamps and firmware. • Class Leading AD/DA Converters Inside the box: •...
-
Page 3: Table Of Contents
Contents iD24 Overview Software Features: Safety Information Input Channel Types Declaration of Conformities Channel Features Installation: Mastering Section Features Mac Installation System Panel Features Windows Installation The Routing Matrix iD App & Firmware Update Setting Up Talkback Save & Loading Presets... -
Page 4: Id24 Overview
Overview Channel 2 (Mic/Line Input) Volume Control Main Meters Channel 1 Headphone (Mic/Line Input) Volume Control Function -10dB Pad Keys High Pass Button Filter Monitor Dim + Cut Optical In + Out USB-C Connection Word Clock 2 x Speaker... -
Page 5: Safety Information
Please read all of these instructions and save them for later reference before connecting and powering up iD24. The iD24 itself does not operate with any high voltage mains supply inside the unit but appropriate safety measures should still be adhered to regarding the USB supply. - Page 6 Safety Information Important Safety Instructions 1. Read these instructions 2. Keep these instructions 3. Heed all warnings 4. Follow all instructions 5. Do not use this equipment near water 6. Clean only with dry cloth 7. Do not install near any heat sources such as radiators, heat registers, stoves, or other equipment (including amplifiers) that produce heat 8.
-
Page 7: Declaration Of Conformities
This device must accept any interference received, including interference that may cause undesired operation We, Audient Ltd, declare that the product, the iD24, to which this declaration relates, is in material conformity with the appropriate CE standards and directives for an audio product designed for consumer use. -
Page 8: Installation
Installation... -
Page 9: Mac Installation
Head to our website for the latest version of our iD Mixer: USB - C audient.com/products/downloads/ id24 Drag the downloaded app into your application folder to install it. 2. Connect iD24 Using the USB cable provided, connect iD24 to your computer’s USB port. - Page 10 It’s also worth checking Audio MIDI Setup Once connected to your computer and (found in Mac HD > Applications > Utilities). powered on, the white status LED on iD24 will illuminate. Window > Show Audio Window Here you should see iD24 report with 10 inputs and 14 outputs.
- Page 11 Visit iD Knoweldge Base Opens a browser windows for the Audient Helpdesk with helpful articles and FAQs. Check for Updates The iD app will check with the Audient update server for any available firmware updates for Show Mixer iD24. If the mixer window has been hidden, this will bring it back to the forefront.
-
Page 12: Windows Installation
Windows Installer: audient.com/products/downloads/ iD24 2. Connect iD24 Using the USB cable provided, connect iD24 to your computer’s USB port. 3. Run iD Mixer Setup Double click on the installer to run the iD mixer setup and follow the on-screen instructions. - Page 13 4. Check Connectivity The USB status LED will illuminate as soon as iD24 has achieved stable communication and should remain solidly lit during operation of the unit until power down. For mixing, a buffer size of 256 should be perfect. For tracking, experiment with lower To double check the connection, go to PC buffer size values.
-
Page 14: Id App & Firmware Update
Windows You can manually check for updates by going Start > All Programs > Audient > iD to the Help menu and selecting ‘Check for Updates’. It will notify you if you’re on the On macOS, the iD app will launch into the... -
Page 15: Hardware Features
Hardware Features... -
Page 16: Microphone & Line Input
‘iD interface range’. The design features discrete Class-A circuitry providing exceedingly low distortion and noise performance. From a sonic point of view, iD24 is fast, open and detailed. The microphone preamplifiers feature: Amphenol ™ XLR/TRS Jack combi-connectors provide microphone and line inputs. -
Page 17: Instrument Input
Please note that the iD24 will only send phantom power to XLR connections, the TRS line inputs will not receive phantom power. -10dB Pad... -
Page 18: High Pass Filter
Balanced Inserts & Returns On both input channels, the iD24 features a dedicated insert allowing you to connect outboard gear to your recording chain; Just like the workflow you would find on an... -
Page 19: Direct Access To Adc
This makes it useful to patch in external microphone preamplifiers without adding additional colouration or noise. It is also handy for using the iD24’s outputs to drive external effects before returning them into your DAW using the insert returns. Please note; the digital calibration level of... - Page 20 Hardware Features Class A Mic Preamplifer, Inserts, A/D converters and Optical Input Block Diagram Auto Sense Neutrik Input +58dB Select D.I 1 Insert Auto Sense Neutrik Input +58dB Select Direct Monitor Insert Path (software controlled) OPTICAL IN 1 Input Specs Insert Return Microphone Input DI Input...
-
Page 21: Digital Inputs And Outputs
Running in S/PDIF mode, the optical i/o gives keep everything in sync. you 2 channels of audio in and out of the iD24 at sample rates up to 96KHz. The Word Clock output will send a clock signal at the same sample rate (44.1, 48, 88.2 or... - Page 22 Hardware Features iD24 with Single BNC Connection 75 Ohm Terminated iD24 clocked via the Optical Port Optical TOSlink Cable BNC Word Clock Cable...
-
Page 23: Speaker Outputs
Speaker Outputs Headphone Output iD24 has two pairs of stereo speaker outputs iD24 features an independent high-current on the back panel in the form of balanced TRS headphone amplifier. This can be accessed jack connectors. The outputs are impedance using both the 3.5mm and 6.35mm sockets balanced using the same topology as our found on the front of the unit. -
Page 24: Id Button
Button The iD button is used to activate iD24’s ScrollControl feature, which turns the encoder into a virtual scroll wheel allowing you to F-Keys control compatible scrollable parameters within your DAW or plugins. The three F buttons, F1, F2, and F3 are the... -
Page 25: Hardware Metering
Kensington lock hole to enable you to protect your iD24. Status LED The status LED indicates connection via USB to your computer. A solidly lit light means that there is stable communication between iD24 and your computer. -
Page 26: Software Features
Software Features... -
Page 27: Input Channel Types
(S/PDIF or ADAT) and the sample rate being used. DAW Returns These are the signals being played back from your DAW. The iD24 has six DAW Return Channels allowing you set up multiple cue mixes or sends to hardware outboard gear. - Page 28 Channel Name Phase Flip +10dB boost Pan Control Stereo Grouping Solo Mute Meters Fader...
-
Page 29: Channel Features
Channel Features Solo Channel Name The Solo button mutes all other channels By double-clicking on the name of the channel other than the one that is currently soloed. you can rename it to help you organise your Multiple channels can be soloed at one time. iD Software Mixer. -
Page 30: Mastering Section Features
Master Section Features Mix Selection Channel Views Cue Mix Mix Solo Name Cue Mix Level Mix Meters Chronometer Monitor Controls... - Page 31 Cue Mix that is sent to the outputs. Monitor Controls These six buttons control various aspects of Mix Meters iD24’s monitor controller capability. The The Mix meters show the master signal level function of each control can be found below: of the selected mix.
- Page 32 Various functions of the iD mixer application almost anywhere! can be assigned to the Function Keys of the iD24 to allow you to quickly control your • ALT monitoring at the click of a button. Alt allows you to quickly switch your...
-
Page 33: System Panel Features
System Panel Features Digital Input Output Format Routing Selection Clock Source Selection Routing Mono Mode Matrix Dim Level Alt Speaker Level Input Talkback Source Source Talkback Device... - Page 34 This control defines the level drop/boost When using an external clock source the when iD24 is switched to ALT speaker mode. indicator beside the selector shows the This is used to balance levels between current status of the clock on that input.
-
Page 35: The Routing Matrix
Routing Matrix The Routing Matrix allows you to control the • DAW THRU - This allows you to route to audio source for each of iD24’s outputs outputs exactly as they would appear from the following options: in your DAW. For example, if you set Analogue out 1+2 to DAW THRU, anything •... -
Page 36: Setting Up Talkback
Talkback Source The Talkback source allows the talkback input to be taken from one of iD24’s internal inputs or from an external device connected to the host computer (such as a built-in microphone or USB microphone). When you select an internal input as your... -
Page 37: Save & Loading Presets
Saving & Loading Mixer Presets To allow you to quickly setup your iD Simply enter the name of your preset and Software Mixer during a session you can press the ‘Save’ button. save and load various presets. This is great if you are moving between different recording It is also possible to export your preset files scenarios quite often. -
Page 38: Audio Loop-Back
Audio Loop-back iD24’s Software Mixer has the ability to loop- The various sources you can select from in back audio so you can record or stream audio the menu are as follows: from different applications on your computer using the dedicated Loopback channels. -
Page 39: Using The Loop-Back Mixer
Using the Loop-back Mixer Recording/Streaming your Loop-back Source To record or stream your loopback mix in your audio software, you would simply need to Once you have selected the Loopback Inputs select the Loopback channels as your input as your audio source in your recording/ channels in your audio software. -
Page 40: Adjusting Output Channels
> Utilities > Audio MIDI Setup. In the Audio When selecting a channel or mix as the MIDI Setup Utility, select the iD24 from the list of devices. Select the ‘Output Tab’ and click loopback source, a small loopback icon will appear on that channel/mix so you can check ‘Configure Speakers’. -
Page 41: Menu & Task Bar Icon
This gives you quick access to various functions of the iD24. Please note that some functions Set Clock Source are only visible when the iD24 is connected to the Computer Allows you to quickly adjust the clock source between the internal and optical clocks. -
Page 42: Firmware Update
‘Update’ and the update will begin. iD24 may available. turn off and on a number of times. Set ASIO Buffer Size Sets the buffer size of the iD24 between 16 and 4096 samples. Higher sizes will take processing load off your computer but will cause increased latency. -
Page 43: Keyboard Shortcuts
Cmd + 3 Ctrl + 3 View DAW Mix Inputs Cmd + 4 Ctrl + 4 View System Panel audient.com/products/iD24 Please check the iD24 page online at for the latest iD Application updates. More shortcuts may be added without notification. -
Page 44: Daw Setups
DAW Setup... -
Page 45: Pro Tools Setup
10-inputs and 6-outputs to and from Pro Tools. Playback Engine Go to Setup > Playback Engine... and ensure that iD24 is set as the active playback device. For more Pro Tools information consult your Avid user manuals & documentation. -
Page 46: Logic Pro Setup
Assigning I/O All of iD24’s input and output channels will be available to Logic for routing. There are a total of 10-inputs and 14-outputs reported from the driver. You can rename input and... - Page 47 File > Project Settings > Audio If you are using the internal clock in iD24, setting the sample rate via Logic Pro will update the iD24 sample rate to follow your session.
-
Page 48: Cubase/Nuendo Setup
Cubase or Nuendo and head straight for the ‘Studio’ menu: Click on Audient iD24 in the side menu. Here Devices > Device Setup... you will see the main iD24 information, where clock sources can be set as well as activating i/o ports. - Page 49 Cubase/Nuendo Setup Operation with Cubase / Nuendo Here you can ensure that all buses have been created in Cubase / Nuendo and therefore all ports are addressable in your session. Add Buffer sizes can be set in the control panel new buses and assign them to the necessary within the VST devices display.
-
Page 50: Ableton Setup
Once iD24 has been successfully installed for recording via the iD mixer. Ensure that following the installation process that can iD24 reports as a 10-in, 14-out device to Live. be found at the start of this manual, launch Ableton Live and head straight to:... -
Page 51: Troubleshooting & Faq
This only needs to be done once slightly higher buffer size as latency is not so straight after power up. Once iD24 is set to the much of a problem. operational state you desire, you can quit the iD application and it will continue to function “When I connect to my computer,... - Page 52 Status LED in the System Panel will be red or yellow. If the status light is red then iD24 cannot detect a clock signal from an external device, and yellow if it can detect a signal at the wrong sample rate.
- Page 53 (see link above). Macintosh HD > User > Library > Application Support > Audient > iD > state.xml (C:) > Users > yourusername > AppData > Roaming > Audient > iD > state.xml Do not delete the parent folder as this will also contain your iD mixer presets.
-
Page 54: Technical Specifications
Technical Specifications Microphone Preamplifier: MIC GAIN: 0 to +58dB MAXIMUM INPUT LEVEL: +12dBu CROSSTALK: <-100dBu @ 1kHz & 10kHz THD+N @0dBu 1kHz: 0.0015%, -96dB MIC EIN: -13dBu A-Weighted CMRR >75dB@1kHz SNR: 97.5dB Unweighted, 100dB A-Weighted FREQUENCY RESPONSE: +/- 0.5dB 10Hz to 40kHz INPUT IMPEDANCE (Mic) 3kΩ... -
Page 55: Dimensions
Dimensions 198mm... -
Page 56: Warranty
In the event of a manufacturing defect becoming apparent during the 3 year limited warranty period, Audient will ensure the product is repaired free of charge. Audient are not liable for direct or consequential loss or damage resulting from the goods and/or their use. -
Page 57: Service & Contact
Your warranty will be void if you tamper with the device at component level. If you have any questions with regard to the repair, please contact Audient Ltd. If your unit is in warranty, please contact your dealer directly for a repair or replacement (at the discretion of the dealer). -
Page 58: Glossary
Glossary Amperes ADAT Alesis Digital Audio Tape Analogue to Digital Converter Digital Audio Workstation Analogue Signal Processing Central Processing Unit Artist Headphone Mix Digital to Analogue Converter Decibel Decibel referenced to 0.775Vrms = 0 dBu dBFS Decibel Full Scale Direct Current Direct Injection (Instrument Input) Declaration of Conformity Digital Signal Processing...
Need help?
Do you have a question about the iD24 and is the answer not in the manual?
Questions and answers