Nokia 6230 User Manual
Nokia 6230: user manual
Hide thumbs
Also See for 6230:
- Extended user manual (165 pages) ,
- User manual (93 pages) ,
- Service manual (23 pages)
Table of Contents
Advertisement
Quick Links
6230.ENv1a_9310059.book Page 1 Monday, March 22, 2004 11:54 AM
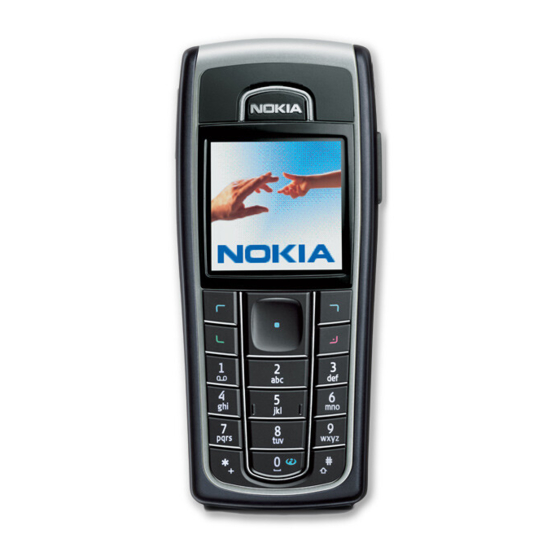
Nokia 6230 phone at a glance
Volume keys
Display screen
Left
selection key
Talk key
Five-way
scroll and
selection key
Charger port
Nokia 6230 User Guide
Microphone
Power key
Earpiece
Loudspeaker
IR port
Right
selection key
End key
Keypad
Pop-Port
connector
Copyright © 2004 Nokia
Advertisement
Table of Contents

Related Manuals for Nokia 6230


Summary of Contents for Nokia 6230
- Page 1 6230.ENv1a_9310059.book Page 1 Monday, March 22, 2004 11:54 AM Nokia 6230 phone at a glance Volume keys Display screen Left selection key Talk key Five-way scroll and selection key Charger port Microphone Nokia 6230 User Guide Power key Earpiece Loudspeaker...
-
Page 2: Quick Guide
6230.ENv1a_9310059.book Page 2 Monday, March 22, 2004 11:54 AM Quick guide Make a call Enter a phone number, and press the Talk key Answer a call Press the Talk key Answer call during call Select Options > Answer call End a call Press the End key. - Page 3 6230.ENv1a_9310059.book Page 3 Monday, March 22, 2004 11:54 AM LEGAL INFORMATION DECLARATION OF CONFORMITY We, NOKIA CORPORATION declare under our sole responsibility that the products RH-12 and RH-28 are in conformity with the provisions of the following Council Directive: 1999/5/EC.
- Page 4 6230.ENv1a_9310059.book Page 4 Monday, March 22, 2004 11:54 AM The information contained in this user guide was written for the Nokia 6230 product. Nokia operates a policy of ongoing development. Nokia reserves the right to make changes to any of the products described in this document without prior notice.
- Page 5 6230.ENv1a_9310059.book Page 5 Monday, March 22, 2004 11:54 AM Manufactured or sold under one or more following US Patents. Asterisk (*) indicates design patents pending. 4868846 5519885 5827082 4969192 5526366 5835889 5001372 5553125 5839101 5045973 5557639 584884 5101175 5565821 5845219...
- Page 6 6230.ENv1a_9310059.book Page 6 Monday, March 22, 2004 11:54 AM Copyright © 2004 Nokia...
-
Page 7: Table Of Contents
Nokia PC Suite ........ - Page 8 6230.ENv1a_9310059.book Page viii Monday, March 22, 2004 11:54 AM Basic operations ......18 Install the SIM card ......... 18 Install the MultiMediaCard .
- Page 9 6230.ENv1a_9310059.book Page ix Monday, March 22, 2004 11:54 AM Instant messaging ......61 IM service provider icons ........61 Register with an IM service .
- Page 10 6230.ENv1a_9310059.book Page x Monday, March 22, 2004 11:54 AM Voice dialing ..........84 Info, service, and my numbers .
- Page 11 6230.ENv1a_9310059.book Page xi Monday, March 22, 2004 11:54 AM 15 Organizer ....... 122 Alarm clock .
- Page 12 Technical information ........168 Nokia one-year limited warranty ......169 Appendix A Message from the CTIA .
-
Page 13: For Your Safety
6230.ENv1a_9310059.book Page 1 Monday, March 22, 2004 11:54 AM 1 For your safety Read these simple guidelines. Not following them may be dangerous or illegal. Read the complete user guide for further information. SWITCH ON SAFELY Do not switch the phone on when wireless phone use is prohibited or when it may cause interference or danger. -
Page 14: About Your Device
6230.ENv1a_9310059.book Page 2 Monday, March 22, 2004 11:54 AM WATER-RESISTANCE Your phone is not water-resistant. Keep it dry. BACK-UP COPIES Remember to make back-up copies or keep a written record of all important information stored in your phone. CONNECTING TO OTHER DEVICES When connecting to any other device, read its user guide for detailed safety instructions. -
Page 15: Shared Memory
6230.ENv1a_9310059.book Page 3 Monday, March 22, 2004 11:54 AM Your service provider may have requested that certain features be disabled or not activated in your device. If so, they will not appear on your device menu. Contact your service provider for more information. -
Page 16: Overview Of Functions
6230.ENv1a_9310059.book Page 4 Monday, March 22, 2004 11:54 AM 2 Overview of functions The Nokia 6230 phone provides many useful functions, such as a radio, alarm clock, calculator, wallet, calendar, and more. Your phone can also connect to a PC, laptop, or other device using the data cable, Bluetooth connection, or built-in infrared (IR) port. -
Page 17: Bluetooth
Your phone supports up to three simultaneous GPRS connections. For more information on GPRS, see “GPRS, EDGE, CSD, HSCSD” on page 97. Also, consult the Nokia PC Suite online help. Nokia PC Suite and all related software can be downloaded from the U.S. Mobile Phone products section of www.nokia.com. -
Page 18: Polyphonic Sound (Midi)
6230.ENv1a_9310059.book Page 6 Monday, March 22, 2004 11:54 AM • POLYPHONIC SOUND (MIDI) Polyphonic sounds can be used in ringing tones, gaming sounds, and message alert tones. They consist of several sound components played at the same time, like an actual melody through a speaker. -
Page 19: About Your Phone
3 About your phone • REGISTER YOUR PHONE Be sure to register your phone at www.warranty.nokiausa.com or call 1-888-NOKIA-2U (1-888-665-4228) so that we can serve you better if you need to call a customer center or to have your phone repaired. • TERMS This guide uses certain terms for the parts of the phone and the steps that you are asked to perform. -
Page 20: Find Information About Your Phone
6230.ENv1a_9310059.book Page 8 Monday, March 22, 2004 11:54 AM • FIND INFORMATION ABOUT YOUR PHONE The label on the back of your phone, underneath the battery and MultiMediaCard, contains the following information: • Model number • Phone type and FCC ID •... -
Page 21: Get Help
Slide the MultiMediaCard to the left and lift it out of the holder as shown. • GET HELP If you need help, Nokia Customer Care is available for assistance. We recommend that you write down the following information and have it available if you call. •... -
Page 22: Contact Your Service Provider
Service providers may differ in their support of features. Before you sign up, make sure a service provider supports the features that you need. Guide updates From time to time, Nokia updates this guide to reflect changes. The latest version may be available at www.nokia.com/us. Online tutorials An interactive tutorial for this product may be available at the Web site www.nokiahowto.com. -
Page 23: Start Screen
6230.ENv1a_9310059.book Page 11 Monday, March 22, 2004 11:54 AM • START SCREEN The start screen is home base and indicates that the phone is in the standby mode. Home Signal strength Left selection Middle selection Home—The name of your service provider may appear here. -
Page 24: Quick Keys
6230.ENv1a_9310059.book Page 12 Monday, March 22, 2004 11:54 AM ORGANIZE FUNCTIONS From the start screen, select Go to > Options > Organize. Scroll to the function you wish to rearrange; then select Move. Select Move up, Move down, Move to top, or Move to bottom from the list of choices. -
Page 25: Indicators And Icons
6230.ENv1a_9310059.book Page 13 Monday, March 22, 2004 11:54 AM About your phone Indicators and icons Icon Indicates... You have one or more text or picture messages. See “Read a message” on page 41. You have one or more multimedia messages. -
Page 26: Copyright Protection
• NOKIA PC SUITE Nokia PC Suite is a collection of powerful software tools that let your phone work with a compatible PC to manage phone features and data. For example, with Nokia PC Suite you can download photos from your phone camera to the PC, create new ringing tones and wallpapers for your phone, synchronize your phone and your PC or remote Internet server, and much more. - Page 27 Nokia Phone Editor to send text messages and edit the contacts in your phone. Nokia Phone Browser to view the contents of the Gallery folder of your phone on a compatible PC. You can browse picture and audio files and also modify files in the phone memory and transfer files between phone and the PC.
-
Page 28: Connection Settings Service
To discard the received settings, select Options > Discard. You may need to activate the settings as described in section for that service. You can also find the settings in the support section of www.nokia.com/us. • PHONE MENUS Phone features are grouped according to function and are accessed through the main menus of your phone. -
Page 29: Scroll Method
6230.ENv1a_9310059.book Page 17 Monday, March 22, 2004 11:54 AM Scroll method At the start screen, use the Middle selection key to select Menu. In the List view, scroll through the main menus one at a time using the Scroll up key and the Scroll down key. -
Page 30: Basic Operations
6230.ENv1a_9310059.book Page 18 Monday, March 22, 2004 11:54 AM 4 Basic operations • INSTALL THE SIM CARD The SIM card and its contacts can easily be damaged by scratches or bending, so be careful when handling, inserting, or removing the card. - Page 31 6230.ENv1a_9310059.book Page 19 Monday, March 22, 2004 11:54 AM Insert the SIM card into the SIM card holder as shown. Make sure that the SIM card is properly inserted and that the gold-colored contact area on the card is facing downward.
-
Page 32: Install The Multimediacard
6230.ENv1a_9310059.book Page 20 Monday, March 22, 2004 11:54 AM REPLACE THE BACK COVER 10 Slide the back cover into place. • INSTALL THE MULTIMEDIACARD Use only MultiMediaCards up to 256 MB with this device. Other memory cards, such as secure digital (SD) cards, do not fit in the MultiMediaCard card slot and are not compatible with this device. -
Page 33: Switch The Phone On Or Off
6230.ENv1a_9310059.book Page 21 Monday, March 22, 2004 11:54 AM • SWITCH THE PHONE ON OR OFF To turn your phone on or off, press and hold the power key on top of the phone for at least 3 seconds. If the phone displays Insert SIM card even though the SIM card is properly inserted, or SIM card not supported, contact your service provider. -
Page 34: Use Contacts
6230.ENv1a_9310059.book Page 22 Monday, March 22, 2004 11:54 AM Use contacts At the start screen, press the Scroll down key and scroll to the entry you wish to view. To search the list of entries quickly, press the key in which the letters match the first letter of the name for which you are searching. -
Page 35: Answer Or Reject An Incoming Call
6230.ENv1a_9310059.book Page 23 Monday, March 22, 2004 11:54 AM Answer or reject an incoming call When you receive a call, the phone shows the caller’s name, phone number, or the message Private number or Call. If more than one name is found in contacts with the seven last digits of the caller’s phone number, only the phone number is... -
Page 36: Loudspeaker
6230.ENv1a_9310059.book Page 24 Monday, March 22, 2004 11:54 AM • LOUDSPEAKER You can use your phone as a loudspeaker during a call. When the loudspeaker is active, you can set the phone on a desk or table and leave your hands free. Do not hold the phone to your ear during the loudspeaker operation. - Page 37 6230.ENv1a_9310059.book Page 25 Monday, March 22, 2004 11:54 AM Basic operations Conference—Call another party and invite them into the call. Up to five callers can participate in a conference call. Private call—Have a private conversation with one participant in a conference call.
-
Page 38: Text Entry
6230.ENv1a_9310059.book Page 26 Monday, March 22, 2004 11:54 AM 5 Text entry You can use two methods for entering text and numbers. • Standard mode (dictionary off) is the only way to enter names into contacts and to rename caller groups. -
Page 39: Predictive Text Input
6230.ENv1a_9310059.book Page 27 Monday, March 22, 2004 11:54 AM • PREDICTIVE TEXT INPUT Predictive text input allows you to write messages quickly using your keypad and the built-in phone dictionary. It is much faster than using the standard mode multitap method. You can use predictive text to write a message, create a calendar note, and make a to-do list. -
Page 40: Special Characters And Smileys
• When the dictionary is full, the most recent addition replaces the first. Predictive text example To write Nokia with predictive text on and with the English dictionary selected, press each of the following keys once: the 6 key the 6 key the 5 key The illustration above simulates your display each time a key is pressed. -
Page 41: Phone Security
6230.ENv1a_9310059.book Page 29 Monday, March 22, 2004 11:54 AM 6 Phone security An array of security features prevents accidental calls, allows you to restrict the calls your phone can make and receive, and keeps your stored information safe. • KEYGUARD With keyguard, you can lock the keypad to prevent keys from being pressed accidentally. -
Page 42: Call Restrictions
6230.ENv1a_9310059.book Page 30 Monday, March 22, 2004 11:54 AM • CALL RESTRICTIONS This network service lets you restrict the calls your phone can make and receive. Check with your service provider for details. When calls are restricted, calls may be possible to emergency numbers programmed into your phone (for example, 911). -
Page 43: Fixed Dialing
6230.ENv1a_9310059.book Page 31 Monday, March 22, 2004 11:54 AM • FIXED DIALING Once you set up and activate a fixed dialing list, your phone can make calls only to those numbers that you have defined in the fixed dialing list. Fixed dialing is a network feature and must be supported by your service provider. -
Page 44: Closed User Groups
6230.ENv1a_9310059.book Page 32 Monday, March 22, 2004 11:54 AM Edit—Edit the highlighted entry. Delete—Delete the highlighted entry. Delete all—Delete all entries in your fixed dialing list. Notes about fixed dialing • If a SIM card with fixed dialing that is activated is inserted into a phone that does not support fixed dialing, the SIM card is rejected. -
Page 45: Security Levels
6230.ENv1a_9310059.book Page 33 Monday, March 22, 2004 11:54 AM • SECURITY LEVELS The security level determines your access to features when a non-owner SIM card is used. A non-owner SIM card is one (other than the original) that is inserted after you power off the phone. -
Page 46: Pin Code
6230.ENv1a_9310059.book Page 34 Monday, March 22, 2004 11:54 AM Once you change the security code from its preset of 12345, keep the new code secret and in a safe place separate from your phone. Use this procedure to change your security code. -
Page 47: Messages
6230.ENv1a_9310059.book Page 35 Monday, March 22, 2004 11:54 AM Messages 7 Messages If you have subscribed to a message network service, you can send and receive messages to compatible phones that are also subscribed to a message service. You can also send and receive picture messages, multimedia messages, and e-mail if supported by your service provider. -
Page 48: Before You Can Send And Receive Messages
6230.ENv1a_9310059.book Page 36 Monday, March 22, 2004 11:54 AM • BEFORE YOU CAN SEND AND RECEIVE MESSAGES You will need the following to send and receive messages: • A messaging service through your service provider • A message center number, which must be saved to your phone (if your service provider has not done so already). - Page 49 6230.ENv1a_9310059.book Page 37 Monday, March 22, 2004 11:54 AM If more than one message profile set is supported by your SIM card, select the set you want to change; then select one of the following: Message center number—Save the phone number of the message center, which is necessary for sending text messages;...
- Page 50 6230.ENv1a_9310059.book Page 38 Monday, March 22, 2004 11:54 AM Folders You can use folders to organize text and picture messages. From the menus, select Messages > Text messages and one of the following folders: Inbox—Messages are automatically stored in the inbox after they have been read or if you select Exit when Message received appears on the start screen.
-
Page 51: Distribution Lists
6230.ENv1a_9310059.book Page 39 Monday, March 22, 2004 11:54 AM Enter a name for the new folder, and select OK. The folder is added. DELETE A FOLDER Only folders created in My folders can be deleted. The Inbox, Sent items, Saved items, and Template folders are protected. -
Page 52: Write And Send A Message
6230.ENv1a_9310059.book Page 40 Monday, March 22, 2004 11:54 AM Options > Clear list—Delete all names and phone numbers from the selected list. Options > Delete list—Delete the selected distribution list. VIEW UNDELIVERED OPTIONS If a message cannot be sent to one or more recipients in the distribution list, Undelivered appears in the list of distribution lists. -
Page 53: Read A Message
6230.ENv1a_9310059.book Page 41 Monday, March 22, 2004 11:54 AM Insert symbol—Insert a special character into your message. This option is available if predictive text is on. Predictive text—Turn predictive text on or off. To send the message, select Send, enter the recipient’s phone number or select Find to retrieve a number from contacts, and select OK. -
Page 54: Reply To A Message
6230.ENv1a_9310059.book Page 42 Monday, March 22, 2004 11:54 AM Edit—Edit the message. Move—Move the message to a folder you specify. Rename—Rename the message before it is saved to a folder. Copy to Calendar—Copy text from the beginning of the message to the phone calendar as a reminder note for the current day. -
Page 55: Picture Messages
6230.ENv1a_9310059.book Page 43 Monday, March 22, 2004 11:54 AM AS E-MAIL While viewing a message, select Options > Forward > Via e-mail. Enter the e-mail address or retrieve it from contacts, and select OK. Enter a subject for the e-mail, and select OK. - Page 56 6230.ENv1a_9310059.book Page 44 Monday, March 22, 2004 11:54 AM Keep scrolling to view other information, such as the sender number and time the message was sent. Once you are finished, select Back to move the picture message to the inbox, or select Options for other choices.
- Page 57 6230.ENv1a_9310059.book Page 45 Monday, March 22, 2004 11:54 AM PREVIEW, CHANGE, OR DELETE A PICTURE FROM A MESSAGE After a picture has been inserted into your message, select Options and one of the following: Preview—Preview the inserted message before sending. Select Back to return to the list of options.
-
Page 58: Multimedia Messages
6230.ENv1a_9310059.book Page 46 Monday, March 22, 2004 11:54 AM WRITE AND SEND SMS E-MAIL From the menus, select Messages > Text messages > Create SMS e-mail. Enter the recipient’s e-mail address, or select Find to search for it in contacts, and select OK. -
Page 59: Mms Settings
6230.ENv1a_9310059.book Page 47 Monday, March 22, 2004 11:54 AM You cannot receive multimedia messages if you have a call in progress, a game or other Java application running, or an active browsing session over GSM. Because delivery of multimedia messages can fail for a variety of reasons, do not rely solely upon them for essential communications. - Page 60 6230.ENv1a_9310059.book Page 48 Monday, March 22, 2004 11:54 AM EDIT CONNECTION SETTINGS Contact your service provider for the settings. From the menus, select Messages > Message settings > Multimedia msgs. > Connection settings > Edit active multimedia settings; then select each of the following in turn and enter the settings provided by the service provider.
-
Page 61: Write And Send
6230.ENv1a_9310059.book Page 49 Monday, March 22, 2004 11:54 AM Allow multimedia reception—Select Yes, No, or In home network for your multimedia service. In home network cannot receive multimedia messages outside the home network. Incoming multimedia messages—Select Retrieve to receive multimedia messages, or Reject to not receive multimedia messages. - Page 62 6230.ENv1a_9310059.book Page 50 Monday, March 22, 2004 11:54 AM To move the text to the top or bottom of the message, select Options > Text on top or Text on bottom. To insert a name from contacts, select Options > More options > Insert contact, scroll to the desired name, and select Select.
-
Page 63: Read And Reply
6230.ENv1a_9310059.book Page 51 Monday, March 22, 2004 11:54 AM Read and reply When a multimedia message is being received, display. Once the message has been fully downloaded, message received appear in the display. To view the message immediately, select Show. -
Page 64: E-Mail
6230.ENv1a_9310059.book Page 52 Monday, March 22, 2004 11:54 AM A SINGLE MESSAGE To delete a single message, you need to open it first. From the menus, select Messages > Multimedia msgs. and the folder containing the message you want to delete. - Page 65 6230.ENv1a_9310059.book Page 53 Monday, March 22, 2004 11:54 AM MANUAL ENTRY From the menus, select Messages > Message settings > E-mail messages > Active e-mail settings. Scroll to the set in which you want to save the settings, and select Activate.
- Page 66 6230.ENv1a_9310059.book Page 54 Monday, March 22, 2004 11:54 AM • SMTP user name—Enter the user name for outgoing mails that you have obtained from your e-mail service provider. If you do not enter an SMTP user name, the e-mail server uses the POP3 or IMAP4 user name instead.
- Page 67 6230.ENv1a_9310059.book Page 55 Monday, March 22, 2004 11:54 AM Folders Your phone has the following folders under Messages > E-mail: Inbox—Store received e-mails. Other folders—Contains the following subfolders: • Drafts—Store unfinished e-mails. • Archive—Organize and save e-mails. • Outbox—Store e-mails that have not been sent.
- Page 68 6230.ENv1a_9310059.book Page 56 Monday, March 22, 2004 11:54 AM Download e-mail messages From the menus, select Messages > E-mail. To download e-mail messages that have been sent to your e-mail account, select Retrieve. To download new e-mail messages and send e-mails saved in the Outbox folder, select Other options >...
-
Page 69: Voice Messages
6230.ENv1a_9310059.book Page 57 Monday, March 22, 2004 11:54 AM • VOICE MESSAGES If you subscribe to voice mail, your service provider will furnish you with a voice mailbox number. You need to save this number to your phone to use voice mail. -
Page 70: Automate Voice Mail
6230.ENv1a_9310059.book Page 58 Monday, March 22, 2004 11:54 AM Automate voice mail You can insert special characters called dialing codes into phone numbers such as voice mail and then save the number to a 1-touch dialing location. Dialing codes instruct the receiving system to pause, wait, bypass, or accept the numbers that follow them in the dialing string. -
Page 71: Info Message Service
6230.ENv1a_9310059.book Page 59 Monday, March 22, 2004 11:54 AM INSERT DIALING CODES Press the * key repeatedly to cycle through dialing codes. Once the desired code appears in the display, pause briefly and the code is inserted into the dialing string. -
Page 72: Service Commands
6230.ENv1a_9310059.book Page 60 Monday, March 22, 2004 11:54 AM • SERVICE COMMANDS Use the Service commands editor to enter and send service requests (also known as USSD commands) to your service provider. Contact your service provider for information about specific service commands. -
Page 73: Instant Messaging
6230.ENv1a_9310059.book Page 61 Monday, March 22, 2004 11:54 AM 8 Instant messaging Take text messaging to the next level by experiencing instant messaging (IM) in a wireless environment. Engage in instant messaging with friends and family, regardless of the mobile system or platform (like the Internet) they are using, as long as you all use the same IM service. -
Page 74: Register With An Im Service
6230.ENv1a_9310059.book Page 62 Monday, March 22, 2004 11:54 AM • REGISTER WITH AN IM SERVICE Before you can begin to use IM, you must register with an IM service to obtain an IM user name and password. You can obtain an IM user name and password by registering over the Internet (using your computer) with the IM service provider you have selected to use. -
Page 75: Conversation View
6230.ENv1a_9310059.book Page 63 Monday, March 22, 2004 11:54 AM From the menus, select IM. Select the IM service you want to log into. At the prompt, enter your user name if it is not already displayed, and select OK. At the prompt, enter your password, and select OK. -
Page 76: Chat History
6230.ENv1a_9310059.book Page 64 Monday, March 22, 2004 11:54 AM IN THE STANDBY MODE When you receive an instant message that is not part of an active conversation, your phone beeps, and New instant message appears. To view the message, select Read. - Page 77 6230.ENv1a_9310059.book Page 65 Monday, March 22, 2004 11:54 AM MANUALLY From the IM online menu, select IM Contacts > Options > Add new contact > Manually enter ID. At the prompt, enter the contact’s user ID, and select OK. The user ID is set by the user’s IM service provider, and is 1–50 characters long.
-
Page 78: Group Chat Sessions
6230.ENv1a_9310059.book Page 66 Monday, March 22, 2004 11:54 AM Select Options > Block contact > OK. During a conversation with a contact, select Options > Block contact > OK. Unblock From the IM online menu, select IM Contacts and the contact from whom you want to unblock messages. - Page 79 6230.ENv1a_9310059.book Page 67 Monday, March 22, 2004 11:54 AM Some IM service providers do not support group services. If you are logged into a service that does not support groups, the menu items related to groups (such as Groups or Search groups) are dimmed in your phone display, and you cannot access them.
-
Page 80: Set Your Availability
6230.ENv1a_9310059.book Page 68 Monday, March 22, 2004 11:54 AM • IM SETTINGS You can customize your IM settings, depending upon the IM service you have selected. Select My settings from the IM online menu and the following options appear: IM availability—Determine if other users can tell whether you are available. -
Page 81: Call Log
6230.ENv1a_9310059.book Page 69 Monday, March 22, 2004 11:54 AM 9 Call log Call log stores information about the last 20 missed, 20 received, or 20 dialed calls. It also adds the total duration of all calls. When the number of calls exceed the maximum, the most recent call replaces the oldest. For Call log to work properly: •... -
Page 82: Missed Calls
6230.ENv1a_9310059.book Page 70 Monday, March 22, 2004 11:54 AM Save—Enter a name for the number and save it to contacts. Add to contact—Add the number to an existing entry in contacts, if the number is not associated with a name. -
Page 83: Call Times
6230.ENv1a_9310059.book Page 71 Monday, March 22, 2004 11:54 AM • CALL TIMES You can receive up to five calls from the same number and view the time and date each call occurred. Your clock must be set for this feature to work accurately. See “Set the clock”... -
Page 84: Contacts
6230.ENv1a_9310059.book Page 72 Monday, March 22, 2004 11:54 AM 10 Contacts Contacts can be saved in the phone memory and on the SIM card. The phone memory can save up to 1000 names with numbers and text notes for each name. You can also save an image with some of the names. -
Page 85: Types Of Information
6230.ENv1a_9310059.book Page 73 Monday, March 22, 2004 11:54 AM • TYPES OF INFORMATION Each contact entry can contain one or more of the following types of information: General phone number Mobile phone number Home phone number Work phone number Fax number... -
Page 86: Save An Entry
6230.ENv1a_9310059.book Page 74 Monday, March 22, 2004 11:54 AM Save an entry From the menus, select Contacts > Add contact. Enter a name, and select OK. Enter a number, and select OK. Select Done to return to the start screen. -
Page 87: Save Addresses And Notes
6230.ENv1a_9310059.book Page 75 Monday, March 22, 2004 11:54 AM To enter the user ID manually, select Enter ID manually, enter the user ID, and select OK. To search for a user ID in the server of your service provider, select Search. -
Page 88: Make A Call
6230.ENv1a_9310059.book Page 76 Monday, March 22, 2004 11:54 AM Press the Scroll up key or the Scroll down key to scroll up and down through names and numbers in the list. Press the Left selection key or the Right selection key to move the cursor left or right in the search window at the bottom of the display, if necessary. -
Page 89: Delete Names And Numbers
6230.ENv1a_9310059.book Page 77 Monday, March 22, 2004 11:54 AM • DELETE NAMES AND NUMBERS From the menus, select Contacts > Delete. To delete individual names and numbers, select One by one. Scroll to the entry you wish to delete, and select Delete > Yes to confirm the deletion. - Page 90 6230.ENv1a_9310059.book Page 78 Monday, March 22, 2004 11:54 AM Change your presence status From the menus, select Contacts > My presence > My current presence and one of the following: View current presence—Select Private pres. or Public pres. to view your current private or public status.
- Page 91 6230.ENv1a_9310059.book Page 79 Monday, March 22, 2004 11:54 AM ADD AND REMOVE VIEWERS FROM YOUR PRIVATE LIST Viewers on your private list can see all of your presence information, including availability, status message, and logo. From the menus, select Contacts > My presence > Viewers > Current viewers >...
-
Page 92: Subscribed Names
6230.ENv1a_9310059.book Page 80 Monday, March 22, 2004 11:54 AM • SUBSCRIBED NAMES You can create a list of contacts whose presence status information you want to be aware of. You can view the information if the contacts allow you to view it and the network does not prevent it. -
Page 93: View Subscribed Names
6230.ENv1a_9310059.book Page 81 Monday, March 22, 2004 11:54 AM View subscribed names From the menus, select Contacts > Subscribed names. The status information of the first contact on the dynamic contacts list is displayed. The information that the person wants to give to the others may... -
Page 94: Copy Entries
6230.ENv1a_9310059.book Page 82 Monday, March 22, 2004 11:54 AM • COPY ENTRIES From the menus, select Contacts > Copy > From phone to SIM card or From SIM card to phone and one of the following: One by one—Selects and copies entries one by one. Go to step 2. -
Page 95: 1-Touch Dialing
6230.ENv1a_9310059.book Page 83 Monday, March 22, 2004 11:54 AM Send a business card Highlight an entry from contacts that you wish to send, and select Details > Options > Send bus. card > Via infrared, Via text message, Via Bluetooth, or Via multimedia. -
Page 96: Voice Dialing
6230.ENv1a_9310059.book Page 84 Monday, March 22, 2004 11:54 AM Delete numbers From the menus, select Contacts > 1-touch dialing. Scroll to the 1-touch dialing location you wish to delete, and select Options > Delete > OK. • VOICE DIALING You can make a phone call by saying a voice tag that has been added to a phone number in contacts. -
Page 97: Info, Service, And My Numbers
6230.ENv1a_9310059.book Page 85 Monday, March 22, 2004 11:54 AM Voice dial a number WITHOUT THE HEADSET At the start screen, press and hold the Volume down key. The phone beeps, and Speak now appears in the display. Within 3 seconds, pronounce the tag into the microphone. -
Page 98: Caller Groups
6230.ENv1a_9310059.book Page 86 Monday, March 22, 2004 11:54 AM • CALLER GROUPS You can add contacts entries to any of five caller groups, and then assign a unique ringing tone or graphic to that group. This enables you to identify callers from the group by their unique ringing tone or graphic. -
Page 99: Operator Menu
6230.ENv1a_9310059.book Page 87 Monday, March 22, 2004 11:54 AM Operator menu 11 Operator menu Your service provider may have programmed an operator-specific menu into your phone. If this menu exists in your phone, its functions depend entirely on the service provider. Contact your service provider for more information. -
Page 100: Settings
6230.ENv1a_9310059.book Page 88 Monday, March 22, 2004 11:54 AM 12 Settings Use this menu to set or change your personal shortcuts, time and date settings, call settings, phone settings, display settings, tone settings, enhancement settings, security settings, and to restore factory settings. -
Page 101: Set A Timed Profile
6230.ENv1a_9310059.book Page 89 Monday, March 22, 2004 11:54 AM My presence—Set your availability status and presence message for the selected profile. This option appears only if the Synchronize with profiles presence setting is set to On. See “Presence service” on page 77 for more information. -
Page 102: Display Settings
Some pictures are presaved in the Gallery menu. You can also take pictures with the built-in camera; receive pictures using multimedia messaging; download them from browser pages, or transfer them with Nokia PC Suite from your PC; and save them in the gallery. Your phone supports JPEG, GIF, BMP, PNG, and WBMP formats but not necessarily all variations of these formats. -
Page 103: Set Screen Saver
6230.ENv1a_9310059.book Page 91 Monday, March 22, 2004 11:54 AM Select menu view You can select either the List interface or the Grid interface. From the menus, select Settings > Display settings > Menu view > List or Grid. Show or hide operator logo This is a network service. -
Page 104: Time And Date Settings
6230.ENv1a_9310059.book Page 92 Monday, March 22, 2004 11:54 AM • TIME AND DATE SETTINGS Set the clock From the menus, select Settings > Time and date settings > Clock > Set the time. Enter the time in hh:mm format, and select OK. -
Page 105: Automatic Update Of Date And Time
6230.ENv1a_9310059.book Page 93 Monday, March 22, 2004 11:54 AM Automatic update of date and time This is a network service. You can set the phone to update the date and time from the network when you turn the phone on. If the clock in your phone is 30 seconds or more off the network time, the phone will be updated automatically to reflect the network time. -
Page 106: Connectivity
GPRS connectivity from the PC. For more information, see the Nokia PC Suite online help. Nokia PC Suite and all related software can be downloaded from the U.S. Mobile Phone products section of www.nokia.com. - Page 107 6230.ENv1a_9310059.book Page 95 Monday, March 22, 2004 11:54 AM PAIRING You can set up a permanent association (pairing) between your phone and another device with Bluetooth connectivity. Some devices may require pairing before data transfer can take place. To pair with a device, you and the owner of the other device must agree on a passcode of 1–16 numeric characters.
- Page 108 6230.ENv1a_9310059.book Page 96 Monday, March 22, 2004 11:54 AM SET UP A BLUETOOTH CONNECTION From the menus, select Settings > Connectivity > Bluetooth. To activate the Bluetooth function, select Bluetooth > On. The active Bluetooth connection is indicated by Select Search for audio enhancements to search for compatible devices with Bluetooth connectivity.
- Page 109 6230.ENv1a_9310059.book Page 97 Monday, March 22, 2004 11:54 AM Infrared You can set up the phone to receive data through its IR port. To use an IR connection, transmission and reception must be to or from an IR compatible phone or device.
- Page 110 GPRS MODEM SETTINGS When you use your Nokia phone as a wireless modem, you can enable GPRS connectivity from your PC or laptop computer. Before you can use GPRS technology, you must save the GPRS settings for each of the applications used over GPRS.
-
Page 111: Data Communication Applications
6230.ENv1a_9310059.book Page 99 Monday, March 22, 2004 11:54 AM GPRS ICONS The following icons appear in the upper left corner of the screen to show you the status of your GPRS connection. Indicates an active GPRS connection, for example, when you are using the browser. -
Page 112: Call Forwarding
6230.ENv1a_9310059.book Page 100 Monday, March 22, 2004 11:54 AM FROM THE MENU From the menus, select Settings > Call settings > Automatic volume control. Select On to activate or Off to deactivate. The default setting is Off. DURING A CALL Note: Setting automatic volume control during an active call affects only the current call. -
Page 113: Anykey Answer
6230.ENv1a_9310059.book Page 101 Monday, March 22, 2004 11:54 AM Select the destination to which your calls will be forwarded. Enter the number to which your calls, data, or other information will be forwarded, and select OK; or select Find to retrieve a number from contacts. -
Page 114: Summary After Call
6230.ENv1a_9310059.book Page 102 Monday, March 22, 2004 11:54 AM ACTIVATE OR DEACTIVATE From the menus, select Settings > Call settings > Call waiting > Activate or Cancel. CHECK STATUS You can see whether call waiting is active, and for which type of calls. -
Page 115: Phone Settings
6230.ENv1a_9310059.book Page 103 Monday, March 22, 2004 11:54 AM • PHONE SETTINGS Language From the menus, select Settings > Phone settings > Phone language and the desired language for the phone display. Phone memory You can check the amount of memory available in the phone and in the MultiMediaCard. -
Page 116: Cell Info Display
6230.ENv1a_9310059.book Page 104 Monday, March 22, 2004 11:54 AM Cell info display Cell info display is a network service and may not work the same in all networks. Contact your service provider for availability. When this function is selected, your phone will indicate when it is used in a system cell based on microcellular network (MCN) technology. -
Page 117: Help Text
6230.ENv1a_9310059.book Page 105 Monday, March 22, 2004 11:54 AM Help text Your phone displays brief descriptions for most menu items. When you arrive at a feature or menu, pause for about 15 seconds to allow the help text to appear. Select More to view all of the description (if necessary), or select Back to return to the menu. -
Page 118: Headset Options
6230.ENv1a_9310059.book Page 106 Monday, March 22, 2004 11:54 AM From the menus, select Settings > Enhancement settings > Headset, Handsfree, Loopset, TTY/TDD, Music stand, or Charger. A list of options appears in the display. Select the option of your choice and follow the prompts. -
Page 119: Security Settings
6230.ENv1a_9310059.book Page 107 Monday, March 22, 2004 11:54 AM Music stand options Default profile—Choose the profile you wish to be automatically activated when your phone is connected to the music stand. Automatic answer—Calls are answered automatically after one ring when the phone is connected. -
Page 120: Gallery
6230.ENv1a_9310059.book Page 108 Monday, March 22, 2004 11:54 AM 13 Gallery You can save pictures, video clips, recordings, and ringing tones to folders in the gallery, and add new folders to the ones already there. You can download images and tones using MMS, mobile Internet sites, or Nokia PC Suite. -
Page 121: Folder Items
6230.ENv1a_9310059.book Page 109 Monday, March 22, 2004 11:54 AM Set password—Create a password (1–8 characters) for the MultiMediaCard, to protect it against unauthorized use. This option is available only for the MultiMediaCard folder. Change password—Change the MultiMediaCard password that you have created. - Page 122 6230.ENv1a_9310059.book Page 110 Monday, March 22, 2004 11:54 AM Scroll to a file, and select Options. Depending on the type of file, some of the following options appear: Play—Play a multimedia file. Pause—Pause a multimedia file that is playing. Zoom—Display a zoomed-in version of the image. Use the scroll keys to move around in the image.
-
Page 123: Edit An Image
6230.ENv1a_9310059.book Page 111 Monday, March 22, 2004 11:54 AM • EDIT AN IMAGE From the menus, select Gallery. Select a folder that contains images, and select Open. Scroll to an image, and select Options > Edit image > Options. Options include Insert text, Insert frame, Insert clip-art, and Crop image. - Page 124 6230.ENv1a_9310059.book Page 112 Monday, March 22, 2004 11:54 AM To change the size of the marking box, select Options > Rescale, and use the scroll keys to move the bottom and right borders of the box. To change the position of the marking box, select Options > Move, and use the scroll keys to move the box.
-
Page 125: Media
MMS, save it as wallpaper in the standby mode, save it in a compatible PC using Nokia PC Suite software, and upload it to a Web address with the content image uploader. When you attach a picture to an entry in your list of contacts, the picture is displayed when your contact calls you. -
Page 126: Record A Video Clip
6230.ENv1a_9310059.book Page 114 Monday, March 22, 2004 11:54 AM Select Back to take another photo. Select Delete to delete the photo. Select Options and one of the following: Zoom—Display a zoomed-in version of the photo. When a photo is zoomed, the photo is not stored permanently in the zoomed size. - Page 127 6230.ENv1a_9310059.book Page 115 Monday, March 22, 2004 11:54 AM Select Back to record another video. Select Play to view the video. Select Options and one of the following: Delete—Delete the video clip. Send—Send the video clip to another device as a multimedia message or using IR or Bluetooth connectivity.
-
Page 128: Media Player
See “Connection settings service” on page 16. To add and edit the settings with Nokia PC Suite, see the Nokia PC Suite online help. To key in the settings manually: From the menus, select Media >... -
Page 129: Music Player
Your phone includes a music player for listening to music or other tracks in MP3 or AAC format. You can transfer files from a PC to your phone through Nokia Audio Manager. To transfer music tracks from a compatible PC and manage the music tracks and track lists, see the instructions for the Nokia Audio Manager application in the Nokia PC Suite online help. -
Page 130: Radio
6230.ENv1a_9310059.book Page 118 Monday, March 22, 2004 11:54 AM Headset—Listen to the music player through a compatible headset connected to the phone. When using a compatible headset, you can skip to the next track by pressing the headset key quickly. To stop the playing, press and hold the headset key. -
Page 131: Save A Radio Channel
6230.ENv1a_9310059.book Page 119 Monday, March 22, 2004 11:54 AM Rename—Enter a new name for the saved channel, and select OK. Loudspeaker or Headset—Listen to the radio through the speakerphone or through the headset. Mono output or Stereo output—Listen to the radio in monaural mode (default) or in stereo. -
Page 132: Voice Recorder
6230.ENv1a_9310059.book Page 120 Monday, March 22, 2004 11:54 AM • VOICE RECORDER You can make a short (up to 3 minutes) recording and save it to the Recordings folder or another folder in the Gallery. You can also record your phone calls. -
Page 133: Media Equalizer
6230.ENv1a_9310059.book Page 121 Monday, March 22, 2004 11:54 AM • MEDIA EQUALIZER The equalizer enhances the sound quality when using the music player by amplifying or attenuating frequency bands. There are five preset equalizer settings (Normal, Pop, Rock, Jazz, and Classical) and two customizable settings. -
Page 134: Organizer
6230.ENv1a_9310059.book Page 122 Monday, March 22, 2004 11:54 AM 15 Organizer Your phone has many useful features for organizing your everyday life, including an alarm clock, a calendar, and a to-do list. • ALARM CLOCK The alarm clock is based on the internal clock of your phone. It sounds an alert or turns on the built-in FM radio at the time you specify. - Page 135 6230.ENv1a_9310059.book Page 123 Monday, March 22, 2004 11:54 AM REPEAT ALARM You can set the alarm clock to alert you on selected days of the week. From the menus, select Organizer > Alarm clock > Repeat alarm > Repetition days.
-
Page 136: Calendar
6230.ENv1a_9310059.book Page 124 Monday, March 22, 2004 11:54 AM • CALENDAR The calendar keeps track of reminders, calls you need to make, meetings, and birthdays. It can even sound an alarm for any of these events. Open the Calendar From the menus, select Organizer > Calendar. -
Page 137: Make A Calendar Note
6230.ENv1a_9310059.book Page 125 Monday, March 22, 2004 11:54 AM Date separator—Select the separator (period, slash, hyphen, or space) for the date that is displayed in the start screen. Time format—Select 12-hour or 24-hour. Week starts—Select the first day of the week (Saturday, Sunday, or Monday). This selection affects both the month view and the week view. - Page 138 6230.ENv1a_9310059.book Page 126 Monday, March 22, 2004 11:54 AM View calendar notes (the day view) After you have created some calendar notes, you can view them as follows: From the menus, select Organizer > Calendar. After a brief pause, the monthly view appears in the display with the current date highlighted.
-
Page 139: Send A Calendar Note To Another Device
6230.ENv1a_9310059.book Page 127 Monday, March 22, 2004 11:54 AM Send a calendar note to another device From the menus, select Organizer > Calendar. After a brief pause, the monthly view appears in the display. Days containing notes are in bold font. -
Page 140: To-Do List
6230.ENv1a_9310059.book Page 128 Monday, March 22, 2004 11:54 AM Receive calendar notes from another device When you receive a calendar note, your phone displays Calendar note received. You can then save the note in your calendar if desired, and set an alarm for any date and time. -
Page 141: Notes
6230.ENv1a_9310059.book Page 129 Monday, March 22, 2004 11:54 AM Options while viewing to-do notes Select Options while viewing the header or body of a particular note and the following options appear: Add—Add another note (available only in header view). Deadline—Set a deadline for the note (available only in body view). -
Page 142: Wallet
6230.ENv1a_9310059.book Page 130 Monday, March 22, 2004 11:54 AM Insert symbol—Insert a special character into the note. Available only when predictive text is on. Predictive text—Turn predictive text on or off. See “Predictive text input” on page 27 for more information. - Page 143 6230.ENv1a_9310059.book Page 131 Monday, March 22, 2004 11:54 AM Change the wallet code From the menus, select Organizer > Wallet. At the prompt, enter your wallet code, and select OK > Settings > Change code. Enter the original wallet code, and select OK.
-
Page 144: Create A Wallet Card
6230.ENv1a_9310059.book Page 132 Monday, March 22, 2004 11:54 AM Settings—Set and change the wallet settings. • Change code—Change the wallet code. • RFID—Set the radio frequency identification (RFID) code. The RFID technology helps to securely conduct commerce transactions with your phone. -
Page 145: Note Options
6230.ENv1a_9310059.book Page 133 Monday, March 22, 2004 11:54 AM Note options While viewing note headers, select one of the following: View—View the contents of the selected note. Options > Edit—Edit the contents of the selected note. Options > Add new—Compose and save a new note. -
Page 146: Synchronization
You can also synchronize your phone contacts, calendar, and notes to correspond with the data of a compatible PC by starting the synchronization from the PC. You must install Nokia PC Suite on your PC to use this feature. See “Nokia PC Suite” on page 14 for more information. -
Page 147: Save Settings
6230.ENv1a_9310059.book Page 135 Monday, March 22, 2004 11:54 AM Save settings You may receive the synchronization settings as a settings message or you may need to enter the synchronization settings manually. SAVE SETTINGS RECEIVED AS A SETTINGS MESSAGE When you receive the synchronization settings as a settings message, Synchronization settings received is displayed. - Page 148 6230.ENv1a_9310059.book Page 136 Monday, March 22, 2004 11:54 AM Synchronize with a remote Internet server If you have saved data in the remote Internet server, you can synchronize your phone by starting the synchronization from your phone. Once you have customized and selected the appropriate synchronization settings, you are ready to synchronize data.
- Page 149 You also need the Nokia PC Suite software installed on your PC. Start the synchronization from your PC using Nokia PC suite. For more information, see the Nokia PC Suite online help. After synchronizing, the data in the phone and in the PC are the same.
-
Page 150: Applications
6230.ENv1a_9310059.book Page 138 Monday, March 22, 2004 11:54 AM 16 Applications Your phone supports J2ME Java applications. You will find some Java applications and games pre-installed on your phone. Also, you can manage and download new applications and games from your service provider. -
Page 151: Game Downloads
6230.ENv1a_9310059.book Page 139 Monday, March 22, 2004 11:54 AM Web page—Get more information or additional data from a mobile Internet page. This feature is shown only if it is supported by the network and a mobile internet address has been provided by the game. -
Page 152: Applications
6230.ENv1a_9310059.book Page 140 Monday, March 22, 2004 11:54 AM • APPLICATIONS Start an application From the menus, select Applications > Collection > Select application. Scroll to an application or an application set, and press the Talk key or select Open. -
Page 153: Calculator
From the menus, select Services > Download links > App. downloads and one of the sites from the list. NOKIA PC SUITE Use the Nokia Application Installer from Nokia PC Suite to download the applications into your phone. See the Nokia PC Suite online help. View memory status for applications You can view the size of memory available for game and application installations. -
Page 154: Currency Conversion
6230.ENv1a_9310059.book Page 142 Monday, March 22, 2004 11:54 AM To perform an arithmetic calculation, press the * key to cycle through the add (+), subtract (-), multiply (*), and divide (/) characters, and pause briefly to select the displayed character. -
Page 155: Countdown Timer
6230.ENv1a_9310059.book Page 143 Monday, March 22, 2004 11:54 AM • COUNTDOWN TIMER The countdown timer is like an egg-timer or the timer on your microwave oven. You can enter a specified time (up to 99 hours and 59 minutes), and when the time runs out, your phone sounds an alarm. -
Page 156: Stopwatch
6230.ENv1a_9310059.book Page 144 Monday, March 22, 2004 11:54 AM • STOPWATCH Your phone has a stopwatch that can be used to track time at sporting events or other occasions. The stopwatch displays time in hours, minutes, seconds, and fractions of a second: hh:mm:ss.ss... -
Page 157: Measure Lap Time
6230.ENv1a_9310059.book Page 145 Monday, March 22, 2004 11:54 AM To stop timing, select Stop. The total time appears at the top of the display. To start timing again from the point where you stopped, select Options > Start. To reset the time to zero without saving it, select Options > Reset > Yes. -
Page 158: Services
You may receive the service settings as a connection settings message from your service provider. See “Connection settings service” on page 16. You can key in the settings manually or add and edit the settings with Nokia PC Suite. To key in the settings manually: From the menus, select Services >... -
Page 159: Connect To The Service
6230.ENv1a_9310059.book Page 147 Monday, March 22, 2004 11:54 AM Connect to the service Your service provider may have programmed the Right selection key to connect you directly to a Web site, for example, the provider’s customer site. You can change this setting by reprogramming the Right selection key. See “Personal shortcuts”... -
Page 160: Example Of A Mobile Internet Site
6230.ENv1a_9310059.book Page 148 Monday, March 22, 2004 11:54 AM • EXAMPLE OF A MOBILE INTERNET SITE The following illustration shows some common elements you may find on a mobile Internet site. These are examples only. 1) Header line. Shows the current mobile Internet site. -
Page 161: Bookmarks
6230.ENv1a_9310059.book Page 149 Monday, March 22, 2004 11:54 AM Character encoding—Select encoding methods for Web content and Web addresses. • Content encoding—Select the character set that the phone uses to display browser pages that do not include that information. •... -
Page 162: File Upload
6230.ENv1a_9310059.book Page 150 Monday, March 22, 2004 11:54 AM To set the phone to automatically fetch the content indicated in the service message: From the menus, select Services > Settings > Service inbox settings > Automatic conn. and one of the following: On—The phone automatically activates the browser from the standby mode when... -
Page 163: Disconnect From The Mobile Internet
6230.ENv1a_9310059.book Page 151 Monday, March 22, 2004 11:54 AM • DISCONNECT FROM THE MOBILE INTERNET To close your connection, press the End key twice. Select Options > Quit > Yes. • RECEIVE A CALL WHILE ONLINE If you are using the browser over GPRS, you can still receive a voice call. Your GPRS connection is put on hold and you can choose to answer the call. -
Page 164: Options While Online
6230.ENv1a_9310059.book Page 152 Monday, March 22, 2004 11:54 AM • OPTIONS WHILE ONLINE While you are connected to the mobile Internet, select Options to access the following options. Some service providers may have customized these options. Contact your service provider for more information if any of the following options are not available. -
Page 165: Digital Signature
6230.ENv1a_9310059.book Page 153 Monday, March 22, 2004 11:54 AM Module PIN request—Select On to set the phone to ask for the module PIN when using services provided by the security module. Change module PIN—Change the module PIN, if allowed by the security module. - Page 166 6230.ENv1a_9310059.book Page 154 Monday, March 22, 2004 11:54 AM Certificates There are three kinds of certificates—server, authority, and user. Certificates have a restricted lifetime. If Expired certificate or Certificate not valid yet is shown even though the certificate should be valid, check that the current date and time settings in your phone are correct.
-
Page 167: Positioning
6230.ENv1a_9310059.book Page 155 Monday, March 22, 2004 11:54 AM • POSITIONING The positioning feature allows the network to detect the location of your phone. When the network receives a request for the location, a message is displayed on your phone. You can then accept or reject the request. -
Page 168: Sim Services
6230.ENv1a_9310059.book Page 156 Monday, March 22, 2004 11:54 AM 18 SIM services In addition to the functions available on the phone, your SIM card may provide additional services that you can access through the SIM services menu. This menu is shown only if it is supported by your SIM card. -
Page 169: Hardware And Enhancements
6230.ENv1a_9310059.book Page 157 Monday, March 22, 2004 11:54 AM 19 Hardware and enhancements • HARDWARE Connection ports and other tools • Charger connector (1) • Pop-Port connector for headsets and data cables (2) • IR port and loudspeaker (3) •... -
Page 170: Recharge The Battery
6230.ENv1a_9310059.book Page 158 Monday, March 22, 2004 11:54 AM Recharge the battery Your phone is powered by a rechargeable battery. To charge the battery: Plug the charger transformer in to a standard ac outlet. Insert the charger output plug into the round connector at the bottom end of the phone. - Page 171 6230.ENv1a_9310059.book Page 159 Monday, March 22, 2004 11:54 AM Beginning at the top of the phone, gently pull the front cover away from the phone and detach the front cover. Remove the key mat from the front cover by pressing it gently outwards.
-
Page 172: Enhancements
6230.ENv1a_9310059.book Page 160 Monday, March 22, 2004 11:54 AM • ENHANCEMENTS Your phone is compatible with the following Nokia mobile enhancements: Power • 850-mAh Li-Ion battery (BL-5C) • Standard travel charger (ACP-7) • Rapid travel charger (ACP-8) • Travel charger (ACP-12) •... -
Page 173: Reference Information
The battery can be charged and discharged hundreds of times but it will eventually wear out. When the talk and standby times are noticeably shorter than normal, buy a new battery. Use only Nokia approved batteries, and recharge your battery only with Nokia approved chargers designated for this device. -
Page 174: Enhancements
LCH-12 chargers. Warning: Use only batteries, chargers, and enhancements approved by Nokia for use with this particular model. The use of any other types may invalidate any approval or warranty, and may be dangerous. For availability of approved enhancements, please check with your dealer. When you disconnect the power cord of any enhancement, grasp and pull the plug, not the cord. -
Page 175: Additional Safety Information
Use the device only in its normal operating positions. To maintain compliance with radio frequency exposure guidelines only use accessories approved by Nokia for use with this device. When the device is on and being worn on the body, always use an approved carrying case. - Page 176 6230.ENv1a_9310059.book Page 164 Monday, March 22, 2004 11:54 AM off your phone in health care facilities when any regulations posted in these areas instruct you to do so. Hospitals or health care facilities may be using equipment that could be sensitive to external RF energy.
-
Page 177: Potentially Explosive Environments
6230.ENv1a_9310059.book Page 165 Monday, March 22, 2004 11:54 AM Potentially explosive environments Switch off your device when in any area with a potentially explosive atmosphere and obey all signs and instructions. Potentially explosive atmospheres include areas where you would normally be advised to turn off your vehicle engine. Sparks in such areas could cause an explosion or fire resulting in bodily injury or even death. - Page 178 6230.ENv1a_9310059.book Page 166 Monday, March 22, 2004 11:54 AM CERTIFICATION INFORMATION (SAR) THIS MODEL PHONE MEETS THE GOVERNMENT'S REQUIREMENTS FOR EXPOSURE TO RADIO WAVES. Your wireless phone is a radio transmitter and receiver. It is designed and manufactured not to exceed the emission limits for exposure to radio frequency (RF) energy set by the Federal Communications Commission of the U.S.
- Page 179 6230.ENv1a_9310059.book Page 167 Monday, March 22, 2004 11:54 AM Reference Information While there may be differences between the SAR levels of various phones and at various positions, they all meet the government requirement. The FCC has granted an Equipment Authorization for this model phone with all reported SAR levels evaluated as in compliance with the FCC RF exposure guidelines.
-
Page 180: Technical Information
6230.ENv1a_9310059.book Page 168 Monday, March 22, 2004 11:54 AM • TECHNICAL INFORMATION Feature Specification Dimensions Width 44 mm Height 103 mm Depth 20 mm Weight 97 g with BL-5C Li-Ion Battery Wireless networks GSM 850, 1800, and 1900 networks (RH-28) -
Page 181: Nokia One-Year Limited Warranty
No charge will be made to the Consumer for any such parts. Nokia will also pay for the labor charges incurred by Nokia in repairing or replacing the defective parts. The limited warranty does not cover defects in appearance, cosmetic, decorative or structural items, including framing, and any non-operative parts. - Page 182 Trojan Horses, cancelbots or damage caused by the connection to other products not recommended for interconnection by Nokia. c) Nokia was not advised in writing by the Consumer of the alleged defect or malfunction of the Product within fourteen (14) days after the expiration of the applicable limited warranty period.
- Page 183 FOREGOING LIMITED WRITTEN WARRANTY. OTHERWISE, THE FOREGOING LIMITED WARRANTY IS THE CONSUMER’S SOLE AND EXCLUSIVE REMEDY AND IS IN LIEU OF ALL OTHER WARRANTIES, EXPRESS OR IMPLIED. NOKIA SHALL NOT BE LIABLE FOR SPECIAL, INCIDENTAL, PUNITIVE OR CONSEQUENTIAL DAMAGES, INCLUDING BUT NOT LIMITED TO LOSS OF ANTICIPATED BENEFITS...
- Page 184 13 This is the entire warranty between Nokia and the Consumer, and supersedes all prior and contemporaneous agreements or understandings, oral or written, relating to the Product, and no representation, promise or condition not contained herein shall modify these terms.
-
Page 185: Appendix A Message From The Ctia
6230.ENv1a_9310059.book Page 173 Monday, March 22, 2004 11:54 AM Appendix A Message from the CTIA (Cellular Telecommunications & Internet Association) to all users of mobile phones © 2001 Cellular Telecommunications & Internet Association. All Rights Reserved.1250 Connecticut Avenue, NW Suite 800, Washington, DC... - Page 186 6230.ENv1a_9310059.book Page 174 Monday, March 22, 2004 11:54 AM Safety is the most important call you will ever make. A Guide to Safe and Responsible Wireless Phone Use Tens of millions of people in the U.S. today take advantage of the unique combination of convenience, safety and value delivered by the wireless telephone.
- Page 187 6230.ENv1a_9310059.book Page 175 Monday, March 22, 2004 11:54 AM can be hazardous, but so is heavy traffic. As a driver, your first responsibility is to pay attention to the road. 5 Do not take notes or look up phone numbers while driving. If you are reading an address book or business card, or writing a "to do"...
- Page 188 6230.ENv1a_9310059.book Page 176 Monday, March 22, 2004 11:54 AM...
-
Page 189: Appendix B Message From The Fda
6230.ENv1a_9310059.book Page 177 Monday, March 22, 2004 11:54 AM Appendix B Message from the FDA Appendix B Message from the FDA (U.S. Food and Drug Administration) to all users of mobile phones ©July 18, 2001For updates: http://www.fda.gov/cdrh/phones... - Page 190 6230.ENv1a_9310059.book Page 178 Monday, March 22, 2004 11:54 AM Consumer Update on Wireless Phones 1. Do wireless phones pose a health hazard? The available scientific evidence does not show that any health problems are associated with using wireless phones. There is no proof, however, that wireless phones are absolutely safe.
- Page 191 6230.ENv1a_9310059.book Page 179 Monday, March 22, 2004 11:54 AM Appendix B Message from the FDA and other health agencies for safety questions about wireless phones. FCC also regulates the base stations that the wireless phone networks rely upon. While these...
- Page 192 6230.ENv1a_9310059.book Page 180 Monday, March 22, 2004 11:54 AM needed to provide answers about some health effects, such as cancer. This is because the interval between the time of exposure to a cancer-causing agent and the time tumors develop - if they do - may be many, many years. The interpretation of epidemiological studies is hampered by difficulties in measuring actual RF exposure during day-to-day use of wireless phones.
- Page 193 6230.ENv1a_9310059.book Page 181 Monday, March 22, 2004 11:54 AM Appendix B Message from the FDA phones and other wireless handsets with the participation and leadership of FDA scientists and engineers. The standard, Recommended Practice for Determining the Spatial-Peak Specific Absorption Rate (SAR) in the Human Body Due to Wireless...
- Page 194 6230.ENv1a_9310059.book Page 182 Monday, March 22, 2004 11:54 AM (AAMI). The final draft, a joint effort by FDA, medical device manufacturers, and many other groups, was completed in late 2000. This standard will allow manufacturers to ensure that cardiac pacemakers and defibrillators are safe from wireless phone EMI.
-
Page 195: Index
6230.ENv1a_9310059.book Page 183 Monday, March 22, 2004 11:54 AM Index Numerics 1-touch dialing 83–84, 101 access codes 33–34 access the Internet accessibility activate call forwarding adjust earpiece volume equalizer ringing volume alarm clock answer a call antenna anykey answer applications menu 138–145... - Page 196 6230.ENv1a_9310059.book Page 184 Monday, March 22, 2004 11:54 AM caller groups copy delete find entry info numbers memory menu options own numbers presence 77–79 save search select view service numbers subscribed names 80–81 countdown timer currency conversion customer care customize profile...
- Page 197 6230.ENv1a_9310059.book Page 185 Monday, March 22, 2004 11:54 AM settings images add to contacts edit in gallery info message service numbers infrared connectivity install SIM card 18–20 instant messaging, see IM international calls Internet options security service 146–154 keyguard language...
- Page 198 6230.ENv1a_9310059.book Page 186 Monday, March 22, 2004 11:54 AM PC Suite personal shortcuts phone memory security 29–32 picture messages 43–45 PIN code 29, 34 player media music predictive text 27–28 presence 77–79, 105 profiles 88–89 PUK codes punctuation quick guide...
- Page 199 6230.ENv1a_9310059.book Page 187 Monday, March 22, 2004 11:54 AM time and date tone shortcuts menu personal SIM card, install 18–20 special characters speed dialing, see 1-touch dialing start screen start-up tone stopwatch 144–145 subscribed names 80–81 summary after call synchronization 134–137...
- Page 200 6230.ENv1a_9310059.book Page 188 Monday, March 22, 2004 11:54 AM Para obtener un manual del usuario en español favor de llamar o enviar un fax al teléfono 1-888-NOKIA-2U, fax 813-249-9619. Nokia 6230 User Guide 9310059 03/04 Copyright © 2004 Nokia...