
Related Manuals for Schweißkraft CRAFT-TIG 201 DC P PULSE

Summary of Contents for Schweißkraft CRAFT-TIG 201 DC P PULSE
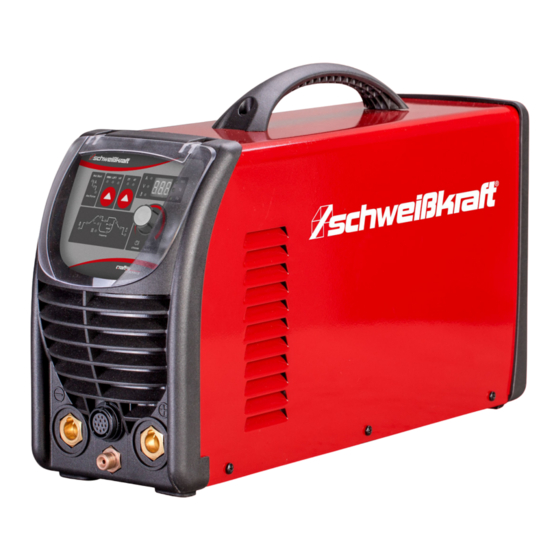
- Page 1 Operating Instructions TIG-Inverter CRAFT-TIG 201 DC P PULSE CRAFT-TIG 253 DC PULSE CRAFT-TIG 201 DC P PULSE...
- Page 2 Imprint WIG-Inverter Item number Product identification CRAFT-TIG 201 DC P PULSE 1074201 CRAFT-TIG 253 DC PULSE 1074202 Stürmer Maschinen GmbH Manufacturer Dr.-Robert-Pfleger-Str. 26 D-96103 Hallstadt Fax: 0951 96555-55 E-Mail: info@schweißkraft.de Internet: www.schweißkraft.de Original instructions Indications regarding the operating instruc- tions Edition: 13.03.2020...
-
Page 3: Table Of Contents
17.1 Spare parts order................51 17.2 Spare parts drawings ................52 18 Wiring diagram..............54 19 Electrical circuit diagrams..........56 19.1 Electrical circuit diagram CRAFT-TIG 201 DC P PULSE ....56 19.2 Electrical circuit diagram CRAFT-TIG 253 DC PULSE ......57 20 EC Declaration of Conformity..........58 21 Notes..................59... -
Page 4: Introduction
Introduction Introduction With the purchase of the welding machine made by Schweißkraft you have made a good choice. Read the operating instructions carefully before commissioning. This informs about the proper commissioning, the intended use as well as the safe and efficient operation and maintenance of the device. The operating instructions are part of the device. -
Page 5: Limitation Of Liability
Safety 1.3 Limitation of liability All information and instructions in the operating instructions have been compi- led taking into account the applicable standards and regulations, the state of the art as well as our many years of knowledge and experience. In the follo- wing cases, the manufacturer assumes no liability for damages: - Failure to observe the operating instructions, - Improper use,... -
Page 6: Qualification Of The Staff
Safety Tips and recommendations Tips and recommendations This symbol indicates useful tips and recommendations as well as information for efficient and trouble-free operation. To reduce the risk of personal injury and property damage and to avoid dan- gerous situations, the safety instructions in this manual must be observed. 2.2 Qualification of the staff The various tasks described in this manual place different demands on the qualifications of the people entrusted with these tasks. -
Page 7: General Safety Instructions
Safety Safety boots The safety boots protect the feet against crushes, falling parts and slipping over on slippery under-ground. Protective clothes The protective clothes are tight clothes of little tensile strength. 2.4 General safety instructions WARNING! Danger in case of misuse! The device may only be operated in a technically perfect condition. -
Page 8: Intended Use
Intended Use Intended Use The device is exclusively designed for arc welding according to MMA and TIG. Intended use also includes compliance with all information in these in- structions. No other use is permitted. Any use beyond the intended use or any other use is considered misuse. -
Page 9: Principle Of Operation
Principle of operation Principle of operation 4.1 Principle of tungsten inert gas welding Welding wire coil Welding wire rollers Shield cup Current contact nozzle Wire electrode Inert gas Drop transfer Electric arc Workpiece Melting bath Fig. 3: Metal inert gas welding In TIG welding (Wolfram Inert* Gas Welding ) an arc is drawn between a non- meltable tungsten electrode. -
Page 10: Principle Of Manual Arc Welding (Mma)
Technical Data 4.2 Principle of manual arc welding (MMA) Rod electrode Slag and gas Coating Melted Core rod zone Base material Electrode welding is an uncomplicated welding method with which almost all metals can be welded. This method can also be used outdoors and with spe- cial equipment even under water. -
Page 11: Type Plate
Power consumption electrode [kVA] Pulse frequency [Hz] 0.5~200 0.5~200 Ignition high frequency Torch cooling Performance factor [cos phi] 0,99 0,67 Sheet thicknesses [mm] 0.5+10.0 0.5+12.0 5.2 Type plate Fig. 4: Type plate CRAFT-TIG 201 DC P PULSE CRAFT-TIG-Series | Version 1.06... -
Page 12: Transport, Packaging, Storage
Transport, packaging, storage Transport, packaging, storage 6.1 Transport After delivery, check the device for visible transport damage. If you discover Check the delivery any damage to the device, report it immediately to the transport company or dealer. 6.2 Packaging All used packaging materials and packaging aids are recyclable and should be taken to a materials recycling depot to be disposed of. -
Page 13: Scope Of Delivery
Therefore, make sure that the machine is in a safe position before using it. Scope of delivery - Gas hose 4 m incl. quick connector CRAFT-TIG 201 DC P PULSE - Burner TIG 26 4 m - Pressure reducer - 3 m ground cable 16 mm² with ground terminal - 3 m welding cable 16 mm²... -
Page 14: Function Principle
8.1 Function principle The function principle of the CRAFT-TIG 201 DC P PULSE is shown as the fol- lowing figur (Fig. 5). Single phases work frequency AC110V/220V (50 Hz) AC is rectified into DC (155/312 V), then is converted to medium frequency AC by... -
Page 15: Volt-Ampere Characteristic
TIG-Inverter characteristics Fig. 6: Function principle of CRAFT-TIG 253 DC PULSE 8.2 Volt-Ampere Characteristic The TIG-Inverters CRAFT-TIG 201 DC P PULSE, CRAFT-TIG 253 DC PULSE have an optimized volt-ampere characteristic (see diagram). In TIG mode, the ratio between nominal voltage U... -
Page 16: Assembly Of Equipment (Tig/Wig)
- Welding torch control cable consisting of two wires. - Pedal control consisting of 3 wires. - Flight socket (has 14 cables for the CRAFT-TIG 201 DC P PULSE and 12 cables for the CRAFT-TIG 253 DC PULSE). - Wear parts for the TIG welding torch, e.g. tungsten electrode, tip, gas nozzle, electrode shield (short/long). - Page 17 Fig. 9: Connection of the equipment CRAFT-TIG 253 DC PULSE Pressure controller Gas cylinder Gas input Control cable of torch switch Control cable Gas connector TIG gun Workpiece Fig. 10: Connection of the equipment CRAFT-TIG 201 DC P PULSE CRAFT-TIG-Series | Version 1.06...
-
Page 18: Polarity Connection (Mma)
CRAFT-TIG 253 DC PULSE: CRAFT-TIG 201 DC P PULSE Fig. 12: Direct current connection options CRAFT-TIG 253 DC PULSE (left), CRAFT-TIG 201 DC P PULSE (right) Two sockets are available for connecting the output cables to this welding CRAFT-TIG 201 DC P PULSE and CRAFT- machine. -
Page 19: Description Of The Operating And Connection Elements
Step 7: The power supply ground must be well grounded. Description of the operating and connection elements CRAFT-TIG 201 DC P PULSE: 1 „+“ Connection: Positive output of the welding machine with reference to polarity. 2 „-“ Connection: Negative output of the welding machine with reference to polarity. - Page 20 CRAFT-TIG 201 DC P PULSE: Function select button 2T /4T select button Multifunction display welding current and parameter other parameters setting Warning light Parameter selection and input button TIG parameter setting Fig. 16: Control panel CRAFT-TIG 201 DC P PULSE CRAFT-TIG-Series | Version 1.06...
- Page 21 Description of the operating and connection elements CRAFT-TIG 253 DC PULSE: Fig. 17: Control panel CRAFT-TIG 253 DC PULSE Overview: Parameter Parameter Digital display „Time value" Parameter select/adjust Knob Digital display „Percentage“ Arc force setting indicator Digital display „Frequency Welding current setting value“...
- Page 22 Description of the operating and connection elements Lights up when overvoltage, overcurrent, input phase loss or electrical over- Alarm indicator (17) heating (due to exceeding the duty cycle) is detected and protection is acti- vated. When the protection is activated, the welding power is deactivated un- til the safety system detects that the overload has been sufficiently reduced and the indicator light goes out.
- Page 23 ‘live’ when it is in contact with the work, contamination is mini- mised. TIG mode selection key of the models: - CRAFT-TIG 201 DC P PULSE - CRAFT-TIG 253 DC PULSE Select and set parameters for the models: Press the encoder to select the parameter, if the parameter indicator lights up, the selected parameter can be changed via the setting dial.
- Page 24 Description of the operating and connection elements Adjustable parameters after selection of 2T or 4T mode CRAFT-TIG 253 DC PULSE DC PULSE 5 to 250 Base current Unit CRAFT-TIG 201 DC P DC P PULSE 5 to 130 (110 V) PULSE 5 to 220 (220 V) CRAFT-TIG 253 DC PULSE...
- Page 25 Fig. 20: Display of overheating protection Welding current and other parameter display by models CRAFT-TIG 201 DC P PULSE and CRAFT-TIG 253 DC PULSE: Before start of welding Indicate the open-circuit voltage when you push the enconder for 3s and the display shows the pre-set value of Tpr ,Is ,Tup,Iw,Dcy,Iw,Fp,Ib,Tdown,Ic,Tpo .
- Page 26 Description of the operating and connection elements Welding torch switch Welding torch switch Adjust current roller wheel: Adjust current button: - when it’s roll upwards, the cur- - when it’s pushed up, the cur- rent decrease, rent increase, - when it’s roll downwards, the - when it’s pushed down, the current increase.
-
Page 27: Welding
Welding NOTE! - During operation, the front panel control on the power sup- ply is still functional but the remote control panel or foot pedal has higher priority level. - When the remote control panel or foot pedal is idles for 10 seconds, it will automatically go into “sleep”... - Page 28 Welding DANGER OF EXPLOSION! - Do not weld in rooms where there is a risk of fire or explo- sion. Special regulations apply here! - No welding work may be carried out on containers in which gases, fuel, oils, dyes or the like have been stored, even if they have been emptied for a long time.
- Page 29 Welding WARNING! Danger due to burns! Moving parts or thermal parts can damage your body or other people. - Workpieces become very hot during welding, wear suitable protective clothing. - Make sure that the wire, the electrode, the electrode coil, the welding head, the nozzle and the semi-automatic wel- ding gun are heated by the current and become very hot! ATTENTION! MAGNETIC FIELD!
- Page 30 Welding DANGER! ELECTRICAL VOLTAGE! - Never touch any live parts! - There is a danger of an electric shock! - Always wear dry and closed gloves and flame-retardant clothing with insulating properties. - Make sure that the insulation of the workplace is such that no person can be physically damaged by contact with the workplace.
-
Page 31: Welding Methods
Welding WARNING! Danger due to incorrect storage and incorrect use of inert gas cylinders! - Only use inert gases in cylinders designed for this pur- pose. - Ensure that all gas lines and hoses are intact. - Ensure that inert gas cylinders are properly secured. Al- ways keep the cylinders in an upright position, e.g. -
Page 32: Pulse Function
Welding ton is pressed again, the welding current drops to a pre-set value. Releasing the button results in the extinction of the arc. 10.5 Pulse function In a pulse welding process, the current intensity alternates between a stron- ger pulse current and a lower background current according to a preset fre- quency. -
Page 33: Tig Welding
Welding 10.7 TIG welding Fig. 23: Set up installation for TIG Welding CRAFT-TIG 253 DC PULSE Step 1: Switch the ON/OFF Switch (located on the rear panel) to OFF. Assembly workflow (Fig. 23) model CRAFT- TIG 253 DC PULSE: Step 2: Connect the ground cable (Pos.1) to the "+" pole, fix it by turning it clockwise. -
Page 34: Welding With Rod Electrode (Mma)
Welding Step 11: Open the gas cylinder valve and adjust the regulator. The flow rate should be between 5 -10 l/min depending on the application. Step 12: Re-check the flow pressure of the regulator when the burner valve is open, as the static gas flow setting may drop after the gas flow. Step 13: Each machine is equipped with a power cord. -
Page 35: Tig Welding
Welding Overload indicator: If the welding current is too high, the display shows an overload. This can oc- cur if a large diameter electrode is used and the unit is set to maximum. Allow the unit to cool down. After the unit has cooled down, the previous display ap- pears again. - Page 36 Welding Fig. 24: 4T operation Press and hold the gun switch, Electromagnetic gas valve is turned on. The shielding gas starts to flow; 0 to t1: Pre flow time, adjustment range of pre flow time: 0 to 2s; Ignite arc, with the set range of the starting current: - 5 to 100% of the main current Release the gun switch.
- Page 37 Welding Impulse TIG Short time welding (2T) for the models CRAFT-TIG 201 DC P TIG welding (2T operation) PULSE and CRAFT-TIG 253 DC PULSE: Fig. 25: 2T operation Press the gun switch and hold it. Electromagnetic gas valve is turned on.
-
Page 38: Mma Welding
MMA welding Short-circuit protection function on the models CRAFT-TIG 201 DC P PULSE and CRAFT-TIG 253 DC PULSE: 1. TIG/LIFT: If the tungsten electrode touches the workpiece during wel- ding, the current will drop to 5A, trying to avoid tungsten inclu- sions. -
Page 39: Electrical Connection
The fusing of the supply lines to the mains sockets must com- ply with the regulations. The mains socket must be properly earthed. The CRAFT-TIG 201 DC P PULSE welding units connect with 230V supply voltage. The CRAFT-TIG 253 DC PULSE welding units connect with 400V supply voltage. -
Page 40: Notes To The Welding Technology
Welding instructions Welding with rod electrode: Workpiece thickness [mm] Electrode Ø [mm] Welding current [A] <1 20 – 40 40 – 50 90 – 110 4,0 – 5,0 3,2 – 4,0 90 – 130 6,0 – 12,0 4,0 – 5,0 160 –... - Page 41 Welding instructions 13.1.3 TIG Parameters matching Parameter of the models CRAFT-TIG 201 DC P PULSE and CRAFT-TIG 253 DC PULSE: The corresponding relationship between gas nozzle diameter and electrode diameter Gas nozzle diameter [mm] Electrode diameter [mm] 1.6 or 2.4 11.1...
-
Page 42: Care And Maintenance
Care and maintenance TIG of stainless steel (single run welding) Workpiece Joint form Tungsten Welding wire Argon gas flow Welding current Welding speed thickness electrode diame- diameter rate [DCEP] [cm /min] [mm] ter[mm] [mm] [L/min] Corner joint 95 ~ 135 Butt joint 100 ~ 135 Corner joint... - Page 43 Care and maintenance WARNING! - Before carrying out any maintenance work, the machine must be switched off and waited at least 5 minutes until the capacity potential has been reduced to 36 V! - After maintenance, repair and cleaning work, check whether all fairings and protective devices have been pro- perly mounted on the TIG Inverter again and whether there are no tools left inside or in the working area of the TIG In-...
-
Page 44: Troubleshooting
Troubleshooting Interval Maintenance task Monthly Cleanliness condition Use the dry compressed air to clean the in- side of the ARC welder. Check the stud in the ARC welding Mainly to remove the dust on the cooler, unit for tightness. the main voltage transformer, the inductive resistor, the IGBT module, the fast char- ging diode and the PCB. - Page 45 Communica- Connection problems between the tion wire feeder and the power source Connection errors Troubleshooting table of the models CRAFT-TIG 201 DC P PULSE and CRAFT-TIG 253 DC PULSE: Malfunction Cause Solution If the power supply is A foreign object in the fan.
- Page 46 Troubleshooting Troubleshooting table of the models CRAFT-TIG 201 DC P PULSE and CRAFT-TIG 253 DC PULSE: Malfunction Cause Solution The arc cannot be igni- The welding cable is not connected Connect the welding cable to the out- ted (TIG): to the two outputs of the welding de- put of the welding machine.
- Page 47 Troubleshooting Troubleshooting table of the model CRAFT-TIG 253 DC PULSE for TIG welding: Malfunction Cause Solution The tungsten Wrong gas or no gas. Use pure argon. Check that the gas cylinder is filled electrode burns with gas, connected, switched on and that the bur- away quickly.
- Page 48 Troubleshooting Troubleshooting table of the model CRAFT-TIG 253 DC PULSE for TIG welding: Malfunction Cause Solution Unstable arc Welding torch connected with Connect the welding torch to the DC- output termi- during welding. DC+. nal. Dirty base material. Remove materials such as paint, lubricant, oil, and dirt, including mill scale, from the base material.
- Page 49 Troubleshooting Troubleshooting table of the model CRAFT-TIG 253 DC PULSE for TIG welding: Malfunction Cause Solution The arc is Incorrect device setting. Check that the device setting is correct. difficult to ignite. Check that the gas is connected and the gas cylin- der valve is open.
-
Page 50: Disposal, Recycling Of Old Equipment
Disposal, Recycling of old equipment Troubleshooting table of the model CRAFT-TIG 253 DC PULSE: Malfunction Cause Solution Insufficient penetration Insufficient heat supply. Increase the current or select a larger electrode. depth Poor welding technology. Use the correct welding technique or contact sup- port from a specialist. -
Page 51: Disposal Via Municipal Collection Points
Information on the device type, article number and year of manufacture can be found on the type plate, which is attached to the device. The front cover for the CRAFT-TIG 201 DC P PULSE must be ordered. The Example front cover is identified in the spare parts drawing 1 with the number 12. -
Page 52: Spare Parts Drawings
The following drawings should help to identify necessary spare parts in case of service. To order, send a copy of the parts drawing with the marked components to your authorized dealer. 17.2.1 Spare parts drawing CRAFT-TIG 201 DC P PULSE Fig. 27: Spare parts drawing CRAFT-TIG 201 DC P PULSE CRAFT-TIG-Series | Version 1.06... - Page 53 Spare parts 17.2.2 Spare parts drawing CRAFT-TIG 253 DC PULSE Fig. 28: Spare parts drawing CRAFT-TIG 253 DC PULSE CRAFT-TIG-Series | Version 1.06...
-
Page 54: Wiring Diagram
Wiring diagram 18 Wiring diagram Verstärker der Fernbedienung Auslöserschalter Auslö- ser- schalter Kurzschluss Fig. 29: PIN assignment of the remote control connector of the EASY-TIG 181 DC CRAFT-TIG 253 DC PULSE Socket pin Function Potentiometer Up / Down not connected not connected not connected not connected... - Page 55 Wiring diagram Fig. 30: PIN assignment of the remote control connector of the CRAFT-TIG 253 DC PULSE Socket pin Function Be shorted with 2 Be shorted with 1 20k ohm (maximum) connection to 20k ohm remote control potentiometer Wiper arm connection to 20k ohm remote control potentiometer Zero ohm (minimum) connection to 20k ohm remote control potentiometer not connected not connected...
-
Page 56: Electrical Circuit Diagrams
Electrical circuit diagrams 19 Electrical circuit diagrams 19.1 Electrical circuit diagram CRAFT-TIG 201 DC P PULSE Fig. 31: Electrical circuit diagram CRAFT-TIG 201 DC P PULSE CRAFT-TIG-Series | Version 1.06... -
Page 57: Electrical Circuit Diagram Craft-Tig 253 Dc Pulse
Electrical circuit diagrams 19.2 Electrical circuit diagram CRAFT-TIG 253 DC PULSE Fig. 32: Electrical circuit diagram CRAFT-TIG 253 DC PULSE CRAFT-TIG-Series | Version 1.06... -
Page 58: Ec Declaration Of Conformity
Manufacturer/distributing company: Dr.-Robert-Pfleger-Straße 26 D-96103 Hallstadt ® Schweißkraft Welding Technology Product group: Designation of the machine *: Item number *: CRAFT-TIG 201 DC P PULSE 1074201 CRAFT-TIG 253 DC PULSE 1074253 TIG Inverter Type of machine: Serial number*: ____________________ 20____... -
Page 59: Notes
Notes 21 Notes CRAFT-TIG-Series | Version 1.06... - Page 60 www.schweißkraft.de...
Need help?
Do you have a question about the CRAFT-TIG 201 DC P PULSE and is the answer not in the manual?
Questions and answers