Table of Contents
Advertisement
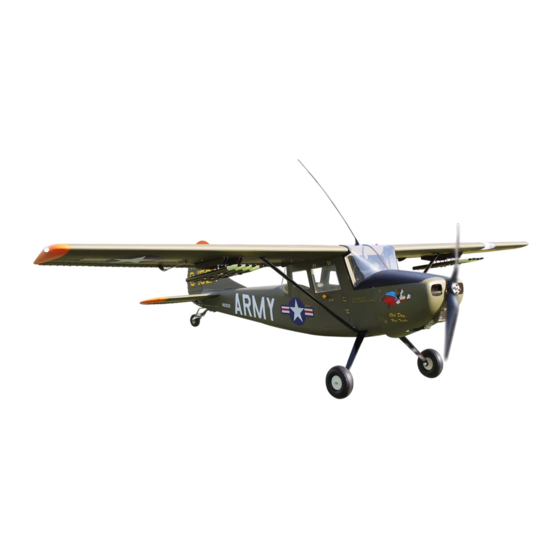
Code : SEA 378
ASSEMBLY MANUAL
Speciications:
Wingspan--------------- 98 in------------------- 250 cm.
Wing area--------------- 1215.2 sq.in---------- 78.4 sq.dm.
Weight------------------- 15.4 lbs--------------- 7.0 kg.
Length------------------- 65.6 in---------------- 166.7 cm.
Engine------------------- 30-40cc.
Motor-------------------- 160/ 2700watt/ ESC 70A-100A/
Lipo 9s-10s/ Electric propeller 18x8-20x10.
Radio--------------------- 6 channels with 7 servos.
1
Advertisement
Table of Contents

Related Manuals for Seagull Models Cessna L-19A Bird Dog


Summary of Contents for Seagull Models Cessna L-19A Bird Dog
- Page 1 Code : SEA 378 ASSEMBLY MANUAL Speciications: Wingspan--------------- 98 in------------------- 250 cm. Wing area--------------- 1215.2 sq.in---------- 78.4 sq.dm. Weight------------------- 15.4 lbs--------------- 7.0 kg. Length------------------- 65.6 in---------------- 166.7 cm. Engine------------------- 30-40cc. Motor-------------------- 160/ 2700watt/ ESC 70A-100A/ Lipo 9s-10s/ Electric propeller 18x8-20x10. Radio--------------------- 6 channels with 7 servos.
-
Page 2: Kit Contents
“Old Dog, New Tricks” 35-40cc - 98” wingspan INTRODUCTION hank you for choosing the Cessna L-19A Bird Dog “Old Dog, New Tricks” 35-40cc - 98” wingspan ARTF by SG MODELS . he Cessna L-19A Bird Dog “Old Dog, New Tricks”... -
Page 3: Additional Items Required
KIT CONTENTS LED LIGHT SET SEA378 Cessna L-19A Bird Dog “Old Please see pictures below. Dog, New Tricks” 35-40cc - 98” wingspan. 1. Fuselage 2. Wing set (3) 3. Tail set (2) 4. Canopy 5. Cowling 6. Wing tube 7. Landing gear 8. - Page 4 Cessna L-19A Bird Dog Instruction Manual. “Old Dog, New Tricks” 35-40cc - 98” wingspan Epoxy...
-
Page 5: Hinging The Aileron
C/A glue HINGING THE AILERON Note : he control surfaces, including the ailer- ons, elevators, and rudder, are prehinged with hinges installed, but the hinges are not glued in place. It is imperative that you properly adhere the hinges in place per the steps that follow us- M2x6mm ing a high-quality thin C/A glue. - Page 6 Cessna L-19A Bird Dog Instruction Manual. “Old Dog, New Tricks” 35-40cc - 98” wingspan Remove each hinge from the wing panel and aileron and place a T-pin in the center of each hinge. Slide each hinge into the wing panel until the T-pin is snug against the wing Epoxy panel.
- Page 7 Note : Work the aileron up and down sev- eral times to “work in” the hinges and check for proper movement. Epoxy INSTALL THE AILERONS CONTROL HORN Epoxy Fiberglass control horn Ailerons control horn...
-
Page 8: Installing The Aileron Servos
Cessna L-19A Bird Dog Instruction Manual. “Old Dog, New Tricks” 35-40cc - 98” wingspan INSTALLING THE AILERON SERVOS C/A glue Use dental loss or heatshrunk tube to secure the connection so they cannot be- come unplugged. Secure the servo to the aileron hatch us- ing Phillips screwdriver and the screws provided with the servo. -
Page 9: Aileron Pushrod Installation
Remove the string from the wing at the servo location and use the tape to attach it 3x10mm to the servo extension lead. Pull the lead through the wing and remove the string. AILERON PUSHROD INSTALLATION 95mm Set the aileron hatch in place and use a Phillips screw driver to install it with four wood screws. - Page 10 Cessna L-19A Bird Dog Instruction Manual. “Old Dog, New Tricks” 35-40cc - 98” wingspan Attach the lap linkage to the control INSTALLING THE FLAP PUSHROD horn. Slide the clevis retainer over the forks of the clevis. Please see below pictures.
- Page 11 Once adjusted, make sure all clevis re- tainers are in position. Apply a drop of threadlock near the clevis, then tighten 18mm the nut against the clevis to keep the link- C/A glue age from changing length inside the wing. 3x10mm Install plastic ribs.
- Page 12 Cessna L-19A Bird Dog Instruction Manual. “Old Dog, New Tricks” 35-40cc - 98” wingspan ROCKETS INSTALLATION Please study images below. Epoxy...
- Page 13 M3x35mm M3x35mm...
- Page 14 Cessna L-19A Bird Dog Instruction Manual. “Old Dog, New Tricks” 35-40cc - 98” wingspan hen, install struts on the wings and fuselage. M4x12mm M4x20mm...
-
Page 15: Installing The Fuselage Servos
3/32” Hole INSTALLING THE FUSELAGE SERVOS Trim and cut Because the size of servos difer, you may need to adjust the size of the precut opening in the mount. he notch in the sides of the mount allow the servo lead to pass through. -
Page 16: Landing Gear Installation
Cessna L-19A Bird Dog Instruction Manual. “Old Dog, New Tricks” 35-40cc - 98” wingspan Switch LANDING GEAR INSTALLATION Locate items needed for landing gear M3x4mm installation. - Page 17 M4x20mm M4x20mm...
-
Page 18: Installing The Stopper Assembly
Cessna L-19A Bird Dog Instruction Manual. “Old Dog, New Tricks” 35-40cc - 98” wingspan With the stopper assembly in place, the weighted pick-up should rest away from the rear of the tank and move freely inside the tank. he top of the vent tube should rest just M6x45mm below the top of the tank. -
Page 19: Mounting The Engine
MOUNTING THE ENGINE Please see below pictures. M5x100mm... - Page 20 Cessna L-19A Bird Dog Instruction Manual. “Old Dog, New Tricks” 35-40cc - 98” wingspan Reinstall the servo horn by sliding the connector over the pushrod wire. Center the throttle stick and trim and install the servo horn perpendicular to the servo center line.
- Page 21 Tape the cowl to the fuselage using low-tack tape. M3x10mm Because of the size of the cowl, it may be nec- essary to use a needle valve extension for the high speed needle valve. Make this out of suf- icient length 1.5mm wire and install it into Use a drill and drill bit to drill the holes the end of the needle valve.
- Page 22 Cessna L-19A Bird Dog Instruction Manual. “Old Dog, New Tricks” 35-40cc - 98” wingspan - Motor: 160 - 2700 Watts - Propeller: 18x8 ~ 20x10 - ESC: 70A - 100A - 9-10S Lipo Locate the items neccessary to install the electric power conversion included with your model.
- Page 23 Blind nut M5x30mm and washers M5x25mm Epoxy hen, use 7mm drill bit to enlarge the holes on the electric motor box. Attach the speed control to the side of the motor box using two-sided tape and tie wraps. Connect the appropriate leads from the speed control to the mo- tor.
-
Page 24: Installing The Spinner
Cessna L-19A Bird Dog Instruction Manual. “Old Dog, New Tricks” 35-40cc - 98” wingspan 175mm Battery INSTALLING THE SPINNER Install the spinner backplate, propeller and spinner cone. he propeller should not touch any part of the spinner cone. If it does, care- fully trim spinner cone opening until pro- peller no longer comes in contact with it. -
Page 25: Hinging The Elevator
HINGING THE ELEVATOR Glue the elevator hinges in place using the same techniques used to hinge the ai- lerons. Epoxy ElevatorFiberglass control horn Epoxy INSTALL ELEVATOR CONTROL HORN Install plastic ribs. Fiberglass control horn... -
Page 26: Installing The Horizontal Stabilizer
Cessna L-19A Bird Dog Instruction Manual. “Old Dog, New Tricks” 35-40cc - 98” wingspan C/A glue Using a modeling knife, carefully remove the covering at mounting slot of horizon- tal stabilizer ( both side of fuselage). Slide the stabilizer into place in the precut slot in the rear of the fuselage. -
Page 27: Hinging The Rudder
When you are sure that everything is aligned correctly, mix up a generous amount of 30 Minute Epoxy. Apply a thin layer to the top and bottom of the stabilizer mounting area and to the stabilizer mounting platform sides in the fuselage. Slide the stabilizer in place and realign. - Page 28 Cessna L-19A Bird Dog Instruction Manual. “Old Dog, New Tricks” 35-40cc - 98” wingspan Rudder Fiberglass control horn Install plastic ribs. INSTALL RUDDER CONTROL HORN C/A glue Fiberglass control horn 18mm Epoxy...
-
Page 29: Installing Vertical Stabilizer
INSTALLING VERTICAL STABILIZER Epoxy Using a modeling knife, remove the cov- ering from over the precut hinge slot cut into the lower rear portion of the fuselage. hs slot accepts the lower rudder hinge. Vertical Stabilizer. Horizontal 90º Stabilizer. Slide the vertical stabilizer into the slot in the top of the fuselage. - Page 30 Cessna L-19A Bird Dog Instruction Manual. “Old Dog, New Tricks” 35-40cc - 98” wingspan When you are sure that everything is hread one clevis and M2 lock nut on aligned correctly, mix up a generous to each elevator control rod. hread the amount of Flash 30 Minute Epoxy.
-
Page 31: Rudder Pushrod Installation
815mm Nylon snap keeper RUDDER PUSHROD INSTALLATION Repeat steps as same as steps done for elevator. MOUNTING THE TAIL WHEEL Locate items necessary to install tail wheel. - Page 32 Cessna L-19A Bird Dog Instruction Manual. “Old Dog, New Tricks” 35-40cc - 98” wingspan...
- Page 33 M3x20mm C/A glue M3x15mm...
- Page 34 Cessna L-19A Bird Dog Instruction Manual. “Old Dog, New Tricks” 35-40cc - 98” wingspan INSTALL LED BULB ON INSTALL THE WINDOW BODY BELLY Parts requirement. See pictures below. Parts requirement. See pictures below. M2x6mm...
- Page 35 Epoxy Epoxy Epoxy...
- Page 36 Cessna L-19A Bird Dog Instruction Manual. “Old Dog, New Tricks” 35-40cc - 98” wingspan Epoxy M3x25mm Epoxy...
- Page 37 M2x6mm M2x6mm INSTALLATION COCKPIT AND CANOPY Locate items necessary to install.
- Page 38 Cessna L-19A Bird Dog Instruction Manual. “Old Dog, New Tricks” 35-40cc - 98” wingspan Epoxy...
- Page 39 INSTALLING BATTERY - RECEIVER Plug the servos leads and the switch lead into the receiver. Plug the battery pack lead into the switch also. Wrap the receiver and battery pack in the protective foam rubber to protect Epoxy them from vibration. Receiver Two batteries ATTACHMENT WING- FUSELAGE...
- Page 40 Cessna L-19A Bird Dog Instruction Manual. “Old Dog, New Tricks” 35-40cc - 98” wingspan M4x12mm...
-
Page 41: Antenna Installation
INSTALL FUEL CAP Parts requirement.See pictures below. ANTENNA INSTALLATION Parts requirement.See pictures below. Epoxy... -
Page 42: Apply The Decals
Cessna L-19A Bird Dog Instruction Manual. “Old Dog, New Tricks” 35-40cc - 98” wingspan 3) When balancing your model, make sure it is assembled and ready for light. Support the plane upright at the marks made on the wing with your igers or a commercially available balancing stand. -
Page 43: Control Throws
CONTROL THROWS Ailerons: Rudder: High Rate : High Rate : Up : 25mm Right : 35mm Down : 25mm Let : 35mm Low Rate : Low Rate : Up : 15mm Right : 25mm Down : 15mm Let : 25mm Elevator: Flap: High Rate :... -
Page 44: Flight Preparation
We wish you many safe and enjoyable lightswith your Cessna L-19A Bird Dog “Old Dog, New Tricks” 35-40cc - 98” wingspan. - Page 45 If you have any queries, or are interested in our products, please feel free to contact us Factory : 12/101A - Hamlet 4 - Le Van Khuong Street - Dong hanh Ward - Hoc Mon District - Ho Chi Minh City - Viet Nam. Oice : 62/8 Ngo Tat To Street - Ward 19 - Binh hanh District - Ho Chi Minh City - Viet Nam Phone : 848 - 86622289 or 848- 36018777...
Need help?
Do you have a question about the Cessna L-19A Bird Dog and is the answer not in the manual?
Questions and answers