Advertisement
Quick Links
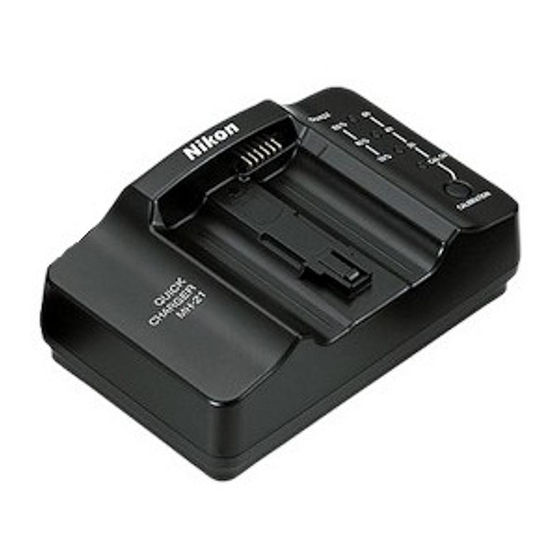
MH-21
日本語
Jp
クイックチャージャー 使用説明書
こ の た び は、 ニ コ ン ク イ ッ ク チ ャ ー ジ ャ ー
MH-21 をお買い上げいただき、誠にありがと
Quick Charger Instruction Manual
うございます。MH-21 は、ニコン Li-ion リ
En
チャージャブルバッテリー EN-EL4 を充電す
De
Akkuladegerät Bedienungsanleitung
るためのチャージャーです。
MH-21 は、表示ランプの点灯/点滅/消灯に
Fr
Chargeur rapide Fiche Technique
より、 充電状況をお知らせする機能およびキャ
リブレーション機能を装備しています。
Es
Cargador Rápido Manual de instrucciones
キャリブレーション機能について
Se
Snabbladdare Bruksanvisning
キャリブレーションとは、バッテリー容量
を正確に測定するための機能です。キャリブ
Snellader Gebruikshandleiding
Nl
レーションを行うことにより、現在のバッテ
リーの残量をより正確に表示することができ
It
Caricabatterie Rapido Manuale di istruzioni
ます。
Ck
快速充电器使用说明书
Li-ion リチャージャブルバッテリー
EN-EL4 について
Ch
快速充電器使用說明書
Printed in Japan
Li-ion リチャージャブルバッテリー EN-EL4
SB5A02000101 (B1)
は、 対応した機器との接続により、 バッテリー
급속충전기 사용설명서
6MAK19B1--
Kr
に関する情報について通信を行うことができ
るリチウムイオンバッテリーです。
ご使用の前に、 本書および Li-ion リチャージャ
ブルバッテリー EN-EL4 の使用説明書をよく
接点
/Contacts/Kontakte/Contacts/
クイックチャージャー本体
/ Quick Charger /
お読みください。
Contactos/Kontakter/Contacten/
Akkuladegerät / Chargeur rapide /
Contatti/ 接触头 /
接觸頭
/
접점
Cargador Rápido / Batteriladdare /
Snellader / Caricabatterie Rapido /
ご使用の前に、この「安全上のご注意」をよく
/ 충전기 본체
快速充电器 /
快速充電器
お読みの上、正しくお使いください。
この「安全上のご注意」は製品を安全に正しく
使用していただき、あなたや他の人々への危害
や財産への損害を未然に防止するために、重要
な内容を記載しています。
お読みになった後は、お使いになる方がいつで
も見られるところに必ず保管してください。
表示ランプ(緑色)
/
表示と意味は次のようになっています。
Charge lamps (green)/
Grüne Kontrollleuchten (Aufl aden)/
この表示を無視して、誤った取り扱
Témoins de charge (verts)/
いをすると、人が死亡または重傷を
警告
Luces de carga (verde)/
負う可能性が想定される内容を示し
Laddningslampor (gröna)/
ています。
Laadlampjes (groen)/
この表示を無視して、誤った取り扱い
Spie di carica (verdi)/
をすると、人が傷害を負う可能性が想
充电灯 ( 绿色 )/
充電燈 ( 綠色 )
/
注意
定される内容および物的損害の発生
표시램프 ( 녹색 )
が想定される内容を示しています。
CAL 表示ランプ(黄色)
/Calibration lamp (yellow)/
Gelbe Kontrollleuchte (Kalibrieren)/Témoin d'étalonnage (jaune)/
お守りいただく内容の種類を、次の絵表示で区
Luz de calibración (amarillo)/Kalibreringslampa (gul)
分し、説明しています。
Kalibratielampje (geel)/Spia di calibrazione (gialla)/
/CAL 표시램프 ( 황색 )
调节灯 ( 黄色 )/
校正燈 ( 黃色 )
記号は、注意(警告を含む)を促す
/Calibration button/
キャリブレーションボタン
内容を告げるものです。図の中や近くに
Taste »Calibration«/Commande d'étalonnage/
具体的な注意内容(左図の場合は感電注
Botón de calibración/Kalibreringsknapp/
意)が描かれています。
Kalibratieknop/Pulsante di calibrazione/
调节钮 /
校正鈕
/ 캐리브레이션 버튼
記号は、禁止(してはいけないこと)
の行為を告げるものです。図の中や近く
に具体的な禁止内容(左図の場合は分解
電源プラグ
/Wall plug/
AC プラグ
/AC adapter plug/
禁止)が描かれています。
Netzstecker/Fiche secteur murale/
Netzgerätestecker/Fiche secteur pour MH-21/
記号は、行為を強制すること(必ずす
Enchufe de Pared/Stickpropp
Enchufe del adaptador a la corriente/
ること)を告げるものです。図の中や近
Stekker stopcontact-zijde/
AC-adapterkontakt/Stekker lader-zijde/
くに具体的な強制内容(左図の場合はプ
Presa a rete/ 墙上插头 /
插頭
/
Connettore a due poli/
ラグを抜く)が描かれています。
전원플러그
AC 适配器接头 /
電源接頭插銷
/AC 플러그
分解したり、修理・改造をしないこと
感電したり、異常動作をしてケガの原因と
分解禁止
なります。
落下などによって破損し、内部が露出した
ときは、露出部に手を触れないこと
接触禁止
感電したり、破損部でケガをする原因とな
ります。
電源プラグを抜いて、 販売店またはニコンサー
すぐに
接点保護カバー
/ Contact protector /
ビスセンターに修理を依頼してください。
修理依頼を
*
*
電源コード
/ Power cable
/ Netzkabel
/
Abdeckung / Protège-contacts /
*
Cordon d'alimentation
/
熱くなる、煙が出る、こげ臭いなどの異常
Protector de contactos / Kontaktskydd /
*
*
Cable de corriente
/
Kabel
/
時は、速やかに電源プラグを抜くこと
Beschermkap contacten /
*
*
Netsnoer
/ Cavo di alimentazione
/
プラグを抜く
そのまま使用すると火災、やけどの原因と
Protezione contatti/
なります。電源プラグを抜く際、やけどに
电源线
*
/ 電線
*
/ 전원코드
*
接头保护罩 / 保護蓋 / 접점보호 커버
充分注意してください。
販売店またはニコンサービスセンターに修
すぐに
図1
/Figure 1/Abbildung 1/Figure 1/Figura 1/Bild 1/
修理依頼を
理を依頼してください。
Figuur 1/Figura 1/图1/
圖
1/그림1
水につけたり、水をかけたり、雨にぬらし
たりしないこと
* Shape of cable depends on country.
* De vorm van het snoer hangt af van het land van aankoop.
水かけ禁止
* Das mit Ihrem Ladegerät mitgelieferte Netzkabel kann von
* La forma del cavo di alimentazione dipende dal paese di
発火したり、感電の原因となります。
der hier gezeigten Abbildung abweichen.
uso.
* La forme du câble dépend du pays d'utilisation.
* 不同国家的电线形状不同。
引火・爆発のおそれのある場所では使用し
* La forma del cable depende del país en el que se haya ad-
*
ないこと
不同國家的電線形狀不同。
quirirdo.
* 구입하는 국가에 따라 전원코드의 모양이 다른 경우가 있습니다 .
プロパンガス、ガソリンなどの引火性ガス
* Kabelns form är landsspecifi k.
使用禁止
や粉塵の発生する場所で使用すると爆発や
火災の原因となります。
電源プラグの金属部やその周辺にほこりが
付着している場合は、乾いた布で拭き取る
こと
a
Li-ion リチャージャブルバッテリー EN-EL4 (別売)
警告
そのまま使用すると火災の原因になります。
EN-EL4 rechargeable Li-ion battery (sold separately)
Lithium-Ionen-Akku EN-EL4 (optionales Zubehör)
雷が鳴り出したら電源プラグに触れないこと
Batterie Li-ion rechargeable EN-EL4 (vendue séparément)
感電の原因となります。
Batería recargable de iones de litio EN-EL4 (se vende por separado)
使用禁止
雷が鳴り止むまで機器から離れてください。
Uppladdningsbart litiumjonbatteri EN-EL4 (säljes separat)
EN-EL4 oplaadbare Li-ion batterij (Apart verkrijgbaar)
電源コードを傷つけたり、加工したりしな
Batteria Ricaricabile Li-ion EN-EL4 (acquistabile separatamente)
いこと
EN-EL4 充电锂离子电池(另售附件)
また、 重いものを載せたり、 加熱したり、 引っ
可充電式 EN-EL4 鋰電池(選購配件)
ぱったり、むりに曲げたりしないこと
禁止
Li-ion 충전식배터리 EN-EL4(별매)
電源コードが破損し、火災、感電の原因と
なります。
AC プラグ差込み口
/AC inlet/Anschluss für Netzkabel/
ぬれた手で電源プラグを抜き差ししないこと
Connecteur électrique/Entrada CA/AC-ingång
感電の原因となります。
感電注意
Netznoer aansluiting/Ingresso AC/ 电源插座 /
電源插座
/AC 플러그 삽입구
ぬれた手でさわらないこと
感電の原因になることがあります。
感電注意
製品は幼児の手の届かない所に置くこと
ケガの原因になることがあります。
放置禁止
小型充電式電池のリサイクル
不要になった充電式電池は、貴重な資
源を守るために、廃棄しないで充電式電
池リサイクル協力店へお持ちください。
b
ガイドライン
/Guide/Führung/
Repère/Guía/Styrning/Geleider/
クイックチャージャー MH-21 の
Guida/ 指南 /
指南
/ 가이드라인
使用上のご注意
重要 ❢
図 2
/Figure 2/Abbildung 2/Figure 2/Figura 2/Bild 2/
MH-21 は ニ コ ン Li-ion リ チ ャ ー ジ ャ ブ ル
2/ 그림 2
Figuur 2/Figura 2/ 图 2/
圖
バッテリー EN-EL4 を充電するためのチャー
ジャーです。他のバッテリーの充電には使用で
†
†
地域により、外観が一部異なる場合がありますが、ご了承ください。
Het uiterlijk van de MH-21 kan enigszins afwijken van de
きません。
†
The external appearance of the MH-21 may differ slightly
illustratie, afhankelijk van het land of gebied van aanschaf.
†
from the illustration depending on the coun try or area of
Il dispositivo di ricarica MH-21 può differire leggermente
• 本製品には、国内での使用に適合する、MH-21
purchase.
dall'illustrazione, ciò dipende dalla nazione in cui è stato
†
Je nach Kaufregion kann das MH-21 im Design von der in der
acquistato.
専用の電源コードが付属しています。付属の電
Illustration dargestellten Version leicht abweichen.
†
根据国家或购买的地区不同,MH-21的外观可能与示意图稍有不
源コードは、本製品以外の製品には使用しない
†
L'apparence extérieure du MH-21 peut légèrement différée
同。
でください。また、本製品を海外で使用する場
de l'illustration selon le pays d'achat.
†
根據國家或購買的地區不同,MH-21的外觀可能與示意圖稍有不
合は、別売の電源コードが別途必要になります。
†
La apariencia externa del MH-21 puede diferir ligeramente
同。
de la ilustración según el país o zona de la adquisición.
†
지역에 따라 외관이 일부 다른 경우가 있습니다만 , 양해하여 주시기
別売の電源コードについては、ニコンサービス
†
Tack för att du valde en MH-21 snabbladdare. MH-21 är av-
바랍니다 .
センターにお問い合わせください。
sedd för laddning av Nikons laddningsbara EN-EL4 Litium-
jonbatterier.
• MH-21 に対応していないバッテリーは、使用
しないでください。
• 使用しないときは、電源プラグをコンセントか
ら抜いてください。
En glish
Thank you for your purchase of an
Li-ion リチャージャブルバッテリー EN-EL4
の使用上のご注意
MH-21 Quick Charger for Nikon EN-EL4
rechargeable Li-ion batteries. The MH-21
重要 ❢
is equipped with battery calibration fea-
カメラの使用直後(特に高温での使用時)な
どは、バッテリー内部の温度が高くなる場合が
ture and charge lamps that glow, blink, or
あります。この状態では、充電ができなかった
turn off according to the battery charge
り、または不完全な充電になるばかりでなく、
state.
バッテリーの性能が劣化する原因になります。
バッテリーの温度が下がるのを待ってから、充
Calibration
電してください。
Calibration allows precise measure-
• ご購入されたときは、フル充電されていません。
ment of battery charge, ensuring that
ご使用の前に充電してください。
the battery level can be displayed more
• 周囲の温度が 0℃以下または 40℃を超える場
所で使用しないでください。バッテリーの性能
accurately.
が劣化したり、故障の原因となります。
EN-EL4 rechargeable Li-ion
• 充電が完了したバッテリーを続けて再充電しな
いでください。バッテリー性能が劣化します。
Batteries
• 万一、異常に熱くなる、煙が出る、こげ臭い
EN-EL4 rechargeable Li-ion batteries can
などの異常や不具合が起きたときは、すぐに使
transmit information on battery state
用を中止して販売店またはニコンサービスセン
ターに修理を依頼してください。
when connected to compatible devices.
■ Li-ion リチャージャブルバッテリー
Before use, read the warnings and other
EN-EL4 の充電方法
information in this manual and in the
1
電源コードの AC プラグをクイックチャー
documentation for your Nikon EN-EL4
安全上のご注意
ジャーの AC プラグ差込み口に差し込みま
rechargeable Li-ion battery.
す(図 2-a) 。
Notices for customers in the U.S.A.
2
電源プラグをコンセントに差し込みます。
Federal Communications Com mis sion (FCC)
Radio Frequency Interference Statement
このとき、CAL 表示ランプを含むすべての
This equipment has been tested and found to
表示ランプは消灯しています。
comply with the limits for a Class B digital device,
pursuant to Part 15 of the FCC rules. These limits are
3
バッテリーの先端(端子側)を本体にある
designed to provide rea son able pro tec tion against
ガイドラインに合わせて置き、矢印の方向
harmful in ter fer ence in a res i den tial in stal la tion. This
にカチッと音がして止まるまでスライドさ
equip ment gen er ates, uses, and can radiate radio
せて装着します(図 2-b) 。装着と同時に
fre quen cy energy and, if not installed and used in
充電が始まります。
ac cor dance with the instructions, may cause harm-
ful in ter fer ence to radio com mu ni ca tions. How ev er,
表示ランプと充電状況は次のように対応して
there is no guar an tee that in ter fer ence will not occur
います。
in a par tic u lar in stal la tion. If this equipment does
cause harmful in ter fer ence to radio or television
表示ランプ (緑色)
充電状況
reception, which can be de ter mined by turn ing the
50 %
80%
100%
equipment off and on, the user is en cour aged to try
バッテリーの容量に対
点滅
消灯
消灯
to correct the in ter fer ence by one or more of the
して 50%以下
fol low ing mea sures:
バッテリーの容量に対
• Reorient or relocate the receiving an ten na.
点灯
点滅
消灯
して 50%以上、80%
• Increase the separation between the equip ment
未満
絵表示の例
and receiver.
バ ッ テ リ ー の 容 量 に
• Connect the equipment to an outlet on a circuit dif-
対 し て 80 % 以 上、
点灯
点灯
点滅
ferent from that to which the receiver is con nect ed.
100%未満
• Consult the dealer or an experienced radio/TV
100% 充電完了
点灯
点灯
点灯
technician for help.
CAUTIONS
4
充電が完了したら、上記
3
と逆の手順で
Modifi cations
バッテリーをクイックチャージャーから取
The FCC requires the user to be notifi ed that any
りはずし、電源プラグをコンセントから抜
changes or modifi cations made to this device that are
きます。
not expressly approved by Nikon Corporation may void
the user's au thor i ty to operate the equipment.
ご使用にならないときは、接点へのほこり
の付着防止や保護のため、付属の接点保護
The accessory power cord must be used
For USA only: Over AC 125 V
カバーをクイックチャージャーに取り付け
Use a power cord suited to the voltage in use with AC
てください。
250 V 15 A rated plugs (NEMA 6P-15) and a minimum
警告
of SVT type cord for insulation and for anything over
■ Li-ion リチャージャブルバッテリー
AWG 18 in size.
EN-EL4 装着時に CAL 表示ランプ
Notice for customers in the State of California
が点滅した場合
WARNING: Handling the cord on this product will
expose you to lead, a chemical known to the State of
CAL 表示ランプは、バッテリーの容量表示を
California to cause birth defects or other reproductive
より正確に表示するためにキャリブレーショ
harm. Wash hands after handling.
ンを行う必要がある場合に、約 10 秒間点滅
Nikon Inc.,
します。CAL 表示ランプが点滅しているとき
1300 Walt Whitman Road, Melville, New York
に、 CAL 表示ランプの下側にあるキャリブレー
11747-3064, U.S.A.
ションボタンを約 1 秒押すと、キャリブレー
Tel.: 631-547-4200
ションが開始されます。キャリブレーション
Notice for customers in Canada
が完了すると、CAL 表示ランプおよびすべて
CAUTION
の表示ランプが消灯し、ただちに充電が始ま
This Class B digital apparatus meets all re quire ments
ります。
of the Canadian In ter fer ence-Causing Equipment
キャリブレーションに必要な時間の目安は次
Regulations.
のとおりです。
ATTENTION
Cet appareil numérique de la classe B respecte toutes
CAL 表示
キャリブ
表示ランプ (緑色)
les exigences du Règlement sur le matériel brouilleur
ランプ(黄色)
レーションに
du Can a da.
必要な時間
CAL ON
2h
4h
6h
Safety Precautions
約 6 時間以上
点灯
点灯
点灯
点灯
約 4 ∼ 6 時間
点灯
点灯
点灯
消灯
To ensure proper operation, read this
manual thor ough ly be fore us ing this
約 2 ∼ 4 時間
点灯
点灯
消灯
消灯
prod uct. Af ter reading, be sure to keep
約 2 時間以内
点灯
消灯
消灯
消灯
it where it will be read by all those who
CAL 表示ランプが点滅した場合は、 バッテリー
use the product.
の容量を正確に測定するため、キャリブレー
ションを行うことをおすすめします。ただし、
Precautions for Use: MH-21
CAL 表示ランプが点滅しても、必ずしもキャ
Quick Charger
リブレーションボタンを押してバッテリーの
キャリブレーションを行う必要はありません。
✔ IMPORTANT
また、キャリブレーションは途中で中断する
ことも可能です。
The Nikon MH-21 can be used to
• CAL 表示ランプの点滅時にキャリブレーション
recharge Nikon EN-EL4 recharge-
ボタンを押さなかった場合は、約 10 秒後に通
able Li-ion batteries only. Do not
常の充電が開始されます。
• 途中でキャリブレーションを中断する場合は、
attempt to recharge any other
再度キャリブレーションボタンを押します。測
batteries with the MH-21.
定が中断され、充電が開始されます。
注意
• Do not use this product with non-com-
こんな時は...
patible batteries.
・バッテリーを装着していないのに表示ランプ
が点滅する
• Remove the power cable from the
クイックチャージャーに異常が発生しまし
power outlet when not in use.
た。ただちに電源プラグをコンセントから抜
いて、ニコンサービスセンターに修理を依頼
Precautions for Use: Nikon EN-EL4
してください。
Rechargeable Li-ion Batteries
・バッテリー装着時に CAL 表示ランプを含む
すべての表示ランプが点滅する
✔ IMPORTANT
充電時にバッテリーまたはクイックチャー
The in ter nal temperature of the
ジャーの異常が発生しました。ただちにバッ
bat tery may rise while the bat tery
テリーを取りはずし、電源プラグをコンセン
トから抜いた後、ニコンサービスセンターに
is in use, es pe cial ly when the am-
修理を依頼してください。
bient temperature is high. If you
at tempt to recharge the bat tery
■ 仕様
while the in ter nal tem per a ture
電源:
AC 100 ∼ 240 V(50/60Hz)
is elevated, the bat tery will not
充電出力:
DC 12.6 V/1200 mA
charge or will charge only partial-
適応電池:
Li-ion リチャージャブルバッテリー
EN-EL4
ly. The battery may also not func-
充電時間:
約 100 分
tion properly. Wait for the battery
※残量のない状態からの充電時間
to cool be fore charging.
使用温度:
0 ∼+ 40 ℃
寸法:
約 135 mm(幅)× 85 mm(奥
• The battery is not fully charged at the
行き)× 54.5 mm(高さ)
fac to ry. Charge the battery before use.
コード長:
約 1800 mm
• When recharging the battery, the am-
質量(重さ) :約 225g(電源コードを除く)
bient temperature should be between
• 仕様、外観の一部を、改善のため予告なく変更
0–40 °C (32–104 °F) or the battery may
することがあります。
not fully charge or may not fuction
properly.
• Do not attempt to recharge a fully-
charged battery. Failure to observe this
precaution will result in re duced battery
performance.
• Should you notice smoke or an unusual
smell coming from the charger, unplug
it, taking care to avoid burns. Take the
charger to a Nikon representative for
inspection.
Deutsch
Recharging Nikon EN-EL4
Vielen Dank für Ihr Vertrauen in Nikon-
Ziehen Sie nach Beendigung des
4
Rechargeable Li-ion Batteries
Produkte. Das Akkuladegerät MH-21 ist
Ladevorgangs den Akku in ent-
ein Schnellladegerät für Lithium-Ionen-
gegengesetzter Richtung wie in
1
Plug the AC adapter plug into the
Akkus vom Typ Nikon EN-EL4. Das MH-21
Abbildung 2-b skizziert aus dem La-
battery charg er (Fig ure 2-a).
besitzt eine Kalibrierungsfunktion und
degerät. Anschließend ziehen Sie den
2
Plug the wall plug into a power outlet.
eine mehrstufi ge Ladezustandsanzeige.
Netzstecker aus der Steckdose.
Note: The charge and calibra-
Sie schützen die Anschlüsse des Lade-
Kalibrierung
tion lamps will not light until a
geräts vor Staub, wenn Sie das Gerät
Durch die Kalibrierung ist eine präzise
battery is inserted.
nach Gebrauch mit der Abdeckung
Bestimmung und Anzeige der Ladeka-
verschließen.
Insert the battery (terminals fi rst),
pazität möglich.
3
aligning the end of the battery with
Lithium-Ionen-Akku EN-EL4
Blinken der gelben Kontroll-
the guide and then sliding the battery
Der Lithium-Ionen-Akku EN-EL4 be-
leuchte (Kalibrieren)
in the direction indicated until it clicks
sitzt eine Diagnoseschnittstelle, über
Wenn die gelbe Kontrollleuchte nach
into place (Figure 2-b). Charging will
die das Akkuladegerät MH-21 den
Einsetzen des Akkus zehn Sekunden
begin when the battery is inserted.
aktuellen Ladezustand des Akkus
lang blinkt, muss der Akku kalibriert
The charge state is shown by the
auslesen kann.
werden, damit sein Ladezustand prä-
charge lamps:
zise ermittelt werden kann. Die grünen
Bitte lesen Sie vor der Inbetriebnahme
Charge lamps (green)
Kontrollleuchten zeigen die Dauer des
Charge state
des Akkuladegeräts diese Anleitung und
50%
80%
100%
Kalibrierungsvorgangs an:
die Dokumentation zum Lithium-Ionen-
Less than 50% of maxi-
mum capacity
Akku EN-EL4 aufmerksam durch.
Kontroll-
Blinks
Off
Off
Voraussichtli-
50–80% of maximum
Sicherheitshinweise
che Dauer der
Kalibrierung
capacity
Glows Blinks
Off
Bitte lesen Sie diese Sicherheitshinweise
More than 80% but less
vor der Inbetriebnahme Ihres Nikon-Pro-
than 100% of maximum
Länger als 6
Glows Glows Blinks
Konstantes
capacity
Stunden
dukts aufmerksam durch, um Schäden
100% of maximum
am Produkt zu vermeiden. Halten Sie die-
capacity
Glows Glows Glows
4 bis 6 Stunden
Konstantes
se Sicherheitshinweise für alle Personen
4
When charging is complete, slide
griffbereit, die dieses Produkt benutzen
the battery out of the charger in the
2 bis 4 Stunden
werden.
Konstantes
reverse direction to that shown in
Hinweise zum Akkuladegerät
Figure 2-b. Unplug the charger.
Kürzer als 2
Konstantes
MH-21
Stunden
When the charger is not in use, replace
the contact protector to prevent dust
✔ WICHTIG
Drücken Sie die Taste »Calibration« re-
from accumulating on the charger
chts neben der gelben Kontrollleuchte
Mit dem MH-21 dürfen Sie nur
contacts.
ungefähr eine Sekunde lang. Während
Lithium-Ionen-Akkus vom Typ Ni-
dieser Zeit blinkt die gelbe Kontroll-
kon EN-EL4 aufl aden. Versuchen
If the Calibration Lamp Blinks
leuchte. Nach Beendigung der Kalibrier-
Sie niemals, andere Akkutypen
If the calibration lamp blinks for about
ung erlöschen die gelbe und die grünen
mit dem MH-21 aufzuladen.
ten seconds after a battery is inserted,
Kontrollleuchten und der Ladevorgang
the battery needs to be calibrated to
• Laden Sie keine Akkus mit dem MH-21
beginnt.
ensure that its charge state can be ac-
auf, die in dieser Anleitung nicht ge-
Es wird empfohlen, eine Kalibrierung des
curately measured. The time needed
nannt sind.
Akkus durchzuführen, damit eine präzise
to calibrate the battery is shown by the
• Ziehen Sie das Netzkabel aus der Steck-
Messung der Ladekapazität gewährleistet
charge lamps:
dose, wenn Sie das Akkuladegerät nicht
ist. Gleichwohl ist eine Kalibrierung, auch
Approximate
Calibra-
benutzen.
wenn die gelbe Kontrollleuchte blinkt,
tion lamp
Charge lamps (green)
time needed
(yellow)
to recalibrate
Hinweise zum Lithium-Ionen-
für den Ladevorgang nicht unbedingt
battery
CAL ON
2h
4h
6h
Akku EN-EL4
notwendig und kann jederzeit wieder
Over 6 hours
abgebrochen werden.
Glows
Glows
Glows
Glows
✔ WICHTIG
• Wenn Sie die Taste »Calibration« trotz
4–6 hours
Glows
Glows
Glows
Off
Der Akku kann sich bei Betrieb er-
Blinken der gelben Kontrollleuchte
wär men, ins be son de re bei hoher
2–4 hours
nicht drücken, wird der Ladevorgang
Glows
Glows
Off
Off
Um ge bungs tem pe ra tur.
Las sen
nach etwa zehn Sekunden gestartet.
Sie den Akku ab küh len, bevor Sie
Under 2 hours
Glows
Off
Off
Off
• Drücken Sie die Taste »Calibration« er-
ihn aufl a den. Das Aufl aden eines
To start calibration, press the CAL button
erwärmten Ak kus kann zur Folge
neut, um eine begonnene Kalibrierung
next to the calibration lamp for about a
abzubrechen. Die Kalibrierung wird
ha ben, dass der Akku nicht oder
second while the lamp is blinking. When
nur teil wei se lädt oder dass kein
sofort beendet und der Ladevorgang
calibration is complete, the calibration
ein wand frei er Be trieb des Ak kus
beginnt.
and charge lamps will turn off and charg-
ge währ lei stet ist.
Problemlösungen
ing will begin.
• Die ab Werk ausgelieferten Nikon-Akkus
• Wenn die Kontrollleuchten blin-
Although calibration is recommended for
sind aus Sicherheitsgründen nicht voll-
ken und kein Akku ins Ladege-
accurate measurement of battery charge
stän dig aufgeladen. Bitte laden Sie Ihren
rät eingesetzt ist ...
state, calibration need not be performed
Akku auf, bevor Sie ihn verwenden.
... liegt eine Funktionsstörung des
when the calibration lamp blinks. Once
• Beim Aufl aden des Akkus sollte die Um-
MH-21 vor. Trennen Sie das Ladegerät
begun, calibration can be interrupted as
ge bungs tem pe ra tur zwischen 0 °C und
vom Stromnetz und wenden Sie sich
desired.
40 °C liegen. Eine höhere oder niedrige-
an den Nikon-Kundendienst.
• If the CAL button is not pressed while
re Umgebungstemperatur während des
• Wenn
alle
the calibration lamp is blinking, normal
La de vor gangs kann zur Folge haben,
gemeinsam blinken, sobald ein
charging will begin after about ten
dass der Akku nicht die volle Kapazität
Akku ins Ladegerät eingesetzt
seconds.
erreicht oder kein einwandfreier Betrieb
wird ...
• To interrupt calibration, press the cali-
des Akkus ge währ lei stet ist.
... ist ein Fehler beim Laden aufgetre-
bration button again. Calibration will
• Laden Sie keinen Akku auf, der bereits
ten. Entfernen Sie sofort den Akku
end and charging will begin.
vollständig aufgeladen ist. Ein Über-
aus dem Ladegerät, ziehen Sie den
laden kann die Leistung des Akkus
Netzstecker aus der Steckdose und
Troubleshooting
mindern.
wenden Sie sich an den Nikon-Kun-
• If the lamps blink when no bat-
dendienst.
• Bei Rauch- oder ungewohnter Ge-
tery is inserted...
ruchs ent wick lung sollten Sie das
...the MH-21 has malfunctioned. Un-
Akkuladegerät sofort vom Stromnetz
Technische Daten
plug the charger immediately and con-
trennen, um einem möglichen Brand
Eingangsspannung: 100–240 V (50/60 Hz)
tact a Nikon service representative.
vorzubeugen. Bitte wen den Sie sich
Ausgangsspannung
• If the calibration and charge
zur Beseitigung der Störungen an
Ladevorgang:
lamps all fl ash at once when a
Ihren Fachhändler oder an den Nikon-
Akkutyp:
battery is inserted...
Kundendienst.
...a problem occurred during charg-
Aufl aden des Lithium-Ionen-
Ladezeit:
ing. Remove the battery and unplug
Akkus EN-EL4
the charger immediately, then contact
a Nikon service representative.
1
Schließen Sie das Netzkabel an das
Betriebstemperatur: 0–40 °C
Ak ku la de ge rät an (Abb. 2-a).
Specifi cations
Abmessungen:
Rated input:
AC 100–240 V (50/60 Hz)
2
Stecken Sie anschließend den Netz-
stec ker in die Steckdose.
Charging output:
DC 12.6 V/1200 mA
Kabellänge:
Supported batteries: Nikon EN-EL4 recharge-
Hinweis: Die Kontrollleuchten
able Li-ion batteries
Gewicht:
für Laden und Kalibrieren
werden erst aktiviert, wenn
Charging time:
Approximately 100 min-
utes when no charge
ein Akku in das Ladegerät ein-
Änderungen der technischen Daten und
remains
gesetzt ist.
des Pro dukt de signs im Sinne des techni-
Operating
schen Fort schritts vor be hal ten.
3
Führen Sie den Akku in Pfeilrichtung
temperature:
0–40 °C (+32–104 °F)
und mit den Anschlüssen zuerst in
Dimensions:
Approximately
das Ladegerät ein. Richten Sie den
135 mm (W) × 85 mm
Akku dabei an der Führung aus und
(D) × 54.5 mm (H)
schieben Sie ihn soweit in das Lade-
(5.3 × 3.3 × 2.1˝)
gerät hinein, bis er hörbar einrastet
Length of cord:
Approximately
(Abb. 2-b). Nun beginnt der Ladevor-
1800 mm (70.8˝)
gang. Die grünen Kontrollleuchten
Weight:
Approximately 225 g
zeigen den Ladezustand an.
(7.9 oz), excluding
power cable
Kontrollleuchten (grüne LEDs)
Ladezustand
50%
80%
100%
Improvements to this product may result
Weniger als
in un an nounced chang es to spec i fi ca tions
50% der max.
Akkukapazität
Blinken
Aus
Aus
and external ap pear ance.
50 bis 79% der
max. Akkuka-
Konstantes
pazität
Blinken
Aus
Leuchten
80 bis 99% der
max. Akkuka-
Konstantes
Konstantes
pazität
Leuchten
Leuchten
Blinken
100% der max.
Konstantes
Konstantes
Konstantes
Akkukapazität
Leuchten
Leuchten
Leuchten
Français
Merci d'avoir acheté le chargeur rapide
Lorsque le processus de charge est
4
MH-21, destiné aux accumulateurs Nikon
terminé, retirez l'accumulateur du
Li-ion rechargeables EN-EL4. Le MH-21
chargeur en le faisant glisser dans
est doté d'une fonction d'étalonnage
la direction opposée à celle indiquée
des accumulateurs et de témoins de
Figure 2-b. Débranchez le chargeur.
charge qui s'allument, clignotent ou
Lorsque vous n'utilisez pas le chargeur,
s'éteignent selon l'état de charge de
replacez le protège-contacts afi n d'éviter
l'accumulateur.
que la poussière ne s'accumule sur ses
contacts.
Étalonnage
L'étalonnage permet de mesurer pré-
Si le témoin d'étalonnage
cisément la charge de l'accumulateur :
clignote
il est ainsi possible de déterminer avec
Si le témoin d'étalonnage clignote
exactitude le niveau de charge de l'ac-
pendant 10 secondes environ, une fois
cumulateur.
l'accumulateur inséré, cela signifi e que ce
Accumulateurs Li-ion rechar-
dernier doit être étalonné pour garantir
geables EN-EL4
une mesure exacte de son état de charge.
Les accumulateurs Li-ion rechargea-
Le temps nécessaire à cet étalonnage est
bles EN-EL4 peuvent transmettre des
indiqué par les témoins de charge :
informations relatives à leur état, s'ils
Témoin
Temps nécessaire
sont connectés à des dispositifs com-
d'étalonna-
à l'étalonnage de
Témoins de charge (verts)
l'accumulateur
ge (jaune)
leuchte
Kontrollleuchten (grüne
patibles.
(environ)
CAL ON
2h
(gelbe
LEDs)
LED)
Avant toute utilisation, lisez les avertisse-
Plus de 6 heures
CAL ON
2h
4h
6h
Allumé Allumé Allumé Allumé
ments et les autres informations de cette
4–6 heures
Konstantes
Konstantes
Konstantes
fi che technique et de la documentation
Allumé Allumé Allumé Eteint
Leuchten
Leuchten
Leuchten
Leuchten
relative à l'accumulateur Nikon Li-ion
2–4 heures
rechargeable EN-EL4.
Allumé Allumé Eteint
Konstantes
Konstantes
Aus
Leuchten
Leuchten
Leuchten
Moins de 2 heures
Mesures de précaution
Allumé
Eteint
Konstantes
Aus
Aus
Pour utiliser correctement ce produit, lisez
Pour lancer l'étalonnage, appuyez sur la
Leuchten
Leuchten
attentivement ce manuel avant toute uti-
commande d'étalonnage (CAL) située à
lisation. Gardez-le ensuite précieusement
côté du témoin d'étalonnage pendant
Aus
Aus
Aus
Leuchten
dans un endroit facilement accessible à
une seconde environ, tant que le témoin
tous ceux qui se serviront de ce produit.
clignote. Une fois l'étalonnage terminé,
les témoins d'étalonnage et de charge
Mesures de précaution:
s'éteignent et le processus de charge
chargeur rapide MH-21
commence.
✔ IMPORTANT
Même si l'étalonnage est recommandé
Le Nikon MH-21 permet de rechar-
afi n de mesurer précisément d'état de
ger uniquement les accumulateurs
charge de l'accumulateur, il n'est pas
Nikon Li-ion rechargeables EN-EL4.
indispensable de l'effectuer si le témoin
N'essayez en aucun cas de rechar-
d'étalonnage clignote. Une fois lancé,
ger d'autres types d'accumulateurs
l'étalonnage peut être interrompu à
avec le MH-21.
tout moment.
• N'utilisez pas ce produit avec des accu-
• Si vous n'appuyez pas sur la commande
mulateurs non compatibles.
d'étalonnage (CAL) alors que le témoin
d'étalonnage clignote, le processus de
• Enlevez le cordon d'alimentation de la
prise de courant lorsque vous ne vous
charge habituel s'activera au bout de
dix secondes environ.
en servez pas.
• Pour interrompre l'étalonnage, ap-
Mesures de précaution:
puyez à nouveau sur la commande
accumulateurs Nikon Li-ion
d'étalonnage (CAL). L'étalonnage s'ar-
rechargeables EN-EL4
rêtera alors et le processus de charge
✔ IMPORTANT
s'activera.
L'accumulateur peut chauffer pen-
Dépannage
dant son uti li sa tion, notamment si
• Si les témoins clignotent en l'ab-
la température am bian te est éle-
sence d'accumulateur...
vée. Si vous essayez de le recharger
... le chargeur MH-21 fait l'objet d'un
alors qu'elle est encore chaude,
mauvais fonctionnement. Débran-
elle ne se rechargera pas ou ne se
chez-le immédiatement et contactez
re char ge ra que partiellement. Elle
un représentant Nikon.
peut éga le ment mal fonc tion ner.
Attendez que l'accumulateur re-
• Si les témoins d'étalonnage et
froi dis se avant de le char ger.
de charge clignotent tous les
deux
brusquement
• L'accumulateur n'a pas été complète-
accumulateur est inséré...
ment char gé en usine. Vous devrez le re-
... un problème est survenu au cours
charger totalement avant de l'utiliser.
Kontrollleuchten
du processus de charge. Retirez l'ac-
• Le chargement de l'accumulateur doit
cumulateur et débranchez le char-
se faire dans une température ambiante
geur immédiatement puis contactez
comprise entre 0 et 40 °C ; dans le cas
un représentant Nikon.
contraire, l'accumulateur risque de ne
Caractéristiques
pas se charger com plè te ment ou de
mal fonctionner.
Valeur d'entrée :
CA 100–240 V
(50/60 Hz)
• N'essayez pas de recharger un accumu-
Valeur de charge : CC 12,6 V/1200 mA
lateur déjà chargé, vous risqueriez de
Piles compatibles : Accumulateurs Nikon
réduire sa capacité de charge.
Li-ion rechargeables
• Si vous remarquez de la fumée ou une
EN-EL4
odeur inhabituelle sortant du chargeur,
Durée de charge :
Environ 100 minutes
dé bran chez-le immédiatement en pre-
si l'accumulateur est
nant soin de ne pas vous brûler et ap-
entièrement déchargé
12,6 V/1200 mA
portez-le à votre centre de maintenance
Température
agréé Nikon afi n de le faire vérifi er.
Nikon EN-EL4 (Lithium-
d'exploitation :
0–40 °C
Ionen-Akku)
Dimensions :
135 mm (L) × 85 mm (P)
Recharge des accumulateurs
ca. 100 Minuten bei
× 54,5 mm (H) en vi ron
Nikon Li-ion rechargeables EN-EL4
vollständig entladenem
Longueur
Akku
1
Branchez la fi che secteur pour MH-21
du cordon :
1,80 m environ
dans le chargeur d'accumulateur (Fi-
Poids :
225 g environ, sans le
gure 2-a).
ca. 54,5 mm × 135 mm
cordon d'ali men ta tion
× 85 mm
2
Branchez la fi che secteur murale dans
Ce produit peut faire l'objet d'une amé lio -
(Höhe × Breite × Tie fe)
une prise électrique murale.
ra tion pou vant résulter de modifi cations
ca. 1,8 m
Remarque : les témoins de char-
des ca rac té ris ti ques et de l'apparence ex-
ca. 225 g
ge et d'étalonnage ne s'allume-
terne du produit, et ce sans avis préalable
(ohne Netz ka bel)
ront pas tant que vous n'aurez
de la part du fabricant.
pas inséré d'accumulateur.
Insérez l'accumulateur (contacts en
3
premier) : faites correspondre l'extré-
mité de l'accumulateur avec le repère
puis faites-le glisser dans la direction
indiquée jusqu'à ce qu'il soit en place
(Figure 2-b). La charge commence
dès que l'accumulateur est inséré.
L'état de charge est indiqué par des
témoins lumineux :
Témoins de charge (verts)
Etat de charge
50%
80%
100%
Inférieur à 50% de la
capacité maximale
Clignote
Eteint
Eteint
50–80% de la capa-
cité maximale
Allumé Clignote Eteint
Supérieur à 80%
mais inférieur à
100% de la capacité
Allumé Allumé Clignote
maximale
100% de la capacité
maximale
Allumé Allumé Allumé
Español
Gracias por adquirir un Cargador Rápido
Cuando se ha completado la carga,
4
MH-21 para baterías recargables de iones
deslice la batería fuera del cargador en
de litio EN-EL4 de Nikon. El MH-21 está
la dirección inversa a la mostrada en la
equipado con la característica de calibra-
Figura 2-b. Desconecte el cargador.
ción de batería y luces de carga que se
Cuando no esté en uso el cargador, re-
iluminarán, parpadearán o se apagarán
emplace el protector de contactos para
de acuerdo con el estado de carga de la
evitar la acumulación de polvo en los
batería.
contactos del cargador.
Calibración
Si Parpadea la Luz de Calibración
La calibración permite una medición
Si parpadea la luz de calibración durante
precisa de la carga de la batería, ase-
aproximadamente diez segundos des-
gurando que el nivel de carga pueda
pués de insertar una batería, la batería
visualizarse con mayor precisión.
necesita ser calibrada para asegurar que
Baterías recargables de iones
el estado de carga puede ser medido
de litio EN-EL4
con precisión. El tiempo necesario para
Las baterías recargables de iones de
calibrar la batería se muestra en las luces
de carga:
litio EN-EL4 pueden transmitir infor-
mación sobre el estado de la batería
Luz de ca-
Tiempo necesario
libración
aproximado
Luces de carga (verde)
cuando se conectan a dispositivos
para recalibrar la
(amarilla)
compatibles.
batería
CAL ON
2h
4h
6h
4h
6h
Antes de su uso, por favor lea las ad-
Más de 6 horas
Luce
Luce
Luce
Luce
vertencias y otra información en este
4–6 horas
manual y en la documentación de su ba-
Luce
Luce
Luce
Apagada
tería recargable de iones de litio EN-EL4
2–4 horas
Luce
Luce
Apagada Apagada
de Nikon.
Menos de 2
Eteint
Precauciones de seguridad
horas
Luce
Apagada Apagada Apagada
Eteint
Eteint
Para garantizar un correcto funciona-
Para iniciar la calibración, pulse el botón
miento del producto, lea este manual
CAL al lado de la luz de calibración du-
atentamente antes de usarlo. Una vez lo
rante un segundo mientras parpadea la
haya leído, guárdelo donde puedan verlo
luz. Cuando se complete la calibración,
todas las personas que vayan a utilizar el
las luces de calibración y carga se apaga-
producto.
rán y comenzará la carga.
Aunque se recomienda la calibración
Precauciones de uso: Cargador
Rápido MH-21
para una medición precisa del estado
de carga de la batería, no es necesa-
✔ IMPORTANTE
rio calibrar cuando parpadea la luz de
El cargador MH-21 debe usarse para
calibración. Una vez ha comenzado, la
recargar únicamente baterías re-
calibración puede interrumpirse cuando
cargables de iones de litio EN-EL4.
se desee.
No intente recargar cualquier otra
• Si no se pulsa el botón CAL mientras
batería con el MH-21.
parpadea la luz de calibración, la carga
• No utilice este producto con baterías no
normal comenzará después de diez
compatibles.
segundos.
• Para interrumpir la calibración, pulse
• Desenchufe el cable de corriente de la
toma de corriente cuando el cargador
el botón de calibración de nuevo.
Terminará la calibración y comenzará
no se esté utilizando.
la carga.
Precauciones de Uso: Baterías
recargables de iones de litio
Solución de Problemas
EN-EL4 de Nikon
• Si las luces parpadean cuando
no está insertada la batería...
✔ IMPORTANTE
...el MH-21 tiene una avería. Desco-
La temperatura interna de la ba-
necte el cargador inmediatamente y
tería pue de aumentar mientras se
contacte con un servicio Nikon.
esté utilizando la batería, especial-
• Si las luces de calibración y carga
mente cuando la tem pe ra tu ra am-
parpadean a la vez cuando se in-
biente sea alta. Si intenta re car gar
serta una batería...
la batería mientras la temperatura
...ocurrió un problema durante la car-
interna sea elevada, la batería no
ga. Extraiga la batería y desconecte el
se car ga rá o sólo se cargará par-
cargador inmediatamente, contacte
cialmente. Espere a que se enfríe
con un servicio Nikon.
la batería antes de cargar.
• La batería no viene totalmente cargada
Especifi caciones
lorsqu'un
de fábrica. Cargue la batería antes de
Entrada nominal:
100–240 V (50/60 Hz)
su uso.
CA
Salida de carga:
12,6 V/1200 mA CC
• Cuando recargue la batería, la tem-
Baterías de
peratura ambiente debería estar entre
aplicación:
Baterías recargables de
0–40 ºC o la batería no se cargará
iones de litio EN-EL4 de
to tal men te o puede no funcionar co-
Nikon
rrectamente.
Duración de
• No intente recargar una batería que
la carga:
Aproximadamente
está totalmente cargada. Si no se ob-
100 minutos cuando
serva esta precaución el rendimiento de
no quede carga
la batería dis mi nui rá.
Temperatura de
funcionamiento:
0–40 ºC
• Si ve humo o percibe un olor inusual
Dimensiones:
Aproximadamente
desde el cargador, desconéctelo, con
135 mm (An.) × 85 mm
cuidado para evitar incendios. Lleve el
(Pr.) × 54,5 mm (Al.)
cargador a un servicio Nikon autorizado
Longitud del cable: Aproximadamente
para su ins pec ción.
1800 mm
Recarga de baterías recarga-
Peso:
Aproximadamente
bles de iones de litio EN-EL4
225 g, ex clu yen do el
de Nikon
cable de co rrien te
Las mejoras realizadas en el producto pue-
Conecte el adaptador CA en el car-
1
den dar como resultado cambios en las
gador de baterías (Figura 2-a).
es pe ci fi ca cio nes y la apariencia externa.
2
Conecte el cable a un enchufe de
corriente.
Nota: Las luces de carga y cali-
bración no se encenderán has-
ta que se inserte una batería.
3
Inserte la batería (primero los termi-
nales), alineando el fi nal de la batería
con la guía y deslice la batería en la
dirección indicada hasta que encaje
en su lugar (Figura 2-b). La carga se
iniciará cuando se conecte la batería.
El estado de la carga se muestra por
las luces de carga:
Luces de carga (verde)
Estado de carga
50%
80%
100%
Menos del 50%
de la máxima
Parpadea Apagado Apagado
capacidad
50–80% de la máxi-
ma capacidad
Luce
Parpadea Apagado
Más del 80% pero
menos del 100% de la
Luce
Luce
Parpadea
máxima capacidad
100% de la máxima
capacidad
Luce
Luce
Luce
Advertisement

Related Manuals for Nikon MH-21


Summary of Contents for Nikon MH-21
- Page 1 ■ 仕様 重要 ❢ 電源: 図 2 /Figure 2/Abbildung 2/Figure 2/Figura 2/Bild 2/ MH-21 は ニ コ ン Li-ion リ チ ャ ー ジ ャ ブ ル 充電出力: 2/ 그림 2 Figuur 2/Figura 2/ 图 2/ 圖 バッテリー EN-EL4 を充電するためのチャー...
- Page 2 Dopo la consultazio- 尼 康 MH-21 仅 可 以 用 于 尼 康 mentre la spia sta lampeggiando. Quan- ne dello stesso, conservatelo in un luogo EN-EL4 充电锂离子电池充电。不...
Need help?
Do you have a question about the MH-21 and is the answer not in the manual?
Questions and answers