
Related Manuals for Hawk s1


Summary of Contents for Hawk s1
- Page 1 SYRINGE PUMP USER MANUAL Shenzhen Hawk Medical Instrument Co. Ltd. Please read the manual before using the product. Please keep the manual for reference! 057-00080-02...
-
Page 2: Table Of Contents
Contents Revision Notes:..................... 1 1.Warnings and Cautions..................2 2. Overview......................5 2.1 Features....................5 2.2 Major Uses and Scope of Application............5 2.3 Type and Specification................5 2.4 Composition and Definition of Model............5 2.5 Operation conditions.................6 2.6 Impacts on Environment and Energy............6 3. - Page 3 8.5 Contraindications................... 43 9.Troubleshooting....................44 10. Safety Invention and Troubleshooting.............. 44 10.1 Safety Invention and Precautions............44 10.2 Troubleshooting..................44 11. Maintenance, Inspection, Repair and Recycling..........44 11.1 Routine maintenance................45 11.2 Maintenance during operation............... 45 11.3 Regular Inspection................45 11.4 Normal maintenance procedure............. 46 11.5 Maintenance for long-time storage............
-
Page 4: Revision Notes
Revision Notes: The copyright of this user manual belongs to Shenzhen Hawk Medical Instrument Co., Ltd. No unit or individual is allowed to copy, revise or translate this user manual without the consent of the company. On the premise of comply with relevant laws and regulations, we’ll revise the manual timely according to the improvement of products or update of laws and regulations. -
Page 5: Warnings And Cautions
1.Warnings and Cautions Warning Failure to follow precautions below may result in the risk of death or injury to patients. A) The Syringe Pump uses motor-driven screw for medical fluid infusion, but cannot detect leakage caused by disconnection or crack of infusion set. It is required to inspect the infusion status regularly to prevent above problems. - Page 6 with surrounding objects. I) The Syringe Pump cannot use with possible large negative or positive pressure piping such as extracorporeal circuit. As in such case, the Syringe Pump cannot ensure infusion accuracy and correct alarm functions. J) The Syringe Pump can not use for blood transfusion. K) Do not use the Syringe Pump near inflammable liquid or gas.
- Page 7 high frequency wave of electric cautery equipment. If the syringe pump has to be used with electric cautery equipment, please take proper measures as follows: (1) Avoid using the Syringe Pump along with old-fashioned electric cautery apparatus (open vacuumtube). (2) The distance between Syringe Pump and the body of electric cautery apparatus or its power source should be more than 25cm.
-
Page 8: Overview
This product is Category I and CF type continuously operated device with internal batteries. It cannot be carried by patients, or used in places with mixed gas of flammable gas and air, or mixed gas of oxygen with nitrous oxide. 2.4 Composition and Definition of Model hawk-s1... -
Page 9: Operation Conditions
Model hawk-s1 Features 1.Rate Mode 2.Time Mode Can be stacked to double channel, 3.Weight Mode three channel,four channel, five 4.Intermittent Infu Mode channel, six channel, six channel, 5.Program Mode seven channel, eight channel 6.TPN Mode syringe pump 7.TIVA Mode 8.Shift Mode 2.5 Operation conditions... -
Page 10: Technical Characteristics, Parameters And Explanations Of Nouns
Pump body: the heart of the whole system and the driving force of transfusing medical liquid. It uses step motor driving screw to push the syringe plunger forward. Detection device: mainly containing sensors,such as ultrasonic sensor (for detecting motor running and reversing) and pressure sensor (for detecting occlusion) etc. - Page 11 KVO rate (0.10-5.00) ml/h, preset by the user; default: 0.10ml/h 5ml syringe: (0.10-150.00)ml/h 10ml syringe:(0.10-300.00)ml/h Infusion rate 20ml syringe: (0.10-600.00)ml/h 30ml syringe: (0.10-900.00)ml/h 50ml(60ml) syringe: (0.10-1800.00)ml/h 5ml syringe: (100.00-150.00)ml/h 10ml syringe: (100.00-300.00)ml/h 20ml syringe: (100.00-600.00)ml/h Bolus 30ml syringe: (100.00-900.00)ml/h 50ml(60ml) syringe: (100.00-1800.00)ml/h 5ml syringe: 150 ml/h 10ml syringe: 300 ml/h Purge...
- Page 12 Li_Polymer 7.4V 1900mAh; Recharge time: 10h with power on, 3.5h with power off. Battery Running time: more than 7h at rate of 5ml/h for 50ml syringes, environment temperature 25℃ after being fully charged. Power consumption 25VA DC12 ± 1.2V, 1.5A, CE certificated Slow fuse Specification: 250V 2A Fuse (Maximum fusing time is 10 seconds when current is 5.5A)
-
Page 13: Installation And Adjustment
Infusion tubing Syringe and extension tube 5. Installation and Adjustment 5.1 Installation conditions and technical requirements The Syringe Pump can be fixed to a vertical IV pole or horizontal bar with diameter of 12-35 mm, or on platform with slope angle not exceeding 5°. 5.2 Assembly/ Disassembly of Handle 5.2.1 Installation of handle Hold the syringe pump with one hand, hold the handle with another hand, push the sliding rail of... -
Page 14: Appearance Introduction
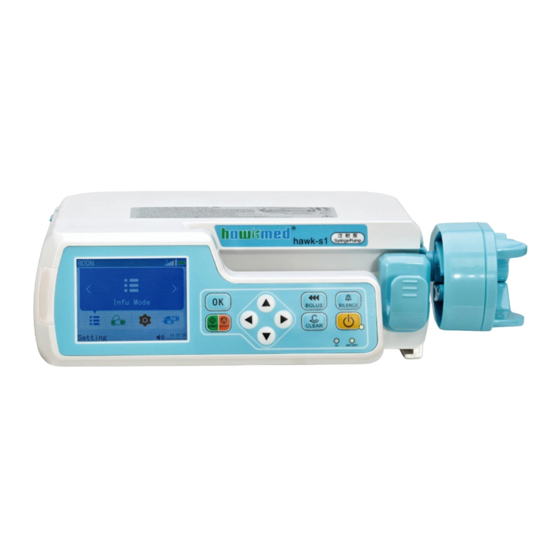
screw down the knob to fix the position of syringe pump. Should hold the syringe pump during the installation; only release the hand after screwed tightly to avoid falling. 6. Appearance Introduction 6.1 Front View ②——Push handle ①——Clutch ③——Clip ④——Syringe edge fixed groove ⑤——Detective button ⑥——Pulling handle ⑧——Display interface... -
Page 15: Keypad
Indicator light: Indicator light indicates operating status/alarms cases. The green indicator light flashes when the infusion is in normal progress. If high-priority alarm occurs, the indicator light shall turn red and flash. If middle-priority alarm occurs during operation, the indicator light shall turn yellow and flash. If low-priority alarm occurs during operation, the indicator light shall turn yellow but not flash. - Page 16 CLEAR/ 1. Clear the alarm signals. BACK key 2. Back to the previous menu. 1. To select the parameter and make it editable. OK key 2. Save the setting value. START key In ‘stop’ status, press this key to start infusion. STOP key Press this key to stop infusion.
-
Page 17: Screen Display
6.3 Screen Display Battery icon 1).Green wave appearing indicates the battery is charging. 2).The battery icon indicates status of battery remaining capacity. Pressure indicating icon 1). Except for the first vertical line, the lines from the left to the right are corresponding to 8 levels of occlusion. -
Page 18: Rear View
6.4 Rear view Description Function Battery compartment Battery location. Open it from the back of machine Pole clamp It is used to fix the syringe Pump on IV stand. AC power socket External 100V-240V 50/60Hz AC power supply USB1 For software updating DC 10.8V --13.2V, 1.25A, DC power supply DC socket External DC power supply should meet the isolation requirements... - Page 19 6.5.2 Symbols and significance Symbols Description Symbols Description Production batch No. Protective Earthing Waterproof level: Serial number IPX3 dripping water by slope angel 60° Caution,consult accompanying AC power documents Type CF DC power Dispose in Date of production environmental-friendly manufacturer Start/stop Bolus Turn on/off...
-
Page 20: Preparation And Inspection
Keep upright during transport 7. Preparation and inspection 7.1 Preparation and Inspection before Use Whether the Syringe Pump is a new one, or it has been stored for a period of time, or it just has been repaired, please check the following terms before use: (1) The outlook remains good, clean, no crack and no leakage. -
Page 21: Operation Method
8. Operation Method 8.1 Operation 8.1.1 Fix the machine and connect the power cord Install the syringe pump and connect it to AC power. AC/DC indicator light will be on. The battery will start charging when connect to external power. 8.1.2 Switch on/off Switch on: Press Power key few seconds, the pump will be switched on and do self-test, and... - Page 24 After correct installation, syringe pump will recognize the syringe size automatically, and displays the size on top left corner of LCD. Please make sure the size displayed on LCD is the same as the using syringe. Otherwise, it will affect the infusion accuracy and alarm functions. There are 6 brands of syringe built in the system: Boon, JR, LX, SG, HD, KDL.Please enter the setting menu to choose the correct brand.
- Page 25 (Fig. 814-1 Infusion mode interface) Select infusion mode by pressing key, press OK key to enter the parameter setting interface of the infusion mode. The following is methods of setting the parameters of modes: (1)Rate Mode (Fig. 814-2) (Fig. 814-3) After entering parameter setting interface of Rate mode, press to choose the parameter to be edited, it will be marked with blue rectangle background.
- Page 26 (Fig. 814-4) After entering parameter setting interface of Time mode, press to choose parameter item to be edited, it will be marked with blue rectangle background. Press OK key, the blue rectangle disappears, then the current editable position will be marked white rectangle background, input the value according to (Fig.
- Page 27 (Fig. 814-5) After entering parameter setting interface of Weight mode, press to choose parameter item to be edited, it will be marked with blue rectangle background. Press OK key, the blue rectangle disappears, then the current editable position will be marked white rectangle background, input the value according to (Fig.
- Page 28 (Fig. 814-6) After entering parameter setting interface of Intermittent mode, press choose parameter item to be edited, it will be marked with blue rectangle background. Press OK key, the blue rectangle disappears, then the current editable position will be marked white rectangle background, input the value according to (Fig. 814-3), Rate, VTBI per time, Interval time and KVO Rate are adjustable, after confirming, press OK to save.
- Page 29 (Fig. 814-7) After entering parameter setting interface of Program mode, press choose parameter to be edited, it will be marked with blue rectangle background. Press OK key, the blue rectangle disappears, then the current editable position will be marked white rectangle background, input the value according to (Fig. 814-3), VTBI and Time are adjustable, after confirming, press OK to save.
- Page 30 (6)TPN Mode (Fig. 814-8) After entering parameter setting interface of TPN mode, press to choose parameter item to be edited, it will be marked with blue rectangle background. Press OK key, the blue rectangle disappears, then the current editable position will be marked white rectangle background, input the value according to (Fig.
- Page 31 key, the blue rectangle disappears, then the current editable position will be marked white rectangle background, input the value according to (Fig. 814-3), Unit, Weight, Concentration, Induce Volume, Induce Time and Maintain dose are adjustable, after confirming, press OK to save. Induce Rate and Maintain Rate will be automatically calculated by system according to the value of Unit, Weight, Concentration, Induce Volume, Induce Time and Maintain dose, and shows on the screen.
- Page 32 2. Select Drug library mode in main menu (Fig. 814-11) Select drug category / type, then select drug name, input parameters and press OK key to save them. To re-select the infusion mode, press Return key to exit. 3. Setting Range of parameters in each Infusion Modes (For Reference) Preset volume : 0000.00-9999.99ml Rate mode flow rate : 0.10-1800.00ml/h...
- Page 33 mol/kg/m,mEq/kg/h,mEq/kg/min,IU/kg/h,IU/kg/min,U/kg/h,U/kg /min Dosage : (0.001-99999.999)mg,ug Liquid volume : (0.01-2000.00)ml Weight Presets : 0-9999.99 ml Interval : 0hrs1min-99hrs59min KVO rate : (0.10-5.00)ml/h Intermittent mode Volume limit each time : (0.01-9999.99)ml Flow rate :(0.10 - 1800.00)ml/h Drug library Weight, dose, volume, dose, preset, flow rate Unit:mg/kg/min,mg/kg/h,ug/kg/min,ug/kg/h Weight : (0.01-300.00)kg Concentration : (0.01-2000.000)mg/ml,ug/ml...
- Page 34 Rate 1 :(0.10-1800.00)ml/h VTBI 2 : (0.10-9999.99)ml Rate 2 :(0.10-1800.00)ml/h 8.1.5 Purge Press Bolus key until the air bubble in infusion tube is totally exhausted.. The volume generated by “purge” is not calculated in accumulated volume. Note: “purge” only use when machine is in non-infusion status, and infusion tube is not connected to patients.
-
Page 35: Alarms And Solutions
After the preset volume was completed or the accumulated volume reached 9999.9ml, the syringe pump will activate KVO function and give finish alarm. Press Stop key to stop the infusion. 8.1.10 Replace syringe (1) Open pump door, pull the pull handle of syringe pump to the end, then turn right 90° (2) Press the clutch and move the push handle right forward, remove the syringe. - Page 36 pump fails. Battery running out 1. At least 3min before the pump turns itself off alarm (In cases Stop using and charge the battery full. automatically for the battery when only battery running out. supplying can be used at power 2.
- Page 37 syringe, and the syringe pump fails to recognize syringe Clutch is pressed during the Press Clear to eliminate alarm, and Handle off alarm operation process of syringe stop pressing the clutch and start to pump. inject again. The hand-push of syringe does Syringe hand-push Press Clear to eliminate alarm.
- Page 38 AC power plug Abnormal off and battery exhausted durin please charge the battery fully. AC fail alarm g infusion, the pump will alarm in sound and red light for 3 minutes Note:The set parameters (including alarm setting) are stored in memory chips. The saved data will not be lost after power failure and can be saved for more than 10 years.
-
Page 39: Syringe Setting
8). Near Empty alarm When the syringe is about to be empty, “Near Empty” shall sound and display on the screen. 9). Syringe off alarm During operation, take out the syringe or pull handle does not compress on syringe, the device shall display “syringe off”... -
Page 40: System Setting
c) press to return to syringe setting interface. Select “Select syringe”and press OK key, select “Brand A” and press OK key. Top left corner of LCD shows “brand A”. d) To ensure infusion accuracy, it should verify after calibration with the methods below: d-1) 0.1ml/h accuracy test Let the syringe pump start injection at 0.1ml/h for 3 hours. - Page 41 required value, then press OK key to save the setting. All the setting parameters can be saved automatically after turn off the device, and storage time is 5 years. 8.4.1 Set alarm sound volume Select “Settings” in the main menu, press OK key to enter. Press OK key for ‘Sound’, press key to select required sound volume (low, medium, high).
- Page 42 Note: 1. If use medical liquid of high viscosity and set low occlusion level, the machine may give occlusion alarm when there is no occlusion in the tube, In this case, please observe the pressure indicator on the screen and condition of syringe, and set higher occlusion level if necessary. 2.
- Page 43 8.4.7 Key Sound setting After entering “Key sound” setting interface, select “ON” or “OFF”, then press OK key to save and exit. 8.4.8 Forget Operate Alarm Setting After entering “Forget Op” setting interface, select “ON” or “OFF”. When the setting is on: in ‘stop’ status, the reminder alarm shall sound when no operation on keypad in 2 minutes.
- Page 44 syringe pump serial number and then click “start”. e. Press to upload records to computer terminal; press “ transfer- capture text - Stop” after finishing uploading, then all infusion/alarms records can be reviewed on the txt that established previously. After finishing uploading, the syringe pump will return to the previous menu automatically. (2) View Log: Press to view the latest infusion/alarm information.
- Page 45 Press OK key to edit the bed number, confirm and press OK key to save. 8.4.16 administrator Settings. Administrator password: 111111. 8.4.16.1 WIFI configuration and WIFI module (optional) The pump supports connection to HK-M1000 Hawkmed fluid management system wirelessly, it works through WIFI module (optional) and router (optional).
-
Page 46: Contraindications
prepare the liquid volume/mass measurement device. For details, see 8.3. 8.4.16.5 Maintenance Period Enter the maintenance cycle setting interface, edit the maintenance time according to the requirement, 0-48 months, press OK key to save after setting. This function is mainly to remind the user to regularly maintain the machine, set maintenance interval, when the machine is turned on detects that the distance from the last maintenance has reached the set time will pop up a reminder box to remind the user to maintain. -
Page 47: Troubleshooting
9.Troubleshooting Failure Cause Analysis Solutions The syringe edge did not install into Please install it correctly the syringe fixed groove The syringe currently used does Select the correct brand of Accuracy discrepancy not match default brand syringe or self-defined syringe Certain parts of the machine may Contact distributor or be defective... -
Page 48: Routine Maintenance
11.1 Routine maintenance Daily maintenance includes the cleaning of outer shell and pump body. Clean it with wet soft cloth and natural drying. Do not use solvents like xylene or acetone or other similar solvents which may corrode the syringe pump. 11.2 Maintenance during operation The maintenance during operation mainly concerns the cleaning of push handle and surrounding areas. -
Page 49: Normal Maintenance Procedure
It is better to replace the battery every year. It is advised to contact the supplier once battery is expired because they are not easy to be replaced. Battery replacement steps are listed as follows: (1) loosen the bottom shell screws and remove the battery cover. (2) unplug the battery cable plug and remove the battery. -
Page 50: Transport And Storage
12. Transport and storage 12.1 Precautions during transport 1. Place the product as per No. of layers indicated on packing carton. 2. Temperature: --20℃~45℃ ; 3. Relative humidity: 10~85% (no frosting) 4. Atmosphere pressure: 50.0kPa~106.0kPa 12.2 Storage conditions. Storage temperature: -20℃~+45℃(With battery) -20℃~+60℃(Without battery) Relative humidity: 10~85% (no frosting) Atmosphere pressure: 50.0kPa~106.0kPa... -
Page 51: After Sales Service
3. Keep all accessories, warranty card and User Manual well for future use and reference. 4. Keep some packing cartons in case of using them to deliver defective machines. 5. If there is any accessory lacking or damaged, please contact the supplier at the earliest. 15. - Page 52 syringe pump should not be put close to or stacked on other devices. If it has to be put close to or stacked on other device, it should be observed and verified that if it can operate normally under its application configuration;...
- Page 53 power supply network that supplies buildings used for Harmonic emission domestic purposes Not applicable GB 17625.1 Voltage fluctuation/Flash Not applicable radiation GB 17625.2 Guidance and Manufacturer’s Declaration-Electromagnetic Immunity The syringe pump is intended for use in the electromagnetic environment specified below. The customer or the user of syringe pump should assure that it is used in such an environment.
- Page 54 Network power should have the quality that is Surge ±1 kV line to line ±1 kV line to line typical for application in IEC 61000-4-5 ±2 kV line to ground ±2 kV line to ground commercial environment or hospital. <5 % U , continuing <5 % U , continuing for...
- Page 55 Guidance and Manufacturer’s Declaration- Electromagnetic Immunity The syringe pump is expected to be used in the following electromagnetic environment. Purchasers and users should ensure that they will use the product in the following electromagnetic environment: IEC 60601 Test Compliance Electromagnetic Environment – Immunity Test Level level...
- Page 56 Note 1: At 80 MHz and 800 MHz, the higher frequency range applies. Note 2: This guidance may not apply to all situations,electromagnetic propagation is affected by the absorption and reflection of buildings, objects and human bodies. a Fixed transmitter, such as the base stations of wireless (cell/cordless) phones and ground mobile radio, amateur radio, amplitude modulation, FM radio broadcast and TV broadcast, etc., its field strength cannot be forecasted accurately in theory.
- Page 57 For the Rated maximum output power of transmitter not listed in the table above, isolation distance d, in m, is recommended. It can be determined with the formula in the frequency column of corresponding transmitter. P here is the maximum rated output power of transmitter, in W, provided by transmitter manufacturer.
- Page 58 No operation alarm Low priority Yellow,steady Table 2 Alarm conditions and alarm signal delay Alarm classification Alarm Condition Delay Alarm Signal Delay Handle off alarm 10ms 100ms Syringe off alarm 10ms 100ms Roll hem abnormality alarm 10ms 100ms Syringe push off 10ms 100ms 840s@1ml/h...
- Page 59 Table 3 Characteristic parameters of alarm signals Table 4 Occlusion response characteristic Flow rate Occlusion Occlusion Occlusion alarm (ml/h) alarm level pressure(KPa) time 12min59sec47s Middle 35min29sec High 42min53sec 4min37sec69s Middle 7min09sec High 9min50sec The above test uses “Boon” brand of 5ml syringe. All the data are obtained by using “Boon” brand syringe.The syringe pump has pressure release function.
- Page 60 Table 5 Starting Curve 1ml Starting Curve 5ml Starting Curve...
- Page 61 Table 6 Trumpet Curves 1ml Trumpet Curves 5ml Trumpet Curves These data are testing result according to GB9706.27-2005 and the company's products standard. It uses syringe pump and 10ml syringe under Boon brand. For more information, please contact with our After-sales Service Department.
- Page 62 Manufacturer : Shenzhen Hawk Medical Instrument Co.,Ltd. Address:1st Floor, Building C, Jianyetai Industrial Zone, No.11 Minhuan Road, Fukang Community, Longhua Street, Longhua District, Shenzhen, 518109, Guangdong, P.R.China Tel: +86-755-8315 1901 Fax: +86-755-8315 1906 E-mail: szhk@hawkmedical.cn Website: www.hawkmedical.cn EU Representative: WellKang Ltd Address:The Black Church, St.
Need help?
Do you have a question about the s1 and is the answer not in the manual?
Questions and answers