Advertisement
Quick Links
Central Inverter System Installation
Vertical (Stacked) and Horizontal (Side by Side)
5 Step Installation
1. Mounting the Cabinet
2. Install / Connect Batteries
3. Install Conduit
4. Install AC Wiring
5. Energize System
For additional information, please refer to the Installation/Operation Manual
Technical Support / Installation Questions - Call 1-800-967-5573
Contractors Guide
Step By Step Procedures – 2,200 Watt/VA
Two Phase, Split Phase
Mounting Guidelines
Monday-Friday, 8AM-5PM EST
2575 Metropolitan Drive • Trevose • PA 19053 U•S•A
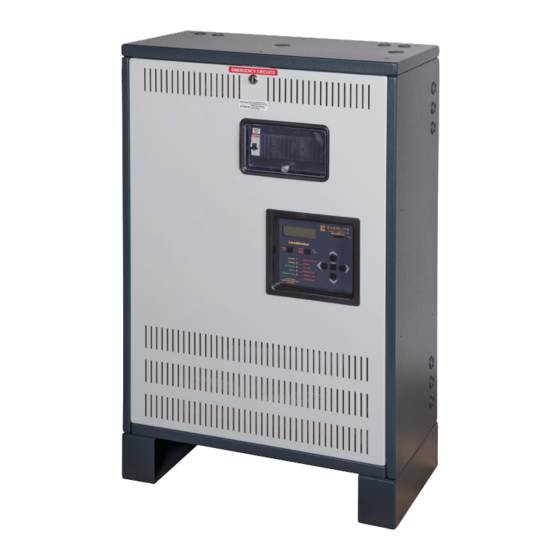
Inverter shown is 2.2KW using a Stacked (Vertical)
configuration. (Factory preferred configuration)
Note - Remove Floor Mounting Brackets from
Inverter Cabinet for Vertical Mounting configuration
Page 1
Advertisement

Related Manuals for Evenlite LiteMinder LM Series


Summary of Contents for Evenlite LiteMinder LM Series
- Page 1 Contractors Guide Central Inverter System Installation Step By Step Procedures – 2,200 Watt/VA Two Phase, Split Phase Vertical (Stacked) and Horizontal (Side by Side) Mounting Guidelines Inverter shown is 2.2KW using a Stacked (Vertical) configuration. (Factory preferred configuration) 5 Step Installation 1.
- Page 2 3 feet minimum clearance AC Breaker Panel in front of all units Man Machine Interface Panel Master Inverter Cabinet Battery Cabinet Horizontal Mounting Bracket, Floor Mounting Inter-cabinet Battery Cable Mounting Slot Ports for Vertical Mounting See Detail 9.97 Master Inverter Cabinet 21.00 Floor Mounting Bolt Pattern 64.3...
-
Page 3: Step 1 Mounting The Cabinet
Step 1 Mounting the Cabinet Mounting can be either Vertical (Stacked) or Horizontal (Side by Side). Each cabinet is shipped with Floor Mounting Brackets to accommodate both configurations. Preferred method is Vertical mounting such that the Front Panel Display is at user's eye level. -
Page 4: Battery Cabinet
*Install Grommet in Battery Cabinet for wire protection before stacking the cabinets. Secure Inverter cabinet on top of Battery Cabinet with 6 x ¼-20 bolts (factory provided). Bolts are mounted from the underside of the Battery Cabinet and screw up into PEM® fasteners in the bottom of the Inverter Cabinet. Master Inverter Cabinet View shows bolts from the... - Page 5 Step 2 Installing and Wiring the Batteries Note – Always ensure that 2 of the DC Fuses in the battery cabinet are removed before starting installation. Battery cable lengths are sufficient for Vertical or Side by Side mounting. Positive and Negative battery cables should be trimmed to length when using Vertical (Stacked) configuration before installing into the battery cabinets terminal blocks.This system has a Series/Parallel battery arrangement.
- Page 6 Step 3 Installing the AC Conduit Use Provided Knock-Outs located on Tops and Sides of Inverter Cabinet Note – Drilling into cabinets may VOID warrant - metal shavings can short circuit electronic components. Input and Output Wires should be run in separate conduit per NEC. Knock-Outs are a dual size for 7/8"...
- Page 7 Step 4 Installing the AC Wiring Ensure the AC Input Breaker CB1 is in the OFF (Down) position before starting. See Installation/Operating manual (section 7) for AC Input and Output AC ratings. Remove Plastic AC Circuit Breaker Cover (secured with 2 x ¼-20 bolts). Wire AC input directly to top side of Input Breaker - AC Input Circuit Breaker on Left side.
-
Page 8: Contents Of Shipment
Step 5 Starting Up/Energizing the Unit Ensure batteries are installed, the wiring is checked per Step 2. Ensure AC Power is present and lighting loads are connected per Step 4. Flip on Input Circuit Breaker CB1. Flip on System's On/Off Switch located to the right of the Interface Panel. System will go through start up diagnostics and go into charge mode if there are no errors.
Need help?
Do you have a question about the LiteMinder LM Series and is the answer not in the manual?
Questions and answers