Table of Contents
Advertisement
Quick Links
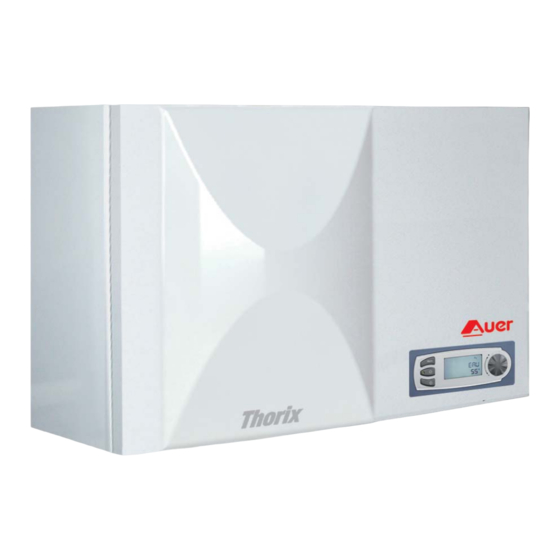
Thorix
EVOLUTION 2C
Hydraulic device for controlling one direct
heating circuit and a secondary mixed
heating circuit
Compatible with all types of generator
Installation and operating instructions
Thorix EVOLUTION 2C
with outdoor sensor
Ref. 411003
Made
in France
Manual ref: 1898557
Edition n°: 22.44
Advertisement
Table of Contents

Summary of Contents for auer Thorix EVOLUTION 2C
- Page 1 EVOLUTION 2C Hydraulic device for controlling one direct heating circuit and a secondary mixed heating circuit Compatible with all types of generator Installation and operating instructions Thorix EVOLUTION 2C with outdoor sensor Ref. 411003 Made in France Manual ref: 1898557...
-
Page 2: Table Of Contents
CONTENTS 1 - IMPORTANT: PLEASE READ IMMEDIATELY . 3 5 - USE ..............20 1.1 - Important information ...............3 5.1 - Setting the date and time ...............20 1.2 - Safety instructions and advice ............3 5.2 - Programming heating mode time periods ......20 1.3 - General delivery conditions ..............3 5.2.1 - Creating a new programme ................21 1.4 - Storage and transport ................3... -
Page 3: Important: Please Read Immediately
1 - IMPORTANT: PLEASE 1.2 - Safety instructions and advice READ IMMEDIATELY The Thorix EVOLUTION must only be installed indoors, in premises protected from bad weather and frost. FORBIDDEN to • It is install the Thorix EVOLUTION outdoors. 1.1 - Important information •... -
Page 4: Introduction
2 - INTRODUCTION 2.3 - Technical data Dimensions The Thorix EVOLUTION manages and controls a mixed heating circuit (circuit n°2) according to outdoor temperature and as an Height 286 mm option to a direct heating circuit (circuit n°1) which is controlled by Width 420 mm a thermostat or ambient temperature sensor, using energy provided... -
Page 5: Accessoires
2.4 - Accessoires 2.6 - Installation recommendations The components described below are optional: Room thermostat (RT) -Ref. 710043- 2.6.1 - Domestic hot water production linked to a For controlling ambient temperature without automatically heat generator correcting the desired set temperature (see § ‘‘Regulator settings’’). Room thermostat with clock/timer for weekly domestic hot water takes priority To ensure that... -
Page 6: Hydraulics Diagrams
2.7 - Hydraulics diagrams 2.7.2 - Mixed circuit (circuit n°2) + direct circuit 2.7.1 - Mixed circuit (circuit n°2) generator (circuit n°1) generator with 1 heating with 1 circulator pump for heating and 1 circulator pump and 1 3-way valve for circulator pump for domestic hot water domestic hot water Boiler,... -
Page 7: Installation
3.2.3 - Characteristics of low-energy, variable- 3 - INSTALLATION speed circulator pump Available pressure head (m) 3.1 - Installation site The Thorix EVOLUTION must be installed in an open space to allow the electronic components (regulation and low-energy pump) to cool down by means of natural ventilation. -
Page 8: 6- Application For Underfloor Heating Circuit(S)
Furthermore, it is important to protect central heating installations 3.2.6- Application for underfloor heating from risks of corrosion, limescale, and microbiological development circuit(s) by using a corrosion inhibitor which is suitable for all types of For underfloor heating, the heating water temperature must not installation (steel radiators, cast iron, PEX underfloor heating). -
Page 9: Electrical Connections
3.4 - Electrical connections Electrical connections for the appliance must be carried out by a qualified professional with the appliance switched off from mains power. 3.4.1 - Accessing electrical connections Remove the upper cover of the appliance and also the protective cover on the electronics board. IMPORTANT: ALL CURRENT RULES AND REGULATIONS ON ELECTRICAL SAFETY IN YOUR COUNTRY MUST BE RESPECTED Diagram of electrical connections for the appliance... -
Page 10: Electrical Diagram
3.4.2 - Electrical diagram PH-N 230V power supply + ground for electronics board 6A safety fuse Optional 2-way motorised valve Circ. Variable-speed circulator pump (signal PWM2) with 3-way directional mixing valve (3WMV2) T3WMV Sensor for leaving water from 3-way mixing valve Outdoor temperature sensor RTS1 Circuit 1 (direct) thermostat or room temperature... -
Page 11: Using The ''Outdoor Temperature Deduction'' Function
To transmit an ambience request to the boiler for 3.4.7 - Power supply to boiler controlled by 65°C at least 1 heating circuit, set parametre 219 = 1 and safety aquastat where the secondary connect the alarm signal to the room temperature circuit is an underfloor heating circuit sensor input on the boiler. -
Page 12: Low Temperature Heat Pump (< 65°C)
4 - SET UP • Fittings carried out on water circuits or electrical installations must conform to current regulations and be done by a qualified professional. • Fill the installation with water. • Purge the heating circuits (open the purgers fully until all of the air has been released). -
Page 13: Installer Menu
To carry out the following adjustments: Display when switched off: Configuration of circuit 1 (turn dial to select type of circuit) : 2 2:1 7 radi ato r Backlighting and LED light on on / off button are off. Enter Standard display when operating % that the 3-way floo r hea. -
Page 14: Purging
4.5 - Manual or automatic setting on the 4.4 - Purging secondary mixed circuit To fully purge the installation: Accessing the installer menu: Accessing the installer menu: Menu • Press the ‘‘ ’’ button Menu • Press the ‘‘ ’’ button •... -
Page 15: Settings
You can return to the previous screen without saving any changes 4.6 - Settings by pressing at any time. 4.6.1 - General parametres The outside temperature P201 - An outside sensor is connected to the Thorix EVOLUTION is deduc ted from the GMOT GMiOT GMOT GMiOT... - Page 16 Factory Parametres Display Name Range Unit setting setting Outside sensor P201 yes ; no Maximum outside temperature (MOT) °C 11 to 25 P202 = • Go into the adjustments for the setting Minimum outside temperature (MiOT) °C -30 to 10 P203 •...
-
Page 17: Circuit 1 (Direct) Control
4.6.2 - Circuit 1 (direct) control Activation of timer/holiday/frost Result of room temperature control protection programming device No parametres are available for Circuit 1. Result of room Result of room Result of temperature temperature It is compulsory to connect a thermostat or a room temperature Programme status programming on thermostat on... -
Page 18: Circuit 2 (Mixed) Heating Curve
4.7 - Adjusting flow rates ("Balancing" 4.6.3.1 - Circuit 2 (mixed) heating curve function) Example of heating curves with the parametres below: The Circuit 2 (mixed) flow rate should be adapted depending on its use. ... -
Page 19: Resetting Installer Parametres
4.9 - Display The following screen indicates that See § "Repairs": "accessing temperature measurements and the circulator pump is adapting its I N p r o g r . information on ciruculator pumps and 3-way valves". speed to reach the desired flow rate 0 .4 8 (and memorising the pressure drop): The balancing period may last a few minutes... -
Page 20: Use
5.2 - Programming heating mode 5 - USE time periods Time periods at different comfort levels can be programmed for 5.1 - Setting the date and time each day and each circuit. The installation will automatically follow the programmed levels. •... -
Page 21: Creating A New Programme
5.2.1 - Creating a new programme 1 8 3 0 - 2 4 0 0 Set comfort level for fourth time period (ECO) Example: a programme created for a Monday E C O COMFORT A message will appear to ECONOMY o k m o n d a y confirm the programming for FROST... -
Page 22: Copying A Pre-Recorded Programme
5.2.3- Modifying a programme 5.2.2.2 - Copying a pre-recorded programme Example: modifying Monday’s programming. For example: Programme 1 to copy for Tuesday m o n d a y Select the day you wish to t u e s d a y Select day for programming modify M O D I F y P R . -
Page 23: User Menu
5.3.1.2 - Setting Ambient Temperature ECO 1 1 8 3 0 - 2 4 0 0 View times and comfort level or 2 for fourth time period E C O • Press : the following screen will appear : s e t t i n g m o n d a y •... -
Page 24: Setting A Holiday Period
5.3.2 - Setting a holiday period 5.3.4 - Temporary override of set comfort mode by programming a time period Holiday mode puts the appliance on standby whilst the freeze protection mode remains active during longer absences and allows The programmed comfort level can be overridden, for example you to programme in the day when you wish to return to normal in cases where someone is at home outside of the usual time comfort mode. -
Page 25: Selecting Summer / Winter Modes
6 - MAINTENANCE 5.3.5 - Selecting summer / winter modes The summer/wintER sub-menu enables you to manually change: AND REPAIRS - to wintER mode (all installed circuits are active) - to summer mode (circuits used for heating are put into LOCKING THE KEYBOARD standby mode) - to AUTOMATIc* mode (automatic switching from summer... -
Page 26: Viewing Counters And Meters
6.1.2 - Viewing counters and meters 6.2 - Locking the keyboard Accessing the Installer Menu: When the keyboard is locked, the symbol appears on the top right-hand side of the screen. • Press There are 3 locking levels: • Turn dial until screen displays: Accessing the Installer Menu: "INST. -
Page 27: Error Messages
6.3 - Error messages Errors are signalled by the backlighting of the screen flashing. If it is an automatic reset error: - resolving the issue that has generated the message will make it disappear automatically. If it is a manual reset error: - resolve the issue, - press the dial to make the error message disappear. -
Page 28: Sensor Data Curve Charts
6.4.2 - Outdoor sensor 6.4 - Sensor data curve charts Temp. Résistance Resistance Temp. R Ohms 6.4.1 - Boiler, outgoing, incoming 3WV and °C °C DHW sensors Ω Ω 171 800 24 947 161 817 23 853 kΩ 152 994 22 800 144 697 21 819... -
Page 29: Water Circuit
6.5.2 - Troubleshooting 6.5.1 - Water circuit Thorix EVOLUTION If your is not working, The only checks to be made on the water circuit are on the filters and to see if there are any leaks. Clean or replace dirty or clogged filters. -
Page 30: Warranty
8.1.2.4 - Electrical connections must be carried out either by your installer or a company where employees are AUER trained and approved. Cases (unlimited) where the warranty is void: In the absence of regular maintenance, the warranty will be void. -
Page 31: Accessories
8.1.2.6 - Accessories 9 - GLOSSARY The warranty does not cover defects resulting from: Alarme .....Voltage-free alarm signal - fitting accessories which do not comply with our recommendations, - using accessories which were not provided by us. Alim ....Power supply Amb 1 ....Room temperature sensor 1 8.1.2.7 - Maintenance Amb 2 ....Room temperature sensor 2... - Page 32 NOTES : Industrial and development site Rue de la République CS 40029 80210 Feuquières-en-Vimeu France Spare parts Tel. : +33 3 22 61 21 21 Fax : +33 3 22 61 33 35 E-mail : pieces@auer.fr Technical department E-mail : sav@auer.fr...
Need help?
Do you have a question about the Thorix EVOLUTION 2C and is the answer not in the manual?
Questions and answers