Table of Contents
Advertisement
Available languages
Available languages
Quick Links
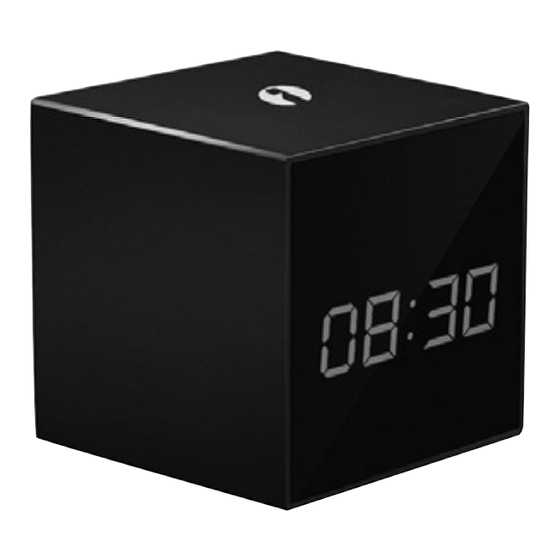
QUICK GUIDE TimeCAM – WIFI CLOCK CAMERA
Istruzioni per la sicurezza
• Non utilizzare l'apparecchio in prossimità di luoghi con presenza di acqua.
• Pulire l'apparecchio utilizzando un panno asciutto.
• Non installarlo in prossimità di fonti di calore come caloriferi stufe,
termoconvettori.
• Non forzare l'inserimento della spina elettrica nella presa.
• Utilizzare unicamente gli accessori presenti nella confezione.
• Prestare attenzione agli aspetti ambientali per lo smaltimento del prodotto.
Questo simbolo indica che questo apparecchio è provvisto di doppio isolamento tra
la tensione di rete e parti accessibili dall'utente.
In caso di manutenzione utilizzare solo parti di ricambio identiche.
Reference code 67.3794.12
Advertisement
Table of Contents

Summary of Contents for iSNATCH TimeCAM
- Page 1 Reference code 67.3794.12 QUICK GUIDE TimeCAM – WIFI CLOCK CAMERA Istruzioni per la sicurezza • Non utilizzare l’apparecchio in prossimità di luoghi con presenza di acqua. • Pulire l’apparecchio utilizzando un panno asciutto. • Non installarlo in prossimità di fonti di calore come caloriferi stufe, termoconvettori. • Non forzare l’inserimento della spina elettrica nella presa. • Utilizzare unicamente gli accessori presenti nella confezione. • Prestare attenzione agli aspetti ambientali per lo smaltimento del prodotto. Questo simbolo indica che questo apparecchio è provvisto di doppio isolamento tra la tensione di rete e parti accessibili dall’utente. In caso di manutenzione utilizzare solo parti di ricambio identiche.
-
Page 2: Contenuto Della Confezione
CONTENUTO DELLA CONFEZIONE PREPARAZIONE Uno smartphone o tablet IOS 6.0 o Android 4.0 (o superiore) • Il dispositivo è in grado di connettersi solo al router Wi-Fi operante a 2.4 GHz. • Il Router deve essere in DHCP. • Durante la configurazione, la distanza massima tra router e Time CAM deve essere inferiore a 5 metri • Non utilizzare caratteri speciali per il nome e la password del Wi-Fi. Installare l’App “Lizvie” • Cerca e scarica l’app “Lizvie” negli stores Apple e Google Player. • Oppure scansiona il QR Code relativo: Importante: in alternative, il dispositivo può essere utilizzato con le app “KALAY CAM” o “EASY N P”. INSTALLAZIONE 1. A prire la back cover 2. L evare la batteria 3. R imuovere le linguette e riposizionare la batteria. Non invertire il segno “+” e “-” - 2 -... - Page 3 4. I nserisci l’alimentatore nella presa elettrica 5. A ccendi la camera (ON) 5. A ttendere 60 secondi circa. Il dispositivo emetterà 3 beep quando sarà attivo. ATTENZIONE • Assicurarsi di utilizzare l’alimentatore fornito • La batteria necessita di una carica di 5 ore • Il dispositivo può funzionare 2-3 ore quando la batteria è completamente carica. • Si prega di rimuovere l’alimentatore in caso di maltempo per evitare danni CONFIGURAZIONE Accedere all’App Lizvie. Assicurarsi che lo smartphone sia connesso al router prima di iniziare la configurazione. 1) Cliccare + - 3 -...
- Page 4 2) Cliccare “First Add” Dopo i 3 Dong, cliccare “Next”. Se la camera non emette i Dong, spegnere e ri-accendere il dispo- sitivo. Se la camera non emetterà nessun suono, tenere premuto per 5 secondi il tasto “RESET” sul retro. Quando si sente Ding, il dispositivo tornerà ai parametri di default. Attendere 60 secondi, il dispositivo si riavvierà. - 4 -...
- Page 5 Scansionare il QR code presente sullo sticker sul retro della camera Dare un nome al dispositivo - 5 -...
- Page 6 Inserire la password corretta del router Wi-Fi Posizionare lo smartphone o tablet vicino alla camera (<10 cm), quindi premere il tasto per la configurazione. Mettere il vo- lume dello smart-phone/tablet al massimo. - 6 -...
- Page 7 Attendere 60 secondi per com- pletare la configurazione. Se la configurazione non si conclude, assicurarsi di aver digitato la password corretta del Router e procedere nuovamente. Cliccare il play sullo schermo per avviare il video. - 7 -...
-
Page 8: Multi User
10) Accedi al menu per impostare i parametri della camera come la rete WiFi, Flip Video, Password, Motion, Registrazione in caso di allarme. Nota: è possibile impostare solo l’account Gmail nella sezione e-mail. Si prega di non utilizzare altri account di posta elettronica. MULTI USER Opzione 1: Aggiungi più user nella stessa rete LAN AVVERTENZE • Assicurarsi che il router Wi-Fi sia collegato a Internet. • Assicurarsi che lo smartphone/tablet siano nella stessa LAN. • Assicurarsi di inserire la password giusta. 1) Cliccare + - 8 -... - Page 9 2) Cliccare “LAN Add” 3) Cercare il dispositivo - 9 -...
- Page 10 4) Inserire la password corretta del dispositivo Opzione 2: Il dispositivo e lo smartphone non sono nella stessa rete LAN. AVVERTENZE • Assicurarsi che il dispositivo e lo smartphone/tablet siano connessi ad internet. • Assicurarsi che l’ID del dispositivo sia corretto. • Assicurarsi che la password del dispositivo sia corretta. 1) Cliccare + - 10 -...
- Page 11 2) Cliccare “Manual Input ID” 3) Inserire la password corretta del dispositivo - 11 -...
-
Page 12: Funzione Sveglia
PC CLIENT Cerca l’indirizzo IP del dispositivo nella rete LAN e inseriscilo nel browser per accedere ai parametri della camera. Inserire username e password (default “admin”, “admin”). ONVIF COMPATIBILE È possibile aggiungere il TIME CAM in un sistema di videosorveglianza com- patibile ONVIF. Di seguito i parametri ONVIF: Username: admin Password: admin Port: 8080 FUNZIONE SVEGLIA - 12 -... -
Page 13: Impostazione Ora
La ditta KON.EL.CO. S.p.A. (P.za Don Mapelli, 75, 20099 Sesto San Giovanni, MI) in qualità di produttore, dichiara sotto la propria responsabilità che il prodotto Marchio iSnatch Tipo: TimeCAM – Wi-Fi clock camera cod. 67.3794.12, a cui fa riferimento questo manuale, è conforme ai requisiti essenziali delle Direttive 2014/35/EU, 1999/5/ EC, 2011/65/EU. La dichiarazione di conformità in forma completa è disponibile presso... -
Page 14: Safety Rules
Reference code 67.3794.12 QUICK GUIDE TimeCAM – WIFI CLOCK CAMERA Safety rules • Do not use this apparatus near water • Clean only with dry cloth • Do not install near any heat sources such as radiations, heat registers, stoves, or other apparatus (including amplifiers) that produce heat. Only use attachments/accessories specified by the manufacture. This symbol indicates that this product incorporates double insulation between hazardous mains voltage and user accessible parts. when servicing use only identical replacement parts. - 14 -... -
Page 15: Package List
PACKAGE LIST PREPARATION One smartphone or tablet with IOS 6.0 or Android 4.0 system (or above) Important note for Wi-Fi Router • Device only can connect to 2.4GHz Wi-Fi router. • Make sure turn on the DHCP of router, and MAC address should be off. • Distance between router and smart clock should be within 5 m during the configuration. • Please don’t use special character such as symbol to name the WiFi. Install “Lizvie” App • Search “Lizvie” App from Apple Store or Google Player, then download. • Scan the QR Code below and install the App. Important: Alternatively, the device will be used with “KALAY CAM” or “EASY N P” Apps. OPERATION INSTRUCTION 1. O pen the back cover 2.Take out the battery 3.Please remove the sleeves and put the battery back. Don’t reverse the “+” and “-“ - 15 -... -
Page 16: Configure Device
4.Plug in the power adapter 5.Please switch it from off to on. 6.Wait for 60 seconds after plug in, the device is active when you hearing 3 sounds of Dong. WARNING • Make sure to use the adapter provided to power the device • The battery needs charge for 5 hours. • The device can work 2-3 hours when the battery is fully charged. • Please remove the adapter in thunderstorm to avoid the possible damage. CONFIGURE DEVICE Open the App of Lizvie. Make sure your smart phone is connected to router before the configuration. 1) Click + - 16 -... - Page 17 2) Click “First Add” When you heard 3 sounds of Dong, please click “Next”. If no sounds, please switch off and turn on the device again. If still no sounds, please press “RESET” button at the backside, and hold it for 5 seconds, the device go back to default when you hear Ding. Wait for 60 seconds, the device will restart.
- Page 18 Scan the QR code on the sticker of the back housing Name the Device - 18 -...
- Page 19 Input the right password of the Wi-Fi Please put your smart phone or tablet to the device within 10cm, then press to configuration. Turn the volume of smart-phone or tablet PC to maximum. - 19 -...
- Page 20 Wait for 60 seconds, the confi- guration will be done. If confi- guration failed Please make sure input right password. Keep the environment is quite when do the configuration. Click the screen to watch the video. - 20 -...
- Page 21 10) Enter into Menu to set some pa- rameters as WiFi network, Video Flip, Password, Motion Detec- tion, Record Alarm. Note: you can set only the gmail account in Email Alarm section. Please, don’t use other account email. MORE USER IN SAME DEVICE Option1: Add more user in same Lan WARNING • Make sure the Wi-Fi is connected to Internet. • Make sure the smart phone/table PC are in same Lan. • Make sure to input right password. 1) Click + - 21 -...
- Page 22 2) Click “LAN Add” 3) Click to search the device - 22 -...
- Page 23 4) Input the right password of the device Option 2: The device and smart phone are not in same Lan. WARNING • Please make sure the device and smart phone or tablet PC are connected to Internet. • Make sure ID of the device is right. • Make sure the password of the device is right. 1) Click + - 23 -...
- Page 24 2) Click “Manual Input ID” 3) Input the ID and password of the device - 24 -...
-
Page 25: Clock Function
PC CLIENT Find the IP address of the device by search it on Lan Add. Go to the web (internet) and input the IP address on the browse. Please input the username and password (default “admin”, “admin”). ONVIF COMPATIBLE You can add the Time CAM into the video surveillance system ONVIF compatible. Below the ONVIF Parameters. Username: admin Password: admin Port: 8080 CLOCK FUNCTION - 25 -... - Page 26 • Press “MODE” for 5 seconds to shut down the LED display. Press any one of “MODE” ,”UP” , “DOWN” to turn on the LED display. Declaration of conformity The company KON.EL.CO. S.p.A. (P.za Don Mapelli, 75, 20099 Sesto San Giovanni, MI) as the manufacturer, declares under sole responsibility that the product Brand iSnatch type: TimeCAM – Wi-Fi clock camera cod. 67.3794.12, referenced in this manual, com- plies with the essential requirements of Directives 2014/35/EU, 1999/5/EC, 2011/65/EU. Due to the continuous evolution of products, features and design of this model may vary without notice KON.EL.CO. S.p.A. – P.zza Don Enrico Mapelli n. 75 – 20099 Sesto S. Giovanni – MI – Italy (www.gbconline.it) Made in China - 26 -...
Need help?
Do you have a question about the TimeCAM and is the answer not in the manual?
Questions and answers