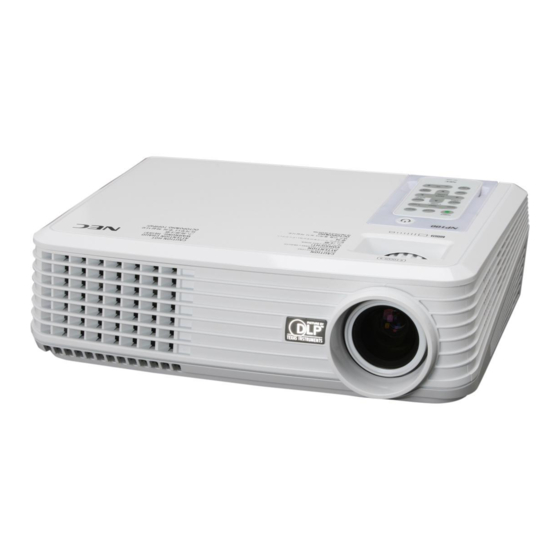
NEC NP100 User Manual
Portable projector
Hide thumbs
Also See for NP100:
- Technical specifications (2 pages) ,
- Quick setup manual (1 page) ,
- Control commands (54 pages)
Table of Contents
Advertisement
Advertisement
Table of Contents
Troubleshooting

Related Manuals for NEC NP100


Summary of Contents for NEC NP100
- Page 1 Portable Projector NP200/NP100 User’s Manual...
- Page 2 (3) Great care has been taken in the preparation of this user’s manual; however, should you notice any questionable points, errors or omissions, please contact us. (4) Notwithstanding article (3), NEC will not be responsible for any claims on loss of profit or other mat- ters deemed to result from using the Projector.
-
Page 3: Important Information
Important Information Safety Cautions Precautions Please read this manual carefully before using your NEC NP100/NP200 projector and keep the manual handy for future reference. CAUTION To turn off main power, be sure to remove the plug from power outlet. The power outlet socket should be installed as near to the equipment as possible, and should be easily accessible. -
Page 4: Important Safeguards
The Federal Communications Commission does not allow any modifications or changes to the unit EX- CEPT those specified by NEC Display Solutions of America, Inc. in this manual. Failure to comply with this government regulation could void your right to operate this equipment. This equipment has been tested and found to comply with the limits for a Class B digital device, pursuant to Part 15 of the FCC Rules. -
Page 5: Fire And Shock Precautions
• Do not cover the lens with the black lens cap or equivalent while the projector is on. Doing so can lead to melting of the cap and possibly burning your hands due to the heat emitted from the light output. -
Page 6: Remote Control Precautions
CAUTION: When removing the lamp from a ceiling-mounted projector, make sure that no one is under the projector. Glass fragments could fall if the lamp has been burned out. -
Page 7: Table Of Contents
Powering On the Projector ...12 Powering Off the projector ...14 Warning Indicator ...14 Adjusting the Projected Image...15 Adjusting the Height of Projector Image ...15 Adjusting the Projector Zoom / Focus ...16 Adjusting Projected Image Size ...16 User Controls ... 17 On Screen Display...17... -
Page 8: Usage Notice
■ Warning- English ... Do not look into the projector’s lens when the lamp is on. The bright light may hurt your eyes. To reduce the risk of fire or electric shock, do not expose this projector to rain or moisture. - Page 9 ■ Turn off the product before cleaning. ■ Use a soft cloth moistened with mild detergent to clean the display housing. ■ Disconnect the power plug from AC outlet if the product is not being used for a long period of time. Do not: ■...
-
Page 10: Introduction
Introduction Product Features This product is an SVGA/XGA single chip 0.55” DLP jector. Outstanding features include: English ... NP100: True SVGA, 800 x 600 addressable pixels ■ NP200: True XGA, 1024 x 768 addressable pixels Single chip DarkChip2 ■ NTSC/NTSC4.43/PAL/PAL-M/PAL-N/SECAM and ■... -
Page 11: Package Overview
Package Overview This projector comes with all the items shown below. Check to make sure your unit is complete. Contact your dealer immedi- ately if anything is missing. Due to the differ- ence in applications for each country, some regions may have dif- ferent accessories. -
Page 12: Product Overview
Introduction Product Overview To release the remote control from the projector gently press down on the top of the remote control above the “Picture” button. This will cause the bottom of the remote control to pop-up for 1. Power removal from the cabi- 2. -
Page 13: Connection Ports
Introduction Connection Ports 1. COMPUTER IN Connector 2. S-VIDEO IN Connector 3. VIDEO IN Connector 4. SERVICE Port 5. MONITOR OUT Connector 6. AUDIO IN Jack 7. AC IN 8. Kensington Lock Port ... English... -
Page 14: Wireless Remote Control
Wireless Remote Control Power Picture Mode Computer Source Freeze Refer to the “Power On/Off the Projector” section on pages 12-13. Select the Picture mode from Presentation, Movie, sRGB, Game and User. Press “Computer” to choose Computer connector. Freeze To pause the screen im- age. - Page 15 Select Keys Source Lock Volume +/- Introduction Adjust the image to compensate for distortion caused by tilt- ing the projector (vertical ± 40 degrees). Press “Source” to choose RGB, Component, S-Video, Composite and HDTV sources. Press “Menu” to launch the...
-
Page 16: Battery Installation
Introduction 1. Press firmly and slide the battery cover off. 2. Remove the old Lithium coin cell and install new one (CR2025). Ensure that the side with a “+” is facing up. Keep the coin cell battery out of reach of children so as not to allow them to swallow the cell battery. -
Page 17: Installation
4... Composite video cable 5...VGA out cable 6...Audio cable jack to jack T o ensure the projector works well with your computer, please make sure the timing of the display mode is compatible with your projector. Installation VGA, DVI... -
Page 18: Powering On/Off The Projector
English ... Powering On the Projector connected. The Power LED will flash blue. The startup screen (NEC logo) will display and the Power LED will turn blue. The projector will detect your source automatically. “Source” on the remote control or use “Computer”, “S-Vid- eo”, “Video”... -
Page 19: Powering Off The Projector
Powering Off the Projector 1. Press the “Power” to turn off the projector lamp, you will see a message as below on the on-screen display. Press the “Power” again to confirm. 3. The cooling fan continues to operate for during the cool down period and the Power LED will flash blue. -
Page 20: Warning Indicator
When the “Power” LED indicator flashes red and the mes- sage below displays on-screen, the projector has detected that the lamp is approaching its end of this message, change the lamp as soon as possible or contact your local dealer or our service center. -
Page 21: Adjusting The Projected Image
Adjusting the Projected Image Adjusting the Height of Projector Image The projector is equipped with adjustable feet to raise and lower the image to fill the screen. To raise/lower the image: 1. Use to fine-tune the display angle The tilt angle of the ... -
Page 22: Adjusting The Projector Zoom / Focus
You may turn the zoom ring to zoom in or out. To focus the im- age, rotate the focus ring until the image is clear. The projector will focus at distances from 3.9 to 39.4 feet (1.2 to 12.0 meters) with mechanical travel. -
Page 23: User Controls
On Screen Display The Projector has a multilingual On Screen Display that allows you to make image adjustments and change a variety of set- tings. The projector will automatically detect the source. How to operate To open the OSD, press “Menu” on the Remote Control. -
Page 24: Picture Mode
User Controls Picture Mode There are many factory presets optimized for various types of im- ages. Use the Brightness Adjust the brightness of the image. Contrast The contrast controls the degree of difference between the lightest and darkest parts of the picture. -
Page 25: White Peaking
If you experience a vertical flicker- ing bar, use this function to make an adjustment. Phase Synchronize the signal timing of the projector with the graphics card. If you experience an unstable or flickering image, use this function to correct it. -
Page 26: Image (Video Mode)
User Controls Picture Mode There are many factory presets optimized for various types of im- ages. Use the Brightness Adjust the brightness of the image. Contrast The contrast controls the degree of difference between the lightest and darkest parts of the picture. - Page 27 User Controls Color Adjust a video imge from black and white to fully saturated color. Press the to decrease the amount of color in the image. Press the to increase the amount of color in the image. Adjust the color balance of red and green. Press the to increase the amount of green in the image.
-
Page 28: Display Setting
User Controls Keystone Adjust image distortion caused by tilting projector. (±40 degrees). H-Position (Horizontal Position) V-Position (Vertical Position) Aspect Ratio Use this function to choose your desired aspect ratio. English ... Press the to move the image left. - Page 29 Front-Desktop The factory default setting. Rear-Desktop When you select this function, the projector reverses the image so you can project behind a translucent screen. Front-Ceiling When you select this function, the projector turns the image upside down for ceiling-mounted projection.
-
Page 30: Power Management
User Controls Default Setting Source Lock When this function is turned “Off”, the projector will search for other signals if the current input signal is lost. When this function is turned “On”, it will only search a specified connection port. -
Page 31: Clear Lamp Hours
User Controls Audio Mute: ■ Choose “On” to mute the volume. ■ Choose “Off” to restore the volume. Volume: ■ Press the to decrease the volume. ■ Press the to increase the volume. Clear Lamp Hours Reset the lamp life hour after replacing a new lamp. Reset Return the adjustments and settings to the factory default values. -
Page 32: Language
User Controls Language Language Choose the multilingual OSD. Press into the sub menu and then use the key to select your preferred language. Press “Enter” to finalize the selection. English ... -
Page 33: Information
User Controls Information Information To display the projector information on the screen..English... -
Page 34: Appendices
Check if the projection lamp has been securely installed. Please refer to the “Replacing the lamp” section. Make sure you have removed the lens cap and the projector is switched on. Ensure that the “AV-Mute” feature is not turned on. - Page 35 If you experience difficulty changing resolutions or your monitor freezes, restart all equipment including the projector. Problem: The screen of the Notebook or PowerBook com- puter is not displaying a presentation If you are using a Notebook PC: ...
- Page 36 Adjust the Focus Ring on the projector lens. Make sure the projection screen is between the required distance 3.9 to 39.4 feet (1.2 to 12.0 meters) from the projector (refer to page 16). Please select 4:3 aspect ratio type on your DVD player if you are playing a 16:9 DVD.
- Page 37 Problem: LED lighting message Message Standby (Input power cable) Power on (Warming up) Lamp lighting (Displaying) Power off (Cooling-I) Power off (Cooling-II) Steady light => Error (Lamp failed) No light => Error (Fan lock) Error (Over temp.) Standby mode (Lamp failed) Standby mode (Fan lock) Standby mode (Over temp.) Appendices...
- Page 38 English ... Over temperature - the projector has exceeded its recommended operating temperature and must be allowed to cool down before it may be used. Replacing the lamp - the lamp is about to reach its maximum life- time.
-
Page 39: Replacing The Lamp
Replacing the lamp (optional lamp NP10LP) The projector will detect the lamp life at 3400 hours in Normal mode. When the “Power” LED indicator flashes red and the message below displays on-screen, the projector has detected that the lamp is approaching its end of life. (Use the same ex-... - Page 40 English ... Lamp Replacing Procedure: 1. Switch off the power to the projector by pressing the Power. 2. Allow the projector to cool down at least 60 minutes. 3. Disconnect the power cable. 4. Use a screwdriver to remove the 2 screws from the cover. ...
-
Page 41: Specifications
Specifications Projection System Single Chip DLP Number of Pixels* NP100: 800 pixels(H) X 600 lines(V), up to SXGA (1280 X 1024) with scaling technology NP200: 1024 pixels(H) X 768 lines(V), up to SXGA+(1400 X 1050) with scaling technology Displayable Color 16.7M colors... -
Page 42: Compatibility Modes
Appendices Compatibility Modes Note: “*” for XGA model only. Note: Shaded signals are compressed with scaling technology. Note: The projector only support a separate sync signal. Composite sync and sync on green are not supported. English ... Modes Resolution 640 x 480... -
Page 43: Cabinet Dimensions
Appendices Cabinet Dimensions Lens Center 1.7"/42mm 8.1"/206mm 7.8"/199mm ... English... -
Page 44: Troubleshooting Check List
Video and Audio No image is displayed from your PC or video equipment to the projector. Still no image even though you connect the projector to the PC first, then start the PC. Enabling your notebook PC’s signal output to the projector. -
Page 45: Installation Environment
Vertical synch frequency Synch polarity Synch type STATUS Indicator: Steady light Flashing light Remote control model number: DVD Player Signal cable NEC standard or other manufacturer’s cable? Model number: Length: Distribution amplifier Model number: Switcher Model number: Adapter Model number:... -
Page 46: Travelcare Guide
Services offered with TravelCare This warranty allows customers to receive service on their product at the NEC and NEC-designated service stations in the countries listed herein when temporarily traveling internationally for business or plea- sure. - Page 47 Email Address: tehgh@rsc.ap.nec.com.sg WEB Address: http://www.nec.com.sg/ap (Regions Covered) Singapore NEC Systems Integration Malaysia Sdn Bhd Address: Ground Floor, Menara TA One, 22, Jalan P. Ramlee, 50250 Kuala Lumpur, Malaysia Telephone: +6 03 2178 3600 (ISDN) Fax Line: +6 03 2178 3789 Email Address: necare@nsm.nec.co.jp...
- Page 48 Date: TO: NEC or NEC’s Authorized Service Station: (Company & Name with signature) Dear Sir (s), I would like to apply your TravelCare Service Program based on attached registration and qualification sheet and agree with your following conditions, and also the Service fee will be charged to my credit card account, if I don’t return the Loan units within the specified period.
- Page 49 10 days to the customer, excluding transport time. There may have a case, repair and return can’t be done by NEC Authorized Service Station, because of shortage of spare parts due to same model is not sold in the territory.
Need help?
Do you have a question about the NP100 and is the answer not in the manual?
Questions and answers