Table of Contents
Advertisement
Advertisement
Table of Contents

Summary of Contents for Mustek Paragon 600 II EP
- Page 1 Paragon 600 II EP with TWAIN Data Source (for PC) User's Guide...
-
Page 2: Fcc Statement
Mustek, Incorporated. Mustek Incorporated reserves the right to revise this manual and to make changes to any or all parts at any time, without obligation to notify any person or entity of such revisions and changes. -
Page 3: Table Of Contents
Document Positioning ... 8 Using the Printer ... 9 Scanning Tips ... 9 Scanning an Image Acquire the Mustek F/B Scanner Dialog Box ... 10 To Scan an Image ... 10 Prescan the Image ... 11 Set the Image Size ... 11 Set the Scan Mode ... -
Page 4: Installation
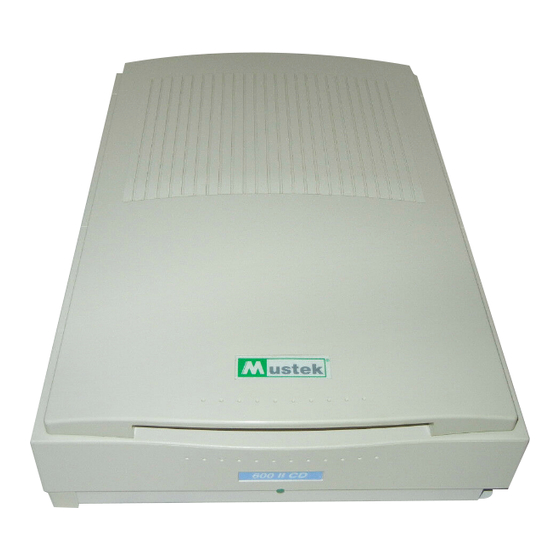
Installation Unpacking the Scanner Package The Scanner Parts Paragon 600 II EP Scanner User's Guide This chapter covers the scanner parts and describes how to connect the scanner to your computer and printer. You will also find information useful in operating the scanner. -
Page 5: Connecting The Scanner To The Pc And Printer
Printer. Tighten the retaining screws. 4. Connect one end of the scanner cable to the printer port in the back of your PC and tighten the retaining screws. 5. Connect the other end of the scanner cable to the port in the back of the scanner marked Host. -
Page 6: Installing The Pc Driver And Software
Installing the PC Driver and Software Under Windows 3.1x: 1. Start Windows. 2. Insert the Mustek Scanner Solutions CD into your CD-ROM drive. 3. From Program Manager, open the "File" menu and select the "Run" command. The "Run" dialog box will be displayed. -
Page 7: Configuring The Software
File menu) and choose Select Source to display the Select Source dialog box. 5. From the list of sources, choose “ Mustek F/B Scanner (EPP)” as your image source and click Select. You will return to the main screen of the host application. Software configuration is now complete. -
Page 8: Document Positioning
Using the Printer Paragon 600 II EP Scanner User's Guide Document Positioning For the best possible image scans, it is important that you position your documents correctly and carefully. 1. Lift the document cover. 2. Place the document face down on the glass and in the upper right corner where the alignment marks are located: 3. -
Page 9: Scanning Tips
Scanning Tips The following tables provide helpful information you can use when setting the scan mode and/or resolution. Recommended scanning resolutions for various output devices are listed as follows: INPUT PRINTER TYPE MATERIAL Color 600-dpi Laser or Grayscale B/W Inkjet Halftone Printer Line Art/Text... -
Page 10: Scanning An Image
Import command.) The Mustek F/B Scanner (EPP) dialog box will appear. The F/B Scanner dialog box is where you set u p your scanner and perform the scanning and enhancement functions. Setting up your scanner involves adjusting the image size, scan mode, and scanning resolution. -
Page 11: Prescan The Image
Prescan, the steps are: 1. Place the document face down on the scan window glass. 2. Click the Prescan button in the Mustek F/B Scanner (EPP) dialog box. After the scanner has scanned the document, the scanned image will appear in the Preview Window. From the Prescan image, you can now set the exact image area you wish to include in your final scan. -
Page 12: Set The Resolution
Execute the Scan When you click Scan, the Mustek F/B Scanner (EPP) dialog box displays the progress of your image transfer. The image will be displayed in the main screen of the host software behind the F/ B Scanner dialog box. -
Page 13: Tonal Adjustment
Shift key and click the Batch Scan icon. 5. Click Scan. The scanner will begin to scan the scan regions one after the other. Once you have scanned an image and viewed the results, you can use the Tonal Adjustment commands to improve the quality of succeeding scans and thereby optimize your scanner’s output. - Page 14 Paragon 600 II EP Scanner User's Guide • Gamma - selectively adjusts brightness in the hilight, shadow and midtone areas of an image. Values of 0.1 to 2.0 will primarily affect the shadow areas of your image. Values of 2.1 to 6.0 will primarily affect the midtone areas and values of 6.1 to 7.9 will primarily affect the...
-
Page 15: Appendix A: Specifications
Halftone Cell Size Brightness Control Contrast Control Interface Light Source Dimensions * Product specifications are subject to change without notice. 600 II EP Flatbed True Color; 24bits/pixel (16.8 million colors) 256 Gray Scale; 8 bits/pixel Halftone; 1 bit/pixel (2 levels) Text/Line Art;... - Page 16 Operating Temperature Operating Humidity Storage Temperature Storage Humidity Paragon 600 II EP Scanner User's Guide 4.8 kg (10.6 lbs) 100 Vac ~ 250 Vac, 47 ~ 63 Hz 30W (maximum) 10 to 40 degrees Centigrade (50 to 104 degrees Fahrenheit)
-
Page 17: Appendix B: Technical Support
Appendix B: Technical Support If you need help installing or using the scanner, please call Technical Support. Mustek, Inc. Mustek Computer GMBH Mustek Systems, Inc. 1702 McGaw Avenue Hellersbergstr. 2a Irvine, CA 92714 41460 Neuss Germany TEL: 1-714-247-1300 TEL: 49-2131-162840... - Page 18 Paragon 600 II EP Scanner User's Guide Note: • Mustek cannot be held responsible for any product returned without an RMA number • Users must return the products to their point of purchase for a refund or credit, according to the dealer's policy •...


Need help?
Do you have a question about the Paragon 600 II EP and is the answer not in the manual?
Questions and answers