
Summary of Contents for KAT VR Nexus
- Page 1 KAT Nexus OWNER'S MANUAL This product is for personal use ONLY. Any form of commercial application is prohibited.
- Page 2 Acknowledgement Thank you for purchasing our product! Please, read this instruction manual carefully and keep it safely stored for future use. KATVR reserves the right to interpret and modify the manual. Any amendments, updates and interpretations to the manual will be published on the KATVR official website. Please pay attention.
- Page 3 Before use Starting Up Network Connection Software Set-UP Get Your KAT Device Ready Install the KAT Gateway of Nexus App onto Your Headset Via KAT Gateway Via Sidequest ( Recommended for Side quest users) Via ADB tool (Only for ADB users)...
-
Page 4: Table Of Contents
Connect Your KAT Device to KAT Nexus Entering the Platform (IMPORTANT!) Opening KAT Gateway KAT GATEWAY OF NEXUS FUNCTIONS INTRODUCTION Device Status Sensor Manager Controller Options Games Follow Recommended Settings (The following are consistent) Controller: Options of the device main functions Game Config... - Page 5 First & Foremost This owner’s manual contains all the information you need to install your KAT Walk Coord 2. The following symbols are used to indicate important information and instructions for the device set-up process: This symbol is a precaution, it usually provides additional information to help you with a task, as well as information that applies only to certain situations.
- Page 6 To ensure good ventilation, please do not put the player in bookcases, cabinet or other confined places. Keep well-ventilated to prevent fire or electronic shock caused by overheat of the player. Keep lit candles and other lit subjects away from the player. Please do not open the case of the player.
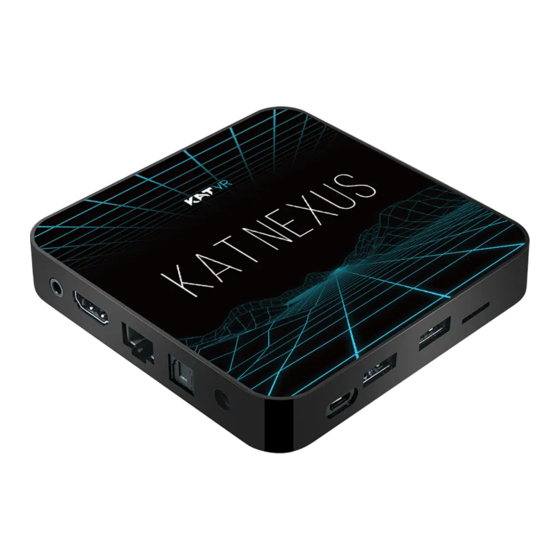
- Page 7 Product Description KAT Nexus Description KAT Nexus is a revolutionary multi-platform adaptation solution - a single bridge connecting different interactive devices with the infinite metaverse of VR games and experiences on all major platform including standalone systems - STEAMVR - META Quest - PlayStation VR - PICO Neo - VIVE Port and other VR platforms.
- Page 8 Before use, check carefully whether the quantity is consistent with the below list. If anything is missing, contact our customer service at service@kat-vr.com before you proceed. Component Name & Picture Quantity KAT Nexus KAT Nexus Brief User Guide KAT Nexus Brief User Guide Power Adapter Network Cable...
- Page 9 Software Set-Up KAT Gateway is the dedicated software for running KAT VR devices. It is currently available in PC, VR-Integrated and Nexus version. The Nexus version allows you to access all the settings and other features directly from your VR headset.
- Page 10 Choose 'always enable' in the windows popups if they show (and the same in your headset). Install the Gateway for Nexus via KAT Gateway, the SideQuest, the ADB Tool as following or any other apk installation tool you're familiar with.
- Page 11 If the headset is not detected, it will display in gray and it won't be possible to proceed. In such a case, re-connect the HMD and check again if it has been detected as normal (displayed in normal color). Click 'confirm' to start the installation.
- Page 12 Via Sidequest ( Recommended for Side quest users) Visit the official website at: https://www.kat-vr.com/, and click 'Support' . In the product list select KAT Nexus and proceed to the product resource page. Download KAT Gateway of Nexus onto your computer (Windows 10 x64) and extract it.
- Page 13 APK file path. Select the katgateway. APK file and click 'Open'. Within a second, SideQuest will begin loading and installing the kat nexus app. Wait until it finished. (You can double - check in the sidequest task manager to see if the installation has been finished successfully.
-
Page 14: Connect Your Kat Device To Kat Nexus
Connect Your KAT Device to KAT Nexus Plug the USB cable of your paired KAT device to any USB port of Nexus. Place the KAT Nexus at a safe spot. USB1 USB2 INTERNET HMD WITH Wi-Fi PAIRED KAT NEXUS GATEWAY INSTALLED... -
Page 15: Entering The Platform (Important
Entering the Platform (IMPORTANT!) C2 as an example: Before getting on or when sensors enter sleep mode (inactive ≥ 30min), click the main button and shake the shoes. Check the sensor light: * Flashing: no connection Constant: successful connection None: sleep mode / no power. Hang the HMD and controllers on the storage hooks. -
Page 16: Kat Gateway Of Nexus Functions Introduction
KAT Gateway of Nexus functions introduction Device Status The interface of KAT Gateway for Nexus once a KAT device is connected (C2 as an example):... - Page 17 Home page of KAT Gateway displays the current device connection status: -Direction of the inner sensor, low battery reminder; -Direction of the left foot sensor, low battery reminder; -Direction of the right foot sensor, low battery reminder; -Vehicle hub status (C2+) -Haptics status (C2+) -The Current device Icon, device name, connection status and Sensor Manager Connected...
-
Page 18: Sensor Manager
-The device Icon, device status. Device currently in use Device is busy Device is ready Device is disconnected Sensor Manager Check the sensor status and manage the sensors. -
Page 19: Controller Options
-Sensor Status: Connected: Sensors are ready. Disconnected: Sensors may enter the sleep mode. Click the main button on the direction sensor and shake the shoe sensors to wake them up. Ensure the sensors are charged. You can pair the sensors in the Sensor Manager. S/N: the serial number of the receiver Battery Information: Shows the battery status of each sensor Controller Options... -
Page 20: Follow Recommended Settings (The Following Are Consistent)
Follow Recommended Settings (The following are consistent): You can also enable the 'Follow Recommended Settings' option to play on our pre-set default profiles. Controller: Options of the device main functions a.Walking Speed: Adjustment of the walking speed for the selected game. b.Walking Accuracy: Adjustment of the walking accuracy for the selected game. -
Page 21: Game Config
Game Config Locomotion system differs in different games! Your KAT Device can only work properly when the settings are all correct based on the following instructions: Always set the in-game locomotion settings to Head Oriented movement if possible! a.Mapping Controller: Try the game and find out which hand controller controls walking. Set it accordingly here. -
Page 22: Haptics And Sitting
4.B/Y: Press B/Y to walk; 5.Grip: Grab Grip button to walk; 6.Trigger: Press Trigger to walk; 7.None: Choose this option if you are playing a game without any walking function. Haptics and Sitting Haptic and Sitting Customization Settings available for C2 + only, please refer to KAT Vehicle Hub User Manual. -
Page 23: Direction Calibration
Direction calibration Calibrate after entering the game. Stand straight, look forward and press the main button or long press the oculus home button on your right controller. -
Page 24: Appendix
APPENDIX Contact Information Company: Hangzhou Virtual and Reality Technology Co., Ltd Add: 9th floor - Building 6, No.1818-2, West Wenyi Road - Yuhang Street, Yuhang District, Hangzhou City, Zhejiang Province, China Postal code: 311100 Email: service@katvr.com Web: www.kat-vr.com/... - Page 25 www.kat-vr.com...
Need help?
Do you have a question about the Nexus and is the answer not in the manual?
Questions and answers