
Subscribe to Our Youtube Channel
Related Manuals for Denver Instrument IR-200


Summary of Contents for Denver Instrument IR-200
- Page 1 Denver Instrument Company IR-200 Moisture Analyzer Operation Manual 901119.1 Rev. F...
- Page 2 You have purchased a quality precision weighing instrument that requires handling with care. Read entire contents of this Operation Manual prior to operating your new Denver Instrument moisture analyzer. Disclaimer Notice “Calibrate your balance using the internal calibration weight or a reference weight of the appropriate tolerance (class).
-
Page 3: Table Of Contents
Table Of Contents Introduction ..........1 Preparation . - Page 4 Declaration Of Conformity Denver Instrument Company declares that the following products: IR-200 Moisture Analyzer conform to the European Union Council Directives and other stan- dards listed below: 73/23/EEC, “Low Voltage Directive” EN 61010-1, “Safety requirements for electrical equipment for measurement, control, and laboratory use.
-
Page 5: Introduction
Introduction Thank you for choosing the Denver Instrument Company IR-200 Moisture Analyzer as your rapid moisture determination system. This state-of-the- art, microprocessor based moisture/solids analyzer using the principle of LOD (Loss On Drying). Samples are heated using infrared heat to liberate... -
Page 6: Preparation
Safety Precautions Warning! Use of this product in a manner not specified by the manufacturer may impair any safety protection provided by the equipment! Every attempt has been made to make this analyzer safe and easy to use. However, like any laboratory instrument respect must be given to the operation of the analyzer due to environmental conditions, the nature of samples being tested and of the chemicals which might be near the analyzer. -
Page 7: Technical Specifications
Technical Specifications Measurement method Infrared radiation and detection of weight loss Heat source Four parallel quartz infrared heaters Temperature setting 30-210°C (86-410°F) in one degree increments of Celsius Temperature control Platinum temperature sensor, +/- 1°C with cali- bration Temperature steps Programmable one or two Weighing pan (dia.) 100 mm (4 inches) -
Page 8: Equipment Installation
Installation Pan Shield and Pan Support Install the pan shield and pan support into the drying cham- ber. Lift up the heater hood with the handle. Place the pan shield so that the center hole fits over the center ring in the base. -
Page 9: Connectors
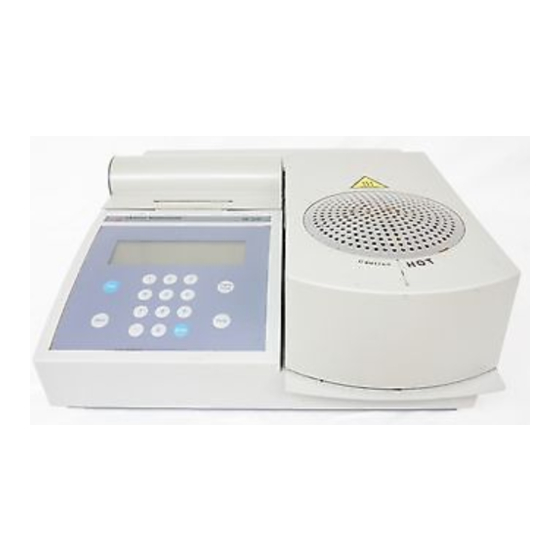
Heater Printer Printer Hood Paper Cover Ventilation Dome Hood Display Handle Keypad Connectors Power - Accepts the universal female end of the appropriate power cord. Serial 1 - This input/output port supports a bi-directional RS232 interface via a 25 pin, DB-25P type connector for intercommunication between two moisture analyzers for the purpose of transferring drying procedures through the PRG XMIT subroutine. -
Page 10: Controls
STANDBY - This screen will be displayed before and after a test. The STANDBY Screen provides access to the Setup, Recall and Test modes. TEST - This is a set of screens which prompt Denver Instrument IR-200 the operator through testing a sample... -
Page 11: Keypad
Keypad The analyzer features a sealed membrane keypad with numeric and function keys as shown in the figure below. The keypad is best operat- ed with a firm button press in the center of the key. With the beeper setup option turned ON to either short (factory default) or long, an audible beep will sound whenever a key has been pressed correctly. -
Page 12: Analyzer Operation
Analyzer Operation Standby Mode After the self-diagnostic routine has been completed on power-up or after a sample test has been completed, the analyzer goes into the Standby mode. (Factory default is 60°C.) During standby, the tempera- ture will go to the set standby temperature. The standby temperature is set for each drying procedure in the Develop subroutine. -
Page 13: Test Mode
1 1 0 0 : : 0 0 0 0 A A M M S S T T A A N N D D B B Y Y 1 1 5 5 N N O O V V 0 0 0 0 P P R R G G # # 0 0 1 1 F F A A C C T T O O R R Y Y 1 1 T T E E M M P P : : 6 6 0 0 C C... - Page 14 A. To test a sample, perform the following: 1). Open the heater hood using the handle on the front and place one pan onto the pan support. Then close the heater hood. 2). At the STANDBY Screen, press the Test key. The display will change to the SAMPLE ID Screen.
-
Page 15: Recall
1 1 0 0 : : 0 0 0 0 A A M M t t e e s s t t i i n n g g 1 1 5 5 N N O O V V 0 0 0 0 # # 0 0 1 1 f f a a c c t t o o r r y y 1 1 6 6 5 5 °... - Page 16 A. To recall a stored program, perform the following steps: 1). From the STANDBY Screen, press the 1 key for Recall to access the Recall routine. The screen will change and show the first page of stored programs as shown below. Up to four programs are shown on each screen.
-
Page 17: Setup Menus
Setup Menus All changes to the analyzer are made in the Setup routine. Setup options consist of two setup menus, SETUP 1 and SETUP 2, which lists the various Setup options. A. To enter the SETUP routine, perform the following: 1. -
Page 18: Statistics
• Serial - Allows set up of communication parameters for both serial ports. • Security - For activating or deactivating security protection of the ana- lyzer. • Conserve - Lets the operator control when the standby temperature and backlight of the LCD display turn OFF. •... - Page 19 Definition of Statistics: Count = the number of test results selected for statis- tical evaluation Average = Sum of test results/Count Σ(X - X Standard Deviation (SD) = Relative Standard Deviation (RSD) = Standard Deviation/Average x 100 Minimum = the smallest value of the selected test results Maximum = the largest value of the selected test results A.
- Page 20 2). Press the number key adjacent to the desired option: 1 key - for ALL to select all data results or 2 key - for NONE to deselect all data or 3 key - for UNITS to select data results by moisture, solids, etc. or 4 key - for DATE RANGE to select data tested between two dates or 5 key - for PRG # to select data tested using a particular program.
-
Page 21: Develop
Develop The Develop subroutine is used for creating new drying procedures for editing a stored program. All parameters related to testing a sample are set in the Develop subroutine. A. To select Develop, perform the following: 1). Press the 2 key for DEVELOP from the SETUP 1 menu. The display will change to the DEVELOP Screen. -
Page 22: Units
Units The analyzer will calculate the test result in a variety of units of measure depending on your specific application. A. To select or change the UNITS, perform the following: 1). Press the number 1 key for UNITS, the display will change to the list of units. -
Page 23: Slope
1 1 0 0 : : 0 0 0 0 A A M M T T I I M M E E 1 1 1 1 5 5 N N O O V V 0 0 0 0 E E N N T T E E R R T T I I M M E E 1 1 : : 0 0 0 0 R R A A N N G G E E : : 0 0 - - 9 9 9 9 . -
Page 24: Standby Temperature
C. To change the WINDOW of time, perform the following: 1). Press the 2 key for WINDOW. The display will change to the WINDOW Screen. 2). Key in the desired amount of time using the numeric keys and the " . " (decimal) key between 0.1 and 99.9 minutes, then press the Enter key. - Page 25 A. To exit the Develop subroutine without saving, perform the following: 1). When the DEVELOP Screen shows all the desired parameters, press the Enter key. The display will change to the SAVE Screen as shown below. 1 1 0 0 : : 0 0 0 0 A A M M S S A A V V E E 1 1 5 5 N N O O V V 0 0 0 0 1 1 >...
- Page 26 5). The display will change to the alphanumeric PROGRAM NAME Screen to enter an alphanumeric program name. Press Enter to use the same program name. 6). To change the program name, use the chart below which describes the function of each key to select in sequence the desired characters of the program name.
-
Page 27: System
System The analyzer system subroutine provides access to important system infor- mation regarding the installed software version, analyzer serial number, analyzer model, the date and time of last calibration of both the heater temperature and balance. This information may also be printed. A. -
Page 28: Printer
Printer The Printer subroutine provides two setup options for selecting the printout style or generating a custom printout by selecting desired information, and configuring the analyzer for an external printer. The two printout set- tings are: Standard Result Printout - Includes all information except operator. Custom Result printout- Includes the choices of turning ON or OFF the header, analyzer ID and model, manufacturer line, program #, program parameters, weight information, Sample ID and operator. - Page 29 C. To select the STANDARD printout style, perform the following: 1). Press the 5 key for PRINTER, the display will change to the Printer menu. 2). Press the 3 key for STANDARD, to toggle standard ON. (Note that in the standard printout, INTERVAL is OFF and therefore turning STANDARD OFF also turns INTERVAL OFF.
-
Page 30: Sample Printouts
Sample Printouts D D e e n n v v e e r r I I n n s s t t r r u u m m e e n n t t C C o o m m p p a a n n y y Sample 1: Standard Printout I I R R - - 2 2 0 0 0 0 M M o o i i s s t t u u r r e e A A n n a a l l y y z z e e r r I I n n s s t t r r u u m m e e n n t t I I D D : : 0 0 0 0 0 0 3 3 1 1 3 3... -
Page 31: Operator
Sample 3: Custom Printout L L i i n n e e # # 1 1 (With header, Model/ID, D D e e n n v v e e r r I I n n s s t t r r u u m m e e n n t t C C o o m m p p a a n n y y Operator, Sample # and PRG # ON) I I R R - - 2 2 0 0 0 0 M M o o i i s s t t u u r r e e A A n n a a l l y y z z e e r r... -
Page 32: Sample Number
Custom 3 Header Lines The custom printout header consists of three line of 32 characters each. A. To set or change printout 3 custom header lines, perform the following: 1). Press the 1 key for HEADER. The display will change to the set HEADER Screen. -
Page 33: Interval
Interval The printout can be set to print intermediate data including time, weight, temperature and intermediate result in the selected unit at various inter- vals. The printing of intermediate data can assist with methods develop- ment. A. To select an INTERVAL style print, perform the following: 1). -
Page 34: Interval
1 1 0 0 : : 1 1 8 8 A A M M C C L L O O C C K K 1 1 5 5 N N O O V V 0 0 0 0 1 1 > > S S E E T T A A M M 2 2 >... -
Page 35: Security
Serial 1 = 25 pin port/computer Note Serial 2 = 9 pin port/external Memo: B. To set or change the BAUD RATE, perform the following: 1). Press the 1 or 4 key for the BAUD RATE of Serial 1 or Serial 2. The display will change to the list of available baud rates. - Page 36 • Develop - If security is turned ON, the password must be entered to access the Develop mode from the SETUP 1 menu. • Printer - If security is turned ON, the operator must enter the password to enter the printer subroutine from the SETUP 1 menu. •...
-
Page 37: Clear Programs
Clear Programs At sometime, you may desire to clear all your drying procedures and to reset the analyzer to the 5 factory default programs. If SECURITY has been turned ON, this clear routine will also be secured and require the password to clear all programs. -
Page 38: Program Transfer
A. To set or change when the standby temperature is turned off, perform the following: 1). Press the 1 key for CONSERVE from SETUP 2 menu. The display will change to the CONSERVE Screen showing the current set value in minutes. -
Page 39: Beeper
3). Press the 2 key for PROG. XMIT from the SETUP 2 menu of both analyz- ers. The display will change to the PROG. XMIT Screen. 4). On the importing analyzer, press the 2 key for EXTERNAL INPUT. 5). On the exporting analyzer, press the 1 key for OUTPUT PROGRAMS. 6). - Page 40 The select OPERATOR Screen will be displayed as: 1 1 0 0 : : 1 1 8 8 A A M M O O P P E E R R A A T T O O R R 1 1 5 5 N N O O V V 0 0 0 0 1 1 >...
-
Page 41: Applications
Applications Moisture Analyzer is applicable to a wide variety of samples including powders, liquids, pastes, slurries and some solids. Application considera- tions include sample composition, sample preparation, sample presenta- tion, sample size, drying parameters, desired precision, accuracy and analysis time. Developing a drying procedure on the analyzer is relatively straight for- ward when a standard convection oven method has already been established for your sample material. - Page 42 1. Glass pads - Circular glass pads are generally used for liquids, pastes and slurries. Samples subject to crusting over should be placed between two glass pads. Less viscous material can generally be added to a single pad using a pipette. Typically, between a 1.0 to 2.0 grams of sample is used for testing and should be evenly spread across the pad in a thin layer.
-
Page 43: Analytical Performance
Analytical Performance The analyzer performance is dependent on a good weighing environ- ment, calibration of weight and temperature, and an optimized drying procedure. The performance of the analyzer can be measured through the statistical determination of precision, accuracy and analysis time for a given sample type. - Page 44 STEP 1 - Sample Preparation. As discussed previously, a sample preparation technique should be cho- sen to: 1) Provide a representative sample testing. 2) And allow rapid moisture loss. One would typically begin with a sample preparation the same as what is presently done for the standard method.
- Page 45 • For powder samples, generally 2-10 grams is sufficient. • Liquid samples with a single sample pad general require greater than 0.5 grams but less than 2 grams. • Pastes with two glass pads will need greater than 1 gram but less than 3 grams.
- Page 46 To achieve the most accurate results, the analyzer must permit the com- plete liberation of volatiles from the sample. This can be seen by the ana- lyzer to a resolution of one milligram weight loss (over up to a 99.9 minute of time.
- Page 47 A). High to Low two step drying procedure. The primary reason to develop a high to low two step drying procedure is to reduce analysis time. With this feature an initial TEMP 1 temperature can to selected to drive off much of the volatiles, however if the sample is kept at this temperature eventually scorching would occur.
-
Page 48: Recommended Care
Recommended Care Your Moisture Analyzer is an integrated system designed to provide pre- cise, fast determination of moisture content. Therefore, proper care and routine maintenance of the unit is required to prevent accidents, to ensure reliable results, and to avoid damage to the unit. Before beginning the cleaning process: •... -
Page 49: Printer Paper Installation
Printer Paper Installation Installation of thermal printer paper using Denver Instrument Part No. 901121.1 is as follows: 1. Open the printer cover and remove any remaining paper from the printer mechanism by pulling the paper through the printer mecha- nism or pressing the Paper Feed key to advance the paper. -
Page 50: Troubleshooting
Therefore, it is advisable to consult the table below before you call your local distributor or Denver Instrument Company for technical assistance. In the event of an electrical operational problem, the analyzer's built in sys- tem diagnostics will indicate the nature of the problem by displaying an error message on the Standby screen. -
Page 51: Factory Defaults
Factory Defaults Program 1: Factory 1 UNITS: MOISTURE TEMP1: 105C TIME1: OFF TEMP2: OFF TIME2: OFF SLOPE: WINDOW: 1.0 %IW: 0.050 STANDBY: 60C Program 2: Factory 2 UNITS: MOISTURE TEMP1: 110C TIME1: 2.0 MINUTES TEMP2: OFF TIME2: OFF SLOPE: WINDOW: 2.0 %IW: 0.010 STANDBY: 110C Program 3:... -
Page 52: Accessories
Accessories Part Number Description 820050.3 50 gram Calibration Weight (ASTM Type 1, Class 3) 900274.1 Disposable Pans. Pkg of 50 900298.1 Glass pads. Pkg of 200 901121.1 Printer Paper. Pkg. of 5 901309.1 Cable DE9S to DB25S 901310.1 Intercommunications Cable (2 @ DB25p) 901318.1 Temperature Calibration Kit 77811093.1... - Page 53 1. Please return the prepaid, pre-addressed Purchase Registration Card to Denver Instrument Company promptly upon your purchase of the Denver Instrument product. the return of the card is not a condition precedent to warranty coverage. 2. If you have any questions about a Denver Instrument product, please call toll-free, 1-800-321-1135 (or FAX description of problem to (303) 423-4831) for technical assistance.
- Page 54 Denver Instrument Company Precision laboratory instruments since 1880 6542 Fig Street • Arvada, Colorado 80004 303-431-7255 • 1-800-321-1135 • Fax 303-423-4831 www.denverinstrument.com...
Need help?
Do you have a question about the IR-200 and is the answer not in the manual?
Questions and answers