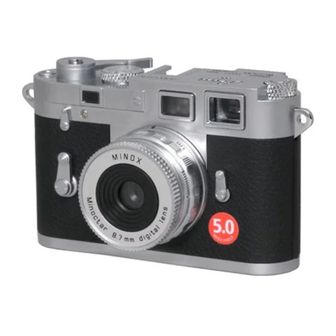
Minox Leica M3 Instruction Manual
Digital classic camera
Hide thumbs
Also See for Leica M3:
- Instruction manual (62 pages) ,
- Brochure (2 pages) ,
- Product information (2 pages)
Table of Contents
Advertisement
Advertisement
Table of Contents

Related Manuals for Minox Leica M3


Summary of Contents for Minox Leica M3
- Page 1 Digital Classic Camera Leica M3 Instruction manual...
- Page 2 Digital Classic Camera Leica M3 • English...
- Page 3 Digital Classic Camera Leica M3 MINOX Classic Camera Flash Optionally available...
-
Page 4: Table Of Contents
Contents Introduction For users in the United States For users in Canada Getting to know your camera The right power supply - Important information on batteries - Inserting the batteries General Instructions Installation of the PC-Software - Installing ArcSoft PhotoImpression - Connecting the DCC to your PC Using the DCC - LCD status display... -
Page 5: Introduction
It combines functionality in the smallest possible space with maximum quality. We have miniaturized the classic camera of the fifties - the Leica M3 - and have given it a modern, digital interior. Simple and fast operation make the MINOX DCC ideal for digital photography. -
Page 6: For Users In The United States
For users in the United States FCC Declaration of Conformity This device is in conformity with Part 15 of FCC rules. Operation of the device is subject to the following two conditions: (I) this device may not cause harmful inter- ference, and (II) this device must accept any interferen- ce received, including interference that may cause undesired operation. -
Page 7: Getting To Know Your Camera
9. Mount for tripod 10. Connection to external flash 11. MINOX Classic Camera Blitz (Optional) Note The MINOX Classic Camera Flash (10) is optionally available and not included in the scope of delivery. Order number: 69125 The right power supply The DCC requires a CR2 battery. -
Page 8: Inserting The Batteries
3. Close and lock the battery compartment. General Instructions Notes on copyright Images taken with your digital camera are not to be used in any way which may infringe upon copyright laws, apart from the use of a purely private nature. -
Page 9: Installation Of The Pc-Software
If you do, you may choose to click the continue anyway-button. Minox has tested this driver or update on Windows XP and it does not impair or destabilize your computer. -
Page 10: Installing Arcsoft Photoimpression
Contents of the DCC CD-ROM • DCC Camera Driver for Windows 98/SE/ME/XP and MacOS 9.x • Web-Cam driver for Windows 98/SE/ME/XP • ArcSoft PhotoImpression 3.0 Software for image editing (Not included in Airline-Version) • User manual as PDF • Acrobat Reader Note Windows 2000, Me and XP, and MAC OS employ MASS STORAGE method to upload images from camera to com-... -
Page 11: Web-Cam Driver
Insert the DCC CD-ROM in your CD-ROM drive and connect the DCC to your computer using the provided USB cable. 1. Turn on your DCC Leica M3 and press the On/Mode button to scroll to the WebCam mode (with LCD displaying VC). -
Page 12: Using The Dcc
6. Follow the instructions on the screen to complete the installation of the WebCam driver. Note Web-Cam Driver applies to all Windows OS versions. Make sure that the DCC CD-ROM is in the CD-ROM drive bevore you connect your DCC to the computer for the first time! Using the DCC LCD status display... -
Page 13: Shooting And Deleting Images
99. Distance setting The lens of the MINOX DCC Leica M3 allows you to select and manually set two depths of field of your choice. To do this you simply have to... -
Page 14: Shooting Images With The Self-Timer
Camera Flash to your DCC. Make sure that your Minox Classic Camera Flash is turned OFF when connecting it to your DCC. Only switch the Minox Classic Camera Flash ON when it is securely fasten to the DCC. Make sure that correct battery is inserted into your Flash unit. -
Page 15: Deleting Images
• Hold the camera steady during the shot to avoid blurred images. Deleting images With the DCC you can either delete the last taken image or you can also delete all of the stored images. Please follow the instructions given below to delete images from the memory. -
Page 16: Video Conference
6. If the current resolution mode is High, the display indicates “Lr“; if it is in Low Resolution mode, the display indicates “Hr“. 7. Press the shutter release to set the appropriate resolution mode. (If you are currently in ‘Hr’ mode, the LCD displays ‘Lr’... -
Page 17: Image Processing On The Pc
Image processing on the PC Loading still images Downloading still images from your DCC to your PC.Turn on the camera and select the camera mode (with LCD displaying 2 digits). To download images onto the PC, connect the DCC to your computer using the provided USB cable. -
Page 18: Video With Arcsoft Photoimpression
Image processing on the MacOS Loading individual images Once you have correctly installed the DCC driver you can load pictures from your digital camera onto your computer. To load pictures onto your Macintosh Com- puter (MacOS) please follow the installation instruc- tions given below. -
Page 19: Uninstalling Drivers
3. Start up Windows, open the window “My Compu- ter“ and double click on “System“. 5. Open “Device Manager“ and then select “Imaging device“ 6. Select the “COACH Digital Camera“ and then press “delete“. 7. Select the “COACH Video Camera“ and then press “delete“... -
Page 20: If The Camera Is Not Used For A Prolonged
Note: Keep the DCC away from sand and dust Like any other digital camera the DCC is also particular- ly susceptible to sand and dust. Always make sure that the camera is not exposed to sand in sandy places, par- ticularly on beaches or in deserts where fine sand is blown about by wind. -
Page 21: Troubleshooting
Troubleshooting These guides are to help you cope with typical problems that may arise. Should the problem remain or if you require further assistance, please contact our technical customer service. The technician will pleased to assist you. In the attachment you will find all the necessary addresses and further technical specifications. Problem I can’t load images onto my PC. -
Page 22: Technical Data
Super Low Resolution (2.1MP): approx. 99 16 MB SD-RAM Integrated optical viewfinder 2 digit MINOX Classic Camera Flash, optional, order number: 69125 5 elements, glass lens element with IR filter F 2.8 9,6 mm / related to small picture: approx. 48 mm... -
Page 23: Technical Support
PC connection USB cable Dimensions 65 x 48 x 44 mm (LxWxH) Weight approx. 95 g Technical Support MINOX GmbH Walter-Zapp-Str. 4 D-35578 Wetzlar, Germany Tel.: +49 (0) 6441 / 917-0 Fax: +49 (0) 6441 / 917-612 e-mail: info@minox.com www.minox.com... -
Page 24: Conditions Of Warranty
4) When submitting claims under warranty please return the MINOX product together with the typewritten sales slip and a description of the claim to the MINOX GmbH or MINOX agency. 5) Tourists may, if required, make use of the Agency of the... - Page 25 Design subject to alterations without notice. MINOX is a registered trademark of MINOX GmbH, Wetzlar. Leica is a registered trademark of Leica Microsystems I. R. GmbH. MINOX GmbH Walter-Zapp-Str. 4 D - 35578 Wetzlar, Germany Tel.: +49 (0) 6441 / 917-0 Fax: +49 (0) 6441 / 917-612 e-mail: info@minox.com...
Need help?
Do you have a question about the Leica M3 and is the answer not in the manual?
Questions and answers