
Related Manuals for Nexigo PJ40


Summary of Contents for Nexigo PJ40
- Page 1 1080p LCD Projector PJ40 User Manual Scan the QR code or visit our link to download the latest manual or watch the installation video. nexigo.com/manuals...
- Page 2 CONTENT TRANSLATIONS English Deutsch Français Español Italiano...
-
Page 3: Contact Information
From all of us here at NexiGo, we want to thank you for your trust in us. We look forward to serving you again in the near future. - Page 4 PROJECTOR DIAGRAM FRONT VIEW SIDE VIEW REAR VIEW BOTTOM VIEW 10 11 13 15 1. Lens 2. Focus Adjustment Wheel 10. RJ45 Port 3. Air Filter 11. USB Input Ports 4. Power Switch 12. HDMI Input Ports 5. Home Button 13.
-
Page 5: What's In The Box
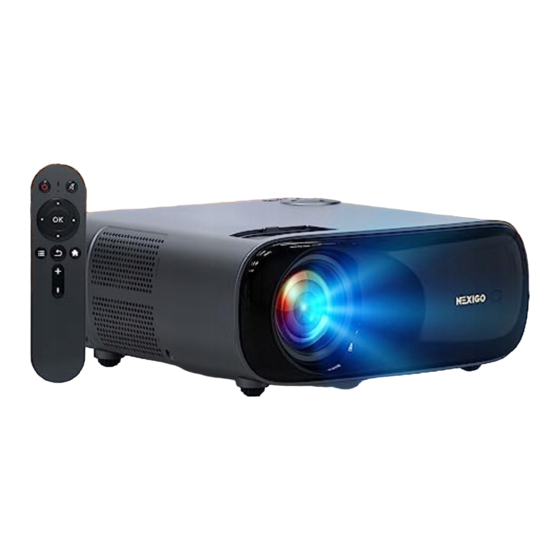
WHAT'S IN THE BOX? 1 x Projector 1 x Power Cable 1 x Cleaning Kit 1 x AV Cable 1 x Remote (Requires two AAA 1 x User Manual batteries, not included) CONNECTION INTRODUCTION 1. USB Inputs: For a Hard Drive, USB Drive, iOS cable mirroring, or charging USB devices. - Page 6 REMOTE CONTROL DIAGRAM AND FUNCTIONS Mute Power Switch Left Right Down Menu (Short Press) Home Input Source (Long Press) Return Vol + Vol - Power Switch: Toggles power on and off. Mute: Toggles audio on and off. Left / Right / Up / Down: Navigates through the on-screen display.
-
Page 7: Specifications
SPECIFICATIONS Imaging Technology Light Source Native Resolution 1920 x 1080 Max Supported Resolution 4096 x 2176 (Local video playback) Focusing Mode Manual operation Keystone Correction Automatic Projection Distance 4.72 - 30.18ft Projection Size 50 - 300 in Aspect Ratio 16:9 / 4:3 Projection Ratio 1.47:1 Power Input... -
Page 8: Quick Start
QUICK START CHOOSING A LOCATION A room's size and layout will be the most important factors when choosing where to place the projector. Consider the following when selecting a location: The size, shape, and position of your screen. ● Where a suitable power outlet is located. ●... - Page 9 Note: 1. A specific rear projection screen is required to use the rear projection function. 2. Please remove the 4 feet at corners on the bottom of the projector for mounting on the ceiling. POWER ON / OFF 1. Plug the power cord into a power outlet.
-
Page 10: Focus Adjustment
2. Press and hold the Power Switch to turn on the projector. Press the Power Switch to turn off the projector. Alternatively, press the Power Switch on the remote to turn the projector on or off. PROJECTOR DISTANCE & SIZE 4.72 5.54 6.50... -
Page 11: Keystone Adjustment
KEYSTONE ADJUSTMENT Please turn on Auto Keystone under Settings > Projection. The projector will automatically correct the vertical keystone. MULTI-MEDIA CONNECTIONS This section will show you how to connect the projector to other equipment. USB CONNECTIONS Insert your USB drive into the port shown in the diagram below. - Page 12 MP4, MPEG, MOV, 3GPP, 3GP, DAT, Video VOB, MPG, MPEG, AVI, MKV, FLV, RM, RMVB, ASF, WMV MP3, AAC, WAV, MKA, 3GP, M4A, Audio OGG, FLAC, PCM Supported Picture JPEG, BMP, PNG Formats Text TXT, SRT, SUB, SMI O ce ppt, xlsx, doc, pdf EN 10...
-
Page 13: Hdmi Connections
HDMI CONNECTIONS Plug an HDMI cable into the device you wish to connect to the projector, and then insert the other end of the HDMI cable into one of the HDMI ports as shown in the diagram below. Open the on-screen menu and select the HDMI source in the... - Page 14 AV CONNECTIONS To use a device with a standard RCA connection, you will need to obtain an RCA to 3.5mm adapter. Connect the adapter to the projector as shown below, and then connect the RCA plugs from the device to the RCA jacks on the adapter. You can also just use a singular AV cable if this is an option for your device.
- Page 15 3.5MM AUDIO CONNECTION To play sound from the source, plug either headphones or speakers into the 3.5mm audio port as shown below. EN 13...
- Page 16 Cast; Samsung - Search Smart View; Sony - Search Screen Mirroring). Once you have opened the casting software for your device, look at the list of available mirroring devices and select the "NexiGo-PJ40" from the list. The connection is now complete.
- Page 17 EN 15...
- Page 18 Airplay Mirror from the options. Go into the control center on the iOS device and click "Screen Mirroring". In the list of available mirroring devices, select the device "NexiGo-PJ40" from the list. The connection is now complete. EN 16...
- Page 19 Then, on the device you want to cast from, open an app that supports casting (ex: YouTube), and then tap the button on the app that allows you to cast. Select "NexiGo-PJ40" from the list of options. Press the play button on the video, and it will now display the video via the projector.
- Page 20 Share the screen of your iPhone or iPad using a IOS CABLE CAST - USB wired connection. Plug your iPhone or iPad into one of the USB ports on the projector. Select Apple Cast from the Home page and then iOS Cable Cast.
-
Page 21: Settings Menu
SETTINGS MENU EN 19... -
Page 22: Network Setting
Connect your projector to WiFi. NETWORK SETTING - 1. In the on-screen menu, select Settings then select the Network option. 2. Select your wireless network from the list as shown below to connect your projector to Wi-Fi. 3. Your projector is now ready for mirroring. EN 20... -
Page 23: Bluetooth Setting
Connect your projector to a Bluetooth audio BLUETOOTH SETTING - device. 1. In the on-screen menu, select Settings then select the Bluetooth option. 2. Turn on Bluetooth for the projector and the device you would like to connect to, and then search the list below for the Bluetooth audio device to connect. - Page 24 Select one of four modes: Standard, Vivid, Movie, PICTURE SETTING - or Custom. Custom mode enables custom settings for contrast, brightness, saturation, etc. Adjust the fan speed of the projector — the brightness will FAN - change slightly according to the fan speed. EN 22...
-
Page 25: Update Settings
PROJECTION Projection Mode: Change the projector mode. The options are: Front, Rear, Ceiling Front, and Ceiling Rear. Auto Keystone: Turn the automatic vertical keystone correction on / off. UPDATE SETTINGS Online Updates: Check online for available updates to download the latest firmware. -
Page 26: System Setting
If you're having any issues with your updates, please contact our customer service team at cs@nexigo.com. Adjust the system language, timezone, keyboard SYSTEM SETTING - style, etc. - Page 27 Factory data reset: Reset the projector to factory default. HOW DO I CLEAN THE AIR FILTER? (WE RECOMMEND CLEANING IT MONTHLY) To keep air circulating and prolong the projector's life, please clean the projector's air filter as follows: 1. Turn off the projector and unplug the power adapter. 2.
- Page 28 WARNINGS 1. Read the manual carefully before you use the projector. 2. Unplug immediately if you notice any issues or problems with your projector. If your projector begins to smoke, make unusual noises, or any strange odor is noticed, immediately unplug your projector. Ensure that it is placed in an open area with ventilation, away from any objects that may be a fire hazard.
-
Page 29: Fcc Requirement
16. If the projector is unused for a prolonged period of time unplug it from the power source. 17. If there are any mechanical issues with the projector, please contact NexiGo Support to exercise the warranty; DO NOT attempt to repair the item yourself. 18. Safe Operational Parameters Operating temperature: between +41°F (+5°C) and +95°F (+35°C) - Page 30 This equipment generates, uses, and can radiate radio frequency energy, and if not installed and used in accordance with the instructions, may cause harmful interference to radio communications. However, there is no guarantee that interference will not occur in a particular installation. If this equipment does cause harmful interference to radio or television reception, which can be determined by turning the equipment off and on, the user is encouraged to try to correct the interference by one or...
- Page 31 DIAGRAMM DES PROJEKTORS VORDERANSICHT SEITENANSICHT RÜCKANSICHT UNTERSICHT 10 11 13 15 1. Objektiv 2. Fokus-Anpassungsrad 10. RJ45-Eingang 3. Luftfilter 11. USB-Eingang 4. Netzschalter 12. HDMI-Eingang 5. Home-Taste 13. 3.5-mm-Audiobuchse 6. Zurück-Taste 14. AV-Eingangsanschluss 7. OK-Taste 15. IR-Empfänger 8. Links / Rechts / Auf / Ab-Taste 16.
- Page 32 WAS BEFINDET SICH IN DER BOX? 1 x 1 x Projektor 1 x Netzkabel 1 x Reinigungsset 1 x AV-Kabel 1 x Fernbedienung (2 AAA-Batterien 1 x Gebrauchsanweisung erforderlich, nicht im Lieferumfang enthalten) EINFÜHRUNG ZUM ANSCHLUSS 1. USB-Eingänge: Für eine Festplatte, ein USB-Laufwerk, iOS- Kabelspiegelung oder das Aufladen von USB-Geräten.
- Page 33 DIAGRAMM UND FUNKTIONEN DER FERNBEDIENUNG Netzschalter Stummschalten Links Rechts Menü (Kurzer Druck) Home Eingabe (Langes Zurück Drücken) Vol + Vol - Netzschalter: Zum Ein- und Ausschalten des Geräts. Stummschalten: Audio ein- und ausschalten. Links / Rechts / Auf / Ab: Zum Bewegen des Cursors auf dem Bildschirm Anzeige.
- Page 34 Bitte scannen Sie den unten stehenden QR-Code, um die komplette Bedienungsanleitung herunterzuladen. DE 32...
- Page 35 DIAGRAMME DU PROJECTEUR VUE DE FACE VUE DE CÔTÉ VUE ARRIÈRE VUE DE DESSOUS 10 11 13 15 1. Lentille 2. Molette de réglage de la 10. Port d’entrée RJ45 mise au point 11. Port d’entrée USB 3. Filtre à air 12.
-
Page 36: Qu'y A-T-Il Dans La Boîte
QU’Y A-T-IL DANS LA BOÎTE ? 1 x projecteur 1 x câble d’alimentation 1 x Kit de nettoyage 1 x câble AV 1 x télécommande (nécessite 1 x Manuel de l’utilisateur 2 batteries AAA, non incluses) INTRODUCTION À LA CONNEXION 1. - Page 37 SCHÉMA ET FONCTIONS DE LA TÉLÉCOMMANDE Interrupteur Muet d’alimentation Haut Gauche Droite Menu (Pression Courte) Accueil D’entrée Retour (Appui Long) Vol + Vol - Interrupteur d’alimentation: active et désactive l’alimentation. Muet: active et désactive l’audio. Gauche / Droite / Haut / Bas: Déplace le curseur dans l’écran a chage.
- Page 38 Veuillez scanner le code QR ci-dessous pour télécharger le manuel d'utilisation complet. FR 36...
- Page 39 DIAGRAMA DEL PROYECTOR VISTA FRONTAL VISTA LATERAL VISTA TRASERA VISTA INFERIOR 10 11 13 15 1. Lente 10. Puerto de entrada RJ45 2. Rueda de ajuste de enfoque 11. Puerto de entrada USB 3. Filtro de aire 12. Puerto de entrada HDMI 4.
-
Page 40: Qué Hay En La Caja
¿QUÉ HAY EN LA CAJA? 1 x Proyector 1 x cable de energía 1 x kit de limpieza. 1 x Cable AV 1 x Mando a distancia (requiere 2 pilas 1 x Manual de usuario AAA, que no están incluidas en la caja) INTRODUCCIÓN A LA CONEXIÓN 1. - Page 41 DIAGRAMA Y FUNCIONES DEL CONTROL REMOTO Interruptor Silencio de encendido Arriba Izquierda Derecha Menú Abajo (Pulsación Corta) Inicio Entrada Volver (Pulsación Larga) Vol + Vol - Interruptor de encendido: Activa y desactiva la alimentación. Silencio: Activa y desactiva el audio. Izquierda / Derecha / Arriba / Abajo: Mueve el cursor en la pantalla pantalla.
- Page 42 Escanee el código QR a continuación para descargar el manual de usuario completo. ES 40...
-
Page 43: Vista Frontale
DIAGRAMMA DEL PROIETTORE VISTA FRONTALE VISTA LATERALE RETROVISORE VISTA DAL BASSO 10 11 13 15 1. Obiettivo 2. Rotella di regolazione della 10. Porta d'ingresso RJ45 messa a fuoco 11. Porta d'ingresso USB 3. Filtro dell'aria 12. Porta d'ingresso HDMI 4. - Page 44 COSA C'È NELLA SCATOLA? 1 x Proiettore 1 x Cavo di Alimentazione 1 x kit di pulizia 1 x Cavo AV 1 x Telecomando (Richiede 2 batterie 1 x Manuale d‘Utente AAA, non incluse) INTRODUZIONE ALLA CONNESSIONE 1. Entradas USB: para un disco duro, unidad USB, duplicación de cable iOS o carga de dispositivos USB.
- Page 45 DIAGRAMA Y FUNCIONES DEL CONTROL REMOTO Interruttore Muto di Alimentazione Sinistra Destra Menu Giù (Pressione Breve) Home Ingresso Ritornare (Pressione Prolungata) Vol + Vol - Interruttore di Alimentazione: Accendere e spegnere l'alimentazione. Muto: Attivare e disattivare l'audio. Sinistra / Destra / Su / Giù: spostare il cursore nello schermo display.
- Page 46 Si prega di scansionare il codice QR qui sotto per scaricare il manuale utente completo. IT 44...
- Page 47 Get in touch with FREE online services. facebook.com/letsnexigo Register to get EXTRA ONE YEAR warranty. Only valid in registering within 14 days of product delivery. nexigo.com/warranty...
Need help?
Do you have a question about the PJ40 and is the answer not in the manual?
Questions and answers