Table of Contents
Advertisement
Advertisement
Table of Contents

Related Manuals for Braaap Moto3


Summary of Contents for Braaap Moto3
- Page 1 Moto3 User Manual...
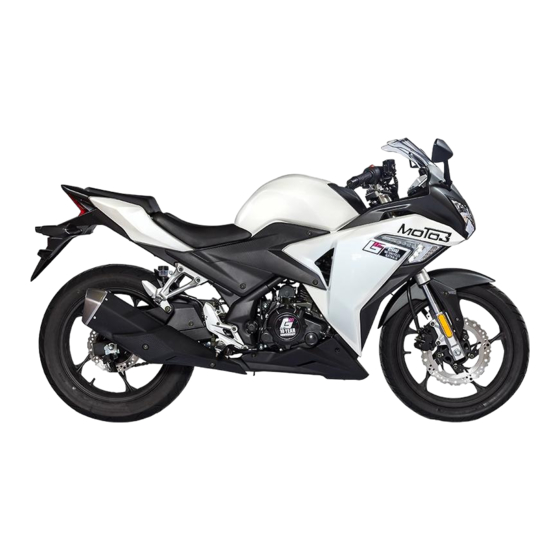
- Page 2 Firstly, thank you for purchasing the braaap Moto3. This is an introduction to the basic structure, adjustment methods and maintenance of the moto3. This manual is designed to help you get to know your motorcycle and teach you how to maintain it to its optimum performance.
- Page 3 Moto3 User Manual...
-
Page 4: Table Of Contents
VI. Checking, adjustment and maintenance..............22 VII. Washing........................35 Oil check........................22 VIII. Maintenance during stops..................36 Oil Replacement......................23 Storage maintenance....................36 Oil tank washing......................23 Return to use......................37 Checking the spark plug.....................23 IX. Electric start explanation..................37 Checking and replacing the air filter................24 X. Electrical schematic diagram..................38 Moto3 User Manual... -
Page 5: User Agreement
If installing spare parts you can follow these steps as a rough guide. If you are still unsure please contact your local braaap service agent. -
Page 6: Riding Safety
Please adjust the rear tire pressure and shock absorber according to the loaded weight and road conditions. This will ensure that all cargo and/or people are solidly fixed and balanced. Please do not tie any large and heavy items to the handlebars, front forks or front mudguard. As it may make the motorcycle hard to steer. Moto3 User Manual... - Page 7 Accessories All braaap accessories have been tested and deemed safe to use. Please make sure to double check with your local service center if you are purchasing other accessories as they may not be safe. If installing new accessories do not let them interfere with the drivers sight, ground clearance or steering.
- Page 8 4. When the roads are wet or icy please allow for extra time to slow down before the corner. 5. Proceed with extra caution when exiting a tunnel, in a valley, passing a truck or when it is generally windy. 6. Always comply with traffic laws and speed limits. Moto3 User Manual...
-
Page 9: Main Technological Parameters
250ml Load capacity of rear axle 196kg Spark plug D8EA Size of front tyre 110/70-17 Clarence of spark plug (0.6-0.7)mm Size of rear tyre 140/70-17 Air inlet valve: (0.04-0.06)mm Maximum designed speed 115km/h Air outlet valve: (0.04-0.06)mm Moto3 User Manual... - Page 10 2nd gear 2.063 Rear position light 12V-0.34W 3rd gear 1.450 Battery 12V7Ah 4th gear 1.130 Rear turning signal 12V-0.25Wx2 5th gear 0.957 Ignition mode CDI electronic ignition 6th gear 0.815 Terminal transmission ratio 3.231 Primary transitional ratio 3.091 Moto3 User Manual...
-
Page 11: Structure Of The Motorcycle
1. Clutch lever 2. LH rear mirror 3. Speedometer 4. Power switch 5. RH rear mirror 6. Front brake lever 7. LH handlebar 8. LH handlebar switch 9. Fuel tank lock 10. RH handlebar switch 11. Throttle grip Moto3 User Manual... -
Page 12: Parts Name
3. Fuel tank lock 4. Fuel switch 5. Rear indicators 6. Rear wheel 7. Rear shock absorber 8. Engine type and factory number 9. Gearshift pedal 10. Front shock absorber 11. Front disc brake 12. Front wheel Moto3 User Manual... - Page 13 1. Muffler 2. Rear disc brake 3. Seat assy. 4. Rear braking pedal 5. Position of brand plate (Name plate, right side of frame) 6. Identification No.(VIN) Position (Right side of standing tube) 7. Gulp valve Moto3 User Manual...
-
Page 14: Moter Indicator Lamp
This light flashes when you turn on the high beam. Neutral indicator This light flashes when you are in neutral gear. Left turning signal Indicator light flashes when turning left. Warning When indicating be sure to switch the indicator off Moto3 User Manual... -
Page 15: Gulp Valve
CO, HC, and Nox. 1. Negative pressure tube on gulp valve 2. Air inlet tube 3. Air outlet tube Moto3 User Manual... -
Page 16: Operation
Use unleaded or low-lead gasoline fuel graded #90 or higher. the engine. If the engine is started in this condition it may cause sever damage to the engine. Moto3 User Manual... -
Page 17: Engine Start-Up
Do not start the engine in the room with poor ventilation or without ventilating device because carbon monoxide is very toxic. Do not get off the motorcycle with the engine running if noone is around to guard it. Moto3 User Manual... -
Page 18: Right Switch Assy
When engaging the electric start be sure to hold it in for no longer than 5 seconds at a time as a discharge can make the circuits and starter motor heat abnormally. If the starter motor is not starting the engine after several attempts, stop and check the oil supply and starting circuit system. Moto3 User Manual... -
Page 19: Left Switch Assy
(4) High beam signal switch 4. High beam signal switch Used for cutting in. Warning Use the indicators to change lanes and make turns. Be sure to turn the indicator off once you have made the turn. Moto3 User Manual... -
Page 20: Gear Shifting
3. Once the bike has reached a balanced running state, reduce the rotation speed of the engine then engage the clutch, then raise the gear shift pedal to the 2nd gear position. The same method can be used for the rest of the gears. International Six-speed Reverse gear Forward gear Moto3 User Manual... -
Page 21: Matters Need Attention In Driving
3. Lonely use of front or rear brake is dangerous, which causes slip and runaway (out of control). Carefully use brake system in wet or smooth road, or road turning. Sudden brake on rough or smooth road may lead to runaway (out of control). Moto3 User Manual... -
Page 22: Checking, Adjustment And Maintenance
Oil replacement Please use the special appointed Braaap oil. Oil is important for the engine to run efficiently so be sure to check the oil regularly. Change the oil after the first 500kms. After this change the oil every 2000kms (however it is recommended to check the oil every 1000km) While the engine is warm/hot carefully remove the drain plug to drain the old oil. -
Page 23: Oil Replacement
2. The installed spark plugs have been carefully chosen for this bike and will be suitable for most working ranges. If you replace the spark plug for another type, please consult with our sales agency first as improper selection will seriously damage the engine. Moto3 User Manual... -
Page 24: Checking And Replacing The Air Filter
2- Clip If you often ride the motorcycle in a dust area be sure to replace the air filter regularly. Carefully check the air filter for any cracks. If you see any cracks replace the air filter. Moto3 User Manual... -
Page 25: Adjusting The Throttle Cable
2. Make sure the engine is hot when you tune the carburetor. 3. Ensure that the motorcycle is on flat ground, adjust the idle by turning the idle screw. Idling speed is: 1500+150r/min Idling screw Moto3 User Manual... -
Page 26: Checking And Adjusting The Valve Cap
After the adjustment, screw down “locknut” to prevent looseness, check the valve gap again and put the valve cover (or cylinder cap) and two hole caps on left case cover. Moto3 User Manual... -
Page 27: Adjusting The Clutch
2. After making the adjustment, tighten the adjustment nut. 1. Limit bolt 2. Rear brake pedal Caution Braking lamp should light up after checking the brake system. Kick Stand 1. Side stand 2. Rear armrest This motorcycle only has a side stand. Moto3 User Manual... -
Page 28: Front And Rear Disc Brake Maintenance
Caution 1. When replacement or adding oil please use authentic DOT3 or DOT4 special brake oil. 2 - Do not mix several types of brake oil. 3 - Do not use polluted brake oil. Moto3 User Manual... - Page 29 1. When replacing the brake lining, be sure to only use the OEM replacement part provided by our service center. Contact the braaap service center if your brakes needs maintaining or repairing. 2. Do not ride the motorcycle just after replacing the brake lining. Hold and release the brake lever and push down and up on the rear brake pedal several times to let the brake lining fully fit to resume normal grasping force, and to make the brake oil circulate all the way through.
-
Page 30: Chain Adjustment
Check brake light when its switch connected, in case of no lighting, view brake lamp, circuit, and brake switch, replace if required. Caution As for adjustment for switch of brake lamp, firstly, confirm free moving distance of brake assy. in stipulated scope Moto3 User Manual... -
Page 31: Checking The Battery
Avoid washing the battery with water when washing the motorcycle. Do not use the fuse exceeding specified specs, otherwise the circuit system will be affected badly and even the engine may be shut off or the motorcycle may be burnt out and the power of the engine may be lost. Moto3 User Manual... -
Page 32: Tires
If a lamp with different rated power is used. The circuit system may be overloaded and the lamp may be blown Headlight 35w x 2/55w Tail/Brake light 0.34w/1.4w Front left/right indicator 0.2w/0.2w Front position light Rear position light 0.34w Rear left/Right indicator 0.25w/0.25w Moto3 User Manual... -
Page 33: Table Of Fastening Parts Torque
“*“ Means done by maintenance station. If you have the specialized tools, spare parts and know how, maintenance could be done, refer to service manual for details. “**” Indicates for safety purpose, done by braaap maintainer only. Note: 1. Frequently wash in dusty region. - Page 34 Replace each 2 years Headlight dimmer Clutch Side stand Suspension bracket Nut, bolt, fastening parts Aluminum/spoke wheel Bearing of steering handle Meaning of each symbol: I. Checking, washing, adjustment, lubrication, or replacement. C. Cleaning R. Replacement A. Adjustment L. Lubrication Moto3 User Manual...
-
Page 35: Vii : Washing
2. Lubricate the drive chain and run the engine at idle speed after the vehicle is cleaned and allowed to dry. 3. Be sure to check the brake system several times before riding the vehicle and troubleshoot it if necessary. Moto3 User Manual... -
Page 36: Maintenance During Stops
Clean the motor cycle, coat the colored component parts with dye fixing agent, and paint the corrodible parts with rust inhibiting oil. Inflate the tires according to specified pressure and then raise the tires by placing wooden pads under them so that they do not touch the ground. Cover the motorcycle with the coat. Moto3 User Manual... -
Page 37: Return To Use
When starting, turn the key to the position of “ON”, tightly hold clutch lever, press button of electric starting, if failed within 5 seconds, start again after several seconds. For your use and maintenance, please refer to “schematic diagram of electric start” below Moto3 User Manual... -
Page 38: Electrical Schematic Diagram
X. Electrical schematic diagram Moto3 User Manual... - Page 39 Moto3 User Manual...
- Page 40 Moto3 User Manual...
Need help?
Do you have a question about the Moto3 and is the answer not in the manual?
Questions and answers