Table of Contents
Advertisement
Quick Links
Advertisement
Table of Contents

Related Manuals for Livox Mid-360


Summary of Contents for Livox Mid-360
- Page 1 Livox Mid-360 User Manual v1.0 2023.01...
-
Page 2: Using This Manual
Downloading Livox Viewer 2 Visit the link below to download Livox Viewer 2: www.livoxtech.com/mid-360/downloads Open-sourced Algorithm Visit the link below to download Livox SDK 2 and Livox ROS Driver 2: https://github.com/Livox-SDK Livox Wiki Visit Livox Wiki for more information intended for developers:... -
Page 3: Table Of Contents
External Power Supply Connection Usage Coordinates Output Data Working States and Working Modes Livox Viewer 2 Software Development Kit (SDK) Storage, Transportation, and Maintenance Storage Transportation Maintenance Troubleshooting After-Sales Information Appendix Livox Mid-360 Dimensions Specifications © 2023 LIVOX All Rights Reserved. -
Page 4: Product Profile
(outside mainland China). Built-in IMU Module: The Mid-360 is embedded with a 3-axis accelerometer and a 3-axis gyroscope. Users turn on or turn off the information push through Livox Viewer 2 or Livox SDK 2. The Mid-360 pushes information at 200 Hz. -
Page 5: Product Characteristics
The FOV coverage of Livox Mid-360 and non-Livox LiDAR sensors using common mechanical scanning methods. The 16-line non-Livox LiDAR sensor has a vertical FOV of 30°, the 32-line non-Livox LiDAR sensor is 41°, and the 64-line non-Livox LiDAR sensor is 27°. - Page 6 × 100% Total area in FOV Refer to the official Livox website for more information about how the FOV coverage is calculated. The figure below shows the average angular gap change curve of the point cloud over different integration times using the non-repetitive scanning technology. Users can select the integration time according to the size and distance of the target object.
-
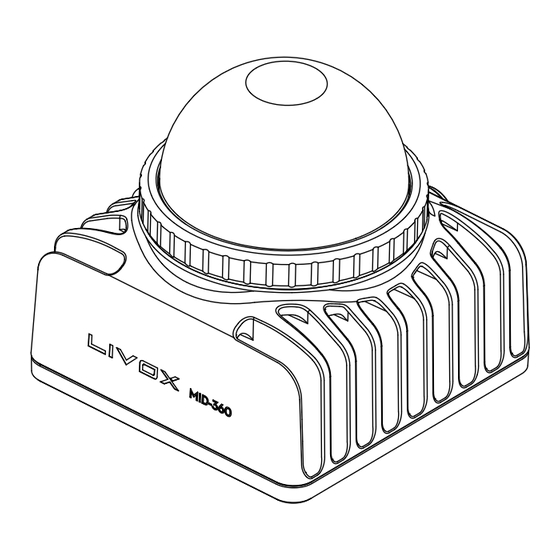
Page 7: Overview
Mid-360. Refer to the Dimensions section for more information. 4. M3 Mounting Holes Mount Livox Mid-360 to an appropriate location using the M3 screws and the mounting holes. Visit the DJI official store to purchase the Livox Aviation Connector 1-to-3 Splitter Cable. The Livox Aviation Connector 1-to-3 Splitter Cable can only be used for testing and debugging. -
Page 8: Connectors
Connectors M12 Aviation Connector The Mid-360 uses a high-reliability M12 A-Code aviation connector (male). The M12 12P A-code fully shielded male connector meets the IEC 61076-2-101 standard. The recommended female connector type is Finecables, port number MA12FAHD12STXXXB14. Both connectors have an IP rating of IP67. - Page 9 Livox Mid-360 User Manual See below for more information on the Mid-360 M12 aviation connector (male) and the Livox Aviation Connector 1-to-3 Splitter Cable. M12 Aviation Connector Signal Type Description Color Function (male/female) Pins Power+ Power DC 9V-27V Red (positive)
-
Page 10: Mounting Livox Mid-360
Effective FOV of the Mid-360 Note that the effective detection range of Livox Mid-360 varies based on where the object is within the FOV. For the vertical FOV, the closer to the upper edge, the shorter the effective detection range is;... -
Page 11: Dimensions
Dimensions The bottom surface of the Mid-360 has four M3 mounting holes with a depth of 5 mm. Refer to the dimensions and the mounting holes in the diagrams below to mount or embed the Mid-360 to or in an appropriate place on the target base. -
Page 12: Getting Started
Getting Started External Power Supply The working voltage range of Livox Mid-360 is from 9 V to 27 V, the recommended working voltage is 12 V. The minimum working voltage should be increased in a low-temperature environment. When the Mid-360 is connected to an external power source directly using the M12 aviation connector, make sure the output voltage range of the external power source is within the operating voltage range of the Mid-360. - Page 13 Connect the M12 aviation connector (female) on the Livox Aviation Connector 1-to-3 Splitter Cable with the M12 aviation connector (male) on Livox Mid-360. The lock nut of the M12 aviation connector (female) should be tightened with a wrench to ensure there is a secure connection with the M12 aviation connector (male).
-
Page 14: Usage
Usage Coordinates The Cartesian coordinates O-XYZ of Mid-360 is defined as below: Point O is the origin, and O-XYZ is the point cloud coordinates of Mid-360. 360° 52° 7° Mid-360 Coordinates Output Data The output information of Mid-360 LiDAR sensors includes: Information Push, Point Could Data and IMU Data. - Page 15 0 to 100% in the Lambertian reflection model. 151 to 255 corresponds to the reflectivity of target objects with retroflection properties. When the target is less than 2 m from the Mid-360, it may result in a large reflectivity error. The data should only be used to distinguish whether the target is total reflective or diffuse reflective.
- Page 16 Timestamp There are two ways to synchronize data with the Mid-360: IEEE 1588-2008 and GPS. Timestamps are displayed in format of 64-bit integers, and the unit is ns. Visit Livox Wiki for more detailed information about time synchronization: https://livox-wiki-en.readthedocs.io. IEEE 1588-2008: IEEE 1588-2008 is the Precision Time Protocol (PTP) enabling precise synchronization of clocks in measurement and control systems by Ethernet.
-
Page 17: Working States And Working Modes
The LiDAR sensor is integrated with a IMU chip (with a 3-axis accelerometer and a 3-axis gyroscope). By default, Livox Mid-360 starts to push IMU data at a frequency of 200 Hz after power-on, which can be enabled or disabled using the host computer. The IMU data contains the 3-axis acceleration and 3-axis angular velocity, the directions of which are the same with that of the point cloud coordinates. -
Page 18: Software Development Kit (Sdk)
Software Development Kit (SDK) Livox SDK 2 Besides using Livox Viewer 2 to check real-time point cloud data, users can also use the Livox SDK 2 to apply the point cloud acquired from Livox LiDAR sensors to different scenarios, such as: •... -
Page 19: Storage, Transportation, And Maintenance
• Make sure the Mid-360 LiDAR sensor is not exposed to environments containing poisonous or corrosive gases or materials. • DO NOT drop the Mid-360 LiDAR sensor and be careful when placing it in storage or taking it out of storage. -
Page 20: Troubleshooting
Troubleshooting The table below shows you how to troubleshoot and resolve common issues with Mid-360 LiDAR sensors. If the issue persists, contact Livox. Issue Solution • Make sure that all cables are correctly wired. • Make sure the voltage of the power supply is suitable. The voltage should be between 9 V and 27 V. -
Page 21: Appendix
Appendix Livox Mid-360 Dimensions Unit: mm 73.0 65.0±0.5 48.0 +0.1 4-M3 +0.1 © 2023 LIVOX All Rights Reserved. -
Page 22: Specifications
[5] Tested in an environment at a temperature of 25° C (77° F) with a target object that has a reflectivity of 80% and is 0.2 meters away from Livox Mid-360. For target objects within 0.1 to 1 m away from the Mid-360, if they have a low reflectivity or are thin and tiny, the detection effect cannot be guaranteed. - Page 23 Livox Mid-360 will stop operating automatically if the temperature is too high. [8] When the ambient temperature is from -20° C (-4° F) to 0° C (32° F), Livox Mid-360 will automatically enter self-heating mode, where the peak power may reach 14 W. Make sure to design the power supply reasonably to ensure the LiDAR sensor works normally.
- Page 24 Visit the Livox official website to download the latest user manual. https://www.livoxtech.com/mid-360/downloads Livox and Livox Mid are the trademarks of Livox Technology Company Limited. Windows is the registered trademark of Microsoft Corporation and its subsidiaries. Ubuntu is a registered trademark of Canonical Ltd.
Need help?
Do you have a question about the Mid-360 and is the answer not in the manual?
Questions and answers