Advertisement
Quick Links
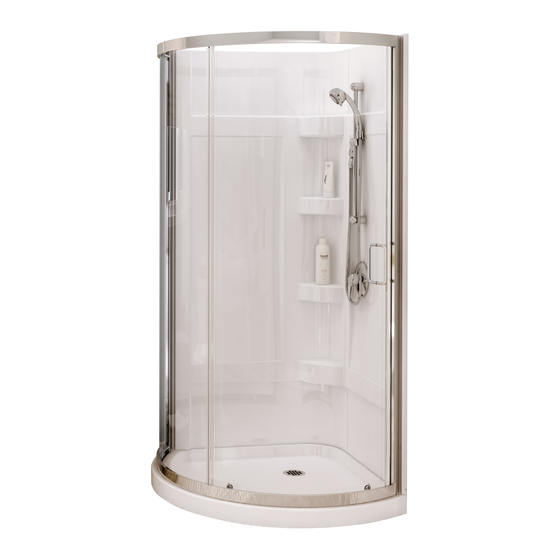
INSTALLATION INSTRUCTIONS
GUIDE D'INSTALLATION
GUÍA DE INSTALACIÓN
Read all instructions carefully before proceeding.
Lire toutes les instructions attentivement avant de commencer
l'installation.
Leer detenidamente todas las instrucciones antes de comenzar
la instalación.
IMPORTANT
• Record the serial number
IMPORTANT
• Noter le numéro de série
IMPORTANTE
• Registre el número de serie
MODEL • MODÈLE • MODELO
300001 • 300002
FOR RIGHT AND LEFT SIDE DOOR INSTALLATION
(LEFT SIDE SHOWN)
POUR INSTALLATION DE PORTE CÔTÉ DROIT ET GAUCHE
(CÔTÉ GAUCHE ILLUSTRÉ)
PARA LA INSTALACIÓN DE LA PUERTA DEL LADO DERECHO E IZQUIERDO
(SE MUESTRA INSTALACIÓN AL LADO IZQUIERDO)
300004 • 300005
SAVE THIS GUIDE FOR FUTURE REFERENCE.
CONSERVER POUR UN USAGE ULTÉRIEUR.
CONSERVE ESTE MANUAL COMO REFERENCIA.
Serial number • Numéro de série • Número de Serie
Advertisement

Related Manuals for MAAX Cyrene 300001


Summary of Contents for MAAX Cyrene 300001
- Page 1 FOR RIGHT AND LEFT SIDE DOOR INSTALLATION INSTALLATION INSTRUCTIONS (LEFT SIDE SHOWN) POUR INSTALLATION DE PORTE CÔTÉ DROIT ET GAUCHE GUIDE D’INSTALLATION (CÔTÉ GAUCHE ILLUSTRÉ) GUÍA DE INSTALACIÓN PARA LA INSTALACIÓN DE LA PUERTA DEL LADO DERECHO E IZQUIERDO (SE MUESTRA INSTALACIÓN AL LADO IZQUIERDO) MODEL •...
- Page 2 PARTS PIÈCES PIEZAS AND COMPONENTS ET COMPOSANTES Y COMPONENTES Wood structure for walls is not included. See page 6 for materials to be purchased PRIOR TO INSTALLATION La structure en bois pour les murs n'est pas incluse. Voir page 6 pour les matériaux à acheter AVANT L'INSTALLATION Estructura de madera para paredes no incluida.
- Page 3 PARTS PIÈCES PIEZAS AND COMPONENTS ET COMPOSANTES Y COMPONENTES #8 x 1/2" #6 x 3/8" Handle from packaging / Poignée de l'emballage / Titador del empaque...
- Page 4 PARTS PIÈCES PIEZAS AND COMPONENTS ET COMPOSANTES Y COMPONENTES DOOR | PORTE | PUERTA Part Nom de la pièce Pieza Cant. Door Porte Puerta Fixed panel Panneau fixe Panel fijo Base Base Base Wall with caddy Mur avec caddie Muro con caddie Wall Muro #10-32 X 5/8"...
-
Page 5: Tools Outils
TOOLS OUTILS HERRAMIENTAS REQUIRED REQUIS NECESARIAS Electric drill Level Pencil Perceuse électrique Niveau Crayon Taladro eléctrico Nivel Lápiz ¼'' ceramic drill bit ⅛ " drill bit Mèche à céramique ⅛ Clear silicone sealant Mèche de ¼ po. ⅛ Broca de "... - Page 6 BEFORE AVANT ANTES YOU BEGIN DE COMMENCER DE COMENZAR If they are out of range you will not be able to install this Compare the shower enclosure measurements to the chart below. door in your shower alcove. Si les mesures de votre alcôve excèdent Comparer les mesure de la cabine de douche avec les valeurs du tableau ci-dessous.
- Page 7 BEFORE AVANT ANTES YOU BEGIN DE COMMENCER DE COMENZAR Double the studs (2x4) where the wall jambs will be installed. Doubler les montants de bois (2x4) là où les montants muraux seront installés. Duplique los montantes (2x4) en los lugares en los que se instalarán las jambas murales. Doubled stud Montant double Montante doble...
- Page 8 This frame is for this model only Ce cadre est pour ce modèle seulement Esta estructura es para este modelo WALL REINFORCEMENTS 300004 | 300005 RENFORT POUR LES MURS REFUERZOS PARA LOS MUROS Note: the wooden pieces must be fixed on finished wall. A.
- Page 9 This frame is for these models only Ce cadre est pour ces modèles seulement Esta estructura es para estos modelos WALL REINFORCEMENTS 300001 | 300002 RENFORT POUR LES MURS REFUERZOS PARA LOS MUROS Note: the wooden pieces must be fixed on finished wall. A.
- Page 10 Parts required: Pieces requises: Partes requeridas: DRAIN ASSEMBLY ASSEMBLAGE DU DRAIN ENSAMBLE DEL DESAGÜE A. Perform the partial assembly of the drain with the shower base (#3) (refer to step 1, ASSEMBLY AND INSTALLA- TION of the instructions enclosed in the drain packaging. The final drain assembly must be done during the shower installation at its location (Step 5).
- Page 11 Parts required: Pieces requises: Partes requeridas: x 12 WALL ASSEMBLY ASSEMBLAGE DES MURS Before working with plastic walls, allow time to ENSAMBLE DE LOS MUROS adjust to ambient temperature. Avant d'assembler les murs en plastique, lais- ser les s'acclimater à la temperature ambiante. A.
- Page 12 Parts required: Pieces requises: Partes requeridas: WALL BASE ASSEMBLY ASSEMBLAGE DE MURS ET BASE ENSAMBLE DE MUROS Y BASE A. Align the assembled walls with the inside of base. Drill holes through the lower lip of the walls and through the base using a 3/32" d-rill bit in line with the imprints of the lower lip of the walls, behind the walls.
- Page 13 Parts required: Pieces requises: Partes requeridas: DRY-FIT / MARKING WALL POSITION AJUSTEMENT À SEC / MARQUAGE DE LA POSITION DU MUR AJUSTE EN SECO / MARCADO DE POSICIÓN EN LA PARED A. Complete drain assembly (refer to step 2, ASSEMBLY AND INSTALLATION of the instructions enclosed in the drain packaging).
- Page 14 Parts required: Pieces requises: Partes requeridas: MARKING PLUMBING HOLES MARQUAGE DES TROUS DE PLOMBERIE MARCADO DE AGUJEROS DE PLOMERÍA A. Take measurements of the fixtures on the wall: From the side mark of the wall to the fixture (A, B and C) and from the shower floor to the fixtures (D and E).
- Page 15 Parts required: Pieces requises: Partes requeridas: x 14 WALL BASE INSTALLATION INSTALLATION DE MURS ET BASE INSTALACIÓN DE MUROS Y BASE A. Slide the shower into its location. THE SHOWER BASE MUST BE UNI- FORMLY LEVELED AND RESTING OVER ITS ENTIRE SURFACE.The wood framing built in step 1 should fall inside raised sections of the walls without interference.
- Page 16 Parts required: Pieces requises: Partes requeridas: FRAME ASSEMBLY ASSEMBLAGE DU CADRE ENSAMBLE DEL MARCO Glass slots Fentes de verre Ranuras para vidrio A. Secure the Tracks (#11) to the Panel Uprights (#12) with the #8 x 3/4” Screws (#17),with the glass slots of the panel uprights facing the inside of the shower as shown.
- Page 17 Parts required: Pieces requises: Partes requeridas: WALL JAMBS DRY FIT ADJUSTMENT RÉGLAGE DE LA POSITION DU MONTANTS À SEC AJUSTE EN SECO DE LA POSICIÓN DE LAS JAMBAS MURALES A. Lift frame assembly and place onto the Base. Center the frame from left to right, use the positions of the wall jambs as a reference.
- Page 18 Parts required: Pieces requises: Partes requeridas: WALL JAMB INSTALLATION INSTALLATION DU MONTANT MURAL INSTALACIÓN DEL MONTANTE MURAL A. Place wall jamb back in the previously marked location. The inside edge of the wall jambs should line up with the pencil line. Mark all of the mounting hole locations.
- Page 19 Parts required: Pieces requises: Partes requeridas: ROLLERS AND HANDLE INSTALLATION INSTALLATION DES ROULETTES ET POIGNÉE INSTALACIÓN DE LOS RODAMIENTOS Y MANIJA TOP VIEW VUE SUPÉRIEURE A. Install the top rollers (#14a) and bottom Rollers (#14b) on Sliding Door VISTA SUPERIOR (#1).
- Page 20 FIXED PANEL INSTALLATION INSTALLATION DU PANNEAU FIXE INSTALACIÓN DEL PANEL FIJO A. Gently put the door inside the shower over cardboard for easier installation. A. Placer délicatement la porte à l'intérieur de la douche sur des cartons pour faciliter l'installation. A.
- Page 21 Parts required: Pieces requises: Partes requeridas: FIXED PANEL INSTALLATION INSTALLATION DU PANNEAU FIXE INSTALACIÓN DEL PANEL FIJO Fixed panel on left when outside shower: Glass clip B on top and A on bottom. (shown). Fixed panel on right: Glass clip A on top and B on bottom. C.
- Page 22 Parts required: Pieces requises: Partes requeridas: FIXING THE FRAME FIXATION DU CADRE FIJACIÓN DEL MARCO INSIDE VIEW VUE INTÉRIEURE VISTA INTERIOR A. With a 3/32" drill bit drill the panel uprights in the 3 wall jamb's pre-drilled holes, from inside the shower. Before inserting wall jambs screws adjust the position of the curved frame to suit the base.
- Page 23 Parts required: Pieces requises: Partes requeridas: A. Insert gasket (#18) between the panel upright and fixed panel with the plastic box handle (#19) from inside the shower. INSIDE VIEW A. Insérer le joint d'étanchéité (#18) entre le montant de panneau VUE INTÉRIEURE et le panneau fixe à...
- Page 24 Parts required: Pieces requises: Partes requeridas: DOORS INSTALLATION INSTALLATION DES PORTES INSTALACIÓN DE LAS PUERTAS A. Insert a door catch (#22) aligned with the holes on each corner on top of the track and fasten with #6-3/8" screws (#26). A. Insérer un loquet de la porte (#22) aligné avec les trous de chaque coin, au-dessus du rail et fixer avec des vis #6-3/8"...
- Page 25 Parts required: Pieces requises: Partes requeridas: GASKETS INSTALLATION INSTALLATION DES JOINTS D'ÉTANCHÉITÉ INSTALACIÓN DE LAS JUNTAS DE ESTANQUEIDAD A. Install door gasket (#23) on each side of door with flaps facing outward as shown. TOP VIEW A. Insérer le joint d'étanchéité de la porte (#23) de chaque VUE SUPÉRIEURE côté...
- Page 26 Parts required: Pieces requises: Partes requeridas: APPLICATION OF THE SILICONE APPLICATION DU SILICONE APLICACIÓN DE LA SILICONA A. From outside the shower, apply siliconized acrylic latex caulk- ing between the wall jambs and the walls, between the bottom track and the base, between the panel uprights and the bottom track. Also between the fixed panel and the bottom track.
-
Page 27: Limited Warranty - United States
LIMITED WARRANTY — UNITED STATES MAAX Bath Inc. offers express limited warranty on each of its products. This warranty extends only to the original owner/end-user for personal household use. For commercial uses, additional limitations apply. For accessing product Limited warranty please visit: https://maax.com/services/warranty... - Page 28 Technical Services / Service technique / Servicio técnico T. 1 877 GET-MAAX (1 877 438-6229) F. 1 888 361-2045 10049410 © 2022 MAAX Bath Inc. PRINTED IN CANADA / IMPRIMÉ AU CANADA / IMPRESO EN CANADA 2022-11-25...
Need help?
Do you have a question about the Cyrene 300001 and is the answer not in the manual?
Questions and answers
shower door does not glide smoothly, almost like something is rubbing, any suggestions or adjustments that I can try
To fix a MAAX Cyrene 300001 shower door that does not glide smoothly, follow these steps:
1. Check the Roller Assembly: Ensure the roller assembly is properly installed by removing the screw (if installed), opening the assembly, sliding it over the top of the door until it engages the hole in the glass, then reinserting and tightening the screw. Avoid overtightening.
2. Inspect the Bottom Rollers: Turn the sliding door panel over and verify the bottom roller assembly is correctly installed.
3. Clean the Tracks and Rollers: Remove any debris or buildup from the tracks and rollers to ensure smooth movement.
4. Lubricate the Rollers: If necessary, apply a small amount of silicone-based lubricant to improve sliding.
5. Adjust the Door Alignment: Check if the door is misaligned and, if needed, adjust the wall jambs or panel uprights for a proper fit.
If the issue persists, verify that all components are secure and correctly positioned.
This answer is automatically generated