Pioneer DDJ-SX Service Manual
Dj controller
Hide thumbs
Also See for DDJ-SX:
- Quick start manual (24 pages) ,
- Operation manual (18 pages) ,
- Settings manual (2 pages)
Table of Contents
Advertisement
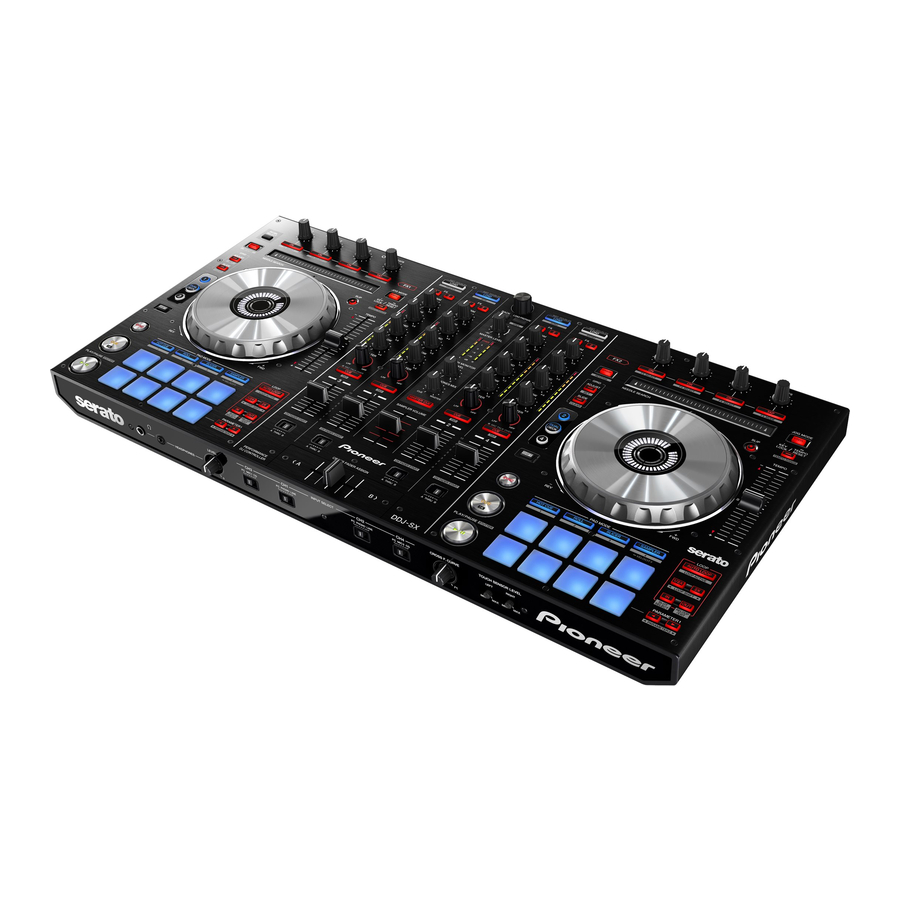
DJ Controller
DDJ-SX
THIS MANUAL IS APPLICABLE TO THE FOLLOWING MODEL(S) AND TYPE(S).
Model
Type
DDJ-SX
UXECB
DDJ-SX
SVYXE8
DDJ-SX
FLPXE
DDJ-SX
AXE5
DDJ-SX
KXE5
PIONEER CORPORATION
PIONEER ELECTRONICS (USA) INC. P.O. Box 1760, Long Beach, CA 90801-1760, U.S.A.
PIONEER EUROPE NV Haven 1087, Keetberglaan 1, 9120 Melsele, Belgium
PIONEER ELECTRONICS ASIACENTRE PTE. LTD. 253 Alexandra Road, #04-01, Singapore 159936
PIONEER CORPORATION
Power Requirement
AC 100 V to 240 V
AC 100 V to 240 V
AC 100 V to 240 V
AC 100 V to 240 V
AC 100 V to 240 V
1-1, Shin-ogura, Saiwai-ku, Kawasaki-shi, Kanagawa 212-0031, Japan
2012
DDJ-SX
K-MZV NOV.
ORDER NO.
RRV4382
Remarks
2012 Printed in Japan
Advertisement
Table of Contents

Related Manuals for Pioneer DDJ-SX


Summary of Contents for Pioneer DDJ-SX
- Page 1 PIONEER CORPORATION 1-1, Shin-ogura, Saiwai-ku, Kawasaki-shi, Kanagawa 212-0031, Japan PIONEER ELECTRONICS (USA) INC. P.O. Box 1760, Long Beach, CA 90801-1760, U.S.A. PIONEER EUROPE NV Haven 1087, Keetberglaan 1, 9120 Melsele, Belgium PIONEER ELECTRONICS ASIACENTRE PTE. LTD. 253 Alexandra Road, #04-01, Singapore 159936...
-
Page 2: Safety Information
PIONEER Service Manual. A subscription to, or additional copies of, Also test with plug reversed Earth PIONEER Service Manual may be obtained at a nominal (Using AC adapter ground charge from PIONEER. plug as required) -
Page 3: Table Of Contents
Compared with eutectic solders, lead-free solders have higher bond strengths but slower wetting times and higher melting temperatures (hard to melt/easy to harden). The following lead-free solders are available as service parts: • Parts numbers of lead-free solder: GYP1006 1.0 in dia. GYP1007 0.6 in dia. GYP1008 0.3 in dia. DDJ-SX... -
Page 4: Service Notice
The USB fixed plate for service is the one after this modification. The numbers of the products that have the older version of the USB fixed plate (fixed with adhesive) is as shown below: DDJ-SX/UXECB: 2,000 DDJ-SX/SVYXE8: 418 DDJ-SX/FLPXE: 572... -
Page 5: Specifications
Stereo phone jack (Ø 6.3 mm) ..........1 set Stereo mini phone jack (Ø 3.5 mm)........1 set USB terminal B type ..................1 set • For improvement purposes, specifications and design of this unit and the included software are subject to change without notice. DDJ-SX... -
Page 6: Basic Items For Service
Accessory (Note: The power plug part is different.) 411-S1-880-HA (FLPXE), 411-S1-881-HA (AXE5), 411-S1-882-HA (KXE5) Lubricants and Glues List Name Part No. Remarks Adhesive GYL1001 Refer to “7. DISASSEMBLY”. Adhesive GYL1005 Refer to “7. DISASSEMBLY”. Grease GEM1072 Refer to “7. DISASSEMBLY”. DDJ-SX... -
Page 7: Pcb Locations
1..CONTROL PCB ASSY B 704-DDJS1-A454-HA 1..MIX PCB ASSY 704-DDJS1-A417-HA 1..TRANSFER PCB ASSY 704-DDJS1-A429-HA 1..CH FADER PCB ASSY 704-DJM250-A032-HA 1..DSP PCB ASSY 704-DDJS1-A418-HA 1..FRONT PCB ASSY 704-DDJS1-A424-HA 1..OUTPUT PCB ASSY 704-DDJS1-A425-HA 1..TOUCH PCB ASSY 704-DDJS1-A426-HA 1..LED PCB ASSY 704-DDJS1-A422-HA 1..SENSOR PCB ASSY 704-PDJ33-A007-HA DDJ-SX... -
Page 8: Block Diagram
When ordering service parts, be sure to refer to "EXPLODED VIEWS and PARTS LIST" or "PCB PARTS LIST". The > mark found on some component parts indicates the importance of the safety factor of the part. Therefore, when replacing, be sure to use parts of identical designation. DDJ-SX... - Page 9 5P CONNECTOR WIRE 404-S1-3758-HA TP 4 TP 4 CONTROL TP 5 TP 5 4P CONNECTOR WIRE 404-S1-3757-HA TP 6 TP 6 TP 7 TP 7 W500 6P CONNECTOR WIRE 404-S1-3759-HA PCB ASSY B TP 8 TP 8 W700 CONNECTOR WIRE 404-S1-3756-HA DDJ-SX...
-
Page 10: Overall Block Diagram
IC31 DI 0 DO0 DO1 LRCK LINE1/P HONO1 PCM1803 +36dB(RI AA) IC29 DSP 567 (24.576M (44.1K /24bit/512fs -9.32dB (I2S format for aud IC32 LINE2/P HONO2 PCM1803 +36dB(RI AA) IC35 LINE4 74HC4052 -9.32dB IC33 PCM1803 Balance(m ono) +40dB MI C2 DDJ-SX... - Page 11 (24.576MHz) BOOTH NJM4580 (44.1K /24bit/512fs for A/D,D/A) (I2S format for audio data) IC11 IC12 LPF& . IC37 BOOTH 24.576M PCM1754 NJM4580 NJM4580 OUTPUT PCB ASSY IC13 FRONT PCB ASSY LPF& . IC38 Headphone (32 ohm/6.3mm & 3.5mm) PCM1754 NJM4556 DDJ-SX...
-
Page 12: Diagnosis
CONTROL PCB Assy A or B, IC505 is defective. If it is on the MIX PCB Assy, IC703 is defective. Replace the defective Assy. If IC505 is defective: CONTROL PCB Assy A, B If IC703 is defective: MIX PCB Assy DDJ-SX... - Page 13 Check whether the signals from Pins 2 The UCOM (IC24) is in failure. and 4 of CN501 are fixed at H when Replace the DSP PCB Assy. the jog dial is turned. The photo interrupter is defective. Replace the SENSOR PCB Assy. DDJ-SX...
- Page 14 Check the diode of the LED that does not light. If it is OK, then the IC to which the LED in question is connected is defective. Replace the corresponding Assy. Assys to be replaced: CONTROL PCB Assy A, B MIX PCB Assy DDJ-SX...
- Page 15 The audio input is not output. Check that there is no abnormality in the operating element system. The audio circuitry is in failure. Is the level indicator lit? Replace the DSP PCB Assy. See "No signal from MASTER OUT." DDJ-SX...
-
Page 16: Service Mode
Blinks in a cycle of 1 second. controller correctly although USB cable is connected at the time of starting, it will be in this state. Replace the USB cable. If this error warning persists, replace the DSP PCB Assy. DDJ-SX... - Page 17 The format of the firmware version is "x.xx". (x: decimal) It is displayed by the Channel level indicators (Deck1/Deck2/Deck4). x.xx This figure is example of "ver2.35". This display is released by any operation (Channel faders) . 0 (all off) Then all LED is turned off. DDJ-SX...
- Page 18 360 degree in 36 steps. In case of the selector type, LED are assigned 1 click by 1 step. The starting position depends on the last position. One unit to light consists of three LED and they are always lit. DDJ-SX...
- Page 19 [Method to reset] Press and hold the left DECK "SYNC" button and the right DECK "SYNC" button for 5 seconds. Then factory reset starts and "SYNC"LEDs are lit. After completing reset, "SYNC" LEDs are turned off. 5 seconds 5 seconds DDJ-SX...
- Page 20 3 The controller display result with three Channel level indicators. Refer to below. The format of the result is "XXX" msec. (X: 0-999 msec .decimal) It is displayed by the Channel level indicators (Deck1/Deck2/Deck4). x.xx The above figure is example of "235msec". 0 (All off) DDJ-SX...
- Page 21 Get the A / D conversion value immediately after the start. It will be reference value. *A/D conversion value to be monitored is Raw data. 4 Start monitoring and later to monitor the A/D conversion value, do the following actions depending on its value with Master level indicator. DDJ-SX...
- Page 22 Rotary selector, and this value will be new reference value. 5. More time has elapsed, to maintain the above display 762 even though the value of the A/D. 6. More time has elapsed, Master level indicator is lit as follows: become the value 764 of the A/D. DDJ-SX...
-
Page 23: Disassembly
Isolation plate • DSP and OUTPUT PCB Assemblies (1) Remove the Strain relief bush by removing the one screw. (602-BTB3012-446B-HA) (2) Remove the four screws. (602-MP3-324-HA) • Rear view (3) Remove the Ground terminal and washer. Screw tightening order DDJ-SX... - Page 24 (7) Disconnect the two flexible cables and three OUTPUT PCB Assy DSP PCB Assy connectors. (CN2Bx2, CN5A, CN5B, CN7) Screw tightening order (referemce information) CN5A CN5B CN2B CN2B CONTROL PCB Assy B CONTROL PCB Assy A • Bottom view DDJ-SX...
- Page 25 (1) Remove the six solders. JW LED base (2) Remove the one nut and one washer. (3) Remove the JW LED base by removing the two screws. (602-3113-122-HA) TRANSFER PCB Assy • Bottom view (4) Remove the one E ring. • Bottom view DDJ-SX...
- Page 26 LED and Cover Assy Hole Jog dial section • Bottom view (2) Remove the LED and Cover Assy. (3) Remove the JW cover by unhooking the six hooks. JW cover (4) Remove the LED PCB Assy. LED PCB Assy • Bottom view DDJ-SX...
- Page 27 • Bottom view • FRONT PCB Assy (1) Remove the two Gain rotate knobs. (2) Remove the three screws. (602-MP3-324-HA) (3) Remove the FRONT PCB Assy by removing the seven screws. (602-DJ5500-452-HA) FRONT PCB Assy Screw tightening order • Bottom view DDJ-SX...
- Page 28 2 Stick 4 pieces (5 mm × 40 mm) of NITTO No. 500 double-back tape to the locations shown in the photo below then remove the paper liner. Note: Even if double-back tape was not used in the initial state, be sure to attach double-back tape when reattaching the front panel. NITTO No. 500 (5 mm × 40 mm) DDJ-SX...
- Page 29 18 screws. (602-SL24F-099-HA) (11) Remove the CONTROL PCB Assy B by removing the 17 screws. (602-SL24F-099-HA) Screw tightening order The other screws are random order. CONTROL MIX PCB Assy CONTROL PCB Assy B PCB Assy A • Bottom view DDJ-SX...
- Page 30 PCB Assy JW LED base Adhesive (GYL1005) MIX PCB Assy Grease Grease (GEM1072) (GEM1072) SENSOR PCB Assy SENSOR PCB Assy Adhesive (GYL1001) Adhesive DSP PCB Assy (GYL1001) Chassis Assy Washer Grease Jog dial section (GEM1072) Adhesive (GYL1001) • Bottom view DDJ-SX...
-
Page 31: Each Setting And Adjustment
(DC IN) Computer (USB) 4 The update of the firmware starts. 2 Turn on the power of DDJ-SX while pressing the [SHIFT] button and the [SYNC] button on the LEFT deck ensure the Level meter LEDs flash before releasing your finger from the these buttons. - Page 32 5 When the firmware update process is complete, click the [OK] button. Please note that if you fail to update, turn on the power of DDJ-SX again and start from Step 3 of the above Updating Procedures. How to check the firmware version...
-
Page 33: Items For Which User Settings Are Available
To enter Utility mode, while holding the SHIFT and PLAY/PAUSE f buttons on the left deck pressed, turn the unit ON. During Utility mode, the PLAY/PAUSE LEDs on both decks are lit. After Utility mode is entered, the current setting for each item is indicated with the corresponding LED. (For details, refer to the operating instructions.) DDJ-SX... -
Page 34: Exploded Views And Parts List
Screws adjacent to b mark on product are used for disassembly. For the applying amount of lubricants or glue, follow the instructions in this manual. (In the case of no amount instructions, apply as you think it appropriate.) 9.1 PACKING SECTION SVYXE8, FLPXE FLPXE only only DDJ-SX... - Page 35 15 Paster board 507-S1-3372-HA 16 Gift Box See Contrast table (2) 17 Soft Bag 509-DDJSX-320-HA (2) CONTRAST TABLE DDJ-SX/UXECB, SVYXE8, FLPXE, AXE5 and KXE5 are constructed the same except for the following: DDJ-SX DDJ-SX DDJ-SX DDJ-SX DDJ-SX Mark No. Symbol and Description...
-
Page 36: Exterior Section
9.2 EXTERIOR SECTION DDJ-SX... - Page 37 DDJ-SX...
- Page 38 603-S1-394-HA 41 DECK 2 Button 100-S1A-2990-HA 87 Clip 603-S1-395-HA 42 TAP Button 100-S1A-2993-HA 88 Velocity Soft Knob 604-S1-608-HA 43 IN/OUT Button 100-S1A-2994-HA 89 Sponge 612-DJFA-373-HA 44 CENSOR Button (-) 100-S1B-2989-HA 90 Foot Mat 612-S1-445-HA 45 DECK 3 Button 100-S1B-2990-HA DDJ-SX...
- Page 39 602-QMX2BPM-322-HA 119 Screw 602-SA12-414-HA 120 Screw (2.6*8 TTP) 602-SL24F-099-HA 121 • • • • 122 Screw (3*8MM TTB) 602-2002-077-HA 123 Screw (3*10M/M) 602-3113-122-HA 124 Sponge 612-S1-461-HA 125 USB Fixed Plate 300-S1-2069-HA 126 Twin Adhesive 501-S1-2526-HA 127 Wheel Assy 704-S1-1383-HA DDJ-SX...
-
Page 40: Schematic Diagram
SG 10C SG 10/K S10 SG 11 G R12/G R7 G R6 G R5 C 507 V D D G N D G R4 G R3 G N D G R2 G R1 G N D A B C DDJ-SX... - Page 41 D 532 G R5 V D D V D D G N D G R4 G R3 ST B G N D C L K G R2 D IN G R1 D O U T G N D O SC DDJ-SX...
-
Page 42: Dsp, Output And Bal. Pcb Assys
TP 16 1000P C445 C239 C125 C126 C127 C128 C129 C245 9.1K -15V TF Z3.3B R295 TP 21 TP 19 TP 17 NC NC NC NC NC NC NC NC NC C243 C247 47P 100u/16 9.1K R299 TF Z3.3B R296 DDJ-SX... - Page 43 2SD2704K 2.7K 2.7K C345 IC13B 470P C341 R406 R408 4556 BCK 2 R396 R410 R412 R397 2.2K R416 10/25 LRCK 2 C342 22,1/2W 10,1/2W R398 100,1/2W C334 -15V 47/25 TF Z3.3B C349 150P R413 R400 2SD2704K MUTE 1SS355 150K DDJ-SX...
-
Page 44: Mix And Ch Fader Pcb Assys
D 771 R730 R731 2A D 13 D 773 R732 R733 C H 2-F X 1 R722 D 762 V C C ST C P SH C P G N D D SO 2A D 12 CN1A 2A D 11 DDJ-SX... - Page 45 G RID 4A G R4 SG 10A G RID 3A G R3 ST B G N D C L K G RID 2A G R2 D IN G RID 1A G R1 D O U T G N D O SC DDJ-SX...
-
Page 46: Front Pcb Assy
10K /1% 10K /1% R1104 R1101 R1111 R1110 SW1103 SW1101 LINE4 LINE2 R1103 R1106 10K /1% C1108 C1109 10K /1% JK 1100 HEADP HONES(3.5m m) C1100 C1101 1500P 1500P CHASSI S C1113 JK 1101 HEADP HONE(6.3m m) C1114 CHASSI S DDJ-SX... -
Page 47: Touch Pcb Assy
A C SH IE L D C IN 4 B IA S C IN 3 G N D C IN 2 V C C C IN 1 V D RIV E C IN 0 CN5A (L side) CN5B (R side) DDJ-SX... -
Page 48: Led Pcb Assy
V C C D 1019 R1019 PL D D 1020 R1020 ST C P SH C P SH C P /M R D SO 1 D 1021 R1021 G N D D SO D 1022 R1022 D 1023 R1023 DDJ-SX... -
Page 49: Waveforms
CDC_SCK (W5 pin 4) EN1AL&EN1BL (CN2A pins 15, 16), EN1AR&EN1BR (CN3A pins 15, 16) -5V (C14 - side) 1AD5V (C81 + side) Fader CDC_SDI (W5 pin 6) 1-10 +15V (C364 + side) 2AD5V (C104 + side) Select SW CDC_SDO (W5 pin 7) DDJ-SX... - Page 50 WL-B (CN501 pin 1) AD-DA SCK 2AD7 (CN2B pin 13) AD-DA BCK 10-1 TP8 to TP2 (CN502 pins 2 to 9) AD-DA LRCK AD-DA DATA DDJ-SX...
- Page 51 DDJ-SX...
-
Page 52: Pcb Connection Diagram
11. PCB CONNECTION DIAGRAM 11.1 CONTROLPCB ASSY A, B, and TRANSFER PCB ASSY SIDE A CONTROL PCB ASSY A CONTROL PCB ASSY B CN501 TRANSFER PCB ASSY A B C DDJ-SX... - Page 53 1. The parts mounted on this PCB include all necessary parts for several destinations. For further information for respective destinations, be sure to check with the schematic diagram. 2. View point of PCB diagrams. Connector Capacitor SIDE A SIDE B P.C.Board Chip Part DDJ-SX...
- Page 54 SIDE B CONTROL PCB ASSY A CONTROL PCB ASSY B CARBON PAD 10-1 TRAN PCB A IC503 IC507 IC504 IC502 Q501 Q500 DDJ-SX...
- Page 55 SIDE B CN501 SENSOR PCB ASSY CN2A (A) CN3A (B) W500B W500A TRANSFER PCB ASSY IC501 IC500 IC506 A B C DDJ-SX...
-
Page 56: Dsp, Output And Bal. Pcb Assys
11.2 DSP, OUTPUT and BAL. PCB ASSYS SIDE A IC39 IC18 IC34 IC40 Q6 Q7 DSP PCB ASSY CN2B CN2B CN2A CN3A 1-10 CN5A CN1A (L side) DDJ-SX... - Page 57 SIDE A IC34 Q9 Q10 IC35 IC21 IC13 CN1A CN5B CN1B CN4B (L side) (R side) OUTPUT PCB ASSY BAL. PCB ASSY D E F DDJ-SX...
- Page 58 SIDE B Q29-Q32 IC33 Q15-Q18 IC12 IC11 IC37 IC16 IC32 IC31 Q19-Q22 IC36 IC29 IC22 IC20 IC30 Q23-Q26 IC10 Q35-Q38 IC38 IC27 DSP PCB ASSY CN5B CN1A OUTPUT PCB ASSY BAL. PCB ASSY D E F DDJ-SX...
- Page 59 SIDE B IC23 IC30 IC25 IC41 IC17 IC26 IC24 IC19 CN3A CN2A CN5A DDJ-SX...
-
Page 60: Mix And Ch Fader Pcb Assys
11.3 MIX and CH FADER PCB ASSYS SIDE A MIX PCB ASSY DDJ-SX... - Page 61 SIDE A CH FADER PCB ASSY W700 CN1B DDJ-SX...
- Page 62 SIDE B MIX PCB ASSY CH FADER PCB ASSY W700 CN1B CN1A IC702 Q700 DDJ-SX...
- Page 63 SIDE B IC704 IC707 IC703 IC705 IC706 DDJ-SX...
-
Page 64: Front And Touch Pcb Assys
11.4 FRONT and TOUCH PCB ASSYS SIDE A FRONT PCB ASSY TOUCH PCB ASSY CN5A (L side) CN5B (R side) SIDE B TOUCH PCB ASSY FRONT PCB ASSY IC1100 DDJ-SX... - Page 65 SIDE A CN4B SIDE B CN4B IC1100 DDJ-SX...
-
Page 66: Led Pcb Assy
11.5 LED PCB ASSY SIDE A SIDE A LED PCB ASSY IC1000 IC1004 IC1001 IC1003 IC1002 Q1000 SIDE B SIDE B LED PCB ASSY W500A DDJ-SX... -
Page 67: Pcb Parts List
413-CDVD2001-265-HA C525-527 ELEC.CAPACITOR 413-HMA2200-5017-HA RESISTORS C508 ELEC. CAPACITOR 413-SPPW3-235-HA R409,410 CARBON FILM RESISTOR 412-CDG11-466-HA C524 CUSHION 612-S1-448-HA CARBON FILM RESISTOR 412-HMA2200-5019-HA R415,416 CARBON FILM RESISTOR 412-HT801K-219-HA R411,412 CARBON FILM RESISTOR 412-SA12-566-HA TRANSFER PCB ASSY There is no service parts. DDJ-SX... - Page 68 D706-719 LED (YELLOW ) 410-HDJ2000-162V-HA WIRE(BLACK) 407-S1-310-HA D516,517 LED(WHITE,3) 410-S1-422-HA WIRE(GREEN) 407-S1-311-HA D776-796 SWITCHING DIODE 414-CD1000-075A-HA WIRE(YELLOW) 407-S1-312-HA D797 DIODE 414-DV300-5014-HA D798 ESD DIODE 414-RMP3-285-HA SENSOR PCB ASSY MISCELLANEOUS M301 4P CONNECTOR WIRE 404-PDJ33-3591V-HA SW719 ENCODER 403-DDJLE-418-HA SW700-718 TACT SW 403-DDJLE-419-HA DDJ-SX...
Need help?
Do you have a question about the DDJ-SX and is the answer not in the manual?
Questions and answers
Doe’s the DDJ-SX have a fuse?