Table of Contents
Advertisement
Quick Links
Advertisement
Table of Contents

Related Manuals for Tigo EI Inverter


Summary of Contents for Tigo EI Inverter
- Page 1 Energy Intelligence (EI) Residential Solar Solution EU Installation Manual...
- Page 2 ENTIRE OBLIGATION OF TIGO. THE CONTENTS OF THIS DOCUMENT SHALL NOT BECOME PART OF, OR MODIFY ANY CONTRACT BETWEEN, THE PARTIES. In no event will Tigo be responsible to the purchaser or user in contract, in tort (including negligence), strict liability, or otherwise for any special, indirect, incidental or consequential...
-
Page 3: Table Of Contents
Assemble and Mount the System Bracket ..................12 Install the Inverter ........................14 Install the Link ........................... 15 Install TS4 MLPE ........................21 Install the Tigo Access Point (TAP) ....................23 Install the BMS ........................... 25 Connect Batteries ........................27 Commissioning ..........................30 Check Connections ........................ - Page 4 Power Off the System ......................... 43 Decommissioning ........................43 Maintenance ..........................43 Error Codes ..........................44 Inverter Codes ........................44 Battery Codes ......................... 46 Specifications ..........................47 Warranty ........................... 47 Customer Support .......................... 48...
-
Page 5: Overview
The Tigo EI Residential Solar Solution optimizes energy consumption based on rate plans and today’s home energy needs. It uses the following hardware components: EI Inverter – A single- or three-phase Tigo EI Inverter may be installed as grid tied •... -
Page 6: Safety
Use only copper conductors rated 75°C or higher. Do not use fine-stranded conductors. • • Unused conduit openings must be properly sealed. Connected conduit must use appropriate fittings. Tigo EI product enclosures are rated IP65. Always wear appropriate PPE and use insulated tools. • These safety symbols appear in the manual: A hazardous situation which could result in serious injury or loss of life. -
Page 7: Pre-Installation
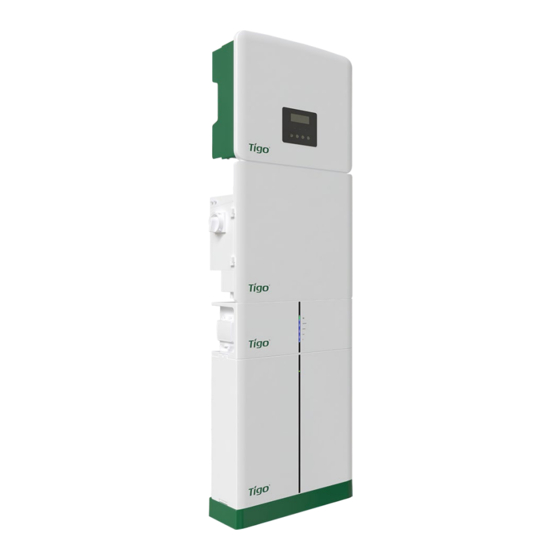
Pre-Installation – Location Pre-Installation Location The default enclosure layout for an EI system is, from the top down: Inverter • Link • • Battery management system (BMS) Battery (one or two). Additional batteries may be placed to the right of the main •... -
Page 8: Wiring Overview
Pre-Installation – Wiring Overview Wiring Overview Single-Phase AC Connections EI Residential Solar Solution Installation Manual | www.tigoenergy.com support@tigoenergy.com... -
Page 9: Single-Phase Dc Connections
Pre-Installation – Wiring Overview Single-Phase DC Connections EI Residential Solar Solution Installation Manual | www.tigoenergy.com support@tigoenergy.com... -
Page 10: Three-Phase Ac Connections
Pre-Installation – Wiring Overview Three-Phase AC Connections EI Residential Solar Solution Installation Manual | www.tigoenergy.com support@tigoenergy.com... -
Page 11: Three-Phase Dc Connections
Pre-Installation – Wiring Overview Three-Phase DC Connections EI Residential Solar Solution Installation Manual | www.tigoenergy.com support@tigoenergy.com... -
Page 12: Earthing
Pre-Installation – Wiring Overview Earthing The EI solution requires TN-C/S or TT-C/S earthing. It does not support IT earthing. EI Residential Solar Solution Installation Manual | www.tigoenergy.com support@tigoenergy.com... -
Page 13: Installation
• Install the Inverter Install the Link • Install TS4 MLPE • • Install the Tigo Access Point (TAP) • Install the BMS Connect Batteries • Place Batteries The EI Battery package includes BMS components, battery components, and accessories. •... - Page 14 Installation – Place Batteries Earthing wire (1200 mm) • • Battery base • Cover brackets (2) Wire protector rings (4) • M4 screws (8) • • Wall bracket accessories • Battery module to BMS power cable (2500 mm, optional) An EI system includes up to four batteries. The default configuration is to stack one or two batteries directly below the inverter, link, and BMS components.
- Page 15 Installation – Place Batteries 3. If installing a single battery, attach the battery bracket to the top of the battery and the wall. Ensure 20mm clearance between the wall and the battery enclosure. 4. If installing an additional battery, use two M4 screws to secure it on the left and right sides of the bottom battery.
-
Page 16: Assemble And Mount The System Bracket
The single-phase system bracket includes two vertical wall-mounting plates and two horizontal component-mounting plates found in the inverter and link packages: • EI Inverter package: horizontal inverter plate • EI Link package: vertical link plate, horizontal link plate, and vertical BMS plate (single-... - Page 17 Installation – Assemble and Mount the System Bracket To mount the system bracket: 1. Single phase: Attach the system bracket to the already-installed battery bracket. 2. Mount the system bracket to the wall using appropriate mounting hardware at the locations shown in the diagram. Ensure the vertical plates are plumb and the brackets are level.
-
Page 18: Install The Inverter
Installation – Install the Inverter Install the Inverter The EI Inverter package includes: • Inverter (single or three phase) • Inverter horizontal mounting plate • Wall anchor, washer, and lag bolt (3) M5 inner hex screw • • Waterproof RJ45 connectors (2 spares) •... -
Page 19: Install The Link
Vertical link mounting plate Vertical BMS plate • Waterproof RJ45 connector (spare) 3 • CCA antenna • • Tigo Access Point (TAP) The three-phase EI Link package includes: Link module • • Vertical link mounting plate Horizontal link mounting plate •... - Page 20 Installation – Install the Link To install the link and connect it to the inverter: 1. Crimp ends of all unterminated conductors with ferrules and earthing terminals and torque to 1.5Nm. 2. Slide the link onto the horizontal link plate and secure it using an M5 screw. 3.
- Page 21 Installation – Install the Link 5. Remove the link safety cover. 6. Run the preinstalled EPS (INV) and GRID (INV) cables from the inverter through their respective ports on the bottom of the link. Single phase: Three phase: 7. Connect the GRID (INV) earthing wire to the link earthing bar. EI Residential Solar Solution Installation Manual | www.tigoenergy.com support@tigoenergy.com...
- Page 22 Installation – Install the Link To make link AC connections: 1. Single phase: Connect conductors from a breaker on the house main breaker panel to link grid terminals. Three phase: 2. Connect the GRID earthing wire to the link earthing bar. EI Residential Solar Solution Installation Manual | www.tigoenergy.com support@tigoenergy.com...
- Page 23 Installation – Install the Link 3. Connect conductors from a breaker on the house breaker panel or backup load panel to the link LOAD terminals. Single phase: Three phase: To connect PV strings to the link, run the PV conductors through the link PV port and connect them to their respective PV + and –...
- Page 24 Installation – Install the Link To enable the Cloud Connect Advanced (CCA) data hub: 1. If using WiFi, screw the CCA antenna into the link. 2. If using a wired network connection, connect the cable to the Ethernet port on the bottom of the link.
-
Page 25: Install Ts4 Mlpe
2. Remove the barcode sticker on the TS4 and place it on the PV array map located at the end of the EI Inverter Quick Start Guide. Ensure the sticker matches the physical location of the module on the roof. - Page 26 Installation – Install TS4 MLPE 3. Connect the longer set of TS4 output cables to the neighboring TS4 to create a string. 4. For TS4 installation data specific to your Tigo MLPE (TS4-A, TS4-M, etc.), scan the following QR code: EI Residential Solar Solution Installation Manual | www.tigoenergy.com...
-
Page 27: Install The Tigo Access Point (Tap)
Installation – Install the Tigo Access Point (TAP) Install the Tigo Access Point (TAP) A TAP wirelessly communicates with TS4 devices to gather data and perform rapid shutdowns. The TAP connects to the link via a T568B-scheme CAT5/6 cable. Install the TAP centrally in an array for best coverage. Ensure there are no obstructions that may interfere with the TAP signal to other TS4 units in the array. - Page 28 Installation – Install the Tigo Access Point (TAP) 2. Attach the TAP to the PV module the same way as the previous step for the TS4. For frameless modules, remove the silver clips and bolt directly to the rail. 3. Run the CAT5/6 cable to the link and connect the RJ45 plug to the TAP port on the bottom of the link.
-
Page 29: Install The Bms
Installation – Install the BMS Install the BMS To install the BMS to manage up to four EI batteries: 1. Place the BMS on the top-most battery underneath the link. 2. Secure the BMS using the provided M4 screws on the left and right side. 3. - Page 30 Installation – Install the BMS 3. Connect one end of the BMS COM cable to the inverter BMS port and the other end to the BMS port labeled BMS. Inverter BMS port for COM cable: BMS port for COM cable: EI Residential Solar Solution Installation Manual | www.tigoenergy.com support@tigoenergy.com...
-
Page 31: Connect Batteries
Installation – Connect Batteries Connect Batteries To connect the BMS to a single battery: 1. Connect the COMM cable to the BMS COMM port and the battery COM1 port. Ensure it clicks into place. 2. Connect the power cables from the BMS B+ and B– ports to their respective battery B+ and B- ports. - Page 32 Installation – Connect Batteries The following example shows a two-battery setup: Three-battery setup: EI Residential Solar Solution Installation Manual | www.tigoenergy.com support@tigoenergy.com...
- Page 33 Installation – Connect Batteries Four-battery setup: EI Residential Solar Solution Installation Manual | www.tigoenergy.com support@tigoenergy.com...
-
Page 34: Commissioning
To commission the system, you will: Check Connections • • Power On the System • Run the Tigo Energy Intelligence App Check Connections Before powering on the system, double-check: Inverter–link connections: • o CT o COMM... -
Page 35: Run The Tigo Energy Intelligence App
Scan this QR code to download the app. To run the Tigo EI app and commission the system, carefully complete all the following steps. If you want help, contact Tigo support within the app or via support@tigoenergy.com. -
Page 36: Select Equipment
Commissioning – Run the Tigo Energy Intelligence App 2. Tap + to configure a new system. Next 3. Enter the system name and turn-on date and tap Create –> 4. Confirm your location and tap to save the system information. - Page 37 Commissioning – Run the Tigo Energy Intelligence App Internet Settings 4. Tap and connect to the customer’s WiFi or Ethernet network. You may need to drag the screen down to refresh • the list of networks. Grid Code 5. Tap Inverter Settings, enter the...
- Page 38 Commissioning – Run the Tigo Energy Intelligence App SCAN BARCODE FOR WARRANTY 8. Tap and use your smartphone camera to capture all equipment bar codes including the link. You may scan either bar codes on enclosures or on • boxes.
- Page 39 Commissioning – Run the Tigo Energy Intelligence App Manufacturer, Model 11. Select a , and Modules count and Save Done 12. Repeat these steps for as many strings as needed and tap 13. Review your entries and tap the back arrow.
-
Page 40: Configure Layout
Commissioning – Run the Tigo Energy Intelligence App Configure Layout Configure Layout 1. Tap to map equipment items on a layout grid. 2. Tap the inverter icon at the bottom of the screen and then tap a location in the layout grid to place it. - Page 41 4. Choose a method to identify TS4 devices attached to PV modules. • If, during installation, you affixed barcode/QR code stickers from each TS4 to the array map included in the EI Inverter Quick Start Guide, you may use the Bulk Scan method. •...
- Page 42 Commissioning – Run the Tigo Energy Intelligence App Bulk Scan 5. To use the Bulk Scan method, tap and take a photo of a completed TS4 array map. If the array map is large and one photo does not •...
-
Page 43: Configure Communication
Ensure your smartphone has Bluetooth enabled but • do not pair the inverter using your smartphone Settings . Only pair using the Tigo EI app as shown in the following step. 2. Pull down the screen to refresh the list. •... -
Page 44: Set Up System Access
Commissioning – Run the Tigo Energy Intelligence App 3. Tap the inverter serial number with the Bluetooth symbol. START 4. Tap to begin the Discovery process. The Discovery process establishes direct • communication between the inverter and individual TS4s that were mapped in the Tigo app. -
Page 45: Complete Commissioning
Commissioning – Run the Tigo Energy Intelligence App Complete Commissioning Press and hold the inverter LCD “Enter” button for five seconds to set it to normal operation mode. This completes the commissioning process. EI Residential Solar Solution Installation Manual | www.tigoenergy.com... -
Page 46: Reference
The front of the inverter includes LED indicators to monitor system status. Do not use the inverter LCD display to make system changes other than commissioning. Perform all operational changes with the Tigo EI mobile app. LCD screen Inverter error code display. -
Page 47: Power Off The System
1. Turn off the system according to the Power Off the System procedure listed above. 2. Contact support@tigoenergy.com to deactivate the system in the Tigo database. Follow these precautions with the battery: Pack the battery in the original packaging or equivalent carton. Secure them with •... -
Page 48: Error Codes
Refer to the topic for details. The Tigo EI app chat function enables real-time help from a Tigo service agent for the issue you are experiencing. For error codes not listed or if any problem persists, contact Tigo support. - Page 49 Reference – Error Codes Code Fault Tigo Fault What To Do IE 012 RC OCP fault Overcurrent Check DC input and AC output impedance and wait for protection fault the system to return to normal. IE 013 Isolation fault Insulation fault 1. Wait for the system to return to normal.
-
Page 50: Battery Codes
Restart the battery. temperature sensor failure BE 17 BMS_Type_Unmatch Battery – type Use the Tigo EI app to upgrade the BMS software. failure BE 18 BMS_Ver_ Unmatch Battery – Use the Tigo EI app to upgrade the BMS software. version... -
Page 51: Specifications
Reference – Specifications Code Fault Tigo Fault What to Do BE 23 BMS_SW_ Protect Battery – slave Wait for the Tigo EI app to finish updating BMS software firmware. protection failure BE 30 BMS_AirSwitch_Fault Battery – air If the battery breaker is ON, contact Tigo support. -
Page 52: Customer Support
When you contact Tigo support for installation or operational assistance: • If the system is commissioned and connected to the internet, Tigo will have component- level data to help understand and resolve the issue. If you have not yet commissioned the system, you’ll need to know your System ID as well as serial and model numbers for...
Need help?
Do you have a question about the EI Inverter and is the answer not in the manual?
Questions and answers