
Related Manuals for Magellan RoadMate 1700-LM


Summary of Contents for Magellan RoadMate 1700-LM
-
Page 1: User Manual
® ® Magellan RoadMate 1700 GPS Receiver User Manual 960 Overland Court, San Dimas, CA 91773... -
Page 2: Important Safety Warnings
Magellan Technical Support. Charging the Magellan RoadMate • An optional AC adapter is available as an accessory for your Magellan RoadMate. Use of another type of AC adapter can result in malfunction and/or possible fire hazard due to battery overheating. •... - Page 3 The user is cautioned that changes and modifications made to the equipment without the approval of manufacturer could void the user's authority to operate this equipment. The Magellan RoadMate must be installed and operated at a distance no closer then 8 inches (20 cm) from the user.
- Page 4 Check the Magellan website (www.magellanGPS.com/ support) for product updates and additional information. © 2009 MiTAC International Corporation. The Magellan logo and Magellan are registered trademarks of MiTAC International Corporation. Magellan RoadMate, QuickSpell, SmartDetour and OneTouch are trademarks of MiTAC International Corporation and are used under license by MiTAC International Corporation.
-
Page 5: Table Of Contents
Using the Adhesive Disk ... 3 Securing the Car Cradle to the Windshield or Adhesive Disk ... 3 Attaching the Magellan RoadMate receiver to the Car Cradle ... 4 Adjusting the Mount for Optimum Viewing ... 4 Connecting Power ... 4 Routing the Cable ... - Page 6 Address Book ... 18 Accessing an Address in Your Address Book ... 18 Routing to an Address in Your Address Book ... 18 Creating a New Entry in Your Address Book by Entering an Address ... 18 Creating a New Entry in Your Address Book from a POI ... 18 OneTouch Menu ...
- Page 7 Viewing Current Location ... 31 Setting Keyboard ... 32 Adding Features ... 32 GPS Options ... 32 Setting the GPS Position ... 32 Viewing the GPS Status ... 32 Backing Up and Restoring Data ... 32 Viewing Product Information ... 33...
-
Page 8: Magellan Roadmate 1700 Receiver
The Magellan RoadMate receiver has a built-in battery so, in most cases, you will be able to follow these instructions while reading them on your computer screen without plugging the Magellan RoadMate receiver to the AC power using an optional AC power adapter. -
Page 9: Magellan Roadmate
Magellan RoadMate (A) Power Switch (B) Micro SD card slot (A micro SD card is optional and is used for backing up and restoring data.) (C) USB connector. (D) AV Input. (Audio and video input. Requires 3.5mm AV cable.) (E) Power Input. -
Page 10: Installation Instructions
Securing the Car Cradle to the Windshield or Adhesive Disk Use the alcohol pad that came with the Magellan RoadMate receiver to clean the area on the windshield that has been selected for mounting the Magellan RoadMate receiver. Let the area dry completely. -
Page 11: Attaching The Magellan Roadmate Receiver To The Car Cradle
Slide the power switch (located at the top right side of the Magellan RoadMate receiver) to the left. Sit in a normal driving position and make any final adjustments to the car cradle for optimum viewing. Make sure the adjusting knobs on the car cradle are firmly in place. -
Page 12: Security
Security It is recommended that the Magellan RoadMate receiver is not left in plain view while unattended for reasons of theft. Please note that the Magellan RoadMate receiver is a receiver only and does not transmit GPS location signals. Neither the receiver nor the vehicle can be tracked using the Magellan RoadMate receiver. -
Page 13: Fundamentals
If for any reason you need to turn the power off manually, slide the power switch to the center position. Checking Battery Level The Magellan RoadMate receiver has an internal battery that permits use of the receiver for brief periods of time while not connected to external power. The battery is charging whenever the Magellan RoadMate is connected to external power. -
Page 14: Brightness
This prolongs the battery life between charges. Main Menu The Main Menu screen is the center for all available functions of the Magellan RoadMate receiver. The Main Menu contains large, easy to access icons for all the major functions. -
Page 15: Keypad
Settings OneTouch Menu Keypad Understanding the keypad while entering an address is an important part of using your Magellan RoadMate receiver. The keypad is the most common method for entering data into the Magellan RoadMate receiver. Keypad Overview Button Name... -
Page 16: Selecting Qwerty Or Abc Keyboard
Smart City Search The Magellan RoadMate receiver utilizes a feature known as “Smart City Search”. Smart City Search attempts to predict the city you are looking for. This prediction is based upon two factors; your position and cities you’ve gone to before. -
Page 17: Quickspell
QuickSpell. In the example to the right, “CE” has been entered for a street name in Chicago, IL. The Magellan RoadMate receiver has predicted that the street name may be Cedar Ave. -
Page 18: Map Screen
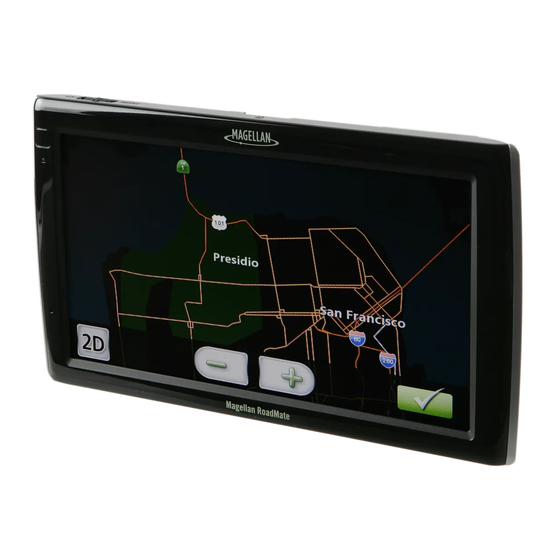
The most commonly used screen is the Map screen. Whether you are following a route or just traveling around a city, the chances are that the Map screen will be displayed. The Map screen can be displayed in two unique modes: normal and routing. - Page 19 (G) Access the list of nearest Highway Exit POIs (available only when driving on a highway/freeway/interstate). (H) Zoom in and zoom out controls to change the map scale. Accessing the Map Screen 1. On the Main Menu screen, tap View Map. Setting the Map Modes (2D or 3D) The map is normally displayed in 3D mode (perspective view) but you can set the map to 2D mode (top down view) if so desired.
-
Page 20: Current Location Screen
1. Access the Maneuver List. 2. Tap the Avoid icon for the maneuver you want to avoid. 3. Tap Yes to confirm. 4. The Magellan RoadMate receiver recalculates the route and the Map screen returns. . (Note: entering a Name is compulsory before... -
Page 21: Volume
The volume can be adjusted or muted from the Map screen. (The volume can also be adjusted from Settings > Sound.) Changing the Volume from the Map Screen 1. Tap the speaker icon 2. Tap on the Mute button 3. Tap . -
Page 22: Enter Address
If you know at least a part of the address, it is the quickest way to select the destination of the route. This function is used to create a route from: • an exact address, including street number, • the midpoint of a street, •... -
Page 23: Entering An Intersection
Entering an Intersection When the street number is not known, an intersecting street can pinpoint the location. 1. From the Main Menu, tap the Go To icon. 2. Tap the Intersection icon. 3. Enter City: You have three ways to do this: •... -
Page 24: Tips On Entering Addresses Quickly
6. Tap the large GO button on the right to return to the Map screen and start navigating. Tips on Entering Addresses Quickly • When you are entering the name of a city or a street, Magellan software only displays those characters that appear in possible search results. The other characters are grayed out. •... -
Page 25: Clearing The List Of Previous Destinations
8. If you have selected to save this to the OneTouch menu, you need to select a the OneTouch button you want to assign. Clearing the list of Previous Destinations 1. Access the list of Previous Destinations as described above. 2. - Page 26 6. Edit information: • Tap the Name field and use the keypad to enter a name for the address book entry. (Entering the name is described in detail in chapter Map Screen.) • (optional) Tap <Work, Cell or Home Phone Number> to specify a phone number for the address book entry. 7.
-
Page 27: Onetouch Menu
In addition to Home Address, there are other icons in the OneTouch Menu. There are predefined bookmarks as well as user assignable bookmarks for searches and favorite destinations. They can be used for easy access of frequent destinations and to get local information when needed. Furthermore, you can assign POI search criteria to OneTouch icons. -
Page 29: Points Of Interest (Poi)
The Magellan RoadMate receiver has preloaded POIs that can be used as a destination for a route. Selecting a restaurant or finding a gas station nearby is at your fingertips. Creating a Route to a POI by Category POIs are categorized into unique categories from gas stations to tourist attractions. Most, but not all categories are further organized into subcategories. -
Page 30: Creating A Route To A Poi By Name
Creating a Route to a POI by Name 1. From the Main Menu, tap the Go To icon. 2. Tap the Points of Interest icon. 3. Tap Search By Name. 4. Spell the name of the POI to be used as the destination. You need not enter the full name, but the more characters you enter, the easier it will be to find the exact POI you are searching for. -
Page 31: Home Address
Your most frequent destination can be entered and saved in the Magellan RoadMate as the Home Address for quick and easy access when you need to navigate there. This does not need to be your real home address. Choose any address you visit frequently. You can access it at any time with the first button of the OneTouch menu. -
Page 32: Traveling On A Route
Each method is discussed in the chapter which is associated with it. Routing Method Regardless of which route type has been created, the Magellan RoadMate needs to know how the route is to be calculated. Routes can be calculated by the following methods: •... -
Page 33: Detouring Off A Route
SmartDetour on Freeways When you slow down under 20% of the speed limit on a freeway, after a few seconds the Magellan software assumes you are in a traffic jam and displays the Detour button on the Map screen. 1. Tap Detour. -
Page 34: Multi Destination Routes
With the Magellan RoadMate you can create routes with more than one destination. Select one destination and create a single route first. Then turn it to a multi destination route by selecting additional destinations. Creating Additional Destinations with Go To Using the search functions of the Magellan RoadMate you can easily create a route with multiple destinations. -
Page 35: Saving A Multi Destination Route To Your Address Book
Saving a Multi Destination Route to Your Address Book Multi destination routes can be saved for later use from the address book. 1. From the Map screen, tap Menu. 2. Tap Trip Options. 3. Tap Edit Trip. 4. The Multiple Destination List is displayed. 5. -
Page 36: Settings
With user Settings you can customize the Magellan RoadMate receiver to better suit your personal needs and preferences. Tapping the Back arrow Tap from any of the Setting screens will not cancel the changes. Changes take effect as soon as you make them. -
Page 37: Selecting Units Of Measure
Selecting Units of Measure Auto power is the duration of time that the Magellan RoadMate receiver remains idle before turning off automatically. 1. Access the System Settings menu (above). 2. Tap Units. 3. Tap on the desired unit of measure. -
Page 38: Setting The Turn Warning Alert Sounds
Sound Setting Volume from Settings 1. From the Main Menu screen, tap the Settings icon. 2. Tap Sound. 3. Tap inside the volume slider bar to set the desired volume level. Muting the Sound 1. From the Main Menu screen, tap the Settings icon. 2. -
Page 39: Backing Up And Restoring Data
It is useful to set a GPS position if you are not receiving satellite information quickly due to travelling over 800 km/500 mi with the Magellan RoadMate receiver turned off. Setting the GPS position will allow the Magellan RoadMate receiver to compute which satellites are available and calculate the position more quickly. -
Page 40: Viewing Product Information
Viewing Product Information 1. From the Main Menu screen, tap the Settings icon. 2. Tap Product Information. (Note: Scroll down the page to view the Serial Number and Software Version.)
Need help?
Do you have a question about the RoadMate 1700-LM and is the answer not in the manual?
Questions and answers