LeapFrog ClickStart My First Computer Manual
- Instructions manual (14 pages) ,
- Manual (13 pages)
Advertisement
Overview

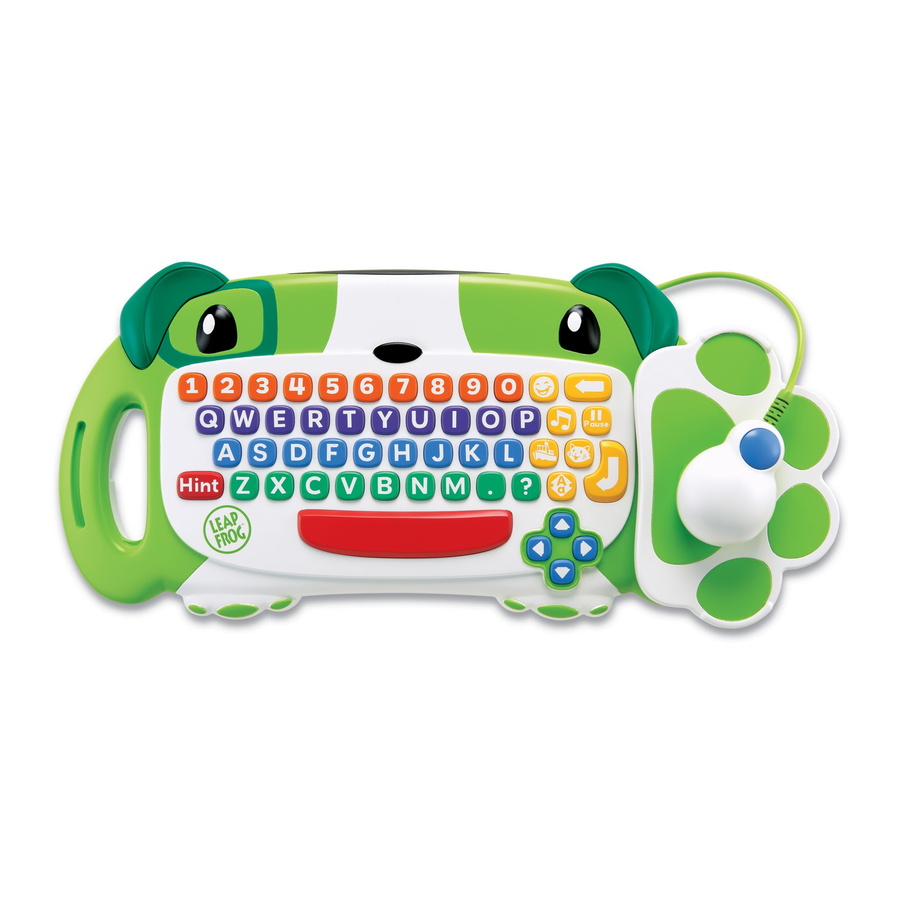
Packed with four included learning games and featuring a playful puppy interface, the CLICKSTART™ system is designed to teach essential skills for school while introducing basic computer navigation.
Getting Started
Installing the Batteries
Note: Batteries are small objects. Replacement of batteries must be done by adults.
Console
- Make sure the unit is turned OFF.
- Locate the battery cover on the bottom of the main unit.
- Using a Phillips screwdriver, loosen the screws on the battery compartment to remove the battery cover.
- Insert 4 C (called LR14 in some countries) alkaline batteries, following the polarity (+/-) diagram in the battery compartment.
- Replace the battery cover and tighten the screws.
Keyboard
- Locate the battery cover on the bottom of the keyboard.
- Using a Phillips screwdriver, loosen the screws on the battery compartment to remove the battery cover.
- Insert 4 AA (called LR6 in some countries) alkaline batteries, following the polarity (+/-) diagram in the battery compartment.
- Replace the battery cover and tighten the screws.
Connecting the CLICKSTART™ Learning System
Console
(A)

Make sure both your TV and your CLICKSTART console are turned off. Connect the console to the TV by plugging the colored/coloured cables on the unit into the matching video (yellow) and audio (white) input jacks on your TV set. Turn on your TV and your CLICKSTART console. Make sure there is a clear line-of-sight between the console and the keyboard.
Note: Older TVs without video/audio inputs may require an additional adapter, not available from LeapFrog.
For TVs with a single audio input:
Connect the yellow connector to the yellow video input jack on the TV. Connect the white connector to the audio input jack on the TV.
For TVs with no audio/video input (usually outside of North America):
Connect the included SCART connector or Euro-connector to the SCART input on the TV. Plug the colored/coloured cables on the unit into the matching video (yellow) and audio (white) input jacks on the SCART connector. Set the TV to video mode.
Mouse and Mousepad
(B, C)

The mousepad can easily be converted for right- or left-handed play. To change the position of the mousepad, simply turn the knob counterclockwise to loosen. Then, lift the mousepad, move it to the other side and turn the knob clockwise to tighten.
You can store the mouse underneath the keyboard. Simply wrap the cord around the posts and click the mouse into place.
Note: In order to conserve batteries, the CLICKSTART system will go to sleep after a period of inactivity. To wake it up again, hit any key on the keyboard or click the mouse. If that does not work, "reboot" the console by turning it off and then on again. Moving the mouse will not reawaken the system.
Instructions for Play
Parent Settings

The first time you turn on your CLICKSTART™ system, you will be taken to the Settings screen. Here, parents can create a player profile for each child who will be using the CLICKSTART system, modify player profiles or send a customized eCard to any player in the system. To get started, enter your child's name.
Adjusting the Level
Each CLICKSTART game features two progressive learning levels designed to help children in prekindergarten through kindergarten (ages 3 to 6) master skills for school. Within each level, the challenge adjusts to help teach and reinforce important concepts. Select a starting level for your child's profile:
 introduces keyboarding, mousing and core curriculum to children aged 3 and 4.
 provides more challenging mousing, keyboarding and academic games for players 4 or older.
Modifying Profiles
You can return to the Settings screen at any time by clicking the Settings tab in the Login screen.
Logging In
The CLICKSTART system will remember the name, rewards tally and learning level of up to three players. Each time you turn on your CLICKSTART system, the Login screen appears. Click the name of the child who will be playing, and the CLICKSTART system will return your child to her personal desktop. From there, children can see all the bones they've earned in Scout's House, or resume any game at the level where they left off!
Desktop Activities
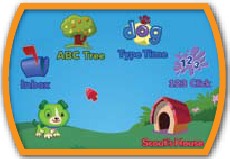
Much like a true PC experience, your child can click any of the icons on the desktop to explore, play a game and learn. There are four learning games included with the CLICKSTART™ system: ABC Tree, 1-2-3 Click, Inbox and Type Time.
ABC Tree
Children tap keys on the keyboard to pick fruit off the ABC Tree!
Level 1

Each time your child taps a key on the keyboard, the corresponding number or letter appears on a piece of fruit in the ABC Tree and makes it fall. Children can keep pressing keys at random to help Scout harvest all the fruit.
Level 2
Each piece of fruit has a letter on it. Children have to tap all the letters on the tree to pick all the fruit. In later rounds, they are asked to hit letters in order, spelling words one letter at a time!

Core Curriculum
Letter exposure and identification, matching
Computer Literacy
QWERTY keyboarding skills, screen navigation
Other Ways to Play
 As your child plays through the first learning level, say a number or letter and ask your child to find it on the keyboard.
Count out loud with your child as the pieces of fruit fall into Scout's wagon.
When consonant-vowel-consonant (CVC) words are introduced in level 2, help your child think of familiar objects that are also CVC words, such as cat, pig, bat, bed, bus and dog. Ask your child to spell the words out loud and then look for the letters on the keyboard.
Ask your child to say CVC words out loud when you encounter them in books or other print to reinforce learning.
1-2-3 Click
Children click and splat glow balls to win bones for Scout!
Level 1

Children get mousing practice by clicking on any glow ball. As level 1 gets more difficult, children are asked to click on specific colors/ colours or numbers, or to match a combination of the two.
Level 2
Now the balls are smaller and move faster! Children are asked to click as many as they can to start. Later in the game, they are asked to click two specific numbers in sequence.
Superball

As children get the hang of the game, super balls start to appear! Kids can click and splat them to see what surprises they hold.
Core Curriculum
Colors/colours, numbers 1 to 10, counting, matching
Computer Literacy
Mousing, screen navigation
Other Ways to Play
Count the glow balls out loud together as your child splats them.
When your child has finished playing, ask her to name one of the colors/colours from the game. Then, see how many other objects your child can find around the house that are the same color/colour.
Inbox
Children can check their Inbox at any time for postcards from Tad or Dot. Each postcard has fun animal facts and items from different continents.
There are three ways to play:
Find It!

Children can help Tad and Dot find their shy animal friends by clicking on animals hiding in postcard scenes from around the world!
Counting

Sometimes, an animal will need your child's help. Your child will be asked to tap the space bar or a letter key a certain number of times to help the animal out of trouble!
Shutterbug

Your child can go on a photo-hunting adventure! The goal is to find as many animals as possible in the time allotted and to take their picture by clicking on them.
Core Curriculum
Colors/colours, vocabulary, counting 1 to 10, letters, continents, animal facts
Computer Literacy
Mousing, QWERTY keyboarding skills, screen navigation
Other Ways to Play
Using an atlas, help your child find the continents from which Tad or Dot sent their postcards. Visit your local library or go online to search for samples of world music, explore animal facts and learn facts about the different cultures on each continent.
Show your child how the numbers on the keyboard progress in sequence from 1 to 9. As you count together, tap the keys in order to reinforce number sequencing.
Type Time
Children develop their keyboarding skills through three different challenge levels!
Picture Mode

Numbers, letters and pictures appear on screen, rewarding children for tapping keys on the keyboard.
Letter Mode

Children can type anything they want, using letters and the period, question mark, space bar and backspace keys.
Word Play

Children look for specific letters in order to build words.
Core Curriculum
Letter names and sounds, word building, wordobject correlation
Computer Literacy
QWERTY keyboarding skills, screen navigation
Other Ways to Play
In Picture mode, help your child make the connection between the keys and the corresponding letters and pictures. For example, when a bear appears on screen, say, "Bear. What letter does bear start with?" Then show your child the key with the letter B.
In Letter mode, help your child type his name, address and phone number. Encourage him to spell other simple words by identifying the right keys and pressing them in order.
Rewards
Rewards Screen
At the end of every round, children can see how many bones they have won for learning something new. The bones are added to each child's tally in Scout's House and can be used to play fun games with Scout.
Scout's House

Scout's House rewards children for everything they have mastered while encouraging mathematics and mousing skills. Children can click the Scout's House icon on the desktop to give the bones they've earned to Scout and to play fun games. They can click once on objects like the Jack in the Box to have some fun, or click twice on other items to feed and brush Scout and give him bones.
Other Ways to Play
As your child takes care of Scout, engage her in questions about your own family's routines. For example, when your child clicks on the bag to feed Scout his lunch, ask your child when your family has breakfast, lunch and dinner, and where she likes to eat best.
Point out items in Scout's room and ask your child to find those same items in his own room. For example, have your child find Scout's bed and then find his own bed.
Lead Scout outside for a walk and encourage your child to click on elements in Scout's yard.
Ask your child to click on something in Scout's house by making up clues that use the senses. For example, say, "Can you find something that smells good? Let's click on it!"
Talk about what's on the left, right, top and bottom of the screen to help your child understand the concept of directional orientation.
Cartridge Rewards
The CLICKSTART™ My First Computer system has a whole library of software available for children ages 3 to 6. Featuring playful themes and popular kids' characters, these software titles have rewards that are unique to their play environments. However, as soon as your child ends a play session and returns to the CLICKSTART desktop, these rewards are transformed into bones for Scout's House. The more games children play, the more bones they win!
Here's a list of rewards for some of the software available:
Finding Nemo: Sea of Keys – Sea stars
Toy Story: To 100 and Beyond – Aliens
Animal Art Studio – Animal matches
Dora the Explorer: Friends! ¡Amigos! – Stars
Learning Carnival – Carnival tickets
Thomas & Friends: Learning Destinations – Train tickets
Sold separately. Some titles may not be available in all markets.
More Fun-Filled CLICKSTART Software
Check out the growing CLICKSTRT™ software* library at leapfrog.com!
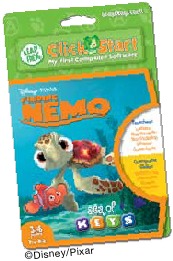
Finding Nemo: Sea of Keys
Letters, Phonics Skills & QWERTY Key Placement
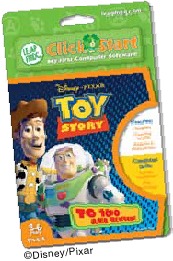
Toy Story: To 100 and Beyond!
Numbers, Counting & Screen Navigation
Animal Art Studio
Shapes, Patterns & Advanced Mousing
Dora The Explorer: Friends! ¡Amigos!
Shapes, Letters & Matching

Learning Carnival
Rhyming, Word Building & Sorting

Thomas & Friends: Learning Destinations
Problem Solving, Letters & Sequencing
Visit leapfrog.com/ClickStart
Check out leapfrog.com for more free resources. You'll find expert articles on child development, fun activities for every age, learning tips and more!
*Additional software sold separately. All titles may not be available in all markets.
System Maintenance and Safety
INSTRUCTIONS FOR CARE
- Keep food and beverages away from product. Never spill liquid of any kind on this product as it may cause damage or render the device inoperative.
- Clean with a slightly damp cloth (cold water).
- Do not use soap or detergent.
- Never submerge the unit in water.
- Remove batteries during prolonged storage.
- Avoid prolonged exposure to extreme temperatures and direct sunlight.
- Avoid dropping the unit. Never try to dismantle it.
BATTERY INFORMATION
Requires 4 C and 4 AA (called LR14 and LR6 in some countries) alkaline batteries, not included.
Battery Removal And Installation Instructions
- Open the battery door with a Phillips screwdriver.
- If used or dead batteries are present, remove these batteries from the unit by pulling up on one end of each battery.
- Install new batteries as shown in the polarity (+/-) diagram inside the battery compartment.
- Replace battery door securely.
Battery Safety
- Batteries are small objects. Batteries must be replaced by an adult.
- Follow the polarity (+/-) diagram in the battery compartment.
- Promptly remove dead batteries from the toy.
- Dispose of used batteries properly.
- Remove batteries for prolonged storage.
- Only batteries of the same or equivalent type as recommended are to be used.
- DO NOT incinerate used batteries.
- DO NOT dispose of batteries in fire, as batteries may explode or leak.
- DO NOT mix old and new batteries or types of batteries (i.e., alkaline/standard).
- DO NOT use rechargeable batteries.
- DO NOT recharge non-rechargeable batteries.
- DO NOT short-circuit the supply terminals.

This console is not a toy. Keep out of reach of children under 3 years of age. The console and mouse cords are a strangulation hazard; also, children pulling on the cord could cause the TV or other equipment to which the console is connected to fall with the possibility of property damage, serious personal injury or death. Adult supervision required during play.
It is rare but possible for seizures to be triggered by light flashes or patterns such as those on computer or TV screens. To reduce exposure to this potential hazard, play/watch TV in a well-lit room, sit an appropriate distance from the screen and take 10- to 15-minute breaks every hour.

Any frame left on the television for an extended period may cause images to be burned into the screen. To avoid this occurrence, it is recommended to turn the unit off, instead of using pause, during extended breaks.
POWER ADAPTER SAFETY
(Adapter sold separately; available from LeapFrog Enterprises, Inc.)
Adapter cord could be a strangulation hazard.
ELECTRIC TOY:
Not recommended for children under 3 years of age. As with all electrical products, precautions should be observed during the handling and use to prevent electrical shock.
FOR INDOOR, DRY-LOCATION USE ONLY
- The transformer is not a toy and should be connected to the wall outlet by an adult. It should be periodically examined for conditions that may result in the risk of fire, electrical shock or injury to persons, such as damage to the cord, plug, blades, housing or other parts, and in the event of such conditions, the transformer must not be used until the damage is repaired.
- The toy must be used only with the recommended transformer.
- The toy is not to be connected to more than the recommended number of power supplies.
- Toys to be cleaned with a liquid are to be disconnected from the transformer before cleaning.
- To clean the transformer, disconnect it from the wall and clean with a cloth dampened with water. Do not immerse in water or use soap or other chemicals. Allow to dry before reusing. Do not connect to the AC outlet if wet or damaged.
AC Adapter Electrical Ratings:
US, CAN Input: ~120VAC, 60Hz
UK Input: ~230V, 50Hz
Australia and New Zealand Input: ~240V, 50Hz
Output: ![]() DC5V, 500mA, 2.5VA
DC5V, 500mA, 2.5VA
Important Note for the CLICKSTART™ Console
- The unit may malfunction when radio interference appears on the power line.
- The unit will revert to normal operation when the interference stops.
Note: In the unlikely event of an electrostatic discharge, the unit may malfunction and lose memory, requiring the user to reset the device.
TROUBLESHOOTING
| Symptom: | Try This: |
| Product does not turn on or does not respond |
|
| Product makes strange sounds or behaves erratically |
|
| Product makes improper responses |
|
| Display stops working |
|
| Power light not on |
|
| Power light on but no picture on TV |
|
| Power light on but no sound from TV |
|
| Colors/Colours are distorted on TV or TV image is flickering |
|
| Images on the TV appear stretched or cut off at the top and bottom |
|
| Colors/Colours do not appear accurate |
|
| Cannot get cartridge game to play |
|
| Game does not respond to keyboard |
|
| Mouse not functioning |
|
| Power light does not turn on or off |
|
Consumer Services
U.S. Consumer Service Contact
Search for frequently asked questions, review your previous questions or submit a question to our support staff via email 24 hours a day at our U.S. Consumer Support website at http://www.leapfrog.com/support. If you do not have Internet access, please call (800) 701-LEAP (5327) during normal business hours.
Canada Consumer Service Contact
Search for frequently asked questions, review your previous questions or submit a question to our support staff via email 24 hours a day at our Canada Consumer Support website at http://lfcanada.custhelp.com. If you do not have Internet access, please call (800) 701-LEAP (5327) during normal business hours.
U.K. Consumer Service Contact
Search for frequently asked questions or submit a question to our support staff via email 24 hours a day at our U.K. Consumer Support website at http://leapfroguk.custhelp.com. If you do not have Internet access, please call 0800 169 5435, or Eire +44 (0)1702 200244, during normal business hours.
Australia Consumer Service Contact
Please submit questions to our support staff via email at info@funtastic.com.au or free-call 1800 244 543 during normal business hours.

If you have a problem with this product, return it to the retailer where the product was purchased for exchange. If the retailer is unable to assist you for any reason, contact LeapFrog Consumer Services. If our service representative is unable to help you resolve the problem, you will be given instructions on how to replace the product and an authorization/authorisation number. Returns must have a Return Merchandise Authorization/Authorisation (RMA) number to be accepted at our warehouse. If you need replacement parts for this product, please contact LeapFrog Consumer Services.
FCC NOTICE:
This device complies with Part 15 of the FCC rules. Operation is subject to the following two conditions:
- This device may not cause harmful interference, and
- This device must accept any interference received, including interference that may cause undesired operation.
This equipment has been tested and found to comply with the limits for a Class B digital device pursuant to Part 15 of the FCC rules. These limits are designed to provide reasonable protection against harmful interference to radio communications. Because this toy generates, uses and can radiate radio frequency energy, there can be no guarantee that interference will not occur. If this toy does cause interference to radio or television reception (you can check this by turning the toy off and on while listening for the interference), one or more of the following measures may be useful:
- Reorient or relocate the receiving antenna
- Increase the separation between the toy and the radio or the TV
- Consult the dealer or an experienced TV-radio technician for help
NOTE: Changes or modifications to this unit not expressly approved by LeapFrog Enterprises, Inc. could void the user's authority to operate the equipment.
AUDIO-VIDEO CABLE NOTE: Use only the audio-video cable provided by LeapFrog. Using any other cable may exceed FCC and other regulatory emissions limits.
Only use accessories recommended by LeapFrog Enterprises, Inc.
This Class B digital apparatus complies with Canadian ICES-003.
Warranty Information
This LeapFrog® product is warranted only to the original purchaser for a period of three months from the original purchase date, under normal use and service, against defective workmanship and material. This warranty is void if the product has been damaged by accident or unreasonable use, immersion in water, neglect, abuse, battery leakage or improper installation, improper service, or other causes not arising out of defects in workmanship or materials of the product. All warranty claims are subject to:
- LeapFrog being notified of the warranty claim within the warranty period,
- LeapFrog verifying the existence of a defect in the product and
- receipt of valid proof of your purchase date.
Before returning a product to LeapFrog for any reason, please notify the LeapFrog Consumer Service Department.
Canada: In addition to the above-referenced warranty, the hardware component shall be free from defects in material and workmanship for 12 months. The above express warranty and any applicable implied warranties are limited in duration to the warranty periods described above. Some provinces do not allow limitations on how long an implied warranty lasts, or the exclusion of incidental or consequential damages, so the above limitations do not apply to you. You may also have other rights, which vary from province to province.
U.K.: In addition to the above-referenced warranty, this LeapFrog product shall be free from defects in material and workmanship for 12 months where the three-month warranty period is not valid. The above express warranty and any applicable implied warranties are limited in duration to the warranty periods described above. You may also have other rights under U.K. law, which this warranty does not limit.
Australia: You may also have other rights under consumer protection conditions and warranties implied by Australia's federal, state and territory laws.
LEAPFROG, the LeapFrog logo, CLICKSTART and the ClickStart logo are registered trademarks or trademarks of LeapFrog Enterprises, Inc. Copyright © 2006 LeapFrog Enterprises, Inc. All rights reserved.
For ages 3 to 6 years.

Documents / Resources
References
LeapFrog Customer Support | Help & Support For LeapFrog Products
Kids Learning Games | Educational Toys & Kids Tablets | LeapFrog
Download manual
Here you can download full pdf version of manual, it may contain additional safety instructions, warranty information, FCC rules, etc.
Advertisement


Need help?
Do you have a question about the ClickStart and is the answer not in the manual?
Questions and answers