
Related Manuals for Toro 21462


Summary of Contents for Toro 21462
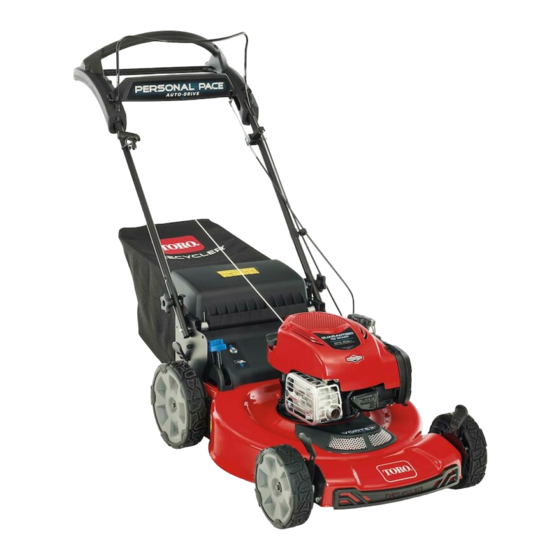
- Page 1 Form No. 3445-579 Rev A 22 Inch AWD/RWD Steel Deck Walk Power Mower Service Manual Published: March 2022...
- Page 2 Revision History Revision History Page 2 22 Inch AWD/RWD Steel Deck Walk Power Mower Service Manual 3445-579 Rev A...
- Page 3 The Toro Company RLC/SWS Customer Care Department 8111 Lyndale Avenue South Bloomington, MN 55420 The Toro Company reserves the right to change product specifications or make changes to this manual without notice. 22 Inch AWD/RWD Steel Deck Walk Power Page 3...
- Page 4 Service Procedure Icons The following icons appear throughout this Service Manual to bring attention to specific important details of a service procedure. Critical Process This icon is used to highlight: • Installing safety equipment (shields, guards, seat belts, brakes, and R.O.P.S. components) that may have been removed •...
-
Page 5: Table Of Contents
Table of Contents Preface ........................ 3 Chapter 1: Safety .................... 1–1 Safety Instructions ..................1–2 Chapter 2: Specifications and Maintenance ............ 2–1 Specifications ....................2–2 Torque Specifications ................... 2–3 Chapter 3: Troubleshooting ................3–1 General Troubleshooting ................3–3 Chapter 4: Power Source ................4–1 General Information .................. -
Page 6: Preface
Preface Page 6 22 Inch AWD/RWD Steel Deck Walk Power Mower Service Manual 3445-579 Rev A... - Page 7 Chapter 1 Safety Table of Contents Safety Instructions ..........................1–2 Think Safety First ..........................1–2 22 Inch AWD/RWD Steel Deck Walk Power Mower Service Page 1–1 Safety Manual 3445-579 Rev A...
-
Page 8: Safety Instructions
Safety Instructions DANGER This safety symbol means danger. When you see this symbol, carefully read the instructions that follow. Failure to obey the instructions could cause serious permanent injury, disability, or death. WARNING This safety symbol means warning. When you see this symbol, carefully read the instructions that follow. - Page 9 Think Safety First (continued) Battery acid is poisonous and can cause burns. Avoid contact with skin, eyes and clothing. Battery gases can explode. Keep cigarettes, sparks and flames away from the battery. Avoid injury due to inferior parts… Use only original equipment parts to ensure that important safety criteria are met. Avoid injury to bystanders…...
- Page 10 Think Safety First (continued) The proper class of fire extinguisher should be used in case of fire. Class A extinguishers are for ordinary combustible materials such as paper, wood, cardboard, and most plastics. The numerical rating on these types of extinguishers indicates the amount of water it holds and the amount of fire it can extinguish.
- Page 11 Chapter 2 Specifications and Maintenance Table of Contents Specifications ............................2–2 Torque Specifications ........................... 2–3 Equivalents and Conversions......................2–8 U.S. to Metric Conversions ........................ 2–9 22 Inch AWD/RWD Steel Deck Walk Power Mower Service Page 2–1 Specifications and Maintenance Manual 3445-579 Rev A...
-
Page 12: Specifications
Specifications Model 21462 21464 21465 21467 21468 21472 21466/21466T Engine Briggs and Briggs and Stratton Toro (60V) Honda Toro (60V) Manufacture Stratton Engine Model 7.25 EXI FLEX-FORCE FLEX-FORCE 7.25 EXI 625 EXI GCV160LA0 104M020010F1 POWER POWER 104M020010F1 SYSTEM® SYSTEM® Starter... -
Page 13: Torque Specifications
Torque Specifications The recommended fastener torque values are listed in the following tables. For critical applications, as determined by Toro, either the recommended torque or a torque that is unique to the application is clearly identified and specified in the service manual. - Page 14 Metric Bolts and Screws g272209 Figure 2 Class 8.8 Class 10.9 Specifications and Maintenance: Torque Specifications Page 2–4 22 Inch AWD/RWD Steel Deck Walk Power Mower Service Manual 3445-579 Rev A...
- Page 15 Standard Torque for Dry, Zinc Plated, and Steel Fasteners (Inch Series) Thread Size Grade 1, SAE Grade 1 Bolts, Screws, SAE Grade 5 Bolts, Screws, SAE Grade 8 Bolts, Screws, 5, & 8 Studes & Sems with Studs & Sems with Regular Studs &...
- Page 16 Standard Torque for Dry, Zinc Plated, and Steel Fasteners (Metric Series) Thread Size Class 8.8 Bolts, Screws, Studs with Regular Class 10.9 Bolts, Screws, Studs with Regular Height Nuts (Class 8 or Stronger Nuts) Height Nuts (Class 10 or stronger Nuts) in-lb N •...
- Page 17 SAE Grade 8 Steel Set Screws Recommended Torque Thread Size Square Head Hex Socket 1/4 - 20 UNC 140 ± 20 in-lb 73 ± 12 in-lb 5/16 - 18 UNC 215 ± 35 in-lb 145 ± 20 in-lb 1/2 - 13 UNC 75 ±...
- Page 18 Equivalents and Conversions Decimal and Millimeter Equivalents Fractions Decimals Fractions Decimals 1/64 0.015625 0.397 33/64 0.515625 13.097 1/32 0.03125 0.794 16/32 0.53125 13.484 3/64 0.046875 1.191 35/64 0.546875 13.891 1/16 0.0625 1.588 9/16 0.5625 14.288 5/64 0.078125 1.984 37/64 0.578125 14.684 3/32 0.9375...
- Page 19 U.S. to Metric Conversions To Convert Into Multiply By Miles Kilometers 1.609 Yards Meters 0.9144 Feet Meters 0.3048 Linear Measurement Feet Centimeters 30.48 Inches Meters 0.0254 Inches Centimeters 2.54 Inches Millimeters 25.4 Square Miles Square Kilometers 2.59 Square Feet Square Meters 0.0929 Area Square Inches...
- Page 20 Specifications and Maintenance: Torque Specifications Page 2–10 22 Inch AWD/RWD Steel Deck Walk Power Mower Service Manual 3445-579 Rev A...
- Page 21 Chapter 3 Troubleshooting Table of Contents General Troubleshooting ........................3–3 22 Inch AWD/RWD Steel Deck Walk Power Mower Service Page 3–1 Troubleshooting Manual 3445-579 Rev A...
- Page 22 GEARS The Systematic approach to defining, diagnosing and solving problems. Gather Information • Information reported by the customer • Information observed by you • Establish the what, where and when of the issue Evaluate Potential Causes • Consider possible causes of the problem to develop a hypothesis •...
-
Page 23: General Troubleshooting
General Troubleshooting Problem Possible Cause Corrective Action The grass blows out the front of the Incorrect alignment of the rear Correctly align the height-of-cut plates. rear bag door height-of-cut plates. The rear bag door is warped. Replace the rear bag door. The drive is weak The PERSONAL PACE®... - Page 24 Troubleshooting: General Troubleshooting Page 3–4 22 Inch AWD/RWD Steel Deck Walk Power Mower Service Manual 3445-579 Rev A...
- Page 25 Chapter 4 Power Source Table of Contents General Information ..........................4–2 Service and Repairs ..........................4–3 Engine/Powerhead Replacement ...................... 4–5 22 Inch AWD/RWD Steel Deck Walk Power Mower Service Page 4–1 Power Source Manual 3445-579 Rev A...
-
Page 26: General Information
General Information This mower is powered by a gas engine or a 60v powerhead. In both cases, replacement of the assembly only varies slightly. Power Source: General Information Page 4–2 22 Inch AWD/RWD Steel Deck Walk Power Mower Service Manual 3445-579 Rev A... -
Page 27: Service And Repairs
Service and Repairs Engine Assembly 1 g352010 Figure 3 Briggs Engine 22–inch Blade Blade Driver Assembly Blade Support 22 Inch AWD/RWD Steel Deck Walk Power Mower Service Page 4–3 Power Source: Service and Repairs Manual 3445-579 Rev A... - Page 28 Engine Assembly 2 g352308 Figure 4 60V Module Motor Blade Blade Driver Blade Support Power Source: Service and Repairs Page 4–4 22 Inch AWD/RWD Steel Deck Walk Power Mower Service Manual 3445-579 Rev A...
- Page 29 Engine/Powerhead Replacement Engine/Powerhead Removal 1. Park the machine on a level surface, stop the engine and wait for all moving parts to stop. 2. Models equipped with the 60v powerhead, remove the harness from powerhead. 3. Models equipped with electric start only, remove the 2 (M4.2 x 2.0) screws securing the battery cover.
- Page 30 Engine/Powerhead Removal (continued) g352012 Figure 6 10. Remove the 3 (3/8–16 x 1.0 inch) screws securing the engine/powerhead to the deck. g352013 Figure 7 11. Remove the engine/powerhead from the deck. Engine/Powerhead Installation 1. Install the engine/powerhead onto the deck. Power Source: Service and Repairs Page 4–6 22 Inch AWD/RWD Steel Deck Walk Power...
- Page 31 Engine/Powerhead Installation (continued) 2. Install the 3 (3/8–16 x 1.0 inch) screws securing the engine/powerhead to the deck. Torque the screws to 45.19–56.49 N • m (400–500 in-lbs). g352013 Figure 8 3. Install the (1/4 x 1.33 inch) shoulder screw securing the bottom intake cover to the deck.
- Page 32 Engine/Powerhead Installation (continued) g352011 Figure 10 5. Install the belt onto the drive blade. 6. Install the blade onto the engine crank. Refer to the product Operator’s Manual for the blade installation procedures. 7. Install the brake cable. Brake Cable Installation (page 5–6) 8.
- Page 33 Chapter 5 Controls Table of Contents General Information ..........................5–2 Service and Repairs ..........................5–3 Brake Cable Replacement ......................... 5–4 RWD Traction Cable Replacement ....................5–8 AWD Front Traction Cable Replacement ..................5–14 AWD Rear Traction Cable Replacement ..................5–16 RWD PERSONAL PACE®...
-
Page 34: General Information
General Information The RWD has 1 cable to operate the system and the AWD has 2 cables. The cable is tensioned to engage the drive, setting the proper cable tension is key for the correct operation and feel of the PERSONAL PACE® system. Controls: General Information Page 5–2 22 Inch AWD/RWD Steel Deck Walk Power... -
Page 35: Service And Repairs
Service and Repairs Controls Assembly g352313 Figure 11 Curved PERSONAL PACE® Handle Cable Yoke Brake Bail Brake Cable LH Curved Guide Curved Handle RH Curved Guide RWD Traction Cable LH Bottom Handle Cable Clamp RH Bottom Handle RWD Cable Anchor Traction Control Rod AWD Front Traction Cable AWD Traction Lever... -
Page 36: Brake Cable Replacement
Brake Cable Replacement Brake Cable Removal 1. Park the machine on a level surface, stop the engine and wait for all moving parts to stop. 2. Models equipped with the 60v powerhead, remove the harness from powerhead. 3. Models equipped with electric start only, remove the 2 (M4.2 x 2.0) screws securing the battery cover. - Page 37 Brake Cable Removal (continued) g352639 Figure 14 8. Remove the bail from the PERSONAL PACE® handle assembly. 9. Spread and remove the cable guide from the curved handle. 10. Using a needle nose pliers, remove the brake cable anchor from the engine assembly.
- Page 38 Brake Cable Removal (continued) g352641 Figure 16 Brake Cable Installation 1. Install the z bend of the brake cable onto the anchor. g352641 Figure 17 2. Install the brake cable anchor onto the engine assembly by pressing the cable anchor into the switch assembly. 3.
- Page 39 Brake Cable Installation (continued) g352639 Figure 18 6. Install the brake cable onto the PERSONAL PACE® handle. g352638 Figure 19 7. Install the brake cable into the cable anchor. 22 Inch AWD/RWD Steel Deck Walk Power Mower Service Page 5–7 Controls: Service and Repairs Manual 3445-579 Rev A...
-
Page 40: Rwd Traction Cable Replacement
Brake Cable Installation (continued) g352637 Figure 20 8. Models equipped with electric start only, connect the battery by installing the positive cable first, then the negative cable to the battery. Install the foam pad and battery cover. Secure the battery cover with 2 (M4.2 x 2.0) screws. Torque the screws to 2.26 ±... - Page 41 RWD Traction Cable Removal (continued) g352893 Figure 21 6. Slide the traction cable upwards and remove the cable anchor from the traction cable. g352894 Figure 22 7. Remove the z bend of the traction cable from the traction lever. 22 Inch AWD/RWD Steel Deck Walk Power Mower Service Page 5–9 Controls: Service and Repairs Manual...
- Page 42 RWD Traction Cable Removal (continued) g352895 Figure 23 8. At the transmission, pull the traction cable spring downwards and unhook the spring from the traction bracket. g352896 Figure 24 9. Using a needle nose pliers, pinch and remove the traction cable anchor from the deck.
- Page 43 RWD Traction Cable Removal (continued) g352897 Figure 25 10. Remove the cable through the large hole in the deck. RWD Traction Cable Installation 1. Route the traction control cable through the chassis. Install the traction cable anchor into the deck. g352897 Figure 26 2.
- Page 44 RWD Traction Cable Installation (continued) g352896 Figure 27 3. Install the z bend of the traction cable onto the traction lever. g352895 Figure 28 4. Install and slide the cable anchor onto the traction cable. Controls: Service and Repairs Page 5–12 22 Inch AWD/RWD Steel Deck Walk Power Mower Service Manual 3445-579 Rev A...
- Page 45 RWD Traction Cable Installation (continued) g352894 Figure 29 5. Using a 3/8 inch wrench, install the lock nut and curved washer securing the cable anchor to the handle. Torque the nut to 4.52 ± 0.56 N • m (40 ± 5 in-lbs). g352893 Figure 30 6.
-
Page 46: Awd Front Traction Cable Replacement
AWD Front Traction Cable Replacement AWD Front Traction Cable Removal 1. Park the machine on a level surface, stop the engine and wait for all moving parts to stop. 2. Remove the grass bagger assembly if attached. 3. Remove the nut and (1/4–20 inch) carriage bolt securing the cable anchor to the handle. - Page 47 AWD Front Traction Cable Removal (continued) g359933 Figure 33 Cable Return Spring Front Traction Cable Anchor 8. Remove the front traction cable from the unit. AWD Front Traction Cable Installation 1. Install the cable return spring to the deck and the front traction control cable anchor to the transmission mount.
-
Page 48: Awd Rear Traction Cable Replacement
AWD Front Traction Cable Installation (continued) g359932 Figure 35 4. Install the plastic cable clamp, secure with the (1/4–20 inch) carriage bolt, washer, and nut. Torque the nut to 4.52 ± 0.56 N • m (40 ± 5 in-lbs). g359929 Figure 36 5. - Page 49 AWD Rear Traction Cable Removal (continued) 2. Remove the grass bagger assembly if attached. 3. Remove the nut and (1/4–20 inch) carriage bolt securing the cable anchor to the handle. g359929 Figure 37 4. Remove the plastic cable clamp and washer. 5.
- Page 50 AWD Rear Traction Cable Removal (continued) g359931 Figure 39 7. Rotate the transmission forward to gain access to the cable anchor on the belt guide. 8. Release the cable anchor and disconnect the rear traction cable from the transmission arm. g352896 Figure 40 9.
- Page 51 AWD Rear Traction Cable Installation (continued) g359931 Figure 41 4. Install the rear traction cable to the cable yoke. g359930 Figure 42 5. Install the plastic cable clamp, secure with the (1/4–20 inch) carriage bolt, washer, and nut. Torque the nut to 4.52 ± 0.56 N • m (40 ± 5 in-lbs). 22 Inch AWD/RWD Steel Deck Walk Power Mower Service Page 5–19 Controls: Service and Repairs...
-
Page 52: Rwd Personal Pace® Handle Assembly Replacement
AWD Rear Traction Cable Installation (continued) g359929 Figure 43 6. Verify the proper cable tension by measuring from the end of cable clamp to the end of the cable conduit. The measurement should be approximately 0.15 cm (0.06 inches). Adjustment may be necessary depending on usage. RWD PERSONAL PACE®... - Page 53 RWD PERSONAL PACE® Assembly Handle Removal (continued) g352637 Figure 44 7. At a 90º angle, remove the brake cable from the PERSONAL PACE® handle. g352638 Figure 45 8. Remove the z bend of the brake cable from the bail. 22 Inch AWD/RWD Steel Deck Walk Power Mower Service Page 5–21 Controls: Service and Repairs Manual...
- Page 54 RWD PERSONAL PACE® Assembly Handle Removal (continued) g352639 Figure 46 9. From the RH side of the unit, remove the bail from the PERSONAL PACE® handle assembly. g353037 Figure 47 10. Using a 3/8 inch wrench, remove the lock nut and curved washer from the cable anchor.
- Page 55 RWD PERSONAL PACE® Assembly Handle Removal (continued) g352893 Figure 48 11. In an upwards motion, slide and remove the cable anchor from the traction cable. g352894 Figure 49 12. Remove the z bend of the traction cable from the traction lever. 22 Inch AWD/RWD Steel Deck Walk Power Mower Service Page 5–23 Controls: Service and Repairs...
- Page 56 RWD PERSONAL PACE® Assembly Handle Removal (continued) g352895 Figure 50 13. Remove the 10 (M4.2 x 2.0) screws securing the LH and RH bottom handles and curved PERSONAL PACE® handle to the curved handle. g353048 Figure 51 14. Pull and remove the curved PERSONAL PACE® handle from the curved handle.
- Page 57 RWD PERSONAL PACE® Assembly Handle Removal (continued) g353082 Figure 52 16. Remove the RH curved guide from the curved handle. 17. Slide the traction rod to the right, remove the traction rod from the curved handle. 18. Remove the traction lever and washer from the LH side of the traction rod. Remove the torsion spring from the RH side of the traction rod.
- Page 58 RWD PERSONAL PACE® Handle Assembly Installation (continued) g353082 Figure 54 6. Point the traction lever upwards and rotate the traction rod 3/4 turn so that the traction lever is pointing backwards. Install the upper PERSONAL PACE® handle onto the curved handle. Note: The spring has half of the rotation wrap when fully assembled.
- Page 59 RWD PERSONAL PACE® Handle Assembly Installation (continued) g353048 Figure 56 9. Install the z bend of the traction cable onto the traction lever. g352895 Figure 57 10. Install and slide the cable anchor onto the traction cable. 22 Inch AWD/RWD Steel Deck Walk Power Mower Service Page 5–27 Controls: Service and Repairs Manual...
- Page 60 RWD PERSONAL PACE® Handle Assembly Installation (continued) g352894 Figure 58 11. Using a 3/8 inch wrench, install the curved washer and lock nut securing the cable anchor to the curved handle. Torque the nut to 4.52 ± 0.56 N • m (40 ±...
- Page 61 RWD PERSONAL PACE® Handle Assembly Installation (continued) g353037 Figure 60 13. Install the z bend of the brake cable onto the bail. g352639 Figure 61 14. At a 90º angle, install the brake cable into the PERSONAL PACE® handle. 22 Inch AWD/RWD Steel Deck Walk Power Mower Service Page 5–29 Controls: Service and Repairs Manual...
- Page 62 RWD PERSONAL PACE® Handle Assembly Installation (continued) g352638 Figure 62 15. Install the brake cable into the cable anchor. g352637 Figure 63 16. Install the recoil rope onto the rope guide. 17. Models equipped with electric start only, connect the battery by installing the positive cable first, then the negative cable to the battery.
-
Page 63: Awd Personal Pace® Assembly Replacement
AWD PERSONAL PACE® Assembly Replacement AWD PERSONAL PACE® Handle Assembly Removal 1. Park the machine on a level surface, stop the engine and wait for all moving parts to stop. 2. Remove the grass bagger assembly if attached. 3. Remove the recoil rope from the rope guide. 4. - Page 64 AWD PERSONAL PACE® Handle Assembly Removal (continued) g353037 Figure 66 8. Remove the nut and (1/4–20 inch) carriage bolt securing the cable anchor to the handle. g359929 Figure 67 9. Remove the cable clamp and washer. 10. Remove the front and rear traction cable from the cable yoke. 11.
- Page 65 AWD PERSONAL PACE® Handle Assembly Removal (continued) g353048 Figure 68 12. Pull and remove the curved PERSONAL PACE® handle from the curved handle. Note: The handle pins may fall off when the upper PERSONAL PACE® handle is removed. 13. Remove the torsion spring from the curved handle. g353082 Figure 69 14.
- Page 66 AWD PERSONAL PACE® Handle Assembly Removal (continued) g353179 Figure 70 17. Remove the LH curved guide from the curved handle. AWD PERSONAL PACE® Handle Assembly Installation 1. Install the traction lever and washer onto the LH side of the traction rod. 2.
- Page 67 AWD PERSONAL PACE® Handle Assembly Installation (continued) g353060 Figure 72 Handle Pins 8. Install the 10 (M4.2 x 2.0) screws securing the LH and RH bottom handles and upper PERSONAL PACE® handle to the curved handle. Torque the screws to 2.26 ± 0.34 N • m (20 ± 3 in-lbs). g353048 Figure 73 9.
- Page 68 AWD PERSONAL PACE® Handle Assembly Installation (continued) g353037 Figure 74 12. Install the z bend of the brake cable onto the bail. g352639 Figure 75 13. At a 90º angle, install the brake cable into the PERSONAL PACE® handle. Controls: Service and Repairs Page 5–36 22 Inch AWD/RWD Steel Deck Walk Power Mower Service Manual...
-
Page 69: Curved Handle Replacement (Non-Electric Start Models Only)
AWD PERSONAL PACE® Handle Assembly Installation (continued) g352638 Figure 76 14. Install the brake cable into the cable anchor. 15. Install the recoil rope onto the rope guide. AWD PERSONAL PACE® Handle Assembly Test 1. Verify the traction control rod returns to a neutral position smoothly. If excessive force is observed, inspect the torsion spring for the correct amount of wrap. - Page 70 Curved Handle Removal (Non—Electric Start Models Only) (continued) g353180 Figure 77 6. Spread and remove the cable guide from the curved handle. 7. Remove the LH handle knob and carriage bolt from the curved handle. Repeat on the RH side of the unit. g353181 Figure 78 8.
- Page 71 Curved Handle Removal (Non—Electric Start Models Only) (continued) g353182 Figure 79 Curved Handle Installation (Non—Electric Start Models Only) 1. Install the quick release assemblies to the curved handle. g353182 Figure 80 2. Install the curved handle onto the chassis. 3. Install the LH handle knob and carriage bolt onto the curved handle. Repeat on the RH side of the unit.
-
Page 72: Curved Handle Replacement (Electric Start Models Only)
Curved Handle Installation (Non—Electric Start Models Only) (continued) g353181 Figure 81 4. Install the cable guide onto the curved handle. 5. Install the rope guide onto the curved handle, secure with a nut. Torque the nut to 4.52 ± 0.56 N • m (40 ± 5 in-lbs). g353180 Figure 82 6. - Page 73 Curved Handle Removal (Electric Start Models Only) (continued) 2. Remove the grass bagger assembly if attached. 3. Models equipped with the 60v powerhead, remove the harness from powerhead. 4. Remove the 2 (M4.2 x 2.0) screws securing the battery cover. Remove the battery cover and foam pad.
- Page 74 Curved Handle Removal (Electric Start Models Only) (continued) g353180 Figure 84 10. Spread and remove the cable guide from the curved handle. 11. Remove the LH handle knob and carriage bolt from the curved handle. Repeat on the RH side of the unit. g353181 Figure 85 12.
- Page 75 Curved Handle Removal (Electric Start Models Only) (continued) g353182 Figure 86 Curved Handle Installation (Electric Start Models Only) 1. Install the quick release assemblies to the curved handle. g353182 Figure 87 2. Install the curved handle onto the chassis. 3. Install the LH handle knob and carriage bolt onto the curved handle. Repeat on the RH side of the unit.
- Page 76 Curved Handle Installation (Electric Start Models Only) (continued) g353181 Figure 88 4. Install the cable guide onto the curved handle. 5. Install the rope guide onto the curved handle, secure with a nut. Torque the nut to 4.52 ± 0.56 N • m (40 ± 5 in-lbs). g353180 Figure 89 6.
- Page 77 Curved Handle Installation (Electric Start Models Only) (continued) g353634 Figure 90 10. Connect the battery by installing the positive cable first, then the negative cable to the battery. Install the foam pad and battery cover. Secure the battery cover with 2 (M4.2 x 2.0) screws. Torque the screws to 2.26 ± 0.34 N •...
- Page 78 Controls: Service and Repairs Page 5–46 22 Inch AWD/RWD Steel Deck Walk Power Mower Service Manual 3445-579 Rev A...
- Page 79 Chapter 6 Deck Table of Contents General Information ..........................6–2 Service and Repairs ..........................6–3 RWD Front Height-of-Cut Replacement..................... 6–8 AWD Front Height-of-Cut Replacement ................... 6–11 Rear Height-of-Cut Replacement..................... 6–12 Upper Intake Replacement ......................6–18 Chute Assembly Replacement......................6–20 Deck Replacement........................... 6–24 22 Inch AWD/RWD Steel Deck Walk Power Mower Service Page 6–1 Deck...
-
Page 80: General Information
General Information This model is equipped with Vortex technology. The upper and lower intake assists with air flow and allows grass clipping to be recycled efficiently. Deck: General Information Page 6–2 22 Inch AWD/RWD Steel Deck Walk Power Mower Service Manual 3445-579 Rev A... -
Page 81: Service And Repairs
Service and Repairs Deck Assembly 1 g352008 Figure 91 Rear Door Assembly 22–inch Deck Chute Assembly Bottom Intake Cover AWD Intake Front Bumper Recycle Knob AWD Lower Belt Cover Recycle Latch RWD Rear Baffle RWD Intake Front Baffle Recycle Deflector 22 Inch AWD/RWD Steel Deck Walk Power Mower Service Page 6–3 Deck: Service and Repairs... - Page 82 Deck Assembly 2 g352009 Figure 92 Bag Frame Assembly Grass Bag Assembly Deck: Service and Repairs Page 6–4 22 Inch AWD/RWD Steel Deck Walk Power Mower Service Manual 3445-579 Rev A...
- Page 83 Deck Assembly 3 g352310 Figure 93 Height—of— Cut Mount Bushing Spring Arm Front Hoc Plate Front Pivot Arm Height—of— Cut Knob Idler Wheel Assembly 22 Inch AWD/RWD Steel Deck Walk Power Mower Service Page 6–5 Deck: Service and Repairs Manual 3445-579 Rev A...
- Page 84 Deck Assembly 4 g352311 Figure 94 V-Belt Height—of— Cut Knob Transmission Bracket Spring Arm Fwd Wheel Assembly Front Pivot Arm Spring Arm Wheel Cover Assembly Height—of— Cut Front Plate Pinion Gear Transmission Deck: Service and Repairs Page 6–6 22 Inch AWD/RWD Steel Deck Walk Power Mower Service Manual 3445-579 Rev A...
- Page 85 Deck Assembly 5 g352312 Figure 95 AWD Belt RH Height—of— Cut Plate Trailing Shield Geared Wheel Assembly LH Hoc Plate Height—of— Cut Bushing Retainer Transmission Bracket Belt Cover V-Belt Rear Pivot Arm AWD Belt Guide Pinion Gear Spring Arm Gear Cover Assembly RWD Transmission AWD Transmission 22 Inch AWD/RWD Steel Deck Walk Power Mower Service...
-
Page 86: Rwd Front Height-Of-Cut Replacement
RWD Front Height-of-Cut Replacement RWD Front Height-of-Cut Removal 1. Park the machine on a level surface, stop the engine and wait for all moving parts to stop. 2. Models equipped with the 60v powerhead, remove the harness from powerhead. 3. Models equipped with electric start only, remove the 2 (M4.2 x 2.0) screws securing the battery cover. - Page 87 RWD Front Height-of-Cut Removal (continued) g352366 Figure 97 Mount Bushing Height-of-Cut Lever Front Pivot Arm 9. Remove the 2 (5/16–18 inch) screws and 2 nuts securing the height-of-cut plate to the LH deck. Remove the height-of-cut plate from the LH deck. Repeat on the RH side of the unit.
- Page 88 RWD Front Height-of-Cut Installation (continued) g352391 Figure 99 2. Install the mount bushing, spring arm, and the front pivot arm to the LH height-of-cut plate and secure with the (5/16–18 inch) screw, flat washer, and nut. Torque the nuts to 19.2 ± 3.39 N • m (170 ± 30 in-lb). Repeat on the RH side of the unit.
-
Page 89: Awd Front Height-Of-Cut Replacement
AWD Front Height-of-Cut Replacement AWD Front Height-of-Cut Removal 1. Park the machine on a level surface, stop the engine and wait for all moving parts to stop. 2. Remove the grass bagger assembly if attached. 3. Remove the AWD front wheels. AWD Front Wheel Removal (page 7–7) 4. -
Page 90: Rear Height-Of-Cut Replacement
AWD Front Height-of-Cut Installation (continued) g360548 Figure 102 2. Install the LH spring arm and pivot arm onto the transmission. Repeat on the RH side of the unit. 3. Install the large snap ring to the LH bushing retainer. Repeat on the RH side of the unit. - Page 91 Rear Height-of-Cut Removal (continued) g361220 Figure 103 7. Remove the (1/4–10 inch) screw securing the LH height-of-cut plate to the chute assembly. Repeat on the RH side of the unit. g361221 Figure 104 8. Remove the (1/4–10 inch) carriage screw and lock nut securing the LH height-of-cut plate to the deck.
- Page 92 Rear Height-of-Cut Removal (continued) g361222 Figure 105 9. Position the LH tab on the trailing shield in alignment with the cutout in the LH height-of-cut plate. Repeat on the RH side of the unit. 10. Remove the rear LH height-of-cut plate assembly from the deck. Repeat on the RH side of the unit.
- Page 93 Rear Height-of-Cut Disassembly (continued) g359620 Figure 107 2. Using a 1 ¼ inch socket or wrench, rotate the bushing retainer counterclockwise to remove the bushing retainer and sleeve bushing from the rear pivot arm. g359619 Figure 108 3. Remove the rear pivot arm and spring arm from the height-of-cut plate. Rear Height-of-Cut Assembly 1.
- Page 94 Rear Height-of-Cut Assembly (continued) 4. Using a 1 ¼ inch socket or wrench, rotate the bushing retainer clockwise to install the bushing retainer to the rear pivot arm. Torque the bushing retainer to 7.9 ± 9 N • m (70 ± 80 in-lbs). g359619 Figure 109 Rear Height-of-Cut Installation...
- Page 95 Rear Height-of-Cut Installation (continued) g361222 Figure 111 3. Install the (1/4–10 inch) screw securing the LH height-of-cut plate to the chute assembly. Torque the screw to 3.39 ± 0.45 N • m (30 ± 4 in-lbs). Repeat on the RH side of the unit. g361221 Figure 112 4.
-
Page 96: Upper Intake Replacement
Rear Height-of-Cut Installation (continued) g361220 Figure 113 5. Install the rear wheels. Rear Wheel Installation (page 7–11) 6. Models equipped with electric start only, connect the battery by installing the positive cable first, then the negative cable to the battery. Install the foam pad and battery cover. - Page 97 Upper Intake Removal (continued) g353303 Figure 114 10. Remove the upper intake from the deck. Upper Intake Installation 1. Position the blade out of the way of the lower intake. 2. Install the upper intake onto the deck, secure with 2 (1/4 x 1.33 inch) screws. Torque the screws to 3.39 ±...
-
Page 98: Chute Assembly Replacement
Chute Assembly Replacement Chute Assembly Removal 1. Park the machine on a level surface, stop the engine and wait for all moving parts to stop. 2. Models equipped with the 60v powerhead, remove the harness from powerhead. 3. Models equipped with electric start only, remove the 2 (M4.2 x 2.0) screws securing the battery cover. - Page 99 Chute Assembly Removal (continued) g352576 Figure 117 9. Remove the baffle from the deck. 10. Remove the 2 (1/4–10 inch) screws securing the belt guide guard to the deck. g352577 Figure 118 11. Remove the belt guide guard from the deck. 12.
- Page 100 Chute Assembly Removal (continued) g352578 Figure 119 13. Remove the chute from the deck. Chute Assembly Installation 1. Install the chute to the deck, secure with 4 (1/4–10 inch) screws. Torque the screws to 3.39 ± 0.45 N • m (30 ± 4 in-lbs). g352578 Figure 120 2.
- Page 101 Chute Assembly Installation (continued) g352577 Figure 121 3. Install the baffle to the deck, secure with the (1/4–10 inch) rear screw. Torque the screws to 3.39 ± 0.45 N • m (30 ± 4 in-lbs). g352576 Figure 122 4. Install the 2 (1/4–10 inch) LH screws securing the rear baffle to the deck. Torque the screws to 3.39 ±...
-
Page 102: Deck Replacement
Chute Assembly Installation (continued) g352575 Figure 123 5. Install the rear back door onto the unit. 6. Install the rear height-of-cut plates. Rear Height-of-Cut Removal (page 6–12) 7. Models equipped with electric start only, connect the battery by installing the positive cable first, then the negative cable to the battery. Install the foam pad and battery cover. -
Page 103: Chapter 6: Deck
Deck Removal (continued) 10. Remove the power head. Engine/Powerhead Removal (page 4–5) 11. RWD models only, remove the RWD front height-of-cut assembly. Front Height-of-Cut Removal (page 6–8) 12. AWD models only, remove the AWD front height-of-cut assembly. Front Height-of-Cut Removal (page 6–11) 13. - Page 104 Deck Installation (continued) g361255 Figure 125 3. AWD models only, install the AWD front transmission. AWD Front Transmission Installation (page 7–19) 4. Install the rear height-of-cut assemblies. Rear Height-of-Cut Installation (page 6–16) 5. RWD models only, install the RWD front height-of-cut assembly. RWD Front Height-of-Cut Installation (page 6–9) 6.
- Page 105 Chapter 7 Drive System Table of Contents General Information ..........................7–2 Service and Repairs ..........................7–3 RWD Front Wheel Replacement ......................7–6 AWD Front Wheel Replacement ......................7–7 Rear Wheel Replacement ........................ 7–10 RWD Transmission Replacement ....................7–11 AWD Rear Transmission Replacement.................... 7–12 AWD Front Transmission Replacement ...................
-
Page 106: General Information
General Information The RWD and AWD models share similar components and all of the transmissions are belt driven but have different forms of engagement. Drive System: General Information Page 7–2 22 Inch AWD/RWD Steel Deck Walk Power Mower Service Manual 3445-579 Rev A... -
Page 107: Service And Repairs
Service and Repairs Drive System Assembly 1 g352310 Figure 126 Mount Bushing Spring Arm Front Height—of— Cut Plate Front Pivot Arm Height—of— Cut Knob Front Wheel 22 Inch AWD/RWD Steel Deck Walk Power Mower Service Page 7–3 Drive System: Service and Repairs Manual 3445-579 Rev A... - Page 108 Drive System Assembly 2 g352311 Figure 127 V-Belt Height—of— Cut Knob Transmission Bracket Spring Arm FWD Wheel Front Pivot Arm Bearing Retainer Wheel Cover Assembly Height—of— Cut Front Plate Pinion Gear Transmission Drive System: Service and Repairs Page 7–4 22 Inch AWD/RWD Steel Deck Walk Power Mower Service Manual 3445-579 Rev A...
- Page 109 Drive System Assembly 3 g352312 Figure 128 AWD V-Belt RH Height—of— Cut Plate Rear Wheel Trailing Shield Bushing Retainer LH Height—of— Cut Plate RWD Transmission Bracket Belt Cover V-Belt Rear Pivot Arm AWD Transmission Bracket Pinion Gear Spring Arm Gear Cover Assembly RWD Transmission AWD Transmission 22 Inch AWD/RWD Steel Deck Walk Power Mower Service...
-
Page 110: Rwd Front Wheel Replacement
RWD Front Wheel Replacement RWD Front Wheel Removal 1. Park the machine on a level surface, stop the engine and wait for all moving parts to stop. 2. Models equipped with the 60v powerhead, remove the harness from powerhead. 3. Models equipped with electric start only, remove the 2 (M4.2 x 2.0) screws securing the battery cover. -
Page 111: Awd Front Wheel Replacement
RWD Front Wheel Installation (continued) g352036 Figure 130 Washer Idler Wheel Front Pivot Arm Wheel Bolt 2. Models equipped with electric start only, connect the battery by installing the positive cable first, then the negative cable to the battery. Install the foam pad and battery cover. - Page 112 AWD Front Wheel Removal (continued) g359881 Figure 131 8. Remove the LH pinion gear and washer from the LH transmission axle shaft. Repeat on the RH side of the unit. g359882 Figure 132 9. Remove the LH wheel cover from the LH transmission axle shaft. Repeat on the RH side of the unit.
- Page 113 AWD Front Wheel Installation (continued) g359882 Figure 133 3. Install the snap ring securing the pinion gear to the LH transmission axle shaft. Repeat on the RH side of the unit. g359881 Figure 134 4. Install the LH wheel to the LH pivot arm, secure with the (3/8–16 inch) shoulder bolt.
-
Page 114: Rear Wheel Replacement
Rear Wheel Replacement Rear Wheel Removal 1. Park the machine on a level surface, stop the engine and wait for all moving parts to stop. 2. Models equipped with the 60v powerhead, remove the harness from powerhead. 3. Models equipped with electric start only, remove the 2 (M4.2 x 2.0) screws securing the battery cover. -
Page 115: Rwd Transmission Replacement
Rear Wheel Removal (continued) 7. Remove the pinion gear, thrust washer, and rear pivot from the LH transmission axle shaft. Repeat on the RH side of the unit. Rear Wheel Installation 1. Install the rear pivot, thrust washer, and pinion gear onto the LH transmission axle shaft. -
Page 116: Awd Rear Transmission Replacement
RWD Transmission Removal (continued) 6. Remove the rear height-of-cut assemblies. Rear Height-of-Cut Removal (page 6–12) 7. Remove the belt from the engine pulley. 8. Remove the transmission and transmission belt. RWD Transmission Installation 1. Install the transmission and transmission belt. 2. - Page 117 AWD Rear Transmission Removal (continued) g352575 Figure 138 9. Remove the (1/4–10 inch) rear screw securing the baffle to the deck. g352576 Figure 139 10. Remove the baffle from the deck. 11. Remove the 2 screws (1/4–10 inch) securing the belt guide guard to the deck. 22 Inch AWD/RWD Steel Deck Walk Power Mower Service Page 7–13 Drive System: Service and Repairs...
- Page 118 AWD Rear Transmission Removal (continued) g352577 Figure 140 12. Remove the belt guide guard from the deck. 13. Remove the rear height-of-cut plates. Rear Height-of-Cut Removal (page 6–12) 14. Remove the transmission from the chassis with the belt and cable attached. 15.
- Page 119 AWD Rear Transmission Installation (continued) g359966 Figure 142 3. Install the transmission into the chassis with the belt. 4. Route the belt between the idler pulley and input pulley. 5. Install the rear height-of-cut plates. Rear Height-of-Cut Installation (page 6–16) 6.
- Page 120 AWD Rear Transmission Installation (continued) g352576 Figure 144 8. Install the 2 (1/4–10 inch) LH screws securing the rear baffle to the deck. Torque the screws to 2.82 ± 0.56 N • m (25 ± 5 in-lbs). Repeat on the RH side of the unit.
-
Page 121: Awd Front Transmission Replacement
AWD Rear Transmission Installation (continued) 13. Models equipped with the 60v powerhead, install the harness to the powerhead. AWD Front Transmission Replacement AWD Front Transmission Removal 1. Park the machine on a level surface, stop the engine and wait for all moving parts to stop. - Page 122 AWD Front Transmission Removal (continued) g359933 Figure 147 Cable Return Spring Front Traction Cable Anchor 9. Remove the blade the from the engine crank. Refer to the product Operator’s Manual for the blade removal procedures. 10. Remove the 2 (1/4–10 inch) screws securing the belt guide guard to the deck. g352577 Figure 148 11.
- Page 123 AWD Front Transmission Removal (continued) g360056 Figure 149 13. Remove the belt from the transmission. 14. Remove the transmission from the chassis. 15. Inspect the belt for wear. Replace if necessary. 16. Inspect the blade driver pulley for wear. Replace if necessary. 17.
- Page 124 AWD Front Transmission Installation (continued) g360056 Figure 150 4. Install the belt guide guard onto the deck, secure with 2 (1/4–10 inch) screws. Torque the screws to 2.82 ± 0.56 N • m (25 ± 5 in-lbs). g352577 Figure 151 5.
- Page 125 AWD Front Transmission Installation (continued) g359933 Figure 152 Cable Return Spring Front Traction Cable Anchor 7. Install the transmission return spring onto the shoulder bolt and transmission bracket. g360054 Figure 153 8. Install the upper intake to the deck. Upper Intake Installation (page 6–19) 9.
-
Page 126: Transmission Belt Replacement
Transmission Belt Replacement Transmission Belt Removal 1. Park the machine on a level surface, stop the engine and wait for all moving parts to stop. 2. Models equipped with the 60v powerhead, remove the harness from powerhead. 3. Models equipped with electric start only, remove the 2 (M4.2 x 2.0) screws securing the battery cover. - Page 127 Transmission Belt Installation (continued) 9. Models equipped with electric start only, connect the battery by installing the positive cable first, then the negative cable to the battery. Install the foam pad and battery cover. Secure the battery cover with 2 (M4.2 x 2.0) screws. Torque the screws to 2.26 ±...
- Page 128 Drive System: Service and Repairs Page 7–24 22 Inch AWD/RWD Steel Deck Walk Power Mower Service Manual 3445-579 Rev A...
- Page 129 Chapter 8 Electrical Table of Contents General Information ..........................8–2 Service and Repairs ..........................8–3 Electric Starter Replacement (Electric Start Models Only)..............8–5 Battery Assembly Replacement (Electric Start Models Only) ............8–10 22 Inch AWD/RWD Steel Deck Walk Power Mower Service Page 8–1 Electrical Manual...
-
Page 130: General Information
General Information This system utilizes a fused wire harness attached to a 12v battery to power a electric starting motor. The push button start has a removable key. Electrical: General Information Page 8–2 22 Inch AWD/RWD Steel Deck Walk Power Mower Service Manual 3445-579 Rev A... -
Page 131: Service And Repairs
Service and Repairs Electrical Assembly 1 g352314 Figure 154 RH Switch Housing Top Battery Foam Switch Button Push Button Switch LH Switch Housing Non-Spillable Battery Battery Cover Battery Tray 40 Amp Fuse Wire Harness 22 Inch AWD/RWD Steel Deck Walk Power Mower Service Page 8–3 Electrical: Service and Repairs Manual... - Page 132 Electrical Assembly 2 g352315 Figure 155 60v Starter Switch Assembly Electrical: Service and Repairs Page 8–4 22 Inch AWD/RWD Steel Deck Walk Power Mower Service Manual 3445-579 Rev A...
-
Page 133: Electric Starter Replacement (Electric Start Models Only)
Electric Starter Replacement (Electric Start Models Only) Electric Starter Removal (Electric Start Models Only) 1. Park the machine on a level surface, stop the engine and wait for all moving parts to stop. 2. Remove the 2 cable ties securing the electric starter wire harness to the curved handle. - Page 134 Electric Starter Removal (Electric Start Models Only) (continued) 6. Remove the foam pad and disconnect the positive and negative battery terminals g353637 Figure 158 7. Disconnect the electric starter harness from the engine harness. g353638 Figure 159 Electric Starter Disassembly (Models Equipped with Electric Start Only) 1.
-
Page 135: Service And Repairs
Electric Starter Disassembly (Models Equipped with Electric Start Only) (continued) g354406 Figure 160 3. Remove the 3 (M4.2 x 2.0) screws securing the LH and RH switch housings. Remove the LH and RH switch housings from the electric starter harness. g354407 Figure 161 Electric Starter Assembly (Electric Start Models Only) - Page 136 Electric Starter Assembly (Electric Start Models Only) (continued) g354406 Figure 162 4. Install the electric starter to the unit. (page ) Electric Starter Installation (Electric Start Models Only) 1. Connect the electric starter harness to the engine harness. g353638 Figure 163 2.
- Page 137 Electric Starter Installation (Electric Start Models Only) (continued) g353637 Figure 164 4. Install the foam pad onto the battery. g353636 Figure 165 5. Install the battery cover onto the battery box, secure with 2 (M4.2 x 2.0) screws. Torque the screws to 2.26 ± 0.34 N • m (20 ± 3 in-lbs). 22 Inch AWD/RWD Steel Deck Walk Power Mower Service Page 8–9 Electrical: Service and Repairs...
-
Page 138: Battery Assembly Replacement (Electric Start Models Only)
Electric Starter Installation (Electric Start Models Only) (continued) g353635 Figure 166 6. Install the cable guide and electric starter to the curved handle, secure with the NI lock nut and (7/16 inch) screw. 7. Install the cable guide onto the curved handle. 8. - Page 139 Battery Assembly Removal (Electric Start Models Only) (continued) 3. Remove the 2 (M4.2 x 2.0) screws securing the battery cover to the battery box. Remove the battery cover. g353635 Figure 168 4. Remove the foam pad and disconnect the positive and negative battery terminals g353637 Figure 169...
- Page 140 Battery Assembly Removal (Electric Start Models Only) (continued) g352575 Figure 170 6. Remove the (1/4–10 inch) rear screw securing the baffle to the deck. g352576 Figure 171 7. Remove the baffle from the deck. 8. Remove the 2 (1/4–10) screws securing the belt guide guard to the deck. Electrical: Service and Repairs Page 8–12 22 Inch AWD/RWD Steel Deck Walk Power...
- Page 141 Battery Assembly Removal (Electric Start Models Only) (continued) g352577 Figure 172 9. Remove the belt guide guard from the deck. 10. Remove the 2 (M4.5 x 2.0) screws securing the battery tray to the chassis. Remove the battery tray from the chassis. Battery Assembly Installation (Electric Start Models Only) 1.
- Page 142 Battery Assembly Installation (Electric Start Models Only) (continued) g352576 Figure 174 4. Install the 2 (1/4–10 inch) LH screws securing the rear baffle to the deck. Torque the screws to 2.82 ± 0.56 N • m (25 ± 5 in-lbs). Repeat on the RH side of the unit.
- Page 143 Battery Assembly Installation (Electric Start Models Only) (continued) g353637 Figure 176 7. Install the foam pad. g353636 Figure 177 8. Install the battery cover, secure with 2 (M4.2 x 2.0) screws. Torque the screws to 2.26 ± 0.34 N • m (20 ± 3 in-lbs). 22 Inch AWD/RWD Steel Deck Walk Power Mower Service Page 8–15 Electrical: Service and Repairs...
- Page 144 Battery Assembly Installation (Electric Start Models Only) (continued) g353635 Figure 178 Electrical: Service and Repairs Page 8–16 22 Inch AWD/RWD Steel Deck Walk Power Mower Service Manual 3445-579 Rev A...
- Page 145 Appendix A Foldout Drawings Table of Contents Electrical Drawing Abbreviations......................A–2 Electrical Schematic — Electric Start ....................A–3 Electrical Schematic — 60v Powerhead Wire Harness ..............A–4 22 Inch AWD/RWD Steel Deck Walk Power Page A–1 Foldout Drawings Mower Service Manual 3445-579 Rev A...
-
Page 146: Electrical Drawing Abbreviations
Electrical Drawing Abbreviations The following abbreviations are used for wire harness colors on the electrical schematics and wire harness drawings in this chapter. Abbreviation Color Black BR or BN Brown Blue Green Gray OR or OG Orange Pink R or RD T or TN Violet VIO or VT... -
Page 147: Electrical Schematic - Electric Start
Electrical Schematic — Electric Start g361309 , Drawing Rev A, Sheet 1 3445-579 Rev A Page A–3... -
Page 148: Electrical Schematic - 60V Powerhead Wire Harness
Electrical Schematic — 60v Powerhead Wire Harness g372500 Page A–4 3445-579 Rev A , Drawing Rev , Sheet...
Need help?
Do you have a question about the 21462 and is the answer not in the manual?
Questions and answers