
Related Manuals for Insignia NS-HTVLGTILT-C


Summary of Contents for Insignia NS-HTVLGTILT-C
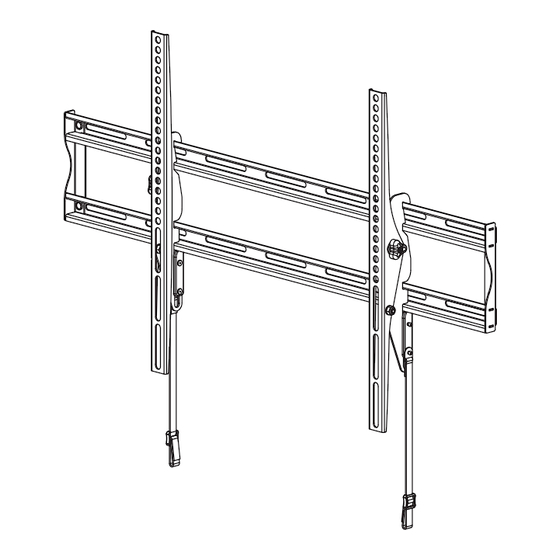
- Page 1 INSTALLATION GUIDE TV Wall Mount NS-HTVLGTILT-C Before using your new product, please read these instructions to prevent any damage.
-
Page 2: Table Of Contents
Contents Introduction ..................3 IMPORTANT SAFETY INSTRUCTIONS . -
Page 3: Introduction
NS-HTVLGTILT-C Introduction Congratulations on your purchase of a high-quality Insignia product. Your NS-HTVLGTILT-C represents the state of the art in TV wall mount design and is designed for reliable and trouble-free performance. IMPORTANT SAFETY INSTRUCTIONS SAVE THESE INSTRUCTIONS CAUTION: • Do not use this product for any purpose not explicitly specified by Insignia. -
Page 4: Tilt Range
TV Wall Mount Tilt range For more information, see STEP 7 - Make adjustments on page 14. 5° Simulated 55" TV 10° VESA TV screw hole patterns Your wall mount works with the following VESA TV screw hole patterns: 100 × 100 mm (3.9 × 3.9") 300 ×... -
Page 5: Package Contents
(1/4 in.) M8 × 50 mm screw Concrete installation kit (optional) If you plan to install your wall mount to a concrete block or solid concrete wall, contact Insignia Customer Support (1-877-467-4289) to order the optional concrete installation kit. LABEL HARDWARE QTY. -
Page 6: Installation Instructions
TV Wall Mount Installation instructions STEP 1 - Determine whether your TV has a flat back or an irregular or obstructed back 1 Carefully place your TV screen face-down on a cushioned, clean surface to protect the screen from damages and scratches. -
Page 7: Step 2 - Select Screws, Washers, And Spacers
For an irregular or obstructed TV back, also use the spacers (12 or 13). Select the spacer that provides an adequate space for a inset screw hole on your TV or room for cables. If you need help selecting the correct spacer, contact Insignia Customer Support. -
Page 8: Step 3 - Option 1: Attaching The Mounting Hardware To Tvs With A Flat Back
TV Wall Mount STEP 3 - Option 1: Attaching the mounting hardware to TVs with a flat back 1 Align the TV brackets (01 and 02) with the screw holes on the back of the TV. Make sure that the brackets are level and that the tilt tension knobs (T) face out (away from the middle of the TV). -
Page 9: Step 3 - Option 2: Attaching The Mounting Hardware To Tvs With Irregular Or Obstructed Backs
NS-HTVLGTILT-C STEP 3 - Option 2: Attaching the mounting hardware to TVs with irregular or obstructed backs IMPORTANT: Make sure that the tilt tension knobs (T) face out. 1 Align the TV brackets (01 and 02) with the screw holes on the back of the TV. Make sure that the brackets are level and that the tilt tension knobs face out (away from the middle of the TV). -
Page 10: Step 4 - Determine The Wall-Mount Location
TV Wall Mount STEP 4 - Determine the wall-mount location Notes: • For more detailed information on determining where to drill your holes, visit our online height-finder at: http://mf1.bestbuy.selectionassistant.com/index.php/heightfinder • Your TV should be high enough so your eyes are level with the middle of the screen. This is normally 40 to 60 in. from the ground. The center of your TV will be offset .8 in. -
Page 11: Step 5 - Option 1: Installing On A Wood Stud Wall
NS-HTVLGTILT-C STEP 5 - Option 1: Installing on a wood stud wall CAUTIONS: • Any drywall covering the wall must not exceed 16 mm (5/8 in.) • Minimum wood stud size: nominal 51 × 102 mm (2 × 4 in.) actual 38 × 89 mm (11/2 × 31/2 in.) •... -
Page 12: Step 5 - Option 2: Installing On A Solid Concrete Or Concrete Block Wall
• Minimum horizontal space between fasteners: 406 mm (16 in.) Note: The concrete wall-mount kit is optional. Contact Insignia Customer Support (1-877-467-4289) to order the optional concrete installation kit. For more information, see Concrete installation kit (optional) on page 5. -
Page 13: Step 6 - Secure The Tv To The Wall Plate
NS-HTVLGTILT-C STEP 6 - Secure the TV to the wall plate 1 Holding the TV with the top of the screen tilted toward the wall, hook the upper edges of the TV brackets (01 and 02) onto the upper lip of the wall plate (11). -
Page 14: Step 7 - Make Adjustments
TV Wall Mount STEP 7 - Make adjustments • To tilt the TV, loosen the knobs on TV brackets (01 and 02), then pull or push the top of the TV to adjust the tilt. Tighten the knobs when the TV is set to the desired tilt. •... -
Page 15: One-Year Limited Warranty
During the Warranty Period, if the original manufacture of the material or workmanship of the Product is determined to be defective by an authorized Insignia repair center or store personnel, Insignia will (at its sole option): (1) repair the Product with new or rebuilt parts; or (2) replace the Product at no charge with new or rebuilt comparable products or parts. - Page 16 For product inquiries, please contact us with the information below: 1-877-467-4289 www.insigniaproducts.com 6907-302075 INSIGNIA is a trademark of Best Buy and its affiliated companies. Distributed by Best Buy Purchasing, LLC 7601 Penn Ave South, Richfield, MN 55423 U.S.A. ©2022 Best Buy. All rights reserved.
Need help?
Do you have a question about the NS-HTVLGTILT-C and is the answer not in the manual?
Questions and answers