Table of Contents
Advertisement
Quick Links
ENGLISH
Operating manual
V-
MIX Fill Plus L
V-
MIX Fill Plus LS
Rev. 5 /08.17
Item no. 110489
Printed in Germany – translation of the original operating manual
Read and follow this operating manual before putting the machine into operation for the first time!
Store for future reference!
www.bvl-group.de
Advertisement
Table of Contents

Related Manuals for BVL V-MIX Fill Plus L


Summary of Contents for BVL V-MIX Fill Plus L
- Page 1 MIX Fill Plus LS Rev. 5 /08.17 Item no. 110489 Printed in Germany – translation of the original operating manual Read and follow this operating manual before putting the machine into operation for the first time! Store for future reference! www.bvl-group.de...
- Page 2 EN ISO 12100:2010 DIN EN ISO 13857 DIN EN 349:2008 ISO 4413:2010 DIN EN ISO 4254-1:2011 DIN EN 703:20024 + A1:2009 Emsbüren, on 08./11/2017 Bernard van Lengerich Managing Director Mixer wagon V-MIX Fill Plus L / LS...
- Page 3 Bernard van Lengerich Copyright Maschinenfabrik GmbH & Co. KG, 2007 All rights reserved. Reprints, even in excerpts, only with the written permission of Bernard van Lengerich Maschinenfabrik GmbH & Co. KG. Mixer wagon V-MIX Fill Plus L / LS...
- Page 4 Bernard van Lengerich Maschinenfabrik GmbH & Co. KG Operations: Grenzstrasse 16 Post address: Postfach 1154 D-48488 Emsbüren Tel.: + 49 (0) 5903 951-0 Fax.: + 49 (0) 5903 951-34 Email: info@bvl-group.de Mixer wagon V-MIX Fill Plus L / LS...
-
Page 5: Table Of Contents
V-MIX Fill Plus 1S LS ....................54 4.7.6 V-MIX Fill Plus 1S LS ....................55 4.7.7 V-MIX Fill Plus 2S LS ....................56 4.7.8 V-MIX Fill Plus 2S LS ....................57 Information on noise generation ..................58 Mixer wagon V-MIX Fill Plus L / LS... - Page 6 Adjusting the length of the drive shaft on the tractor (work to be performed at a workshop)99 6.5.1 Installation instructions for the specialty workshop: ..........100 Mounting the control panel to the tractor ................101 Mixer wagon V-MIX Fill Plus L / LS...
- Page 7 11.8.1 Changing the tyres ....................157 11.9 Hydraulic system ........................ 159 11.9.1 Markings on hydraulic hose lines ................160 11.9.2 Maintenance intervals .................... 160 11.9.3 Inspection points for hydraulic hose lines .............. 160 Mixer wagon V-MIX Fill Plus L / LS...
- Page 8 14.3 Requirements for the operation of tractors with trailed machines ........171 14.3.1 Combination possibilities of connecting and pulling equipment ......171 14.3.2 Calculating the actual D value for the combination to be coupled ...... 172 15 Index ........................ 173 Mixer wagon V-MIX Fill Plus L / LS...
-
Page 9: User Information
If selling the machine, pass this operating manual on to the purchaser. Locational information in this operating manual All locational information in this operating manual is given in relation to the direction of travel. Mixer wagon V-MIX Fill Plus L / LS... -
Page 10: Illustrations Used
A hazard is the source of a potential injury or damage to a person's health. Manufacturer The term "manufacturer" refers to Bernard van Lengerich Maschinenfabrik GmbH & Co. KG. Machine The term "machine" refers to the V-Mix PLUS mixer wagon. Mixer wagon V-MIX Fill Plus L / LS... -
Page 11: Safety Instructions
Check if tractor and machine are roadworthy and safe to operate every time before putting them into operation. Mixer wagon V-MIX Fill Plus L / LS... -
Page 12: Organizational Measures
If the correction of a fault is not part of the operator's responsibilities or the operator lacks the necessary expertise, the operator must report the defect to his supervisor or the owner. Mixer wagon V-MIX Fill Plus L / LS... -
Page 13: Qualification Of The Personnel
Note: A qualification that is equivalent to professional technical training can be acquired by working in the respective field for several years. Mixer wagon V-MIX Fill Plus L / LS... -
Page 14: Product Safety
The manufacturer does not accept any liability for damages caused by: unauthorized modifications of the machine, unapproved modification and accessory parts, welding and drilling operations on load-bearing sections of the machine. Mixer wagon V-MIX Fill Plus L / LS... -
Page 15: Replacement And Wear Parts As Well As Auxiliary Supplies
Intended use also comprises: observing all information provided in this operating manual, performing all inspection and maintenance work, Mixer wagon V-MIX Fill Plus L / LS... - Page 16 Improperly performed repairs. Natural disasters and force majeure. Vandalism. Damage resulting from improper use: is the sole responsibility of the owner, is not the responsibility of the manufacturer. Mixer wagon V-MIX Fill Plus L / LS...
-
Page 17: General Safety Instructions
Pay particular attention to children! Do not transport any person or object on the machine! Allowing people to hitch a ride or transport objects on the machine is prohibited! Mixer wagon V-MIX Fill Plus L / LS... - Page 18 must not rub against other components! Always set down the uncoupled machine such that it is stable! Mixer wagon V-MIX Fill Plus L / LS...
- Page 19 Secure the tractor against starting up and rolling away inadvertently before exiting the tractor! Securely support raised covers before allowing anyone to step under these raised covers! Mixer wagon V-MIX Fill Plus L / LS...
- Page 20 Adjust your driving speed to the present conditions! Shift into a lower gear before driving down a steep hill! Turn off independent wheel braking before setting out on transport trips (lock the pedals)! Mixer wagon V-MIX Fill Plus L / LS...
-
Page 21: Hydraulic System
Never use your bare hands to try and detect leaks on account of the risk of contracting a severe infection. Use suitable aids when trying to detect leaks (cleaning spray, special leak detection spray)! Mixer wagon V-MIX Fill Plus L / LS... -
Page 22: Electrical System
Make sure that subsequently installed electrical or electronic components comply with the current revision of the EMC Directive 2004/108/EC and bear the CE mark! Mixer wagon V-MIX Fill Plus L / LS... -
Page 23: Pto Operation
Set the uncoupled drive shaft down onto the designated holder! After removing the drive shaft, slip the protective cover onto the PTO shaft stub! Mixer wagon V-MIX Fill Plus L / LS... - Page 24 Secure tractor and machine against starting up and rolling away inadvertently before cleaning, lubricating or adjusting PTO- powered machines or drive shafts! Mixer wagon V-MIX Fill Plus L / LS...
-
Page 25: Trailed Machines
Use special care when performing welding, flame cutting or drilling operations close to brake lines! Always conduct a brake test following the conclusion of all work steps performed to set up and repair the brake system! Mixer wagon V-MIX Fill Plus L / LS... - Page 26 Hydraulic brake systems are not permissible when traveling on public roadways in Germany! When topping off or changing hydraulic oils, use only the hydraulic oils that have been specified. Observe the applicable regulations when changing the hydraulic oils! Mixer wagon V-MIX Fill Plus L / LS...
-
Page 27: Tyres
When staying on the side of the tyre, use an inflating hose with a minimum length of 1.5 m for easier inflation. Re-tighten all fixing bolts and nuts following the manufacturer's specifications! Mixer wagon V-MIX Fill Plus L / LS... -
Page 28: Mixer Wagon
Pay attention to the position of the cutting blades on the mixing auger! When using power tools, make sure not to move the connecting cables across sharp-edged cutting blades! Mixer wagon V-MIX Fill Plus L / LS... -
Page 29: Cleaning, Maintenance And Repairs
Replacement parts must meet the minimum technical requirements specified by the manufacturer! Compliance is ensured by the use of original spare parts! Observe the maintenance intervals applicable to wear parts! Mixer wagon V-MIX Fill Plus L / LS... -
Page 30: Action-Related Safety Instructions And Important Information
Failure to observe safety instructions marked with the "CAUTION" symbol may potentially result in minor or moderate injury or property damage. Mixer wagon V-MIX Fill Plus L / LS... -
Page 31: Important Information
NOTICE indicates tips on proper use and information that is particularly helpful. This information makes it possible to use all features on the machine in the most efficient way. Mixer wagon V-MIX Fill Plus L / LS... -
Page 32: Warnings And Instructions
Keep everyone away from the danger area of the machine before the parts of the machine are set in motion.” Mixer wagon V-MIX Fill Plus L / LS... - Page 33 Read and follow the instructions provided in the operating manual before servicing and Item 3 mending hydraulic hoses. Seek immediate medical attention if injury from hydraulic oil has occurred. Mixer wagon V-MIX Fill Plus L / LS...
- Page 34 This hazard may cause serious injury, including death. Secure the machine against rolling away inadvertently before uncoupling the machine from the tractor or setting it down. Use the parking brake and/or the chock(s) for this Item 7 purpose. Mixer wagon V-MIX Fill Plus L / LS...
- Page 35 These hazards may cause serious injury, including death. Never climb into the loading space as long as the tractor engine is running with the drive shaft/hydraulic/electronic system attached. Item 11 Mixer wagon V-MIX Fill Plus L / LS...
- Page 36 Risk from moving cutting blades. There is a risk of injury even at a standstill. Item 14 0085357 Staying in the danger area of the cutting unit is prohibited. Never step under the raised cutting unit. Item 15 Mixer wagon V-MIX Fill Plus L / LS...
- Page 37 Item 18 0085356 Risk from stepping into the loading bucket! Do not step into the loading bucket and the mixing hopper. Item 19 Mixer wagon V-MIX Fill Plus L / LS...
- Page 38 Do not reach through the open loading scoop and do not climb into the mixing hopper. Item 22 0088324 Risk from lowering parts Secure the machine or raised moving parts of the machine from being lowered inadvertently. Item 23 Mixer wagon V-MIX Fill Plus L / LS...
- Page 39 These hazards may cause serious injury, including death. The following is prohibited as a general rule: drilling on the frame. drilling out holes already existing on the frame. welding on load-bearing parts. Item 24 Mixer wagon V-MIX Fill Plus L / LS...
-
Page 40: Instructions
Re-tighten screws on a regular basis. necessary. We cannot assume liability for any consequential Item 28 damage. 0091071 Attention! Do not switch intermediate gears Do not switch intermediate gears under load. under load. Item 29 Mixer wagon V-MIX Fill Plus L / LS... - Page 41 A pacemaker may be switched to test mode, causing discomfort. A defibrillator may stop working properly. If wearing these types of devices, keep at a safe distance to the magnets. Warn wearers of such devices against approaching the magnets. Mixer wagon V-MIX Fill Plus L / LS...
-
Page 42: Positioning Of Warnings And Instructions
Safety instructions 2.6.3 Positioning of warnings and instructions The following illustrations show the arrangement of warnings and instructions on the machine. Fig. 2.6-1 and Fig. 2.6-2 Mixer wagon V-MIX Fill Plus L / LS... -
Page 43: Risks Resulting From Failure To Observe The Safety Instructions And Warnings
risk of personal injury from mechanical and chemical impact, danger to the environment due to hydraulic-oil leakage. result in the loss of any and all claims for damages. Mixer wagon V-MIX Fill Plus L / LS... -
Page 44: Loading And Unloading
The mixer wagon is fitted with designated attachment points (1) for loading and unloading the machine by means of a crane and suitable lifting equipment. Fig. 2.7-1 Mixer wagon V-MIX Fill Plus L / LS... -
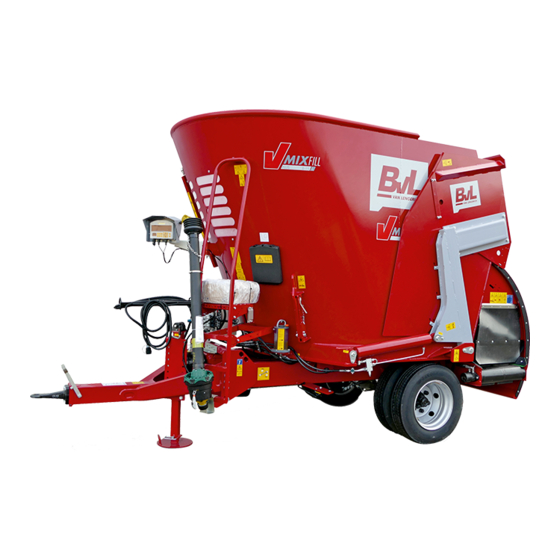
Page 45: Product Description
(13) Cutting unit (4) Control panel with monitor for the tractor (14) Loading fixture (5) Drawbar (6) Drive shaft (7) Counter blade (8) Chassis (9) Brake axle with wheels (10) Planetary gear Mixer wagon V-MIX Fill Plus L / LS... -
Page 46: Safety Devices And Guards
(6) Block ball valve for right dosing gate, securing the open dosing gate against inadvertent lowering Fig. 4.2-2 (7) Guard tube for drive shaft (8) Protective pot for drive shaft Fig. 4.2-3 Mixer wagon V-MIX Fill Plus L / LS... -
Page 47: Supply Lines Between Tractor And Machine
(1) Multi-function light (2) Triangular reflectors (3) Side reflectors (not shown) (4) Speed identification sign (not shown) Fig. 4.4-1 Mixer wagon V-MIX Fill Plus L / LS... -
Page 48: Danger Area And Hazard Areas
in the area of the powered cross conveyor, inside the mixing hopper when the machine is under power, around the discharge spout on machines fitted with a straw blower. Mixer wagon V-MIX Fill Plus L / LS... -
Page 49: Type Plate And Ce Mark
= permissible gross weight in kg perm. axle load = permissible axle load Fig. 4.6-2 in kg Unladen weight in kg perm. drawbar load = permissible drawbar load in kg Mixer wagon V-MIX Fill Plus L / LS... -
Page 50: Technical Data
Brake axle with parking brake and hydraulic service brake up to 8 km/h. Adjustable drawbar for high or low coupling with DIN hitch eye. Work platform for monitoring the mixing process. Inspection window. Welded anti-spill ring for specifically light fodder components. Mixer wagon V-MIX Fill Plus L / LS... -
Page 51: V-Mix Fill Plus 1S L
The technical data specified assumes a speed of 8 km/h during farmyard travel as well as standard equipment. Technical data and equipment options vary in connection with a TÜV certificate for obtaining a road travel permit. Mixer wagon V-MIX Fill Plus L / LS... -
Page 52: V-Mix Fill Plus 2S L
Adjustable drawbar for high or low coupling with DIN hitch eye. Work platform for monitoring the mixing process (ladder only for V-Mix 13, 15, 17, and 18). Inspection window. Welded anti-spill ring for specifically light fodder components. Mixer wagon V-MIX Fill Plus L / LS... -
Page 53: V-Mix Fill Plus 2S L
The technical data specified assumes a speed of 8 km/h during farmyard travel as well as standard equipment. Technical data and equipment options vary in connection with a TÜV certificate for obtaining a road travel permit. Mixer wagon V-MIX Fill Plus L / LS... -
Page 54: V-Mix Fill Plus 1S Ls
Adjustable drawbar for high or low coupling with DIN hitch eye. Work platform for monitoring the mixing process (ladder only for V-Mix 13, 15, 17, and 18). Inspection window. Welded anti-spill ring for specifically light fodder components. Mixer wagon V-MIX Fill Plus L / LS... -
Page 55: V-Mix Fill Plus 1S Ls
The technical data specified assumes a speed of 8 km/h during farmyard travel as well as standard equipment. Technical data and equipment options vary in connection with a TÜV certificate for obtaining a road travel permit. Mixer wagon V-MIX Fill Plus L / LS... -
Page 56: V-Mix Fill Plus 2S Ls
Adjustable drawbar for high or low coupling with DIN hitch eye. Work platform for monitoring the mixing process (ladder only for V-Mix 13, 15, 17, and 18). Inspection window. Welded anti-spill ring for specifically light fodder components. Mixer wagon V-MIX Fill Plus L / LS... -
Page 57: V-Mix Fill Plus 2S Ls
The technical data specified assumes a speed of 8 km/h during farmyard travel as well as standard equipment. Technical data and equipment options vary in connection with a TÜV certificate for obtaining a road travel permit. Mixer wagon V-MIX Fill Plus L / LS... -
Page 58: Information On Noise Generation
Declaration of Conformity and the CE mark on the machine will become void, the manufacturer will not accept any warranty and liability claims as a result of personal injury and property damage, the operator will assume responsibility. Mixer wagon V-MIX Fill Plus L / LS... -
Page 59: Required Tractor Equipment
The hydraulic hose lines are color-coded at the hydraulic plugs: Pressure lines (flow P) are marked red, Return lines (return T) are marked blue. Mixer wagon V-MIX Fill Plus L / LS... - Page 60 Mirrors The tractor used must be equipped with mirrors to allow the driver to have a clear view of the danger areas on both sides of the machine from his tractor's seat. Mixer wagon V-MIX Fill Plus L / LS...
-
Page 61: Design And Function
During mixing, the mixing auger first conveys the loaded fodder components up towards the center of the mixing hopper (3). Next, the fodder slides down along the wall of the mixing hopper, creating a mixing cycle. Mixer wagon V-MIX Fill Plus L / LS... -
Page 62: Manual Gearbox
II Fig. 5.1-3 3. As an alternative, the holder for the control lever (2) can also be attached to the drawbar of the mixer wagon. Fig. 5.1-4 Mixer wagon V-MIX Fill Plus L / LS... -
Page 63: Cutting Blades
Extends the service life of the mixing auger under extensive stress. Perfect for retrofitting mixing augers that show a medium degree of wear. Mixer wagon V-MIX Fill Plus L / LS... -
Page 64: Anti-Spill Ring
The hydraulic cylinders: allow for the counter blades to be swiveled in and out in an infinitely variable manner, are controlled remotely from the tractor using the control panel. Fig. 5.1-9 Mixer wagon V-MIX Fill Plus L / LS... -
Page 65: Filling Funnel For Mineral And Concentrated Feed
Filling tube for molasses Special equipment: The filling tube offers a convenient way to fill liquid components such as liquid yeast or molasses into the mixing hopper while standing on the ground. Fig. 5.1-11 Mixer wagon V-MIX Fill Plus L / LS... -
Page 66: Work Platform And Inspection Window
V-Mix 13/15/17/18 L 2S plus V-Mix 13/15/17/18 LS 2S plus as well as machines that come with the following special equipment: Cross conveyor in the front Fig. 5.2-1 S-turbo in the front Mixer wagon V-MIX Fill Plus L / LS... -
Page 67: Discharge Variants
/ rear. Fig. 5.3-1 5.3.1 Possible arrangement of the doors Door rear conveyor. Fig. 5.3-2 Door front conveyor. Fig. 5.3-3 Mixer wagon V-MIX Fill Plus L / LS... - Page 68 (3) on the scale (4). Scale value Dosing gate closed (no discharged fodder quantity) fully open (largest discharged fodder quantity) Fig. 5.3-4 Fig. 5.3-4-1 Fiber door Fig. 5.3-4-2 Mixer wagon V-MIX Fill Plus L / LS...
- Page 69 • A defibrillator may stop working properly. • If wearing these types of devices, keep at a safe distance to the magnets. • Warn wearers of such devices against approaching the magnets. Mixer wagon V-MIX Fill Plus L / LS...
-
Page 70: Cross Conveyor
(3). The belt speed is adjusted by hand directly at the flow control valve. Position of the toggle Fodder discharge switch Fig. 5.3-7 left left side middle no discharge right right side Mixer wagon V-MIX Fill Plus L / LS... -
Page 71: Adjusting The Belt Speed Of The Conveyor
Use the control dial on the control panel to adjust the belt speed: Control dial Belt speed engaged 0 (OFF / stopped) turn clockwise reduce (MIN) turn counterclockwise increase (MAX) Fig. 5.3-9 Mixer wagon V-MIX Fill Plus L / LS... -
Page 72: Straw Blower
USB stick and PC interface, Fig. 5.5-1 a mobile feed management system with GPRS interface for an automatic data transfer in real time Fig. 5.5-2 5.5.1 Aligning the display of the weighing system Mixer wagon V-MIX Fill Plus L / LS... - Page 73 Insufficient clearance will cause damage to the weighing system and the rear window of the tractors (if present). For additional information, refer to the operating manual of the weighing system provided by the manufacturer. Mixer wagon V-MIX Fill Plus L / LS...
-
Page 74: Weighing System Connections
1= weighing computer 2 = distribution box weighing unit 3 = load cells 4 = additional horn (optional) 5 = additional display (optional) 6 = control panel 7 = distribution (electromagnetic control) Mixer wagon V-MIX Fill Plus L / LS... -
Page 75: 5.6 Camera System / Monitor
To protect it against dust and moisture, the control panel should always be hooked into the designated mount or mounted inside the tractor's cab. Fig. 5.6-3 Mixer wagon V-MIX Fill Plus L / LS... -
Page 76: Control Panel
The machine may be fitted with different control panels depending on the model shipped. The illustrations below show the possible symbols and their meaning. Mixer wagon V-MIX Fill Plus L / LS... -
Page 77: Switching The Control Panel On/Off
Control panel switch (ON) green indicator light on (OFF) green indicator light off 5.7.2 Adjusting the belt speed of the conveyor Position of the control Symbol Belt speed dial (engaged) High (near 0) Mixer wagon V-MIX Fill Plus L / LS... -
Page 78: Opening/Closing The Doors
Switch on the conveyor (front or rear) (hold) Toggle switch position Conveyor belt Tipping a conveyor top/bottom mounted on the side (hold) up/down Switching a conveyor top/bottom mounted on the side (hold) on/off Mixer wagon V-MIX Fill Plus L / LS... -
Page 79: Switching The Work Light On/Off
Lower to support position (hold) bottom Lift to transport position (hold) 5.7.7 Swiveling the counter blades in / out Symbol Toggle switch position Counter blades down/up Swivel in / swivel out (hold) Mixer wagon V-MIX Fill Plus L / LS... -
Page 80: Swiveling The Loading Bucket In / Out
(height of the machine). It goes out: as soon as the cutting unit has left the bottommost position or exceeded the specified height of the machine. Mixer wagon V-MIX Fill Plus L / LS... -
Page 81: Lifting/Lowering The Straw Blower
(hold) Open/close straw down/up blower discharge (hold) opening. 5.7.11 Swiveling ejector hood/tower in / out Symbol Toggle switch position Ejector hood/tower down/up Swiveling the ejector hood. (hold) down/up Turning the tower. (hold) Mixer wagon V-MIX Fill Plus L / LS... -
Page 82: Drawbar
5.8.2 Low hitch The pulling equipment (1) is a drawbar eye (hitch ring) for a towing hook (pick-up hitch) or a towing pin (piton fix). Fig. 5.8-3 Mixer wagon V-MIX Fill Plus L / LS... -
Page 83: Parking Jack
Depending on the equipment of the machine, it is controlled: directly using a double-acting control unit fitted on the tractor or using the control panel. Fig. 5.9-2 Mixer wagon V-MIX Fill Plus L / LS... -
Page 84: Hydraulic System
Always set the actuator levers on the tractor's control unit to the float position. Seek immediate medical attention if injury from hydraulic oil has occurred. Mixer wagon V-MIX Fill Plus L / LS... -
Page 85: Operation Via Control Block
5.10.2.3 Electromagnetic flow control valve The electromagnetic flow control valve is used to continuously adjust the belt speed of the corresponding conveyor. The belt speed is adjusted using the control panel on the tractor. Fig. 5.10-4 Mixer wagon V-MIX Fill Plus L / LS... -
Page 86: Equipment For Road Travel
The full braking power will not be available until after the completion of a few run-in phases. Verify that the brake system functions properly before setting out on transport trips. Mixer wagon V-MIX Fill Plus L / LS... -
Page 87: Hydraulic Working Brake
The machine will decelerate when the operator presses the brake pedal on the tractor. The hydraulic service brake (EU version) is not approved for use in Germany! (1) Hydraulic cylinder of the brake axle Fig. 5.12-1 Mixer wagon V-MIX Fill Plus L / LS... -
Page 88: Dual-Line Service Brake System
(5) Trailer brake valve with braking force regulator (6) Diaphragm brake cylinder (7) Test port diaphragm brake cylinder (8) Compressed air tank (9) Drain valve (10) Test port compressed air tank Fig. 5.12-2 Mixer wagon V-MIX Fill Plus L / LS... - Page 89 can the tractor / machine combination be decelerated gently and gradually, will predominant braking of the machine prevent the tractor / machine combination from jack-knifing. Mixer wagon V-MIX Fill Plus L / LS...
-
Page 90: Single-Line Service Brake System (Not Approved For Use In Germany, Export Only)
3. Trailer brake valve with braking force regulator (4) Diaphragm brake cylinder (5) Test port diaphragm brake cylinder (6) Compressed air tank (7) Drain valve (8) Test port compressed air tank Fig. 5.12-4 Mixer wagon V-MIX Fill Plus L / LS... - Page 91 can the tractor / machine combination be decelerated gently and gradually, will predominant braking of the machine prevent the tractor / machine combination from jack-knifing. Mixer wagon V-MIX Fill Plus L / LS...
-
Page 92: Parking Brake
(1) Crank; in adjusting position (2) (2) Adjusting position (3) Idle position, swiveled by 180° relative to the adjusting position (4) Spindle (5) Cable pull Fig. 5.12-6 Mixer wagon V-MIX Fill Plus L / LS... -
Page 93: Commissioning
Equip the tractor with mirrors to allow the driver to have a clear view of the danger areas on both sides of the machine from the tractor. Mixer wagon V-MIX Fill Plus L / LS... -
Page 94: Traffic Regulations
6 km/h or more. Farming or forestry trailers traveling at less than 25 km/h must be identified with the license plate of a tractor registered to the corresponding business. Mixer wagon V-MIX Fill Plus L / LS... -
Page 95: Checking Suitability Of The Tractor
The tractor must also achieve the braking rate prescribed by the tractor manufacturer with the mounted / hitched machine. For additional information, refer to the included manual: “Tractor and accessory equipment combination.” Mixer wagon V-MIX Fill Plus L / LS... -
Page 96: Securing The Tractor And The Machine Against Inadvertent Start-Up And Rolling Away
7. Secure the machine against rolling away: on level terrain using the parking brake or the chocks, on heavily uneven terrain or slopes using the parking brake and the chocks. Mixer wagon V-MIX Fill Plus L / LS... -
Page 97: Adjusting The Installation Height Of The Drawbar (Work To Be Performed At A Workshop)
When lifting the chassis with a car jack and securing it with trestles, make sure the subsurface is sufficiently stable. If necessary, use stable, load-distributing mats for added support. Mixer wagon V-MIX Fill Plus L / LS... - Page 98 Insufficient clearances will lead to damage on the drive shaft. 6. If necessary, screw the parking jack (5) in place on the drawbar (6). Fig. 6.4-3 Mixer wagon V-MIX Fill Plus L / LS...
-
Page 99: Adjusting The Length Of The Drive Shaft On The Tractor (Work To Be Performed At A Workshop)99
Every adjustment of the drive shaft applies only to the current tractor type. You may have to adjust the drive shaft again if intending to hitch the machine up to a different tractor. Mixer wagon V-MIX Fill Plus L / LS... -
Page 100: Installation Instructions For The Specialty Workshop
Slip on the drive shaft at the tractor. Make sure the latch of the drive shaft has engaged after coupling! Hook in the chain to secure the drive shaft guard on the vehicle. Fig. 6.5-3 Mixer wagon V-MIX Fill Plus L / LS... -
Page 101: Mounting The Control Panel To The Tractor
BvL. Fig. 6.6-2 Operation requires a continuous power supply of 12 V. The 3-pin power socket must be protected by a 16 A fuse. Fig. 6.6-3 Mixer wagon V-MIX Fill Plus L / LS... -
Page 102: Checking The Machine For Proper Operation
4.7 Allow the conveyor belt to run at different belt speeds. 4.8 Lower the lateral conveyor to the work position before lifting it to the transport position. 4.9 Test the effectiveness of the brake system. Mixer wagon V-MIX Fill Plus L / LS... -
Page 103: Getting Started
Commissioning Getting started Mixer wagon V-MIX Fill Plus L / LS... -
Page 104: Coupling And Uncoupling The Machine
When coupling the supply lines, check the way they are routed. The supply lines: must easily yield without tension, kinking or friction when the vehicles negotiate curves, must not rub against foreign objects. Mixer wagon V-MIX Fill Plus L / LS... - Page 105 When uncoupling the machine, always make sure there is enough clearance in front of the machine to allow the tractor to line up with and drive up to the machine the next time the machine is hitched to the tractor. Mixer wagon V-MIX Fill Plus L / LS...
-
Page 106: Lifting The Hydraulic Parking Jack To The Transport Position
“Lower” position until the parking jack has been lowered from the transport position to the support position. The drawbar no longer transmits a drawbar load to the tractor. Mixer wagon V-MIX Fill Plus L / LS... -
Page 107: Coupling The Drawbar
7.2 When using a self-actuated pin coupling, lock the inserted coupling pin positively. 8. Couple the supply lines. 9. Release the parking brake. 10. Lift the parking jack to the transport position. Mixer wagon V-MIX Fill Plus L / LS... - Page 108 8. Lower the drawbar using the parking jack until the towing pin catches the drawbar eye. 9. Fasten and secure the cross bolt above the towing pin. 10. Release the parking brake. 11. Lift the parking jack (if present) to the transport position. Mixer wagon V-MIX Fill Plus L / LS...
-
Page 109: Coupling The Drawbar
5. Secure the tractor against unintended start-up and rolling away. 6. Fasten and secure the downholder (cross bolt) above the towing pin. 7. Uncouple the supply lines. 8. Store the supply lines in the hose cabinet. 9. Pull the tractor forward. Mixer wagon V-MIX Fill Plus L / LS... -
Page 110: Drive Shaft
50 mm. If not, the machine must not be powered by the drive shaft. Mixer wagon V-MIX Fill Plus L / LS... - Page 111 Before switching on the PTO shaft, observe the safety instructions for PTO shaft operation provided in the chapter “General safety instructions”, page 23. Mixer wagon V-MIX Fill Plus L / LS...
-
Page 112: Coupling The Drive Shaft
7. Verify that the clearances around the drive shaft are sufficient in all operating conditions. Insufficient clearances will lead to damage on the drive shaft. Mixer wagon V-MIX Fill Plus L / LS... -
Page 113: Uncoupling The Drive Shaft
2. Pull the lock of the drive shaft off the PTO shaft on the tractor. 3 Set the drive shaft down in the designated holder (1). Fig. 7.2-2 Fig. 7.2-3 Mixer wagon V-MIX Fill Plus L / LS... -
Page 114: Hydraulic Hose Lines
Check if the coupling points on the hydraulic hose lines are seated correctly and tightly. Coupled hydraulic hose lines: must easily yield without tension, kinking or friction when the vehicles negotiate curves, must not rub against foreign objects. Mixer wagon V-MIX Fill Plus L / LS... -
Page 115: Uncoupling The Hydraulic Hose Lines
3. Uncouple the hydraulic plug. 4. Use the protective dust cap to protect the hydraulic plug against dirt. 5. Store the hydraulic brake line in the hose cabinet. Fig. 7.2-5 Mixer wagon V-MIX Fill Plus L / LS... -
Page 116: Hydraulic Service Brake (Eu Version)
1. Remove the dummy socket (1) from the hydraulic socket. 2. Couple the hydraulic socket on the machine side to the hydraulic plug of the hydraulic brake system on the tractor side. 3. Release the parking brake. Mixer wagon V-MIX Fill Plus L / LS... -
Page 117: Dual-Line Service Brake System
Always couple the coupling head of the brake line (yellow) first before coupling the coupling head of the supply line (red). The service brake of the machine releases immediately from the brake position as soon as the red coupling head has been coupled. Mixer wagon V-MIX Fill Plus L / LS... - Page 118 2. Loosen the coupling head of the supply line (red). 3. Loosen the coupling head of the brake line (yellow). 4. Fasten the coupling heads inside the dummy couplings. 5. Close the covers of the coupling heads on the tractor. Mixer wagon V-MIX Fill Plus L / LS...
- Page 119 The supply pressure from the air tank brakes the machine. 5. Apply the parking brake on the maneuvering vehicle. 6. Apply the parking brake on the machine. 7. Uncouple machine and maneuvering vehicle. Mixer wagon V-MIX Fill Plus L / LS...
-
Page 120: Single-Line Service Brake System (Not Approved For Use In Germany, Export Only)120
2. Loosen the coupling head of the supply line (green). 3. Fasten the coupling head inside the dummy coupling. 4. Close the covers of the coupling heads on the tractor. Mixer wagon V-MIX Fill Plus L / LS... - Page 121 The supply pressure from the air tank brakes the machine. 5. Apply the parking brake on the maneuvering vehicle. 6. Apply the parking brake on the machine. 7. Uncouple machine and maneuvering vehicle. Mixer wagon V-MIX Fill Plus L / LS...
-
Page 122: Parking Brake
1. Swivel the crank (1) 180° from the idle position (3) to the adjusting position (2). 2. Turn the crank (1) clockwise and use the cable pull (5) to apply the parking brake (tightening the parking brake requires approx. 40 kg of hand force). Mixer wagon V-MIX Fill Plus L / LS... -
Page 123: Settings
Secure tractor and machine against starting up and rolling away inadvertently before setting up the machine when hitched to the tractor. Wait until the machine has come to a complete standstill before entering the danger area of the machine. Mixer wagon V-MIX Fill Plus L / LS... -
Page 124: List Of Settings
The counter blades are swung in or out by hand and fixed in place at one of the three possible positions by inserting the bolt (2) into the corresponding hole. For more information, see chapter "5.1.4 Counter blades", page 64. Mixer wagon V-MIX Fill Plus L / LS... - Page 125 The mechanical, two-position parking jack (7) with spindle adjustment can be mounted at different heights on the drawbar and can be adjusted using the hand crank. For more information, see chapter "5.9 Parking jack", page 83. Mixer wagon V-MIX Fill Plus L / LS...
- Page 126 (11) until the blades stop moving. The pressure relief valve will now respond. Loosen the adjusting screw by approx. ½ turn (corresponds to approx. 15-20 bar) until the blades run properly again. Re-tighten the lock nut. Mixer wagon V-MIX Fill Plus L / LS...
-
Page 127: Use Of The Machine
PTO shaft of the tractor. CAUTION Risks from component failure may arise when the overload coupling responds! Switch off the tractor's PTO shaft if the overload coupling responds. This will prevent damage to the overload coupling. Mixer wagon V-MIX Fill Plus L / LS... -
Page 128: Filling The Mixer Wagon
When loading any additional feeding stuff (e.g. mineral feed) into the mixing hopper, do so only from the platform or using the filling funnel (special equipment). Mixer wagon V-MIX Fill Plus L / LS... - Page 129 drive components may sustain mechanical damage. Depending on the loaded fodder components, this may already occur at load levels that will not cause the shear bolt to shear off, Mixer wagon V-MIX Fill Plus L / LS...
- Page 130 20 cm above the clamp (blue LED ( 3 ) inside the control panel goes out after the cutting unit has been lifted). Fig. 9.1-3 Mixer wagon V-MIX Fill Plus L / LS...
- Page 131 13. The final mixing process varies heavily with the fodder components used. Long- stemmed fodder components that need to be cut require a longer mixing process. As a general rule, approx. 5 minutes should suffice for completion. Fig. 9.1-6 Mixer wagon V-MIX Fill Plus L / LS...
-
Page 132: Recommended Order During Filling
7. Fodder components with a high water content, e.g. brewer's grains, potato pulp or sugar beet pulp. 8. Liquid components via the filling funnel used for mineral feed or the filling tube for molasses, e.g. liquid yeast, molasses. Mixer wagon V-MIX Fill Plus L / LS... -
Page 133: Mixing
Sharp cutting blades reduce the necessary drive power of the mixing auger. Sharpen the cutting blades on a regular basis; for more information, see 153. Mixer wagon V-MIX Fill Plus L / LS... -
Page 134: Fodder Discharge
A high drive speed of the mixing auger will result in a more uniform depositing of the fodder along the feed alley. Mixer wagon V-MIX Fill Plus L / LS... -
Page 135: Rear Conveyor
8. Close the gate using the switch (4) inside the control panel. 9. Run the conveyor until it is completely empty. 10. Switch off the conveyor using the switch (5) inside the control panel. 11. Deactivate the tractor's hydraulic system. Mixer wagon V-MIX Fill Plus L / LS... - Page 136 Use of the machine Fig. 9.3-3 Mixer wagon V-MIX Fill Plus L / LS...
-
Page 137: Front Conveyor
9. Run the conveyor until it is completely Fig. 9.3-6 empty. 10. Switch off the conveyor using the switch (5) inside the control panel. 11. Deactivate the tractor's hydraulic system. Mixer wagon V-MIX Fill Plus L / LS... -
Page 138: Removing Clogs
9. Switch on the PTO shaft. 10. Operate the mixing auger at the desired drive speed. 11. Open the dosing gate to the desired opening width and resume discharging the fodder. Fig. 9.3-8 Mixer wagon V-MIX Fill Plus L / LS... -
Page 139: Transport Trips
Prior to transport trips: lock pivoting parts of the machine when in the transport position, check if pivoting parts of the machine are locked in place when in the transport position. Mixer wagon V-MIX Fill Plus L / LS... - Page 140 If necessary, drive the machine with the mixing hopper only partially filled. WARNING Danger of falling when hitching a ride on the machine! Hitching a ride on the machine is prohibited. Mixer wagon V-MIX Fill Plus L / LS...
-
Page 141: Cleaning, Maintenance And Repairs
The following is prohibited as a general rule: drilling on the frame / chassis, drilling out holes already existing on the frame / chassis, welding on load-bearing parts. Mixer wagon V-MIX Fill Plus L / LS... -
Page 142: Cleaning
300 mm between the cleaning jet of the high pressure sprayer or steam cleaner and the machine, observe the safety regulations on how to handle high pressure sprayers. Mixer wagon V-MIX Fill Plus L / LS... -
Page 143: Lubricating
Lubrication intervals of the drive shafts The lubrication intervals of the main drive shaft are indicated in the diagram on the left. Further information can be found in the operating instructions issued by the drive shaft manufacturer. Mixer wagon V-MIX Fill Plus L / LS... -
Page 144: Replacing The Shear Bolt Of The Shear Bolt Coupling
6. Turn the drive train so that the holes of the coupling halves (2 and 3) align. 7. Replace the shear bolts (1) with a screw of equal quality. Fig. 11.2-1 8. Close the assembly opening. 9. Couple the drive shaft. Mixer wagon V-MIX Fill Plus L / LS... -
Page 145: 11.2.4 Lubrication Schedule
Cleaning, maintenance and repairs 11.2.4 Lubrication schedule Fig. 11.2-2 Mixer wagon V-MIX Fill Plus L / LS... -
Page 146: Oil Change On Planetary Gear And Gearbox
WARNING If gear oil is spilled during an oil change, the resulting slip hazards can cause personal injury! Clean up spilled oil immediately with a binding agent. Mixer wagon V-MIX Fill Plus L / LS... -
Page 147: Gearbox Bvl 0090273 Ecs 1512
15. Close the lid (1) on the oil tank. 16. Check the oil level after 5 hours of operation. The oil level must lie between the two marks, refill if necessary. Fig.11.3.1 Mixer wagon V-MIX Fill Plus L / LS... -
Page 148: Gearbox Bvl 0095277 Pga 2502
15. Close the lid (1) on the oil tank. 16. Check the oil level after 5 hours of operation. The oil level must lie between the two marks, refill if necessary. 11.3.1 Mixer wagon V-MIX Fill Plus L / LS... -
Page 149: Gardini Bruno Ap 502
This function has been integrated as an additional element in the control panel of the regular electromagnetic control unit. An oil change for this gearbox must be performed as described in item 1-10. Mixer wagon V-MIX Fill Plus L / LS... -
Page 150: Access To The Mixing Hopper
Before entering the mixing hopper, turn the mixing auger such that the cutting blades are pointing away from the door. Mixer wagon V-MIX Fill Plus L / LS... - Page 151 9.1 Swing the cover apron back. 9.2 Slightly raise the cover apron to slide the flat iron of the cover apron into the bracket. 9.3 Screw the cover apron to the mixing hopper. Mixer wagon V-MIX Fill Plus L / LS...
-
Page 152: Installation And Positioning Of The Mixing Augers
Excessive torque may, furthermore, have a negative impact on the mixing behavior and the discharge at the gate valve. The augers need to be installed in the following position and, naturally, be interlinked accordingly in the drive train via the drive shafts. V-Mix 2S V-Mix 3S Mixer wagon V-MIX Fill Plus L / LS... -
Page 153: Cutting Blades Of The Mixing Auger
3. Carefully sharpen the cutting blades on the smooth side. 4. Remove all foreign objects (tools, etc.) from the mixing hopper. 5. After the work is completed, exit the mixing hopper via the door. Fig. 11.6-1 Mixer wagon V-MIX Fill Plus L / LS... -
Page 154: Swiveling/Replacing Cutting Blades
6. Tighten all 3 screws (2) of the cutting blade Fig. 11.6-2 bolt joints. 7. Remove all foreign objects (tools, etc.) from the mixing hopper. 8. After the work is completed, exit the mixing hopper via the door. Mixer wagon V-MIX Fill Plus L / LS... -
Page 155: Cutting Unit
When new, the tips of the moving blade will protrude 2-3mm over those of the stationary blade. Fig. 11.6-4 Mixer wagon V-MIX Fill Plus L / LS... -
Page 156: Conveyor Belt
The alignment of the conveyor belt is Fig. 11.7-2 not straight unless the clearance A is identical on both sides of the conveyor belt. 4. Re-tighten both lock nuts (1) firmly. Mixer wagon V-MIX Fill Plus L / LS... -
Page 157: Tyres
If necessary, use stable, load-distributing mats for added support. Stay out from under a raised, unsecured machine. Mixer wagon V-MIX Fill Plus L / LS... - Page 158 +20+0 M 18x1.5 – 270 +60+0 M 22x1.5 – 450 5 Check if the wheel nuts are seated firmly every 10 operating hours. Re-tighten the wheel nuts if necessary. Fig. 11.8-2 Mixer wagon V-MIX Fill Plus L / LS...
-
Page 159: Hydraulic System
Dispose of waste oil according to regulations. If experiencing problems with disposal, contact your oil supplier. Store hydraulic oil in a place inaccessible to children. Make sure no hydraulic oil seeps into the soil or water. Mixer wagon V-MIX Fill Plus L / LS... -
Page 160: Markings On Hydraulic Hose Lines
The maximum period of use of 6 years has been exceeded. The period of use is derived from the date on which the hydraulic hose line was manufactured plus a period of 6 years. Mixer wagon V-MIX Fill Plus L / LS... -
Page 161: Installing And Removing Hydraulic Hose Lines
Fasten the hydraulic hose lines at the designated attachment points. Avoid any additional hose brackets which impair the natural movement and length adjustment of the hydraulic hose lines. It is prohibited to refinish hydraulic hose lines. Mixer wagon V-MIX Fill Plus L / LS... -
Page 162: Tightening Torques For Bolt Joints
M 22 M 22x1.5 1050 M 24 1000 1200 M 24x2 1100 1300 M 27 1050 1500 1800 M 27x2 1150 1600 1950 M 30 1450 2000 2400 M 30x2 1600 2250 2700 Mixer wagon V-MIX Fill Plus L / LS... -
Page 163: Faults
Polarity of the power socket Reconnect the power socket, operational, but the weighing reversed reverse (+ / -) system is without function Fuse in the junction box defective Replace fuse (1 A) Mixer wagon V-MIX Fill Plus L / LS... - Page 164 Sharpen blades, replace if Cutting performance poor or necessary decreasing Reduced blade stroke due to Set up the pressure relief valve altered switching pressure for the feed cylinders of the cutting unit correctly Mixer wagon V-MIX Fill Plus L / LS...
-
Page 165: Appendix
W 3202-100S Feed cylinder Function 3 Door Single control disk W 3202-100S Function 4 Throttle valve Loading scoop Single control disk Loading scoop cylinder W 3202-100S Terminal plate W 3202-110S Fig. 13.1-1 Mixer wagon V-MIX Fill Plus L / LS... -
Page 166: Electric Circuit Diagram Ls With Options
Important information 13.1.2 Electric circuit diagram LS with options Fig. 13.1-2 Mixer wagon V-MIX Fill Plus L / LS... -
Page 167: Important Information
The front axle of the tractor must always be loaded with at least 20 % of the dead weight of the tractor. The tractor must also achieve the braking rate prescribed by the tractor manufacturer with the mounted / hitched machine. Mixer wagon V-MIX Fill Plus L / LS... -
Page 168: Calculation Of The Actual Values
See operating manual or vehicle registration certificate of the tractor or measure Distance between rear axle middle and See operating manual or vehicle registration middle of lower link connection certificate of the tractor or measure Mixer wagon V-MIX Fill Plus L / LS... -
Page 169: 14.2.2 Minimum Ballasting Of The Tractor
See the information from the tyre manufacturer for this purpose. Enter the doubled value of the load capacity of a tyre of the front and rear axle in the table (chapter 1.2.7). Mixer wagon V-MIX Fill Plus L / LS... -
Page 170: 14.2.7 Table
Gross weight Front axle load Rear axle load A front weight must be used which corresponds to at least the minimum required front ballasting (G V min Mixer wagon V-MIX Fill Plus L / LS... -
Page 171: Requirements For The Operation Of Tractors With Trailed Machines
Towing pin (piton fix) Drawbar eye (hitch ring) ISO ISO 6489-4 5692-1 4000 kg - 40 km/h Ball coupling 80 Ball bracket 80 2000 kg - > 40 km/h Mixer wagon V-MIX Fill Plus L / LS... -
Page 172: Calculating The Actual D Value For The Combination To Be Coupled
With differing values on the type plates of the attachment support and drawbar coupling, the lower value is authoritative. for the pulling equipment, directly on the type plate of the pulling equipment. Mixer wagon V-MIX Fill Plus L / LS... -
Page 173: Index
Conveyor belt ........72, 128 Manual gearbox ........64, 127 Conveyor belt - maintenance ...... 159 Maximum operating pressure ....... 61 Counter blades ........66, 127 Mirrors ............62 Coupling and uncoupling the machine ..18 Mixer wagon V-MIX Fill Plus L / LS... - Page 174 Type plate ............49 Tyres .............. 27 Use of the machine ........19 Warnings ............32 Warnings - explanation ........32 Work to be performed at a workshop .... 13 Workplace, driver's position ......14 Mixer wagon V-MIX Fill Plus L / LS...
Need help?
Do you have a question about the V-MIX Fill Plus L and is the answer not in the manual?
Questions and answers