Table of Contents
Advertisement
Advertisement
Table of Contents

Related Manuals for Lexmark X2600


Summary of Contents for Lexmark X2600
- Page 1 2600 Series User's Guide 2008 www.lexmark.com...
-
Page 3: Table Of Contents
Contents Safety information...7 Introduction...8 Finding information about the printer...8 Setting up the printer...10 Bypassing security warnings during software installation...10 Setting up the printer as a copier only...10 Understanding the parts of the printer...15 Using the printer control panel...17 Understanding the printer software...19 Installing printer software...19 Installing the optional XPS driver (Windows Vista users only)...19 Using the Windows printer software...20... - Page 4 Maintaining print cartridges...44 Installing print cartridges... 44 Removing used print cartridges... 45 Refilling print cartridges... 46 Using genuine Lexmark print cartridges... 46 Wiping the print cartridge nozzles and contacts ... 46 Preserving the print cartridges ... 47 Cleaning the scanner glass...47 Cleaning the exterior of the printer...48...
- Page 5 Notices...57 Product information...57 Edition notice...57 European EC directives conformity statement for radio products...60 Power consumption...63 Index...68...
-
Page 7: Safety Information
This product is designed, tested, and approved to meet strict global safety standards with the use of specific Lexmark components. The safety features of some parts may not always be obvious. Lexmark is not responsible for the use of other replacement parts. -
Page 8: Introduction
Where to find (rest of world) Telephone numbers and support hours vary by country or region. Visit our Web site at www.lexmark.com. Select a country or region, and then select the Customer Support link. Note: For additional information about contacting Lexmark, see the printed warranty that came with your printer. -
Page 9: Limited Warranty
Where to find (rest of world) E-mail support varies by country or region, and may not be available in some instances. Visit our Web site at www.lexmark.com. Select a country or region, and then select the Customer Support link. Note: For additional information about contacting Lexmark, see the printed warranty that came with your printer. -
Page 10: Setting Up The Printer
Setting up the printer Bypassing security warnings during software installation Third-party applications, including antivirus, security, and firewall programs may alert you about the printer software being installed. For your printer to work properly, allow the printer software to be installed on your computer. Setting up the printer as a copier only Use the following instructions if you do not want to connect the printer to a computer. - Page 11 Remove all tape and packing material from all areas of the printer. Extend the paper exit tray, and then raise the paper support. Extend the paper guides. Connect the power cord, and then make sure the power is on.
- Page 12 Open the printer, and then press down on the levers. Remove the tape from the black cartridge, insert the cartridge in the left carrier, and then close the black cartridge carrier lid.
- Page 13 Remove the tape from the color cartridge, insert the cartridge in the right carrier, and then close the color cartridge carrier lid. Close the printer, and then load paper.
- Page 14 Press and hold the button for three seconds. An alignment page prints. Place the printed page on the scanner glass. Press the button.
-
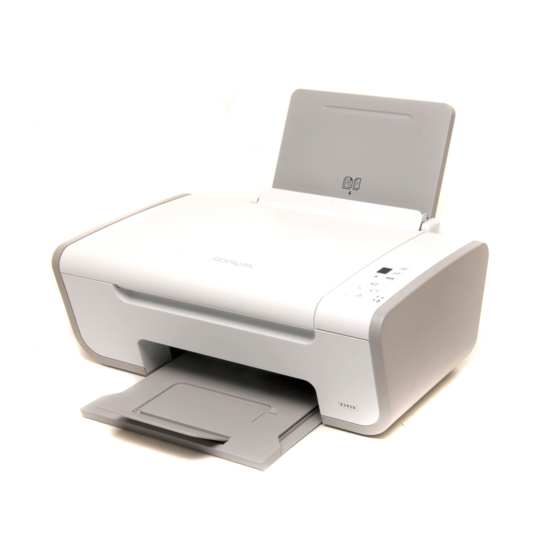
Page 15: Understanding The Parts Of The Printer
Discard the alignment page. Notes: • The alignment page may differ from the one shown. • Streaks on the alignment page are normal, and do not indicate a problem. Understanding the parts of the printer Use the Paper support Load paper. Printer control panel Operate the printer. - Page 16 Use the Paper guide Keep paper straight when feeding. Scanner glass Copy, scan, fax, or remove an item. Use the Scanner unit Access the print cartridges. Scanner support Hold up the scanner unit. Print cartridge carrier Install, replace, or remove a print cartridge. Power supply with port Connect the printer to a power source.
-
Page 17: Using The Printer Control Panel
Using the printer control panel Press Start a color copy of a document or photo. Start a black-and-white copy of a document or photo. Start a 4 x 6-inch color photo copy. Scan a document or photo to the computer. Load or eject paper. - Page 18 Check The display Determine the number of copies to be printed. • Determine if the color print cartridge needs to be replaced. • Determine if the color print cartridge is missing or invalid. light • Determine if the black or photo print cartridge needs to be replaced. •...
-
Page 19: Understanding The Printer Software
Follow the instructions on the screens. Using the World Wide Web Go to the Lexmark Web site at www.lexmark.com. From the home page, navigate through the menu selection, and then click Drivers & Downloads. Choose the printer and the printer driver for your operating system. -
Page 20: Using The Windows Printer Software
Add, edit, or delete contacts in the built-in phone book. • Access the Lexmark Fax Setup Utility. Use the Lexmark Fax Setup Utility to set the Speed Dial and Group Dial numbers, set Ringing and Answering, and print fax history and status reports. -
Page 21: Using The Macintosh Printer Software
Use the Printing Preferences Lexmark Wireless Setup Utility Using the Macintosh printer software Use the Print dialog Adjust the print settings and schedule print jobs. Printer Services dialog • • • • • Applications are also installed with the printer software during installation. These applications are saved in the printer folder that appears on the Finder desktop after installation. - Page 22 Use the Lexmark Printer Utility Lexmark Wireless Setup Assistant Set up the printer on a wireless network. Note: Your printer may not come with these applications, depending on the features of the printer that you purchased. • Get help with cartridge installation.
-
Page 23: Loading Paper And Original Documents
Loading paper and original documents Loading paper Make sure: • You use paper designed for inkjet printers. • If you are using photo, glossy, or heavyweight matte paper, you load it with the glossy or printable side facing you. (If you are not sure which side is the printable side, see the instructions that came with the paper.) •... - Page 24 Load up to 10 envelopes 25 sheets of labels 50 transparencies Make sure • The print side of the envelopes faces you. • The stamp location is in the upper left corner. • The envelopes are designed for use with inkjet printers. •...
- Page 25 Load up to 10 iron-on transfers 25 greeting cards 25 index cards 25 photo cards 25 postcards custom-size paper Make sure • You follow the loading instructions that came with the iron-on transfers. • The print side of the transfers faces you. •...
-
Page 26: Loading Original Documents On The Scanner Glass
Load up to banner paper Loading original documents on the scanner glass You can scan and then print photos, text documents, magazine articles, newspapers, and other publications. You can scan a document for faxing. Note: The maximum scan area for the scanner glass is 216 x 297 mm (8.5 x 11.7 in.). Open the top cover. - Page 27 Place the original document or item facedown on the scanner glass in the lower right corner. Note: Photos should be loaded as shown. Close the top cover to avoid dark edges on the scanned image.
-
Page 28: Printing
Click Print. Printing Web pages If you chose to install the Lexmark Toolbar software for your Web browser, then you can use it to create a printer-friendly version of any Web page. Notes: •... -
Page 29: Printing Multiple Copies Of A Document
Select a print option to print the page. You can also adjust settings or preview the page before printing. Printing multiple copies of a document Using Windows With a document open, click File Click Properties, Preferences, Options, or Setup. From the Copies section of the Print Setup tab, enter the number of copies that you want to print. Click OK to close any printer software dialogs. -
Page 30: Printing The Last Page First (Reverse
Click Print. Note: To prevent smudging when printing photos, remove each photo as it exits the printer, and then let it dry before stacking. Printing the last page first (reverse page order) Using Windows With a document open, click File Click Properties, Preferences, Options, or Setup. -
Page 31: Pausing Print Jobs
Click OK to close any printer software dialogs. Click OK or Print. Using Macintosh With a document open, click File From the print options pop-up menu, choose Layout. • From the Pages per Sheet pop-up menu, choose the number of page images that you want to print on one sheet. -
Page 32: Canceling Print Jobs
Using Macintosh While the document is printing, click the printer icon in the Dock. The print queue dialog appears. Do one of the following: • If you want to pause a particular print job, choose the document name, and then click Hold. •... -
Page 33: Printing Specialty Documents
Photo Paper—A high-quality photo paper specifically designed for Lexmark inkjet printers, but compatible with all inkjet printers. It is used specifically for printing professional quality photos with a glossy finish. It is best when used with genuine Lexmark evercolor 2 ink, providing photos that are fade- and water-resistant. -
Page 34: Printing Envelopes
Using Macintosh Customize the settings as needed in the Page Setup dialog. With a photo open, choose File From the “Format for” pop-up menu, choose the printer. From the Paper Size pop-up menu, choose the paper size loaded. Choose an orientation. Click OK. -
Page 35: Printing Labels
Using Macintosh Customize the settings as needed in the Page Setup dialog. With a document open, click File From the “Format for” pop-up menu, choose the envelope size. If no size matches the size of the envelope, then set a custom size. Select an orientation. -
Page 36: Printing On Custom-Size Paper
Tips on loading label sheets • Make sure the top of the label sheet feeds into the printer first. • Make sure the adhesive on the labels does not extend to within 1 mm of the edge of the label sheet. •... -
Page 37: Printing Other Specialty Documents
All Programs, and then select the printer program folder from the list. Programs or All Programs, and then select the printer program folder from YYYY Lexmark, and then select your printer model. Print. Restore a Profile, and then select the name of the profile that... - Page 38 Using Macintosh The Presets pop-up menu lets you save the print settings you use often. When print settings are saved into a Preset, there is no need to adjust the print settings for every print job. With a document open, click File From the print options pop-up menu, choose and adjust the settings.
-
Page 39: Copying
Copying Making a copy Load paper. Load an original document facedown on the scanner glass. If you want to print more than one copy, then press display. Press to start a color copy or Copying 4 x 6 photos Load a 4 x 6 in. (10 x 15 cm) photo card with the glossy or printable side facing you. (If you are not sure which side is the printable side, then see the instructions that came with the paper.) Place a photo facedown on the scanner glass in the lower right corner. -
Page 40: Scanning
In Windows Vista, click • In Windows XP, click Start list. Click Lexmark Productivity Studio. On the main screen, click Scan. Follow the instructions on the screen. All Programs, and then select the printer program folder from the list. Programs or All Programs, and then select the printer program folder from the... -
Page 41: Canceling Scan Jobs
To cancel a job being scanned on the scanner glass, go to the printer control panel, and then press Using Windows To cancel a scan job started in the Lexmark Productivity Studio or Lexmark FastPics, open the software, and then follow the instructions on the screen. -
Page 42: Faxing
The printer is connected to a computer with an active fax modem, and both the printer and computer are on. • The Lexmark Fax Solutions and Lexmark Productivity Studio software are installed on your computer. Installing these programs is optional. If you have not installed these programs, uninstall and reinstall the printer software. - Page 43 From the “I Want To” menu, click Adjust speed dial list and other fax settings. Click the Ringing and Answering tab. From the “Automatically answer incoming calls as a fax” area, select On from the Auto Answer drop-down list. To turn the Auto Answer feature on and off at scheduled times, select the settings that you want from the drop-down lists.
-
Page 44: Maintaining The Printer
Maintaining the printer Maintaining print cartridges Installing print cartridges Open the printer, and then press down on the cartridge carrier levers. Remove the used print cartridge or cartridges. If you are installing new print cartridges, remove the tape from the back and bottom of the black cartridge, insert the cartridge in the left carrier, and then close the black cartridge carrier lid. -
Page 45: Removing Used Print Cartridges
Remove the tape from the back and bottom of the color cartridge, insert the cartridge in the right carrier, and then close the color cartridge carrier lid. Warning—Potential Damage: Do not touch the gold contact area on the back or the metal nozzles on the bottom of the cartridge. -
Page 46: Refilling Print Cartridges
Refilling print cartridges The warranty does not cover repair of failures or damage caused by a refilled cartridge. Lexmark does not recommend use of a refilled cartridge. Refilling a cartridge can affect print quality and may cause damage to the printer. For best results, use Lexmark supplies. -
Page 47: Preserving The Print Cartridges
Gently hold the nozzles against the cloth for about three seconds, and then wipe in the direction shown. Using another clean section of the cloth, gently hold the cloth against the contacts for about three seconds, and then wipe in the direction shown. With another clean section of the cloth, repeat step 3 and step 4, and then let the nozzles and contacts dry completely. -
Page 48: Cleaning The Exterior Of The Printer
Warning—Potential Damage: Using a damp cloth to clean the interior may cause damage to your printer. Make sure the paper support and paper exit tray are dry before beginning a new print job. Ordering supplies Ordering print cartridges Lexmark 2600 Series models Item Black cartridge Black cartridge... -
Page 49: Ordering Paper And Other Supplies
Ordering paper and other supplies To purchase supplies or to locate a dealer near you, visit our Web site at www.lexmark.com. For best results when printing photos or other high-quality images, use Lexmark Photo Paper or Lexmark PerfectFinish Photo Paper and Lexmark print cartridges. -
Page 50: Troubleshooting
Troubleshooting Using the printer troubleshooting software (Windows only) The Lexmark Service Center provides step-by-step troubleshooting help and contains links to printer maintenance tasks and customer support. To open the Lexmark Service Center, use one of these methods: Method 1 If it appears on an error message dialog, click the For additional assistance, use the Lexmark Service Center link. -
Page 51: Software Did Not Install
Plug the power cord into an electrical outlet that other electrical devices have been using. Press to turn the printer on. Software did not install If you encountered problems while installing, or if your printer does not appear in the list in the Printers folder or as a printer option when sending a print job, you can try uninstalling and reinstalling the software. -
Page 52: Page Does Not Print
If necessary, double-click setup.exe. Follow the instructions on the computer screen to install the software. When the installation is completed, enable the security software again. Page does not print These are possible solutions. Try one or more of the following: HECK MESSAGES If an error message appears, then resolve the error before trying to print again. - Page 53 Under Hardware and Sound, click Printer. In Windows XP Click Start. Click Printers and Faxes. In Windows 2000 Click Start. Click Settings Printers. Double-click the printer. Click Printer. • Make sure no check mark appears next to Pause Printing. • If a check mark does not appear next to Set As Default Printer, then you must select the printer for each file that you want to print.
-
Page 54: Removing And Reinstalling The Software
If you want to set the printer as the default printer: Go back to the Printer List dialog, and then select the printer. Click Make Default. ISCONNECT AND RECONNECT POWER SUPPLY Press to turn off the printer. Disconnect the power cord from the wall outlet. Remove the power supply from the printer. -
Page 55: Enabling The Usb Port In Windows
Insert the installation CD, and then follow the instructions on the computer screen to reinstall the software. If the software still does not install correctly, visit our Web site at www.lexmark.com to check for the latest software. In all countries or regions except the United States, select your country or region. -
Page 56: Solving Printer Power Problems
Click the plus sign (+) beside Universal Serial Bus Controller. If USB Host Controller and USB Root Hub are listed, then the USB port is enabled. For more information, see the computer documentation. Solving printer power problems The printer and the computer cannot exchange data. These are possible solutions. -
Page 57: Notices
The following paragraph does not apply to any country where such provisions are inconsistent with local law: LEXMARK INTERNATIONAL, INC., PROVIDES THIS PUBLICATION “AS IS” WITHOUT WARRANTY OF ANY KIND, EITHER EXPRESS OR IMPLIED, INCLUDING, BUT NOT LIMITED TO, THE IMPLIED WARRANTIES OF MERCHANTABILITY OR FITNESS FOR A PARTICULAR PURPOSE. -
Page 58: Licensing Notices
Note: To assure compliance with FCC regulations on electromagnetic interference for a Class B computing device, use a properly shielded and grounded cable such as Lexmark part number 1021294 for USB attach. Use of a substitute cable not properly shielded and grounded may result in a violation of FCC regulations. -
Page 59: Exposure To Radio Frequency Radiation
Exposure to radio frequency radiation The following notice is applicable if your printer has a wireless network card installed. The radiated output power of this device is far below the radio frequency exposure limits of the FCC and other regulatory agencies. A minimum separation of 20 cm (8 inches) must be maintained between the antenna and any persons for this device to satisfy the RF exposure requirements of the FCC and other regulatory agencies. -
Page 60: European Community (Ec) Directives Conformity
A declaration of conformity with the requirements of the directives has been signed by the Director of Manufacturing and Technical Support, Lexmark International, Inc., S.A., Boigny, France. This product satisfies the Class B limits of EN 55022 and safety requirements of EN 60950. - Page 61 Alulírott, Lexmark International, Inc. nyilatkozom, hogy a termék megfelel a vonatkozó alapvetõ követelményeknek és az 1999/5/EC irányelv egyéb elõírásainak. Íslenska Hér með lýsir Lexmark International, Inc. yfir því að þessi vara er í samræmi við grunnkröfur og aðrar kröfur, sem gerðar eru í tilskipun 1999/5/EC. Italiano Con la presente Lexmark International, Inc.
-
Page 62: Noise Emission Levels
Diretiva 1999/5/CE. Slovensky Lexmark International, Inc. týmto vyhlasuje, že tento produkt spĺňa základné požiadavky a všetky príslušné ustanovenia smernice 1999/5/ES. Slovensko Lexmark International, Inc. izjavlja, da je ta izdelek v skladu z bistvenimi zahtevami in ostalimi relevantnimi določili direktive 1999/5/ES. Svenska Härmed intygar Lexmark International, Inc. -
Page 63: Power Consumption
The power consumption levels listed in the previous table represent time-averaged measurements. Instantaneous power draws may be substantially higher than the average. Values are subject to change. See www.lexmark.com for current values. Power Saver This product is designed with an energy-saving mode called Power Saver. The Power Saver Mode is equivalent to the EPA Sleep Mode. - Page 64 Lexmark that cannot be excluded or modified. If any such provisions apply, then to the extent Lexmark is able, Lexmark hereby limits its liability for breach of those provisions to one of the following: replacement of the Software Program or reimbursement of the price...
- Page 65 Lexmark. You may not separate the components of the Software Program for use on more than one computer. You agree that you will not Use the Software Program, in whole or in part, in any manner that has...
- Page 66 Lexmark's limited warranty, or for any other claim whatsoever related to the subject matter of this Agreement, Lexmark's and its suppliers’ liability for all types of damages, regardless of the form of action or basis (including contract, breach, estoppel, negligence, misrepresentation, or tort), shall be limited to the greater of $5,000 or the money paid to Lexmark or its Authorized remarketers for the license hereunder for the Software Program that caused the damages or that is the subject matter of, or is directly related to, the cause of action.
- Page 67 License Agreement, any other written agreement signed by you and Lexmark relating to your Use of the Software Program). To the extent any Lexmark policies or programs for support services conflict with the terms of this License Agreement, the terms of this License Agreement shall...
-
Page 68: Index
25 cartridges, print installing 44 ordering 48 preserving 47 removing 45 using genuine Lexmark 46 wiping 46 cleaning exterior of the printer 48 copying 39 4 x 6 photos 39 custom-size paper, loading 25, 36 custom-size paper, printing 36... - Page 69 16 print cartridge carrier 16 print cartridges installing 44 ordering 48 preserving 47 refilling 46 removing 45 using genuine Lexmark 46 wiping 46 print jobs, canceling 32 print settings saving and deleting 37 printer setting up without a computer 10...
Need help?
Do you have a question about the X2600 and is the answer not in the manual?
Questions and answers