
Related Manuals for STIEBEL ELTRON HPA-O 3 CS Plus


Summary of Contents for STIEBEL ELTRON HPA-O 3 CS Plus
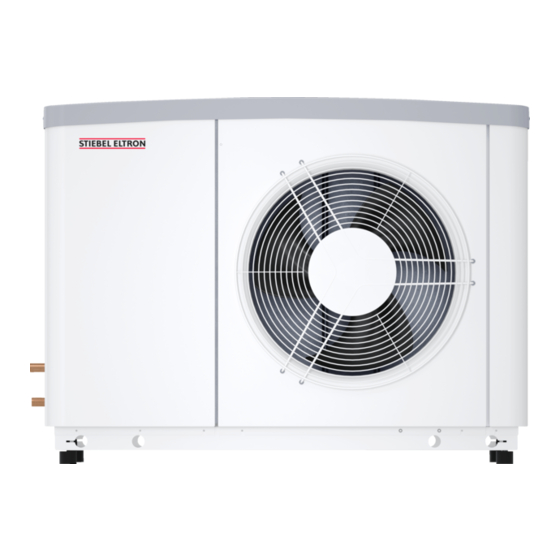
- Page 1 OPERATION AND INSTALLATION Air source heat pump » HPA-O 3 CS Plus » HPA-O 4 CS Plus » HPA-O 6 CS Plus » HPA-O 8 CS Plus...
-
Page 2: Table Of Contents
TABLE OF CONTENTS SPECIAL INFORMATION Appliance handover ���������������������������������������� 19 Shutting down the system �������������������������������� 19 OPERATION 15.1 Standby mode ��������������������������������������������������� 19 General information �����������������������������������������3 15.2 Power interruption ��������������������������������������������� 19 Other applicable documents ���������������������������������� 3 Maintenance ������������������������������������������������ 19 Safety instructions ����������������������������������������������� 3 Other symbols in this documentation �����������������������... -
Page 3: Special Information
SPECIAL INFORMATION | OPERATION General information SPECIAL INFORMATION OPERATION - The appliance may be used by children aged 8 General information and older and persons with reduced physical, sensory or mental capabilities or a lack of ex- The chapters "Special information" and "Operation" are intended for appliance users and qualified contractors. -
Page 4: Other Symbols In This Documentation
OPERATION Safety Other symbols in this documentation Safety Note Intended use General information is identified by the adjacent symbol. The appliance is designed for room heating and cooling within f Read these texts carefully. the application limits given in the specification. The appliance is intended for domestic use. -
Page 5: Appliance Description
OPERATION Appliance description Appliance description Material losses During the defrost cycle, the fan is switched OFF and the Minimum software versions heat pump circuit is reversed. The heat required for de- frosting is drawn from the buffer cylinder. For operation The following minimum software versions are necessary for op- without a buffer cylinder, observe chapter "Menu / Menu eration of the heat pump:... -
Page 6: Settings
OPERATION Settings Heat pump application limit Fault Cause Remedy The fan runs At outside temperatures The heat pump is switched off if the outside temperature falls when the below 10 °C, the fan is below the selected lower application limit for cooling (LIMIT COOL- compressor is regularly started at the switched OFF. -
Page 7: Safety
A gravel bed is an essential requirement for both installation versions. HPA-O 3 CS Plus | HPA-O 4 CS Plus Sound emissions The tested appliance conforms to IEC 61000-3-3. -
Page 8: Minimum Clearances
INSTALLATION Preparation Minimum clearances 9.2.1 Installation in coastal areas >500 m 1 Main wind direction 2 Building, wall or wind protection 3 appliance 4 Air discharge f Ensure that the air intake direction is the same as the main wind direction. If the main wind direction is from the sea (> ≥1000 ≥500 2 % salinity), ensure that the installation is at least 500 m... - Page 9 Example: Gravel bed under T-support SK 2 Example: Gravel bed under wall mounting bracket WK 1 1 Drainage pipe Heat pump 1 Drainage pipe HPA-O 3 CS Plus HPA-O 4 CS Plus Heat pump HPA-O 6 CS Plus HPA-O 3 CS Plus HPA-O 8 CS Plus HPA-O 4 CS Plus HPA-O 6 CS Plus...
- Page 10 2 Air discharge side f Observe the minimum clearance below the appli- 3 Main wind direction ance (see chapter "Preparations / Minimum clear- ances"). Heat pump HPA-O 3 CS Plus HPA-O 4 CS Plus HPA-O 6 CS Plus HPA-O 8 CS Plus ≥200 Material losses The T-support may bend if the heat pump is subject to any lateral load.
-
Page 11: Installing The Supply Lines
Use cables with the relevant cross-sections. Observe the ap- buffer cylinder is not required. plicable national and regional regulations. We recommend the use of a buffer cylinder to ensure trouble-free HPA-O 3 CS Plus | HPA-O 4 CS Plus appliance operation. Fuse protec- Assignment... -
Page 12: Installation
INSTALLATION Installation 10.3 Flow and return connection f If you have selected a lower fuse protection for the compres- sor, you will need to limit the maximum power consumption. In the COMMISSIONING / COMPRESSOR menu, adjust the Material losses MAXIMUM CURRENT parameter. Observe the information in In cooling mode, condensate can form when the dew the commissioning instructions for the heat pump manager. -
Page 13: Heating Water Connection
INSTALLATION Installation 10.5 Heating water connection How the push-fit connectors work The push-fit connectors are equipped with a retainer with stain- Material losses less steel serrations and an O-ring for sealing. The push-fit con- The heating system to which the heat pump is connected nectors also have a "twist and secure"... -
Page 14: Filling The Heating System
INSTALLATION Electrical connection 10.7 Filling the heating system 10.7.3 Venting the heating system The appliance has an automatic air vent valve. 10.7.1 Water quality Carry out a fill water analysis before filling the system. This analy- sis may, for example, be requested from the relevant water supply utility. -
Page 15: Terminal Area
INSTALLATION Electrical connection 11.1 Terminal area f Route cables and leads through the strain relief fittings. f Terminate the screen at both ends of the bus cable. The terminals are located in the terminal area of the appliance. f If you wish to use the following appliance functions, install Observe chapter "Preparing the electrical installation". -
Page 16: Commissioning
INSTALLATION Commissioning 12. Commissioning Connection A WPM heat pump manager is required to operate the appliance. All necessary adjustments prior to and during operation are made on this device. Only qualified contractors may make the settings in the heat pump manager commissioning report, commission the appliance and instruct the owner in its use. - Page 17 INSTALLATION Commissioning The design of the underfloor heating system determines the pos- HPA-O 3 HPA-O 4 HPA-O 6 HPA-O 8 CS Plus CS Plus CS Plus CS Plus sible flow rate through the permanently open heating circuits. If the flow rate of the permanently open heating circuits is less Minimum flow rate of heat pump than the minimum flow rate of the heat pump, check whether the available external delivery head of the heating circulation pump...
-
Page 18: Settings
INSTALLATION Settings 12.2.3 Systems with a buffer cylinder Standard values to begin with: f Operate the appliance in heating mode. Parameter Underfloor heating Radiator heating f Adjust the parameters. system Heating curve Parameter Setting Control dynamic MINIMUM PUMP RATE (COMMISSIONING / CHARGING Comfort temperature 20 °C 20 °C... -
Page 19: Standby Mode
A-7/W35 pump to summer or winter mode. restriction [kW] [dB(A)] HPA-O 3 CS Plus 2.23 15.1 Standby mode 1.38 HPA-O 4 CS Plus 2.65 To shut the system down, simply set the heat pump manager to 1.38... -
Page 20: Troubleshooting
INSTALLATION Troubleshooting 17. Troubleshooting WARNING Electrocution f Before working on the appliance, isolate it from the power supply at the control panel. Following disconnection from the power supply, parts of the appliance may remain energised for 2 minutes until the inverter capacitors have discharged. Note Please observe the instructions for the heat pump man- ager. -
Page 21: Reset Button
INSTALLATION Troubleshooting 17.2 LEDs (IWS) 17.1.1 DIP switch (WP-Typ) The DIP switch (WP-Typ) on the IWS serves to set the relevant heat pump type. Factory setting Compressor mode with electric emergency/auxiliary heater Note There is an emergency/auxiliary heater in the products required as accessories (see chapter “Installation / Ap- pliance description / Accessories”). - Page 22 INSTALLATION Troubleshooting 17.4 Fan noise The heat pump draws heat from the outdoor air. This causes the outdoor air to cool down. At outside temperatures of 0 °C to 8 °C, the air may be cooled to below freezing point. If, under these conditions, precipitation occurs in the form of rain or fog, ice may form on the air grille, the fan blades or the air routing pipes.
-
Page 23: Specification
INSTALLATION Specification 18. Specification 18.1 Dimensions and connections HPA-O 3 CS Plus HPA-O 4 CS Plus HPA-O 6 CS Plus HPA-O 8 CS Plus appliance Height appliance Width 1022 1022 1152 1152 Entry electrical cables Condensate drain Heating flow Diameter... -
Page 24: Wiring Diagram
INSTALLATION Specification 18.2 Wiring diagram L1 N 5 turns 5 turns X11.1 PE Versorgung N Versorgung L Versorgung X11.2 Verdichter Schütz N Verdichter Schütz L X11.3 Abtauventil N Abtauventil L X11.4 Ölsumpfheizung N Ölsumpfheizung L X11.5 1 turn 5 turns N PE Düsenheizung X11.6... - Page 25 INSTALLATION Specification 5 turns X12.1 X12.2 Heißgastemperatur Heißgastemperatur GND Heizungsrücklauftemperatur Heizungsrücklauftemperatur GND Außenlufttemperatur Außenlufttemperatur GND Verdichtereintrittstemperatur Verdichtereintrittstemperatur GND Verdampferausgangstemperatur Verdampferausgangstemperatur GND Ölsumpf Ölsumpf GND X12.3 CAN GND CAN L CAN H (IWS IV) X12.4 +12..+18V ND 4..20mA +12...+18V HD 4...20mA X12.5 +12V Phase 4...
-
Page 26: Application Limit
INSTALLATION Specification 18.3 Application limit Integral heat pump control unit (IWS) Inverter compressor/fan Heating flow temperature sensor – Pt1000 18.3.1 Heating Heating return temperature sensor – Pt1000 Hot gas temperature sensor - Pt1000 Outdoor air temperature sensor – Pt1000 Compressor intake temperature sensor – Pt1000 Evaporator discharge temperature sensor –... -
Page 27: Output Diagrams Hpa-O 3 Cs Plus
INSTALLATION Specification 18.4 Output diagrams HPA-O 3 CS Plus Heating output X Outside temperature [°C] 1 max. W55 3 max. W35 5 min. W45 Y Heating output [kW] 2 max. W45 4 min. W55 6 min. W35 Cooling capacity X Flow temperature [°C] 1 Max. -
Page 28: Output Diagrams Hpa-O 4 Cs Plus
INSTALLATION Specification 18.5 Output diagrams HPA-O 4 CS Plus Heating output X Outside temperature [°C] 1 max. W55 3 max. W35 5 min. W45 Y Heating output [kW] 2 max. W45 4 min. W55 6 min. W35 Cooling capacity X Flow temperature [°C] 1 Max. -
Page 29: Output Diagrams Hpa-O 6 Cs Plus
INSTALLATION Specification 18.6 Output diagrams HPA-O 6 CS Plus Heating output X Outside temperature [°C] 1 max. W55 3 max. W35 5 min. W45 Y Heating output [kW] 2 max. W45 4 min. W55 6 min. W35 www.stiebel-eltron.com HPA-O CS Plus |... - Page 30 INSTALLATION Specification Cooling capacity X Flow temperature [°C] 1 Max. A35 Y Cooling capacity [kW] 2 Min. A35 | HPA-O CS Plus www.stiebel-eltron.com...
-
Page 31: Output Diagrams Hpa-O 8 Cs Plus
INSTALLATION Specification 18.7 Output diagrams HPA-O 8 CS Plus Heating output X Outside temperature [°C] 1 max. W55 3 max. W35 5 min. W45 Y Heating output [kW] 2 max. W45 4 min. W55 6 min. W35 Cooling capacity X Flow temperature [°C] 1 Max. - Page 32 The power consumption figures for the integral auxiliary drives are maximum values and may vary subject to operating point. The power consumption of the integral auxiliary drives is included in the output details of the heat pump (to EN 14511). HPA-O 3 CS Plus HPA-O 4 CS Plus HPA-O 6 CS Plus HPA-O 8 CS Plus...
- Page 33 INSTALLATION Specification HPA-O 3 CS Plus HPA-O 4 CS Plus HPA-O 6 CS Plus HPA-O 8 CS Plus Energy data Energy efficiency class, moderate climate, W55/W35 A+/A++ A+/A++ A++/A+++ A++/A+++ Electrical data Max. power consumption excl. emergency/auxiliary heater 2.20 2.20 4.60...
- Page 34 GUARANTEE | ENVIRONMENT AND RECYCLING Guarantee The guarantee conditions of our German companies do not apply to appliances acquired outside of Germany. In countries where our subsidiaries sell our products a guarantee can only be issued by those subsidiaries. Such guarantee is only grant- ed if the subsidiary has issued its own terms of guarantee.
- Page 35 NOTES www.stiebel-eltron.com HPA-O CS Plus |...
- Page 36 Deutschland Verkauf Tel. 05531 702-110 | Fax 05531 702-95108 | info-center@stiebel-eltron.de STIEBEL ELTRON GmbH & Co. KG Kundendienst Tel. 05531 702-111 | Fax 05531 702-95890 | kundendienst@stiebel-eltron.de Dr.-Stiebel-Straße 33 | 37603 Holzminden Ersatzteilverkauf www.stiebel-eltron.de/ersatzteile | ersatzteile@stiebel-eltron.de Tel. 05531 702-0 | Fax 05531 702-480 info@stiebel-eltron.de...
Need help?
Do you have a question about the HPA-O 3 CS Plus and is the answer not in the manual?
Questions and answers