Table of Contents
Advertisement
Quick Links
Assembly Instructions & User's Manual
for
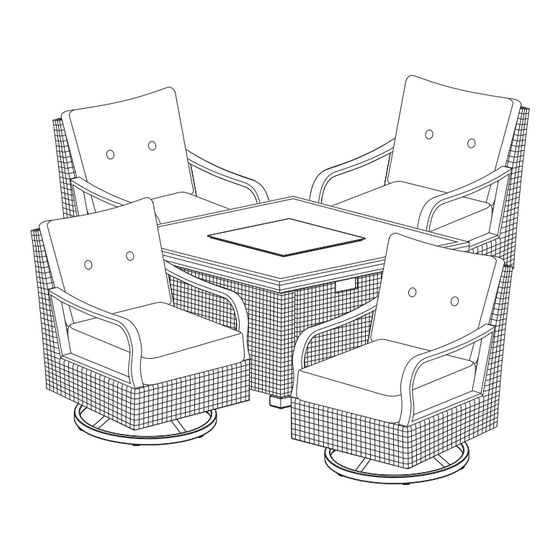
Members Mark Newcastle 5pc Gas Firepit Set
Item Number:
Model Number: BGK03901-5SC
Customer Assistance
: 1-800-416-3511
(spare/replacement parts)
or Email: customerservice@agio-usa.com
THIS ASSEMBLY MANUAL CONTAINS IMPORTANT SAFETY INFORMATION.
PLEASE READ AND KEEP FOR FUTURE REFERENCE.
Page 1
Need Assistance? Visit us at: samsclub.com/membersmarkhelp
Advertisement
Table of Contents

Summary of Contents for Members Mark Newcastle BGK03901-5SC
- Page 1 Assembly Instructions & User's Manual Members Mark Newcastle 5pc Gas Firepit Set Item Number: Model Number: BGK03901-5SC Customer Assistance : 1-800-416-3511 (spare/replacement parts) or Email: customerservice@agio-usa.com THIS ASSEMBLY MANUAL CONTAINS IMPORTANT SAFETY INFORMATION. PLEASE READ AND KEEP FOR FUTURE REFERENCE.
-
Page 2: Table Of Contents
Table of Contents Quality Statement.............3 Important Safety Information..........3 Before Assembly..............3 Package Contents............4 Product Information............5 Swivel Rocker Components..............6 Hardware..............6 Tools................6 Step1.................7 Fire Pit Components...............8 Hardware..............8 Tools................8 Step1-Step7............9-11 Care & Use and Storage Instructions.........12 Warranty Information............12 Page 2 Need Assistance? Visit us at: samsclub.com/membersmarkhelp... -
Page 3: Quality Statement
Quality Statement Important Safety Information Please read all instructions carefully before assembling this furniture. For your safety, assembly by two or more adults is strongly recommended. Use only vendor-supplied hardware to assemble this item. Using unauthorized hardware could jeopardize the structural integrity of the item. Hardware may loosen overtime. -
Page 4: Package Contents
Package Contents 1Set / 4Ctn Box 1 of 4: Component Description Quantity Swivel Rocker Box 2 of 4: Component Description Quantity Swivel Rocker Box 3 of 4: Component Description Quantity Firepit Table Base Furniture Cover Fire Ice Burner Cover Box 4 of 4: Component Description Quantity... -
Page 5: Product Information
Product information Factory Weight Description Dimensions Part No. Assembly Capacity 250lb per seat Swivel Rocker BGK03901 27.5" W*34.5" D*35.25" H A.Foot Cap FC0768 Factory Weight Description Dimensions Part No. Assembly Capacity Firepit Table BRK01600 43.75" W*43.75" D*25" H A.Foot Cap FC0553 Description Part No. -
Page 6: Components
Components CHAIR FRAME SWIVEL BASE & ROCKER Part No. SR0274 ASSEMBLY Qty 1 Part No. SR0275 Qty 1 Hardware (H1) (H2) (H3) 5/16" X 35 MM BOLT Ø8.0 X 2.3 MM SPRING WASHER "U" METAL PLATE PART NO:HW0820 PART NO:HW0003 PART NO:HW0760 Qty: 4 Qty: 4... -
Page 7: Step1
Step 1 (H1) (H2) (H3) 5/16" X 35 MM BOLT Ø8.0 X 2.3 MM SPRING WASHER U" METAL PLATE Qty: 4 Qty: 4 Qty: 2 (H4) (H6) (H7) 5/16" NUT HEX WRENCH-1 HEX WRENCH-2 Qty: 1 Qty: 4 Qty: 1 CAUTION: 1.Note the horseshoe shape of the rocker plate. -
Page 8: Components
Components A. FIRE PIT TABLE TOP B FIRE PIT TABLE BASE C. BURNER COVER Part No.FP3377 Part No.FP3376 Part No.FP3378 Qty 1 Qty 1 Qty 1 D. BURNER PAN PROTECTIVE E. FIRE ICE RING Part No.FP2147 Part No.FP3379 Qty 2 Qty 1 Hardware (H1) -
Page 9: Step1-Step7
Step 1 - Step 7 Step 1 There are two factory assembled M4 screws in the firepan/burner assembly. Remove those two screws in order to remove the burner pan protective ring. Step 2 (H17) (H19) (H16) Ø20 X Ø6.5 X 2.0 MM HEX BOLT DRIVER 1/4"... - Page 10 Step 3 Place the burner pan protective ring, into the burner as shown in the diagram . Secure the burner pan protective ring to the burner pan by using two M4 screws. (H10) M4 BOLT Qty: 2 (H18) HEX BOLT DRIVER Qty: 1 NOTE: Bolts must be FULLY tightened.
- Page 11 Step 6 Open the door and place the LP tank in the bottom frame. Connect the regulator. Turn the black handle clockwise to tighten. Turn the handle counterclockwise to remove. The hose must point down. Open the control door and check that the valve is turned all the way clockwise to the “OFF”...
-
Page 12: Care & Use And Storage Instructions
Care & Use Instructions CARE AND MAINTENANCE FRAMES Cleaning - Use mild soap and warm water. Do not use abrasive materials, cleansers or bleach products. Rinse with clean water and dry thoroughly. Maintenance - Periodically clean and dry thoroughly. Be sure to drain any water accumulated inside the frames. - Page 13 Distributed by Sam's West Inc. 2101 SE Simple Savings Dr. Bentonville, Arkansas 72716-0745 Made in China Page 13 Need Assistance? Visit us at: samsclub.com/membersmarkhelp...


Need help?
Do you have a question about the Newcastle BGK03901-5SC and is the answer not in the manual?
Questions and answers