Table of Contents
Advertisement
Quick Links
Advertisement
Table of Contents

Related Manuals for RCT Power Storage DC 8.0

Summary of Contents for RCT Power Storage DC 8.0
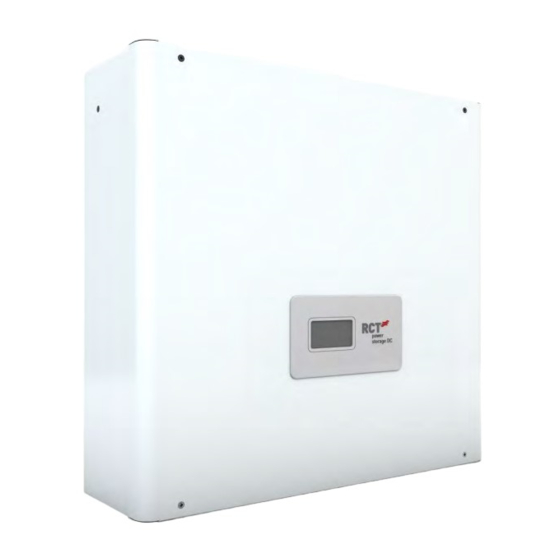
- Page 1 MANUAL Power Storage DC 8.0 / 10.0...
- Page 2 Copyright © 2016 RCT Power GmbH. All rights reserved. Any form of reproduction of this document in whole or in part without the written permission of RCT Power GmbH constitutes a violation of EU and international copyright laws and will be prosecuted. This includes but is not limited to duplication, distribution, translation or transmission by electronic or mechanical means, photocopying, recording or storage on data carriers.
-
Page 3: Table Of Contents
Table of contents ABOUT THIS MANUAL ............................1 Validity, purpose and scope of this document and legal regulations ................. 1 Explanation of Symbols and References ........................1 SAFETY INSTRUCTIONS ............................2 Personnel and Qualifications ............................2 Safety Procedures ............................... 3 PRODUCT PRESENTATION ........................... - Page 4 Device ..................................67 7.2.2.4 Network ..................................69 Display ..................................70 Exporting RCT Power APP log data to MS Excel for further processing ..............72 7.4.1 Abbreviations of the individual data records and their definitions ................72 7.4.1.1 Data records "Day” ..............................72 7.4.1.2...
- Page 5 Keep this manual in a safe place for future reference. Declaration of conformity RCT Power GmbH confirms that the Power Storage DC inverter described in this document is in compliance with the essential requirements and provisions of the following European Union directives: •...
-
Page 6: About This Manual
We explicitly reserve the right to make technical changes which improve the device or increase its safety standard. These changes do not require a separate notification. RCT Power GmbH is not liable for damages resulting from the use of this document. -
Page 7: Safety Instructions
2 Safety Instructions Personnel and Qualifications The inverter and the battery must only be installed, wired, connected, commissioned and serviced by qualified personnel to prevent material damage or personal injury. Qualified personnel authorised to perform the tasks described in this manual must have the following skills and technical expertise: •... -
Page 8: Safety Procedures
Safety Procedures The Power Storage DC was developed and tested in strict accordance with international safety regulations. All safety instructions relating to electrical and electronic equipment must be complied with during installation, operation and maintenance. Danger to life or serious injury due to electric shock! High voltages are present in cables and inner parts of the inverter if it is connected to the grid (AC / AC voltage source) or the solar generator (DC / DC voltage source) is exposed to sunlight. -
Page 9: Product Presentation
3 Product Presentation Intended use Power Storage DC 8.0 and 10.0 are stationary 3-phase inverters with integrated battery charging unit. The energy received from the connected solar generator and the battery is converted into grid-compliant AC current and fed into the grid. PV energy can also be charged directly into the battery on the DC side. -
Page 10: Product Specification
Product specification 3.2.1 Scope of supply Our products are inspected for proper condition before shipment. Despite careful packaging, transport damage can occur. The transport company usually has to take responsibility for this damage. Please inform the transport company immediately if you notice any damage to the packaging or the Power Storage DC. Your specialist dealer will be happy to assist you if necessary. - Page 11 Fig. 3-3 Product specification Description Comment Displays important Inverter status and operational information (see LCD Operating Display section 7.3) Battery connection area Battery connections (see sections 5.1 to 5.4) RJ45-CAN bus communication RJ45-sockets for CAN-bus connection with batteries, Power Sensor connectors and Power Switch Normal operation: Switch is in position "1", Turning switch to position...
-
Page 12: Type Plate And Warning Signs
3.2.3 Type plate and warning signs Fig. 3-4 Type plate Description Serial number Technical data Symbols This symbol indicates that the user manual must be read and understood before the device is put into operation. After disconnecting the electrical connections, wait a minimum of 10 minutes before opening the unit. -
Page 13: Mechanical Installation
4 Mechanical Installation Select mounting location Danger to life or serious injury from fire or explosions! • Do not mount the inverter on a flammable surface. • No combustible materials must be stored within 3 m of the inverter. • The inverter must not be installed in areas and rooms subject to explosion hazards. - Page 14 Mount the inverter in an upright or slightly backward inclined position. Required minimum distances to allow sufficient free convection of air for cooling the unit. To prevent mutual heating, inverters must not be mounted on top of each other. Installation in a closed cabinet is prohibited. •...
-
Page 15: Mounting
Mounting Additional material required (not included in the scope of supply): • At least 3 to 6 screws with a diameter of 6 to 8 mm. • Suitable dowels. • Suitable washers with a minimum outer diameter of 18 mm. Procedure: Mount the wall bracket as shown left. -
Page 16: Electrical Installation
5 Electrical Installation Connections overview Fig. 5-1 Overview of wiring area and interior connecting components Description Comment Battery connection area Battery connectors, Connector Plug Type : Weidmüller WM4 RJ45-CAN bus communication RJ45-sockets for CAN-bus connection with batteries, Power Sensor connectors and Power Switch Normal operation: Switch is in position "1", Turning switch to DC load break switch... -
Page 17: Configuration Of The Pv Inputs
Danger to life or serious injury from electric shock! • Only qualified personnel must carry out the work described in this section. • Important: All voltage sources (DC /solar generator, DC /battery and AC /grid) must be disconnected before carrying out any electrical work on the inverter. •... -
Page 18: Dc Connection
B) Parallel Mode This mode is only used if several strings with the same number of modules are to be connected in parallel and the resulting maximum input current per input exceeds 14 A. Conditions for parallel mode: • The total current of all strings connected to the inverter must not exceed 28 A. •... -
Page 19: Dc Connector Assembly
• Check the cables for correct polarity. • Ensure the DC Switch is set to position "0" before connecting the connectors. • The system voltage must not exceed the maximum input voltage of the inverter (see Type plate). PV modules are suitable for a maximum system voltage according to IEC 61730 Class A. - Page 20 Inserting the cable conductor: Do not turn connector plug in the screw fitting before strands are wired. Select the correct connector type. Pay attention to the polarity. Insert the cable in a straight line into the plug. Ensure that the contact snaps into place audibly with a "click".
-
Page 21: Dc Battery Connection
DC Battery connection Danger to life or serious injury from electric shock! • Only the battery systems specified and certified by RCT Power GmbH must be connected! Check the cables for correct polarity. • Cables must only be connected or disconnected in a voltage-free state. -
Page 22: Disconnecting Voltage Sources
Disconnecting voltage sources Danger to life or serious injury from electric shock! High voltage is present in the inverter components when the inverter is connected to the mains (AC voltage source) and/or to a PV array exposed to sunlight or is connected to a battery (DC voltage source). -
Page 23: Additional Protective Conductor Connection
Connect the cable end to the equipotential bonding rail. Connection – Power Switch This section only applies when the RCT Power Switch is used with a battery system. The RCT Power Switch in conjunction with the battery system ensures that your household loads continue to be supplied in the event of a power failure. - Page 24 Procedure: Disconnect voltage sources (see section 5.5). Install the Power Switch in the house junction box or nearby. For more information on installing the Power Switch, refer to the Power Switch manual.
-
Page 25: Connection - Power Sensor
This section only applies when the RCT Power Sensor is used. The functionality of the power storage system is based on the measurement of energy flows. The RCT Power Sensor can easily be installed without disconnecting the cables and allows 3- phase current monitoring. RJ45 connection to... -
Page 26: Communication Ports
6 Communication Ports I/O circuit board Pos Description X102: Serial RS485 interface. X100: Multifunction relay, max. 24V, 1A. X101: Ripple control signals: 4 digital inputs for potential-free relay contacts. X103: Digital in/outputs (S0 signals), max. input 24V, max. output 5 V, 10 mA. Fig. -
Page 27: Rs485 - X102 Interface
6.1.1 RS485 - X102 Interface Application: The serial interface enables the connection of external data loggers or meters. Select the appropriate RS485 operation mode in the APP configuration: Connection data logger → “Modbus Slave“ Connection meter → “Modbus Master“ Wiring: The number of inverters that can be connected to a joint data logger is limited. -
Page 28: Ripple Control Signals X101 Interface
6.1.3 Ripple control signals X101 Interface Application: Four digital inputs are available for potential-free relay contacts connecting one or more inverters to a ripple control receiver. Wiring: • A maximum of 3 inverters can be connected to each other via X101. •... -
Page 29: Connection Ethernet Interface
Communication over Ethernet requires a network cable of Cat5e or higher standard. The Power Storage DC is connected to the network device (usually a network router) with this cable. To configure the Ethernet connection, open the RCT Power APP and select the menu item "Network Settings". (see also section 7.1.9) -
Page 30: Rj45 Connections For Power Battery, Power Sensor And Power Switch
RJ45 connections for Power Battery, Power Sensor and Power Switch The inverter communicates with the battery via a Controller Area Network (CAN bus). If the inverter was optionally supplied with a Power Sensor or Power Switch refer to the devices‘ manuals for more detailed commissioning instructions. -
Page 31: Commissioning
The inverter is equipped with an internal Wi-Fi module. To set up and commission the inverter, you must connect to it via Wi-Fi using the RCT Power APP. This Android operating system based App contains the inverter's central user interface. -
Page 32: Accessing The Inverter
7.1.2 Accessing the inverter If the inverter is detected or selected by the RCT Power APP the display shows a "*" after the IP address Step Description Activate the Wi-Fi option in the settings menu of your smartphone or tablet. -
Page 33: Configuring The Inverter
The power supply unit can only be switched on to start and complete the commissioning tasks if the PV array is exposed to sufficient solar radiation. Step Description Launch “RCT Power APP“ and establish connection to the inverter (see 7.1.2) Press the Settings icon“ “. -
Page 34: Setting Solar Plant Peak Power And External Power Reduction
The feed-in power is measured at the mains connection point and is only capped if the excess power exceeds the set value. Step Description In the RCT Power APP tap on “DEVICE“ --> “Settings“ --> “Device settings“ Enter the desired values for “External power reduction based on solar plant peak power [0;1]“... -
Page 35: Configuring The Battery
Description In the main menu go to "DEVICE" and then press "Settings" and "Battery" Press "Battery type" and select "Li-Ion RCT Power" or the corresponding battery type to be used in your system. Turn on the battery by setting the battery ON/OFF switch to position "1". -
Page 36: Configuring The Power Sensor (During Operation)
Re-wiring or other changes to your system might require the Power Sensors to be tuned in again. Below is the procedure: Step Description Launch “RCT Power APP“ and establish a connection to the inverter. Follow the following menu path: DEVICE → Settings → Device settings (scroll down on screen) →... -
Page 37: Expert Settings Battery
Expert Settings Battery In some instances individual target values may need to be changed in the battery configuration. Below is the procedure: Caution: Please do not change the pre-configured values without prior consultation with RCT Power! Step Description Launch “RCT Power APP“ and establish connection to the inverter (see 7.1.2) - Page 38 • Max. compensation power [W] The maximum power that can be taken from the battery for load compensation. • Max. battery to grid power [W] The maximum power that can be taken from the battery to feed into the grid. •...
-
Page 39: Connecting The Inverter To A Network Via A Wi-Fi Connection
Connecting the inverter to a network via a Wi-Fi connection Procedure to integrate the inverter into a home network via a Wi-Fi connection (Customer or Installer - Login). Step Description Launch “RCT Power APP“ and establish connection to the inverter (see 7.1.2) Press the settings icon “ “. - Page 40 Expand the drop-down list and select the appropriate network. Enter the corresponding Wi-Fi password. Set a tick mark in the "Show extended parameters" box. Drop-down selection lists for the following parameters are available: "Encryption Method" (default: WPA2PSK), "Encryption Algorithm" (default: AES) and "Network Mode"...
- Page 41 Wait until the new settings are confirmed and then press the "FINISH" button again. Close the RCT Power APP. (this will speed up the process of obtaining the IP address). After a short time, the LCD display of the inverter will show the IP address assigned by your home network.
-
Page 42: Connecting The Inverter To A Network Via An Ethernet Connection
7.1.9 Connecting the inverter to a network via an Ethernet connection Procedure to integrate the inverter into a home network via an Ethernet connection (Customer or Installer - Login). Ensure that a suitable network cable is used to connect the inverter to the home network router. (see 6.2). - Page 43 Wait until the new settings are confirmed and then press the "FINISH" button again. Close the RCT Power APP. (this will speed up the process of obtaining the IP address). After a short time, the LCD display of the inverter will show the IP address assigned by your home network.
-
Page 44: Internet Based Remote Access To The Inverter
7.1.10 Internet based remote access to the inverter There are three feasible scenarios for remote access to the inverter from the internet. The configuration is explained in the following chapters with the example of the widely used FRITZ!Box router from AVM. Routers from other manufacturers will not support remote access with the MyFritz! account. - Page 45 Call up the user interface of your Fritz!Box. Enter “fritz.box“ or the IP address of the Fritz!Box into the URL address box (192.168.1.1 or 192.168.178.1 are commonly used addresses). Log in and navigate to “Internet“-→ “Permit Access“ → “DynDNS“. Activate “Use DynDNS“ by setting a tick mark.
- Page 46 Enter the credentials supplied to you by your provider and confirm with a click on “Apply“. https://domain4myInverter.selfhost.eu Go to “Home Network“ → “Network“-→ and find your inverter in the “Network Connections“ section. Click on the symbol with the pencil to set up a static IP address for your inverter. Power-Storage-PS6-RBO...
- Page 47 Set a tick mark to activate the “Always assign this Network device the same IPv4 address“setting. Confirm by clicking “OK“. Details for Power-Storage-PS6-RBO Power-Storage-PS6-RBO Now port sharing has to be activated for the inverter. This is required because the Fritz!Box will be responsible for the port forwarding.
- Page 48 Click on “ Add Device for Sharing“. 10) Locate your inverter in the “Device“ dropdown list. Power-Storage-PS6-RBO Power-Storage-PS6-RBO...
- Page 49 11) Select “New Sharing“ to configure the Port sharing. Application: Other application Name: Free choice, just for naming purposes Protocol: Port an Gerät: 8899 Port requested externally (IPv4): 8899 Confirm selection with „“OK“. 12) Click on “OK“again to save and enable.
- Page 50 13) Click on “Apply“ to confirm the newly configured Port sharing. 14) This completes the installation. The inverter can now be remotely accessed over an internet connection using the RCT Power App and the DynDNS URL or the static IP address.
-
Page 51: Remote Access Via A Fritz!Box By Port Forwarding And A Myfritz! Account
Remote access via a FRITZ!Box by port forwarding and a MyFRITZ! account 7.1.10.2 Remote Access to devices connected to a home network using an internet connection always poses a potential security risk. To enable remote access over the Internet, the inverter must be connected via Wi-Fi or LAN to a stable home network with access to the Internet. - Page 52 The following sections describe the configuration for remote access via a FRITZ!Box by port forwarding and a MyFRITZ! Account. Call up the user interface of your Fritz!Box. Enter “fritz.box“ or the IP address of the Fritz!Box into the URL address box (192.168.1.1 or 192.168.178.1 are commonly used addresses). In the router interface navigate to “System“-→...
- Page 53 Continue to “Internet“-→ “MyFRITZ! Account“. Use an existing MyFRITZ! Account or enter an email address to register a MyFritz! Account. Setting up the MyFRITZ! Account. If a new account setup was requested, MyFRITZ! will send a registration conformation email to the address entered in the router interface.
- Page 54 This will complete the registration and activate your “MyFRITZ! Account“. You have the option to assign a password during the registration steps. You can use your registered email address and password to access your MyFritz! Account in the router user interface or alternatively over https://myfritz.net.
- Page 55 If a security warning in the browser indicates that the router has not yet received a trusted certificate you can use the recommended certification from letsencrypt.org as shown below. Log in to the Fritz!Box with your credentials. ……….. User Notice : If you do not assign a name to your FRITZ!Box the access URL address will contain a randomly created character string before “.myfritz.net“.
- Page 56 Enter name Now port sharing has to be activated for the inverter. This is required because the Fritz!Box will be responsible for the port forwarding. The inverter communicates over Port 8899. If the router receives requests on Port 8899 it will forward these to the inverter. The static IP address of the inverter is required for this setup.
- Page 57 Click on “ Add Device for Sharing“. Locate your inverter in the “Device“dropdown list. Power-Storage-PS6-RBO Power-Storage-PS6-RBO...
- Page 58 14) Select “New Sharing“ to configure the Port sharing. Application: Other application Name: Free choice, just for naming purposes Protocol: Port an Gerät: 8899 Port requested externally (IPv4): 8899 Confirm selection with „“OK“. 15) Click on “OK“again to save and enable.
- Page 59 The inverter can now be remotely accessed over an internet connection using the RCT Power App. You can find the URL address under the section “Internet“-→ “MyFRITZ! Account“. rct-power-anlage.myfritz.net https://rct-power-anlage.myfritz.net Open the “RCT-Power-App“,go to „“NETWORK“ add the URL address in the “Add device“ section and press on the “ “ sign to connect.
-
Page 60: Remote Access Via Vpn Using Dyndns Or A Myfritz! Account
Remote access via VPN using DynDNS or a MyFRITZ! account 7.1.10.3 Remote Access to devices connected to a home network using an internet connection always poses a potential security risk. It requires changes to your network router settings. You may need to contact your internet service provider to have some of the required settings options enabled. - Page 61 Each separate VPN connection requires a seperate user account in the FRITZ!Box. A feasible scenario could be to set up one user for the owner and one for service personnel. The access for service personnel can then be switched on/off independently from the owner access. Configuration steps 1) to 6) have to be repeated corespondingly.
- Page 62 Click on the Pencil symbol next to the user for whom the VPN connection to the FRITZ!Box should be enabled. Click on „“Add User“ if apart from the “admin“ account no user has been set up. Add the necessary credentials in the “User“ section. Take a note of the Password for future reference. In the „Rights“...
- Page 63 Click on “OK“ to display the section „“Configuring VPN for Mobile Devices“ which contains a summary of the configuration details and installation instructions for mobile devices. The VPN settings can be called up at any time if changes are required. Go into the User account edit mode and click on“Show VPN Settings“.
- Page 64 The example VPN set up was performed with a device with Android 9.0 (Stock-Version). In other versions and also depending on the device manufacturer the menu and settings descriptions might differ. Go to „“Settings“-→ „“Network & Connection“. Tap on „“VPN“ to change these settings. Press “...
- Page 65 Enter the FRITZ!Box VPN Data set in the corresponding VPN configuration dialog fields. → see5). You have made a note of the password during the user account setup. → see 3) We have named the VPN profile for this example “Fritz“. After you press “SAVE“ the profile will display as an available VPN connection.
- Page 66 „“Connected“. The RCT Power App can now access the inverter with the static IP address previously assigned. Attention: The complete network traffic of the Smartphone/Smartdevice in this state is processed via the...
- Page 67 The VPN connection can be terminated by an another tap on “Fritz“ in the VPN settings. Tap on „“DISCONNECT“ to end the VPN connection. Tip: There are several Apps available in the Play Store ( e.g. “VPN Shortcut“) that allow for accessing the VPN connection directly from the homescreen.
- Page 68 10) These are the steps for the VPN configuration under Apple iOS: Open “Settings“ in your iOS device. 11) Select "General-→ VPN-→ Add VPN.
- Page 69 12) Enter the required VPN data in the corresponding fields. Refer to → 5) for details. 13) Consider these settings: • Set „“User Authentication“ to “None“. • Set "Use Certificate " to inactive. • Set "Proxy" to "Off".
- Page 70 14) Complete the configuration.
-
Page 71: Rct Power App Description
RCT Power APP Description The inverter is equipped with an internal Wi-Fi/LAN module. To set up and commission the inverter, you must connect to it via Wi-Fi using the Android based RCT Power APP. The App contains the inverter's central user interface. -
Page 72: Detailed Description Of The Rct Power App Menu Items
7.2.2 Detailed Description of the RCT Power APP Menu Items Online 7.2.2.1 "Online" is an interactive overview of all devices in the system with their status and values. Touching one of the device icons displays more details. The level of details depends on the access area. - Page 73 7.2.2.3.3.1.1 Battery properties (Installer Area!) Use to view and retrieve the serial numbers, software versions and parameters of the Power Battery or Power Battery Stacks. 7.2.2.3.3.2 Interfaces Use to configure the interfaces for peripheral devices. 7.2.2.3.3.2.1 Multifunctional relay The multifunction relay can be configured in the operation modes "Load" or "Alarm". In the mode "Load", the relay switches on when a certain power threshold is reached.
-
Page 74: Network
Network 7.2.2.4 Use this section to monitor a selected inverter with the RCT Power APP. Press the "SCAN" button to search the network for available inverters. Any device within the search range will be listed. Alternatively, the device can also be added manually by entering the IP address at the bottom of the screen (press the "... -
Page 75: Display
Display Pos. Description Comment Displays the current power received from or fed into the grid • Pgrid load: Power drawn from the grid. AC power (grid) • Pgrid feed: Power feed into the grid. Displays the current household power • Pload: current power consumption household consumers. Household Power •... - Page 76 Display of Device Information. Values alternate between: • IP-address-→ (M= Master, S=Slave) • MAC-address Device Information • Serial number • RS485 - address Display of Device Information. Values alternate between: • Date/Time • Norm Parameter • Software Version Device Information •...
-
Page 77: Exporting Rct Power App Log Data To Ms Excel For Further Processing
Exporting RCT Power APP log data to MS Excel for further processing Please note: Some of the data records are not available for all inverter types. 7.4.1 Abbreviations of the individual data records and their definitions Data records "Day” 7.4.1.1 Recorded are 5-minute averages for the following values: Values can be recorded covering a period of up to 90 days. -
Page 78: Data Records "Week" And "Month
Data records "Week" and "Month" 7.4.1.2 Recorded are the daily values in the specified period. Values can be recorded covering a period of up to 11 years Data records "Year" and "Total" 7.4.1.3 Recorded are monthly / annual values in the specified period. Values can be recorded covering a period of up to 85 years. -
Page 79: Exporting Data Records
Procedure: Step Description Launch “RCT Power APP“ and establish connection to the inverter. Select Menu item “HISTORY“ and press “ “. Two options are shown. Select “Export Log Data“. - Page 80 Touch the date shown after "from" to select the start date for your data export period. A calendar date selection window will open. Tap on the desired date and confirm selection by pressing "OK". Now touch the date shown after "to" to select the end date for your data export period.
- Page 81 The selected data is now transferred from the inverter's internal data memory to the RCT Power APP. The estimated remaining time for the transfer to complete is displayed below the selected date range. Please note: Depending on the amount of data and the time period selected, it may take several hours until the download completes.
- Page 82 A dialogue window similar to the one shown on the right will open. It is recommended to send the file by e-mail for further processing. Select your preferred e-mail app to send the file to the desired address, which can be your own. You can also process the file on your Smartphone/Tablet if an adequate application is installed.
-
Page 83: Importing Rct Power App Log Data To An Ms Excel Spreadsheet
7.4.3 Importing RCT Power APP log data to an MS Excel spreadsheet The log data file can be imported into a spreadsheet program. It can be saved, processed or possibly added to a sequential file. (The import procedure is described below using MS Excel for Windows). - Page 84 3. Select "General" for the Column data format. Click on "Advanced.." for more options. 4. In the advanced import settings dialogue box select "." (decimal point) for Decimal separator, and " ' " (inverted comma) for Thousands separator. Remove the tick mark for "Trailing minus for negative numbers". Confirm your selections with "OK".
- Page 85 5. Clicking "OK" in the Import data dialog box completes the file import. The imported data can now be further processed in MS Excel.
-
Page 86: Configuration
8 Configuration Power reduction There are 2 options for power reduction: Dynamic power reduction at the house connection point. Power reduction using a ripple control receiver. -
Page 87: Dynamic Power Reduction At The House Connection Point
Configuration using the RCT Power APP: Launch the "RCT Power APP" and continue to DEVICE --> Settings --> Device settings Enter : External power reduction based on solar plant peak power: e.g. -
Page 88: Power Reduction Using A Ripple Control Receiver
Recommended cable type: e.g. YR05x0.8WS, YSLY-OZ05x0.5GR Configuration using the RCT Power APP: Launch the "RCT Power APP" and continue to DEVICE-→ Settings-→ Interfaces-→ External active power reduction Displays the current status of relays K4...K1 as decimal code (K1 ≙ 2^0) Actual K4..K1 data:... -
Page 89: Multifunction Relay
Connect the cables for the power supply (max. 24V/1A) and the contactor to the terminals X100 on the I/O circuit board. Configuration using the APP: Launch the "RCT Power APP" and continue to DEVICE-→ Settings-→ Interfaces-→ Multifunctional relay-→ Multifunctional relay usage-→ Load... -
Page 90: Configuration Of The Emergency Stop Switch
Connect the cables of the ripple control receiver to the terminals X103 on the I/O circuit board. Configuration using the RCT Power APP: Launch the "RCT Power APP" and continue to DEVICE-→ Settings-→ Interfaces-→ Digital I/O‘s Under Menu option "Digital I/O 1 usage" select the setting "Input emergency turn off". -
Page 91: Configuration Of The External Display
Connect the cables from the S0 input of the display to the terminals X103 on the I/O circuit board. Please configure the appropriate pulse ratio of the solar display in the RCT Power APP. The recommended pulse ratio is between 1000 and 5000 pulses / kWh. -
Page 92: Networking
Excess power generated by the Power Inverter can be stored in the battery via the Power Storage DC. If the Power Storage DC is accessed via the RCT Power APP, the generated power of the other inverters is displayed as added- up value. - Page 93 Configuration using the APP: Power Inverter configuration Launch the "RCT Power APP" connect to the Power Inverter and continue to DEVICE → Settings → Interfaces-→ Digital I/O‘s → Digital I/O 1 usage-→ Input S0 grid power feed-in Select “10000“ for “Number of impulses per kWh for SO signal on I/O 1“ , and continue with DEVICE-→...
-
Page 94: Connecting A Power Storage Dc And Third-Party Inverter To The Same Network
Excess power generated by the third-party inverters can be stored in the battery via the Power Storage DC. If the Power Storage DC is accessed via the RCT Power APP, the generated power of the third-party inverters is displayed as added-up value. - Page 95 Configuration using the APP: Power Storage DC Launch the "RCT Power APP" and connect to the Power Storage DC. DEVICE → Settings → Interfaces → Digital I/O‘s → Digital I/O 1 usage → Input S0 external power Select “2000“ for “Number of impulses per kWh for SO signal on I/O 1“...
-
Page 96: Connecting Multiple Rct Power Inverters In A Lan / Wlan Network
Fig 2: Device networking via router [4 clients] Use the RCT Power APP to integrate multiple devices of RCT Power Storage and RCT Power Inverters into your home network. Integration must be performed for the Master device and all slave devices separately. -
Page 97: Integration Master Device
8.5.3.1 Please use a Power Storage AC or DC as your master device. Step Description Launch the "RCT Power APP" and connect to the Power Storage. Press the settings icon “ “. Tap on "LOGIN" Enter the password in the dialogue box and press “OK“... - Page 98 Press "NEXT >>" to continue. Slide button for "Obtain an IP address automatically" to "OFF"position and tap "FINISH". An IP address of 0.0.0.0 usually indicates that a device is not connected to a TCP/IP network. Connect your device to your home network to obtain a valid IP address (see section 7.1.8 and 7.1.9).
-
Page 99: Integration Slave Device
Integration Slave device 8.5.3.2 Step Description Launch the "RCT Power APP" and connect to the Power Storage that you want to integrate into the system. Press the settings icon “ “. Tap on "LOGIN" Enter the password in the dialogue box and press “OK“... - Page 100 Expand the selection list for "Network mode" and select "Slave". Add the IP address of the Master device in the field "Master IP address". The default value for the "Master TCP port" is 8899. It should only be changed if a networking device requires a different setting. Press "NEXT >>"...
-
Page 101: System Visualisation
Slave devices will be overwritten by the Master device settings. When the Master device is accessed by the RCT Power APP via the "ONLINE" menu a system visualisation is presented. The Slave devices in the system are grouped under the "G" icon. Tap on the icon to get more detailed information. "GRAPHIC"... - Page 102 Example: System view “GRAPHIC“ Example: System view “TABULAR“ The inverter display indicates if the inverter is used as a Master or a Slave device by adding an additional letter after the IP address. ("S" for Slave and "M" for Master )
-
Page 103: Firmware Update Over Network Connection
Please note that when you update the software over the network, the master unit must always be updated first. Otherwise, the system may be affected by unforeseeable issues. Step Description Launch “RCT Power APP“ and establish a connection to your Master device. Press the settings icon “ “. -
Page 104: Increase Battery Capacity With Additional Battery Modules (Series Connection)
Please ensure that before you expand the battery the "SOC target selection" is set to "Internal". Please note that a maximum of 6 battery modules in total can be added to the RCT Power Storage. Extend your system in 3 steps: 8.6.1 Preparing the existing battery system... -
Page 105: Preparing The Existing Battery System
2-3 hours, depending on the initial state of charge. The first step can be started by the end consumer thus avoiding idle time for the installer on site. Step Description Launch the“RCT Power APP“ and establish connection to the inverter. Press the settings icon“ “. - Page 106 The menu item "RCT-Power Battery Stack Commission" will be displayed. Press "START" to start the calibration. The existing battery stack will now fully charge (SOC of 100%) and then automatically discharge to a SOC of 50%. After the discharge process has completed the system is held in the state "...
- Page 107 Press "STOP" to return the system to normal compensation mode after the calibration has completed. Then press "FINISH" to complete the process. After the system has returned to compensation mode, immediately switch off the battery and inverter. (DC switch for Power Storage DC/mains fuse for Power Storage...
-
Page 108: Adding Additional Battery Modules
8.6.3 Calibrating the new system Continue to complete the extension: Step Description Launch “RCT Power APP“ and establish connection to the inverter. Press the settings icon“ “. Tap on "LOGIN" Enter the password in the dialogue box and press “OK“ to enter the configuration options screen. - Page 109 Select a time or date that is in the past and press "Set" to trigger the calibration. The system will now begin calibration. You can check progress in the RCT Power APP. In the Menu "ONLINE" check the Battery Icon for the notification message "charge (calib.)" and the SOC target value 100%.
-
Page 110: Connecting A Modbus Meter To The Power Storage Dc (With Or Without Radio Transmitter Module)
Connecting a ModBus meter to the Power Storage DC (with or without radio transmitter module) The use of a bidirectional meter with Modbus connection, instead of the Power Sensor, can be beneficial under certain conditions, e.g. bridging of long distances to the house connection point. Connections over distances of up to 500m are possible. - Page 111 APP configuration with or without radio module: Please note that the inverter requires at least SW version 4464 to ensure correct functioning. Launch the “RCT Power APP“. “ Login with installer password → "DEVICE"-→ "Settings" → "Interfaces"-→ "RS485" Press the Settings icon “...
-
Page 112: Software Updates For Inverter And Battery
Please use the following procedure to update your device to the latest software version: Ensure that the "RCT Power App" is up to date. In "Google Play Store" go to "My apps & games" and check under the tab "Updates"... - Page 113 To view the error log launch RCT Power App and go to the “HISTORY” menu. Then press the symbol. The errors are displayed by type and time of occurrence. Tap the error to show duration and error description. Error message...
- Page 114 When the maximum permissible limit of UL_OVER_L2_LV1 level1 is exceeded, Power Storage stops UL_OVER_L3_LV1 feeding. Your power storage continually monitors Check grid voltage level and / or ask UL_OVER_L1_LV2 voltage level of grid. grid provider about grid stability. UL_OVER_L2_LV2 When the minimum permissible limit of UL_OVER_L3_LV2 level2 is exceeded, Power Storage stops feeding...
- Page 115 current. AFI_300mA Inverter stops feeding. Your power storage continually monitors Restart the Power Storage. the quality of current fed in. If the error still occurs, please contact IDC_SLOW If an increased DC-component in AC- service. current is detected, inverter stops feeding. CAN communication timeout with battery.
-
Page 116: Maintenance
RCT Power GmbH. RCT Power GmbH does not accept any liability for damage caused by incorrect or lost data, due to incorrect operation or malfunction of the inverter, the software, additional devices or personal computers. -
Page 117: Technical Data
12 Technical Data Power Storage 10.0 Order Number 110-0003 110-0004 DC-INPUT Max. recommended DC power (South / East-West)* 10,8 kW / 12 kW 13,5 kW / 15 kW MPPT 2 (paralleling possible) Input per MPPT Maximum DC current per MPPT 14 A ( 28 A in parallel mode) Rated DC voltage 700 V... - Page 118 Dimensions (height x width x depth) 570 x 585 x 200 mm Weight 32 kg SAFETY / STANDARDS Safety class Overload behaviour Working point adjustment Certificates CE, VDE-AR-N 4105:2018-11, EN 50549 More certificates: www.rct-power.com EN61000-6-2, EN61000-6-3, EN61000-3-2, EN61000-3-3 Safety EN/IEC62109-1, EN/IEC62109-2 BLOCK DIAGRAM...
Need help?
Do you have a question about the Power Storage DC 8.0 and is the answer not in the manual?
Questions and answers