Welbilt Convotherm 4 User Manual
Combi oven
Hide thumbs
Also See for Convotherm 4:
- Training manual (156 pages) ,
- Installation manual (120 pages) ,
- Operating manual (115 pages)

Related Manuals for Welbilt Convotherm 4


Summary of Contents for Welbilt Convotherm 4
- Page 1 Combi oven Convotherm 4 C4 floor-standing units User manual - Original, ENG Advancing Your Ambitions...
-
Page 3: Table Of Contents
Table of Contents Table of Contents General information EC Declaration of Conformity for electric appliances EC Declaration of Conformity for gas appliances Environmental protection Identifying your combi oven Structure of customer documentation About this user manual Essential reading relating to safety Design and function The functions of the combi oven Design and function of the combi oven... - Page 4 Table of Contents 5.2.3 How to clean the cooking chamber without using cleaning agents 5.2.4 How to perform cooking chamber cleaning using only rinse aid from connected canisters 5.2.5 How to perform cooking chamber cleaning using only rinse aid from single-measure dispensing bottles Operating principles and instructions for user-assisted cleaning processes 5.3.1...
-
Page 5: General Information
Welbilt Deutschland GmbH, Talstraße 35, 82436 Eglfing, Deutschland Germany Authorized representative UK Welbilt UK Limited, Provincial Park, Nether Lane, Ecclesfield, Sheffield, S35 9ZX, United Kingdom Validity of Declaration of Conformity This Declaration of Conformity applies to the following electric appliance models: C4 12.20 ES... - Page 6 Authorized body for documentation The following person is authorized to compile the technical documentation: EU: Welbilt Deutschland GmbH, Talstraße 35, 82436 Eglfing, Deutschland Germany ■ UK: Welbilt UK Limited, Provincial Park, Nether Lane, Ecclesfield, Sheffield, S35 9ZX, United Kingdom ■ User manual...
-
Page 7: Ec Declaration Of Conformity For Gas Appliances
Welbilt Deutschland GmbH, Talstraße 35, 82436 Eglfing, Deutschland Germany Authorized representative UK Welbilt UK Limited, Provincial Park, Nether Lane, Ecclesfield, Sheffield, S35 9ZX, United Kingdom Validity of Declaration of Conformity This Declaration of Conformity applies to the following types of gas appliances: C4 12.20 GS... -
Page 8: Environmental Protection
The following person is authorized to compile the technical documentation: EU: Welbilt Deutschland GmbH, Talstraße 35, 82436 Eglfing, Deutschland Germany ■ UK: Welbilt UK Limited, Provincial Park, Nether Lane, Ecclesfield, Sheffield, S35 9ZX, United Kingdom ■ 1.3 Environmental protection... -
Page 9: Identifying Your Combi Oven
Layout of the type plate on electric appliances Item Name Name of appliance Combi oven Trade name Element Meaning Convotherm 4 appliance series easyTouch controls easyDial controls numbers xx.yy Appliance size Electric appliance with boiler Electric appliance with water injection for appliances with an NSF certificate... - Page 10 Type plate Additional plate Name Name of appliance Combi oven Trade name Element Meaning Convotherm 4 appliance series easyTouch controls easyDial controls numbers xx.yy Appliance size Gas appliance with boiler Gas appliance with water injection for appliances with an NSF...
-
Page 11: Structure Of Customer Documentation
1 General information 1.5 Structure of customer documentation Contents of the appliance documentation Book type Contents Installation manual Describes how to move, set up and install the appliance, and how to put the appliance ■ into service Describes the hazards and appropriate preventive measures relevant to all installation ■... -
Page 12: Essential Reading Relating To Safety
1 General information 1.7 Essential reading relating to safety Safety information in the customer documentation Safety information relating to the combi oven appears only in the installation manual and the user manual. The installation manual contains the safety information for the tasks covered by the manual and which are performed when moving, setting up and installing the appliance and when putting the appliance into service and removing the appliance from service. -
Page 13: Design And Function
2 Design and function 2 Design and function 2.1 The functions of the combi oven The cooking modes You can cook a range of food in your combi oven. The combi oven is able to do this by working in the following cooking modes: Steam ■... -
Page 14: Design And Function Of The Combi Oven
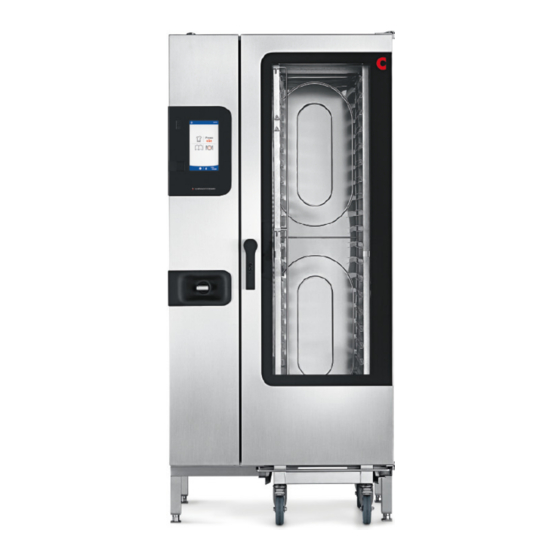
2 Design and function 2.2 Design and function of the combi oven Components and function (electric appliances) The following illustration shows a size 20.20 combi oven as an example for all electric appliances: Item Name Function Ventilation port External air intake for removing the moisture from the cooking chamber ■... - Page 15 2 Design and function Item Name Function Recoil hand shower Intended solely for rinsing out the cooking chamber with water ■ (this is not fitted on certain appli- Retracts automatically into the holder after use ■ ances) Antibacterial ("HygieniCare") ■ Core temperature probe, sous- Measures the core temperature of the food being cooked ■...
- Page 16 2 Design and function Item Name Function Cooking chamber Contains the food during cooking operation Built-in preheat bridge in appli- Used for safety purposes during preheating and reduces energy wastage ance door Loading trolley Holds standard-sized food containers Loading trolley handle Curved grip for moving the loading trolley ■...
-
Page 17: Layout And Function Of The Operating Panel
2 Design and function 2.3 Layout and function of the operating panel Layout and elements of the easyTouch operating panel Item Name Function Appliance Switches the combi oven on and off ON/OFF switch USB port For connecting a USB stick Full touch screen Central controls for appliance display... -
Page 18: For Your Safety
3 For your safety 3 For your safety Purpose of this chapter This chapter provides you with all the information you need in order to use the combi oven safely without putting yourself or others at risk. This is a particularly important chapter that you should read through carefully. Basic safety code Object of this safety code This safety code aims to ensure that all persons who use the combi oven have a thorough knowledge of the hazards and... -
Page 19: Intended Use Of Your Combi Oven
3 For your safety Intended use of your combi oven Intended use The combi oven is designed and built solely for cooking different foodstuffs in standard-sized food containers (e.g. Gas- ■ tronorm containers, standard baking trays). Steam, convection and combi-steam (non-pressurized superheated steam) are used for this purpose. -
Page 20: Warning Signs On The Combi Oven
3 For your safety Warning signs on the combi oven Positioning of warning signs The following illustration shows a size 20.20 electric combi oven as an example of all floor-standing units: Loading trolley Obligatory warning signs The following warning signs must be attached to the combi oven and accessories in the area indicated so as to be easily visible at all times. - Page 21 3 For your safety Range Warning sign Description Tip-over hazard warning for the loading trolley There is a risk of the loading trolley toppling over if moved. Always take great care when moving the loading trolley. When moving the loading trolley, watch out for ob- jects in the way or unevenness in the floor.
-
Page 22: Owner Obligations
3 For your safety Owner obligations Owner obligations in summary The owner bears the responsibility for transferring knowledge to all other users about how to work safely and correctly with the appliance during operation, cleaning and servicing. The owner is responsible for ensuring that the appliance is in an operational state prior to use. -
Page 23: General Hazards
3 For your safety General hazards General rules for working in the kitchen In general a huge range of hazards can arise in the kitchen. You must therefore wear the prescribed protective clothing in the kitchen, and in particular wear protective gloves when working with the kitchen appliances. The following section describes the nature of these hazards, what effect they have and how you can avoid them. - Page 24 3 For your safety Contact with cleaning agents Cleaning products are used in the kitchen. This can cause the following hazards: Risk of chemical burns or irritation to skin, eyes and respiratory system from contact with cleaning agents and their vapours. When? For all cleaning actions ■...
-
Page 25: Hazards Arising From The Appliance
3 For your safety Hazards arising from the appliance General rules for working with the appliance The combi oven is designed to protect the user from all hazards that can reasonably be avoided by design measures. The actual purpose of the combi oven, however, means that there are still residual risks; you must therefore take precautions to avoid them. - Page 26 3 For your safety Hazard points (gas appliances) The following illustration shows a size 20.20 combi oven as an example for all gas appliances: Item Safety hazard Hazard locations Proximity to flammable materials On top of the appliance Escaping gas (no picture) Hot surfaces Air vent, ventilation port, exhaust outlet, appliance door,...
- Page 27 3 For your safety Proximity to flammable materials Heat produced in the appliance during cooking operations can cause the following hazards: Fire hazard from heat given off by the appliance What can cause this? By storing flammable materials, gases or liquids on top of the appliances ■...
- Page 28 3 For your safety Hot liquids When using the loading trolley to load the appliance with food that involves hot liquids, the following hazards can arise: Risk of scalding from hot liquids When? When taking hot, liquid food out of the cooking chamber ■...
- Page 29 3 For your safety Contact with cleaning agents The following hazards can arise during cleaning of the appliance: Risk of chemical burns or irritation to skin, eyes and respiratory system from contact with cleaning agents and their fumes What can cause this? If the cooking chamber has not been cooled sufficiently ■...
- Page 30 3 For your safety Break in the cold chain A break in the cold chain can cause the following hazards if food is eaten: Risk from microbiological contamination of food When? When cooking is manually interrupted ■ When the food cold-chain is broken by loading the cooking chamber in advance ■...
-
Page 31: Safety Devices
3 For your safety Safety devices Meaning The combi oven has a number of safety devices to protect the user from hazards. It is absolutely essential that all safety devices are fitted, secured correctly and in working order when operating the combi oven. Position and function The following illustration shows a size 20.20 electric combi oven as an example of all floor-standing units: Item... - Page 32 3 For your safety Item Protective device Function Check Disconnector Used to disconnect the appliance There is no need for the user to per- from the power supply during clean- form a test. (installed by ing, repair and servicing work and in customer) a hazardous situation Gas shut-off device...
-
Page 33: Requirements To Be Met By Personnel, Working Positions
3 For your safety Requirements to be met by personnel, working positions Requirements to be met by operating personnel The table shows the skills required to perform the specified roles. One person may perform more than one role depending on need and organization of work, provided this person has the skills required for the role concerned. -
Page 34: Personal Protective Equipment
3 For your safety Personal protective equipment Operation and servicing Activity Materials used Personal protective equipment Loading / removing food None Work wear as specified in country-specific standards and di- rectives (BGR 111 in Germany) for kitchen work, in particular: Protective clothing ■... -
Page 35: Cooking Procedures
4 Cooking procedures 4 Cooking procedures 4.1 Basic principles for loading the combi oven 4.1.1 Placing food containers in appliances of size X.10 GN containers/baking tray sizes 1/1, 1/2; shelf grill; in U-rails (standard model) Rules for handling The containers or the shelf grill must be inserted as far as ■... - Page 36 4 Cooking procedures 4.1.2 Placing food containers in appliances of size X.20 GN containers/baking tray sizes 2/1, 1/1; shelf grill; in U-rails (standard model) Rules for handling The containers or the shelf grill must be inserted as far as ■ they will go BETWEEN the two arms of each U-rail (1).
-
Page 37: Loading Capacity For The Combi Oven
4 Cooking procedures 4.1.3 Loading capacity for the combi oven Maximum load for cooking 12.20 20.10 20.20 Applies to GN containers and for standard-sized baking trays Maximum load per appliance [kg] Maximum load per shelf [kg] Maximum load for regenerating 12.20 20.10 20.20... -
Page 38: Operating Principles And Instructions For Cooking
4 Cooking procedures 4.2 Operating principles and instructions for cooking 4.2.1 Turning the combi oven on and off For your safety when using the combi oven Before starting work, it is essential that you familiarize yourself with the rules and hazard warnings specified in the chapter 'For your safety on page 18' and in this instruction manual, and follow the instructions given there. - Page 39 4 Cooking procedures Switching off the combi oven at the end of the working day Perform the necessary cleaning tasks as specified in the cleaning and servicing schedule. Switch off the combi oven. Leave the appliance door ajar in order to let moisture escape. Switching off the combi oven before prolonged breaks in use Switch off the water, gas and electricity on site before prolonged breaks in use.
-
Page 40: How To Cook
4 Cooking procedures 4.2.2 How to cook For your safety when using the combi oven Before starting work, it is essential that you familiarize yourself with the rules and hazard warnings specified in the chapter 'For your safety on page 18' and in this instruction manual, and follow the instructions given there. Prior knowledge required You need to know these operations: Opening and closing the appliance door safely... - Page 41 4 Cooking procedures Close the appliance door. Start the cooking operation. Wait for the cooking operation to finish. An audible signal is given when the cooking operation is finished. Follow the prompts displayed by the software. Open the appliance door. Take out the food.
-
Page 42: Specific Cooking Instructions
4 Cooking procedures 4.3 Specific Cooking Instructions 4.3.1 Opening and closing the appliance door safely For your safety when using the combi oven Before starting work, it is essential that you familiarize yourself with the rules and hazard warnings specified in the chapter 'For your safety on page 18' and in this instruction manual, and follow the instructions given there. - Page 43 4 Cooking procedures Slowly open the appliance door. For appliances with a right-hinged door stop: Open the appliance door fully. For appliances with a right-hinged door, marine version: Risk of burns from touching the door holder Wear personal protective equipment when setting up the door hold- ■...
-
Page 44: Loading And Removing Food (Standard Model)
■ Using a loading trolley from the +3 range In order to be able to use a loading trolley from the +3 range in a Convotherm 4 combi oven, you can obtain an easy-to-fit upgrade kit from the manufacturer. Never wheel a loading trolley from the +3 range into a Convotherm 4 combi oven unless the trolley has been upgraded with this kit, otherwise the appliance may be damaged. - Page 45 4 Cooking procedures Placing food in the combi oven Lift up the shelf-securing bar at the front of the loading trolley and swing it to the left. Risk of scalding from hot liquids Make sure you insert the containers, baking trays and shelf grills ■...
- Page 46 4 Cooking procedures Open the appliance door. Release the parking brakes on the loading trolley. Insert the loading trolley handle in the guides on the front of the ■ loading trolley. (This step is not needed for the prison model of the combi oven be- cause the loading trolley handle is permanently fixed to the loading trolley.) Grab the loading trolley from the loading trolley handle in order not...
- Page 47 4 Cooking procedures Store the loading trolley handle on the trolley by placing one hollow end over the designated holder (recommended accessory) fitted on one of the appliance feet. Alternatively, place the loading trolley handle in good view in a suitable place close to the appliance but never on the appliance.
- Page 48 4 Cooking procedures Removing food Open the appliance door. Insert the loading trolley handle in the guides on the front of the load- ing trolley. (This step is not needed for the prison model of the combi oven be- cause the loading trolley handle is permanently fixed to the loading trolley.) Release the parking brakes on the loading trolley.
- Page 49 4 Cooking procedures Pull the loading trolley out of the cooking chamber by its handle. For the prison model: Risk of burns from high temperatures inside the cooking cham- ber on all parts that are or were inside during cooking mode Wear personal protective equipment.
-
Page 50: Loading And Removing Food (Bakery Model)
4 Cooking procedures 4.3.3 Loading and removing food (bakery model) For your safety when using the combi oven Before starting work, it is essential that you familiarize yourself with the rules and hazard warnings specified in the chapter 'For your safety on page 18' and in this instruction manual, and follow the instructions given there. Prior knowledge required You need to know these operations: Opening and closing the appliance door safely... - Page 51 4 Cooking procedures Lock the open shelf-securing bar back in place. (This step is not required for appliance size 20.10.) Open the appliance door. Release the parking brakes on the loading trolley. User manual...
- Page 52 4 Cooking procedures Insert the loading trolley handle in the guides on the front of the ■ loading trolley. (This step is not needed for the prison model of the combi oven be- cause the loading trolley handle is permanently fixed to the loading trolley.) Grab the loading trolley from the loading trolley handle in order not ■...
- Page 53 4 Cooking procedures Close the appliance door. Re-apply the brakes on the wheels of the loading trolley. User manual...
- Page 54 4 Cooking procedures Removing food Open the appliance door. Insert the loading trolley handle in the guides on the front of the load- ing trolley. (This step is not needed for the prison model of the combi oven be- cause the loading trolley handle is permanently fixed to the loading trolley.) Release the parking brakes on the loading trolley.
- Page 55 4 Cooking procedures Pull the loading trolley out of the cooking chamber by its handle. For the prison model: Risk of burns from high temperatures inside the cooking cham- ber on all parts that are or were inside during cooking mode Wear personal protective equipment.
-
Page 56: Putting Away And Retrieving The Core Temperature Probe
4 Cooking procedures 4.3.4 Putting away and retrieving the core temperature probe For your safety when using the combi oven Before starting work, it is essential that you familiarize yourself with the rules and hazard warnings specified in the chapter 'For your safety on page 18' and in this instruction manual, and follow the instructions given there. -
Page 57: Using The External Core Temperature Probe Or Sous-Vide Sensor
4 Cooking procedures 4.3.5 Using the external core temperature probe or sous-vide sensor For your safety when using the combi oven Before starting work, it is essential that you familiarize yourself with the rules and hazard warnings specified in the chapter 'For your safety on page 18' and in this instruction manual, and follow the instructions given there. - Page 58 4 Cooking procedures Disconnecting and putting away the external core temperature probe or sous-vide sensor Open the appliance door. Risk of burns from high temperatures inside the cooking cham- ber on all parts that are or were inside during cooking mode Wear personal protective equipment.
-
Page 59: Using A Usb Stick
4 Cooking procedures 4.3.6 Using a USB stick For your safety when using the combi oven Before starting work, it is essential that you familiarize yourself with the rules and hazard warnings specified in the chapter 'For your safety on page 18' and in this instruction manual, and follow the instructions given there. Purpose of the USB sliding cover The sliding cover protects the USB port so that no water vapour can get into the control electronics during cooking or clean- ing. - Page 60 4 Cooking procedures Inserting the USB stick for easyDial Open the cover to the USB port on the operating panel. Plug in the USB stick. If the USB stick is too large, use a standard commercial adapter cable. User manual...
-
Page 61: Cleaning Procedures
5 Cleaning procedures 5 Cleaning procedures 5.1 Basic principles for cleaning the combi oven 5.1.1 Cleaning methods Cleaning method Cleaning method Description Criteria for use Oven cleaning without using A fully automatic process in which the To remove very light soiling or odours be- ■... -
Page 62: Cleaning Agent Delivery For Fully Automatic Cleaning Processes
5 Cleaning procedures Visual check for no residues after cleaning After completion of any of the specified cleaning methods, always carry out a visual inspection to check that no residues have been left by the cleaning process. 5.1.2 Cleaning agent delivery for fully automatic cleaning processes Cleaning agent delivery variants The type of cleaning agent delivery method for the combi oven’s fully automatic cleaning processes is set with a setting in the software settings. -
Page 63: Cleaning Instructions
5 Cleaning procedures 5.1.3 Cleaning instructions Overview The following illustration shows a size 20.20 combi gas combi oven as an example for all appliances: Item Name Outside of appliance case Cooking chamber Hygienic plug-in gasket Double glass door Appliance door Transverse gasket above the preheat bridge Oven drain with filter Loading trolley (rack) - Page 64 5 Cleaning procedures What must be cleaned? Procedure Cleaning agents Condensate collecting tray in loading 'Emptying the condensate collecting Common household detergent ■ trolley tray for the loading trolley' on page Clean by hand using a soft, non- ■ abrasive sponge Rinse off after with water ■...
- Page 65 5 Cleaning procedures What must be cleaned? Procedure Cleaning agents Loading trolley rack (particularly also Clean by hand using a soft cloth and ConvoClean new or forte ■ the area around the condensate collect- cleaning agent ing tray) Wipe off thoroughly with a soft cloth ■...
-
Page 66: Cleaning Agents
5 Cleaning procedures 5.1.4 Cleaning agents Cleaning agents Use solely the cleaning agents specified here to clean the combi oven and its accessories. Product Container ConvoClean new Oven cleaning Spray bottle for light soiling By hand ■ Not intended for cleaning containers, Semi-automatic ■... -
Page 67: Preparing The Cleaning Agents
5 Cleaning procedures 5.1.5 Preparing the cleaning agents Preparing the cleaning agents Preparation form Handling / Usage Cleaning agents Spray bottle Never leave the spray bottle unused under pressure for ConvoClean new ■ ■ prolonged periods. Open the pump head slowly to release ConvoClean forte ■... -
Page 68: Operating Principles And Instructions For Fully Automatic Cleaning Processes
5 Cleaning procedures 5.2 Operating principles and instructions for fully automatic cleaning processes 5.2.1 How to perform fully automatic cooking chamber cleaning using connected canisters For your safety when using the combi oven Before starting work, it is essential that you familiarize yourself with the rules and hazard warnings specified in the chapter 'For your safety on page 18' and in this instruction manual, and follow the instructions given there. - Page 69 5 Cleaning procedures Risk of scalding from hot steam and vapour Expect to face a larger blast of steam than normal. ■ Make sure that any bystanders step back from the appliance. ■ Open the appliance door slowly and carefully. ■...
-
Page 70: How To Perform Fully Automatic Oven Cleaning Using Single-Measure Dispensing Bottles
5 Cleaning procedures 5.2.2 How to perform fully automatic oven cleaning using single-measure dispensing bottles For your safety when using the combi oven Before starting work, it is essential that you familiarize yourself with the rules and hazard warnings specified in the chapter 'For your safety on page 18' and in this instruction manual, and follow the instructions given there. - Page 71 5 Cleaning procedures Close the appliance door. Result: Cleaning process in progress. Wait for the soak cycle to finish (about 5 to 10 minutes depending on the cleaning profile). An audible signal is given when the soak cycle is finished. ■...
- Page 72 5 Cleaning procedures Close the appliance door. Wait for the final wash cycle to finish (about 20 to 30 minutes depend- ing on the cleaning profile). An audible signal is given when the final wash cycle is finished. ■ Follow the prompts displayed by the software. ■...
- Page 73 5 Cleaning procedures Wait for the wash cycle to finish (about 30 to 60 minutes depending on the cleaning profile). An audible signal is given when the wash cycle is finished. ■ You are prompted to add the rinse aid. ■...
-
Page 74: How To Clean The Cooking Chamber Without Using Cleaning Agents
5 Cleaning procedures 5.2.3 How to clean the cooking chamber without using cleaning agents For your safety when using the combi oven Before starting work, it is essential that you familiarize yourself with the rules and hazard warnings specified in the chapter 'For your safety on page 18' and in this instruction manual, and follow the instructions given there. -
Page 75: How To Perform Cooking Chamber Cleaning Using Only Rinse Aid From Connected Canisters
5 Cleaning procedures 5.2.4 How to perform cooking chamber cleaning using only rinse aid from connected canisters For your safety when using the combi oven Before starting work, it is essential that you familiarize yourself with the rules and hazard warnings specified in the chapter 'For your safety on page 18' and in this instruction manual, and follow the instructions given there. -
Page 76: How To Perform Cooking Chamber Cleaning Using Only Rinse Aid From Single-Measure Dispensing
5 Cleaning procedures 5.2.5 How to perform cooking chamber cleaning using only rinse aid from single- measure dispensing bottles For your safety when using the combi oven Before starting work, it is essential that you familiarize yourself with the rules and hazard warnings specified in the chapter 'For your safety on page 18' and in this instruction manual, and follow the instructions given there. - Page 77 5 Cleaning procedures Close the appliance door. Wait for the last wash cycle to finish (about 10 minutes). An audible signal is given when the final wash cycle is finished. ■ Follow the prompts displayed by the software. ■ Open the appliance door and check the cleaning result. The cooking ■...
-
Page 78: Operating Principles And Instructions For User-Assisted Cleaning Processes
5 Cleaning procedures 5.3 Operating principles and instructions for user-assisted cleaning processes 5.3.1 How to perform semi-automatic cooking chamber cleaning For your safety when using the combi oven Before starting work, it is essential that you familiarize yourself with the rules and hazard warnings specified in the chapter 'For your safety on page 18' and in this instruction manual, and follow the instructions given there. - Page 79 5 Cleaning procedures Hinge out the suction panel into the cooking chamber. Use the spray bottle to spray cleaning agent around the cooking chamber, the suction panel and the area behind the suction panel, and the oven drain. Secure the suction panel back in place. Wheel the loading trolley back into the cooking chamber.
- Page 80 5 Cleaning procedures Risk of food contamination from cleaning agent or rinse aid re- sulting from inadequate rinsing If the appliance does not have a hand shower, use an external water ■ spray instead of the hand shower or wipe down the cooking cham- ber, fittings and the area behind the suction panel thoroughly with plenty of water and a soft cloth.
-
Page 81: How To Clean The Cooking Chamber By Hand
5 Cleaning procedures 5.3.2 How to clean the cooking chamber by hand For your safety when using the combi oven Before starting work, it is essential that you familiarize yourself with the rules and hazard warnings specified in the chapter 'For your safety on page 18' and in this instruction manual, and follow the instructions given there. - Page 82 5 Cleaning procedures Check that the suction panel is fitted correctly: The suction panel is in place and secured at the top and bottom. ■ Leave the appliance door ajar to let the cooking chamber dry out. User manual...
-
Page 83: How To Clean The Cooking Chamber Behind The Suction Panel
5 Cleaning procedures 5.3.3 How to clean the cooking chamber behind the suction panel For your safety when using the combi oven Before starting work, it is essential that you familiarize yourself with the rules and hazard warnings specified in the chapter 'For your safety on page 18' and in this instruction manual, and follow the instructions given there. -
Page 84: How To Clean The Double Glass Door
5 Cleaning procedures 5.3.4 How to clean the double glass door For your safety when using the combi oven Before starting work, it is essential that you familiarize yourself with the rules and hazard warnings specified in the chapter 'For your safety on page 18' and in this instruction manual, and follow the instructions given there. Prior knowledge required You need to know these operations: Opening and closing the appliance door safely... -
Page 85: How To Perform Intensive Cleaning Of The Hygienic Plug-In Gasket
5 Cleaning procedures 5.3.5 How to perform intensive cleaning of the hygienic plug-in gasket For your safety when using the combi oven Before starting work, it is essential that you familiarize yourself with the rules and hazard warnings specified in the chapter 'For your safety on page 18' and in this instruction manual, and follow the instructions given there. -
Page 86: Specific Cleaning Instructions
5 Cleaning procedures 5.4 Specific Cleaning Instructions 5.4.1 Releasing and securing the suction panel For your safety when using the combi oven Before starting work, it is essential that you familiarize yourself with the rules and hazard warnings specified in the chapter 'For your safety on page 18' and in this instruction manual, and follow the instructions given there. - Page 87 5 Cleaning procedures Releasing and hinging out the suction panel Use the tool to release the four fasteners (top, centre and bottom) on the suction panel. Model size 12.20 only has two fasteners (top and bottom). Hinge out the suction panel into the cooking chamber. User manual...
- Page 88 5 Cleaning procedures Securing the suction panel To secure the suction panel, follow the steps in the reverse order that you performed to release it. Make sure that all four fasteners are secured (top, centre and bottom). Model size 12.20 only has two fasteners (top and bottom). User manual...
-
Page 89: Removing And Fitting The Hygienic Plug-In Gasket
5 Cleaning procedures 5.4.2 Removing and fitting the hygienic plug-in gasket For your safety when using the combi oven Before starting work, it is essential that you familiarize yourself with the rules and hazard warnings specified in the chapter 'For your safety on page 18' and in this instruction manual, and follow the instructions given there. Prior knowledge required You need to know these operations: Opening and closing the appliance door safely... - Page 90 5 Cleaning procedures Fitting the hygienic plug-in gasket Refit the hygienic plug-in gasket first in the four corners, starting from one of the top corners. Once all the corner sections are fitted, press the hygienic plug-in gas- ket carefully into the straight sections of the guide. Make sure that the hygienic plug-in gasket is seated tightly against the door and does not contain any kinks or curves.
-
Page 91: Emptying The Condensate Collecting Tray In The Loading Trolley
5 Cleaning procedures 5.4.3 Emptying the condensate collecting tray in the loading trolley For your safety when using the combi oven Before starting work, it is essential that you familiarize yourself with the rules and hazard warnings specified in the chapter 'For your safety on page 18' and in this instruction manual, and follow the instructions given there. - Page 92 5 Cleaning procedures Emptying the condensate collecting tray into a drain Pull the condensate collecting tray back slightly. Tilt the condensate tray slightly at the end stop so that you can pull it out backwards over the end stop. Lift the condensate collecting tray horizontally out of the loading trolley. Empty the condensate out of the condensate collecting tray into a drain.
-
Page 93: Releasing And Securing The Interior Glass Door
5 Cleaning procedures 5.4.4 Releasing and securing the interior glass door For your safety when using the combi oven Before starting work, it is essential that you familiarize yourself with the rules and hazard warnings specified in the chapter 'For your safety on page 18' and in this instruction manual, and follow the instructions given there. Prior knowledge required You need to know these operations: Opening and closing the appliance door safely... - Page 94 5 Cleaning procedures Hinge the interior glass panel away. Securing the interior glass door To secure the interior glass door, follow the steps in the reverse order that you performed to release it. Check that the spring clips are securing the interior glass again cor- rectly at top and bottom.
-
Page 95: Emptying And Cleaning The Grease Collecting Canister (Only Applies To Convogrill)
5 Cleaning procedures 5.4.5 Emptying and cleaning the grease collecting canister (only applies to ConvoGrill) For your safety when using the combi oven Before starting work, it is essential that you familiarize yourself with the rules and hazard warnings specified in the chapter 'For your safety on page 18' and in this instruction manual, and follow the instructions given there. -
Page 96: Replacing The Rinse Aid Canister
5 Cleaning procedures 5.4.6 Replacing the rinse aid canister For your safety when using the combi oven Before starting work, it is essential that you familiarize yourself with the rules and hazard warnings specified in the chapter 'For your safety on page 18' and in this instruction manual, and follow the instructions given there. Materials required One empty canister (10 litres) for the ConvoCare rinse aid ■... - Page 97 5 Cleaning procedures Replacing the rinse aid canister Risk of irritation to skin, eyes and respiratory system Do not let the rinse aid come into contact with skin, eyes or mucous ■ membranes. Do not inhale vapours from the rinse aid. ■...
-
Page 98: Replacing The Cleaning Agent Canister
5 Cleaning procedures 5.4.7 Replacing the cleaning agent canister For your safety when using the combi oven Before starting work, it is essential that you familiarize yourself with the rules and hazard warnings specified in the chapter 'For your safety on page 18' and in this instruction manual, and follow the instructions given there. Materials required ConvoClean new or ConvoClean forte replacement canister ■... - Page 99 5 Cleaning procedures Place ready the new canister (1) filled with cleaning agent. ■ Feed the (red) supply tube plus suction nozzle (2) into the full canis- ■ ter (1) and screw it on. Make sure that there are no kinks in the tube and that the vent hole ■...
-
Page 100: Adding Cleaning Agent From Single-Measure Dispensing Bottles To The Cooking Chamber
5 Cleaning procedures 5.4.8 Adding cleaning agent from single-measure dispensing bottles to the cooking chamber For your safety when using the combi oven Before starting work, it is essential that you familiarize yourself with the rules and hazard warnings specified in the chapter 'For your safety on page 18' and in this instruction manual, and follow the instructions given there. - Page 101 5 Cleaning procedures Press the bottle approximately vertically onto the spike in the centre of the oven drain in order to pierce the foil. Leave the bottle sitting upright on the spike for about 10 seconds so ■ that the liquid drains out completely. Look to check that the fluid has drained out completely.
-
Page 102: Servicing Procedures
Part number of your appliance (see 'Identifying your combi oven' on page 9) ■ Serial number of your appliance (see 'Identifying your combi oven' on page 9) ■ Contact details for Convotherm Germany Welbilt Deutschland GmbH Talstraße 35 82436 Eglfing Germany Head office... - Page 103 6 Servicing procedures Contact details for Welbilt Asia SEA Region Welbilt Asia Pacific 627A Aljunied Road, #05-03 Biztech Centre, Singapore 389842 Phone +65 6420 0800 e-mail info.apac@welbilt.com CHINA Welbilt Shanghai 255 Yangzhai Road, Bldg 5, 5A, Changning District, Shanghai, China 200051...
-
Page 104: Warranty Information
6 Servicing procedures 6.1.2 Warranty information Warranty information Warranty claims involving your combi oven will only be honoured if the unit has been installed by a qualified Service Engi- neer from an authorized service company in accordance with the instructions in the installation manual. The manufacturer must be in receipt of a fully completed checklist, enclosed with the appliance, before a warranty claim can be dealt with. -
Page 105: Servicing Schedule
6 Servicing procedures 6.1.3 Servicing schedule Rules for servicing the appliance The combi oven must be serviced regularly to ensure it can operate safely and reliably. Servicing includes maintenance tasks that can be performed by the user as well as maintenance work that must be carried out by a qualified Service Engineer from an approved customer service office. -
Page 106: Troubleshooting
6 Servicing procedures 6.2 Troubleshooting 6.2.1 Error codes Errors and required responses The following table lists the errors that you may be able to resolve yourself. If the combi oven continues to display the error after you have tried to resolve it, please contact customer service. Always contact customer service for help if any error messages appear that are not listed here. -
Page 107: Emergency Mode
6 Servicing procedures 6.2.2 Emergency mode Operating the combi oven in emergency mode Your combi oven has an emergency mode that lets you continue to use it when it has a fault that cannot be resolved quickly. This gives you continued but limited use of the appliance even though it has a fault. Always notify your customer service office however. - Page 108 6 Servicing procedures Error no. Functions available in emergency mode Limitations / Action Convection No preheating of boiler E05.2.x ■ ■ Delta-T cooking Convection Cleaning not possible ■ ■ Cook&Hold Convection ■ Smoker ■ Crisp&Tasty ■ ecoCooking Convection ■ All functions Steam at exactly 100 °C Longer cooking time E21.1...
- Page 109 6 Servicing procedures Error no. Functions available in emergency mode Limitations / Action Convection Cleaning not possible E28.2.1 ■ E28.2.3 Delta-T cooking Convection ■ Cook&Hold Convection ■ Smoker ■ Crisp&Tasty ■ ecoCooking Convection ■ All functions, EXCEPT: Only affects the cleaning E30.1 ■...
-
Page 110: Problems During Use
6 Servicing procedures 6.2.3 Problems during use Problems with the food being cooked Problem Possible cause Required response Uneven browning Suction panel not closed correctly 'Releasing and securing the suction panel' on page 86 Cooking chamber not preheated Preheat the cooking chamber Oven temperature too high Select a lower oven temperature and extend the cooking time... - Page 111 6 Servicing procedures Problems with cleaning Problem Possible cause Required response Black marks in the cooking chamber Incorrect cleaning agent Use ConvoClean forte for fully auto- ■ matic oven cleaning using connected canisters Use ConvoClean forte S for fully au- ■...
-
Page 112: Servicing Tasks
6 Servicing procedures 6.3 Servicing tasks 6.3.1 Replacing the hygienic plug-in gasket For your safety when using the combi oven Before starting work, it is essential that you familiarize yourself with the rules and hazard warnings specified in the chapter 'For your safety on page 18' and in this instruction manual, and follow the instructions given there. -
Page 113: Replacing The Halogen Lamp For The Oven Light
6 Servicing procedures 6.3.2 Replacing the halogen lamp for the oven light For your safety when using the combi oven Before starting work, it is essential that you familiarize yourself with the rules and hazard warnings specified in the chapter 'For your safety on page 18' and in this instruction manual, and follow the instructions given there. - Page 114 6 Servicing procedures Removing the halogen lamp Use the socket wrench to remove the four hex bolts on the oven light. The special construction means that the assembly of screws, trim, glass panel and gasket including mount remains in one piece when the screws are undone.
- Page 116 Order no. Additional technical documentation can be found in the download center at : www.convotherm.com Welbilt offers fully-integrated kitchen systems and our products are backed by KitchenCare aftermarket parts and service. Welbilt’s portfolio of award- ® winning brands includes Cleveland™, Convotherm ®...
Need help?
Do you have a question about the Convotherm 4 and is the answer not in the manual?
Questions and answers
maxx pro oven stuck in cleaning cycle . used water drop trick to enter service screen . what next