
Related Manuals for Afore AF1K-SL-1


Summary of Contents for Afore AF1K-SL-1
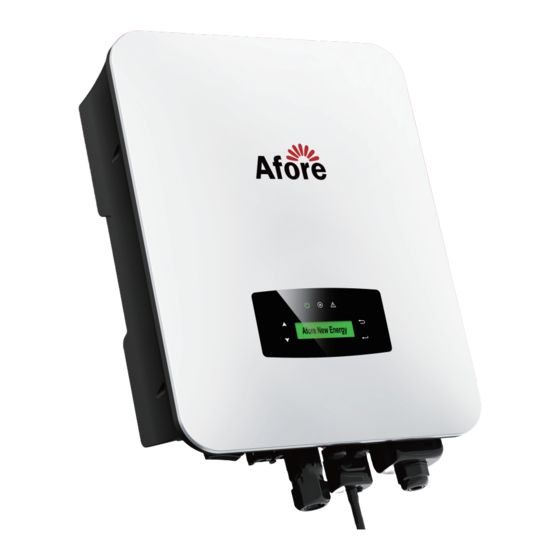
- Page 1 Hybrid Inverter Installation and Operation Manual +86-21-54326236 +86-21-54326136 info@aforenergy.com Building 7, No.333 Wanfang Rd, Minhang District, Shanghai, China. 201112...
-
Page 2: Table Of Contents
Contents Contents 1. About This Manual ..... . 1.1 Scope of Validity ......1.2 Target Group . - Page 3 Contents 5. Operation ......5.1 Control Panel ....... 5.2 Menu Overview .
-
Page 4: About This Manual
5. Please ensure that the used device and any relevant accessories are disposed of in accordance with applicable regulations. 6. Afore inverter should be placed upwards and handled with care in delivery. Pay attention to waterproof. Do not expose the inverter directly to water, rain, snow or spray. -
Page 5: Explanations Of Symbols
Safety & Symbols 2.2 Explanations of Symbols Afore inverter strictly comply with relevant safety standards. Please read and follow all the instructions and cautions during installation, operation and maintenance. Danger of electric shock The inverter contains fatal DC and AC power. All work on the inverter must be carried out by qualified personnel only. -
Page 6: Introduction
Introduction 3. Introduction 3.1 Basic Instruction The Afore AF-SL series hybrid inverters are designed to increase energy independence for homeowners. Energy management is based on time-of-use and demand charge rate structures, significantly reduce the amount of energy purchased from the public grid and optimize self-consumption. -
Page 7: Time Of Use
Introduction Note: Advance Setting When select 0 W under P_Feed menu, the inverter will export zero energy to the grid. When select xx W under P_Feed menu, the inverter will export customized energy to the grid. 3.2.2 Time of Use The Time of Use mode is designed to reward customers who do their part to reduce demand on the electric grid, particularly during peak usage periods. - Page 8 Introduction B. Discharge 4 periods of time discharge setting Energy flow: Battery and PV → Load → Grid C. Forbidden Discharge 4 periods of time discharge setting, the battery will be charged firstly. Energy flow: PV → Battery → Load → Grid...
-
Page 9: Selling First
Introduction 3.2.3 Selling First The Selling First mode is suitable for the regions with high feed-in tariff. Energy flow: PV → Load → Grid → Battery 3.2.4 Back-Up When the grid fails, the system will automatically switch to Back-Up mode. The back-up loads can be supplied by both PV and battery energy. -
Page 10: Installation
Installation 4. Installation 4.1 Pre-installation 4.1.1 Unpacking & Package List Unpacking On receiving the inverter, please check to make sure the packing and all components are not missing or damaged. Please contact your dealer directly for supports if there is any damage or missing components. Package List Open the package, please check the packing list shown as below. -
Page 11: Product Overview
Plastic Expansion Tube Security Screw Smart Meter (Opitional) AC Wiring Terminal AC Waterproof Cover Communication Connectors Communication Adapter Note: DC connectors Qty.: The AF1K-SL-1~AF3.6K-SL-1 is 1 pair of DC plug connector, the AF3K-SL~AF6K-SL is 2 pairs. 4.1.2 Product Overview 370mm 192mm... -
Page 12: Mounting Location
Installation Inverter Terminals Items Items DC Switch Communication Port DC Connectors ( + ) For PV Strings AC Port & EPS Port DC Connectors ( − ) For PV Strings Monitor Module Port Battery Port 4.1.3 Mounting Location The inverters are designed for indoor and outdoor installation (IP65), to increase the safety, performance and lifespan of the inverter, please select the mounting location carefully based on the following rules: •... - Page 13 Installation The inverter should be installed vertically on the wall, or lean back on plane with a limited tilted angle. Please refer to below picture. <15° >0° Leave the enough space around inverter, easy for accessing to the inverter, connection points and maintenance. 300mm 300mm 300mm...
-
Page 14: Mounting
Installation 4.2 Mounting Step 1 219mm 17mm 264mm Step 2 Step 3 Security screw... -
Page 15: Electrical Connection
Installation 4.3 Electrical Connection Smart Load Cri�cal Load Wind Turbines PV Array Smart meter Wind Turbines PV Array Grid Load Communication Adapter pin assignment COM1 COM2 NTC+ Meter 485A NTC- Meter 485B Dry Contact BAT 485A Dry Contact BAT CANH BAT CANL 12345678 BAT 485B... -
Page 16: Pv Connection
Installation 4.3.1 PV Connec�on The AF-SL series hybrid inverter has one/two MPPT channels, can be connected with one/two strings of PV panels. Please make sure below requirements are followed before connecting PV panels and strings to the inverter: • The open-circuit voltage and short-circuit current of PV string should not exceed the reasonable range of the inverters. -
Page 17: Battery Connection
4.3.2 Ba�ery Connec�on AF-SL series hybrid inverters are compatible with lithium battery. For lead acid battery or batteries with other brands, please confirm with local distributor or Afore for technical support. Note: Set battery type and manufacturer, please refer to Chapter 5.3. - Page 18 Installation Step 1 19±1mm Battery cable Note: Battery cable suggestion Cross - section 8-10 AWG Please make sure the battery polarities are correct. Step 2 Pass the crimped battery harness through the waterproof connector and the cover. Step 3 Insert the wire harness into the terminals according to “+” and “-” polarity, make the insulated terminals parallel with the terminals , the crimping screw torque is 2.0±0.1N.m...
- Page 19 Installation Step 4 A “click” sound will be heard when the connector assembly is correct. Step 5 Use an open-end wrench to tighten the waterproof lock. Step 6 Insert the battery connector into the inverter, if hear a “click”, it means the battery connection is finished.
-
Page 20: Bat-Can/Rs485
Installation 4.3.2.1 BAT-CAN/RS485 2 3 4 5 6 7 8 6 7 8 Assignment Assignment RS485A CAN/RS485 CANH CANL RS485B Lithium 4.3.2.2 BAT-NTC 12345678 RJ45 Plug Assignment NTC+ NTC- Lead Acid... -
Page 21: Multi Inverter Parallel
Installation 4.3.3 Mul� Inverter Parallel 12345678 RJ45 Plug Assignment 485A 485B 12345678 RJ45 Plug Assignment 485A 485B 12345678 RJ45 Plug Assignment 485A 485B... -
Page 22: Ac Connection
Installation 4.3.4 AC Connec�on The AC terminal contains “GRID” and “EPS”, GRID for load, and EPS for emergency load. Before connecting, a separate AC breaker between individual inverter and AC input power is necessary. This will ensure the inverter be securely disconnected during maintenance and fully protected from current of AC input. - Page 23 Installation Note: The wiring terminals should be wrapped with insulation tape, otherwise it will cause a short circuit and damage the inverter. Note: The Max. power load connects to EPS port should not exceed the inverter's EPS Max. output power range. Step 2 GRID EPS Load Step 3...
-
Page 24: Ct Or Meter Connection
Installation 4.3.5 CT or Meter Connec�on Meter and a current sensor(CT for short below) are used to detect current power direction of the local load and the grid. The output control function of the inverters will be activated based on the detected data. Meter Install the CT Main... - Page 25 Installation Install the Meter Inverter Afore Meter Main Breaker Grid Load Grid 1 2 3 4 5 6 7 8 Assignment RS485 A ( 24 ) RS485 B ( 25 )
-
Page 26: Communication Connection
Installation 4.4 Communication Connection The monitoring module could transmit the data to the cloud server, and display the data on the PC, tablet and smart-phone. Install the WIFI / Ethernet / GPRS / RS485 Communication WIFI / Ethernet / GPRS / RS485 communication is applicable to the inverter. Please refer to "Communication Configuration Instruction"... -
Page 27: Earth Connection
Installation 4.5 Earth Connection Note: A second protective earth (PE) terminal should be connected to the inverter. This prevents electric shock if the original protective PE wire fails. Step 1 Grounding terminal 10 ±0.5mm Note: Earth cable PE suggestion: Cross-section (Copper) 4-6mm² / 10AWG Step 2 Fix the grounding screw to the grounding connection of the machine housing. -
Page 28: Operation
Operation 5. Operation 5.1 Control Panel ○ ○ ○ ○ ○ ○ ○ ○ Items Items LCD Display UP Touch Button POWER LED Indicator DOWN Touch Button GRID LED Indicator BACK Touch Button ENTER Touch Button FAULT LED Indicator Note: Hold UP/DOWN button can be rolling quickly. -
Page 29: Menu Overview
Operation 5.2 Menu Overview AF-SL hybrid inverter has a LCD for clearly operating, and menu of the LCD can be presented as following: PV Info Bat Info Inv Info Run Info Grid Info Safty Load Info Model EPS Info Prated Err Record Tem Info Vrated... -
Page 30: Time & Date
Operation 5.3.1 Time & Date Sys Param System parameters setting Date &Time Date YYYY-MM-DD Time 24:00:00 5.3.2 Safety Sys Param System parameters setting Safty Safety Specifications Com-50Hz Com-60Hz China Japan-50 Japan-60 Note: US_240S Select the safty according to the US_240D requirements of the installation site. -
Page 31: Lithium Battery
Operation 5.3.3 Lithium Battery Run Param Operating parameters setting 5 4 3 2 * * * * Bat Param Lithium Afore Aoboet ApoLLo Note: Please select the right battery frand to your use. CALB Dyness ..5.3.4 PV Mode Operating parameters setting... -
Page 32: Leadacid
Operation 5.3.5 Lead Acid Run Param Operating parameters setting 5 4 3 2 * * * * Bat Param LeadAcid Capacity: 0-1000Ah Capacity range (0~1000Ah). Energy Management System (EMS Param) 5.3.6 Run Param Operating parameters setting 5 4 3 2 * * * * Energy management EMS Param... -
Page 33: Timing Of Use
Operation 5.3.7 Time of Use Run Param Operating parameters setting 5 4 3 2 * * * * Energy management EMS Param system parameters setting Chg/DChg Chg Cmd Charge / discharge. Stop Charge / discharge power Chg Pwr PChg: range -10000W~10000W. Chg Range Battery charge / discharge setting. -
Page 34: Ac Charging
Operation 5.3.8 AC Charging Run Param Operating parameters setting 5 4 3 2 * * * * Energy management EMS Param system parameters setting AC Chg AC charging ACChg: 1. ACChg — AC charging enable. MaxPpct: 0.0% 2. MaxPpct — AC charging Percentage. MaxSoc: 0.0% 3. -
Page 35: Forced Discharging
Operation Force Chg Forced charging ForceChg: PForce: 0.0% 1. ForceChg — Force charging enable. MaxSoc: 0.0V 2. PForce — Forced charging power percentage. TimOn1: 00:00 3. MaxSoc — Forced charging Max Soc. TinOff1: 00:00 4. TimOn1 — Forced charging start time 1. TimOn2 : 00:00 5. -
Page 36: Protection Parameters
Operation 5.3.11 Protection Parameters Run Param Operating parameters setting 5 4 3 2 * * * * IsoChk 1. Insulation resistance detection GfciChk 2. Leakage current detection EarthChk 3. Ground detection V.max 0.0V 4. Voltage upper limit V.maxT 0.00S 5. Voltage upper limit time V.min 0.0V 6. -
Page 37: Multi-Machine In Parallel
Operation 5.3.12 Multi-machine in Parallel Com Param Communication parameters setting Meter COM4 Parallel Parallel Sunspec Modbus Addr 1. Address Baud 9600 2. Band rate P Enable 3. Parallel enable 1. Inverter parallel amount Inv_Amout 2. Master / Slave Master/Slave 3. Address of slave Addr 4. -
Page 38: Power On/Off
AC side(Such as the grid side, EPS side, Gen side). • Earth line and Smart meter/CT line are connected. • AF-DF hybrid inverters should be set according to the required local grid standard. • More information please contact with Afore or distributors. -
Page 39: Power On
Maintenance&Trouble Shooting 6.1 Power ON • Turn on DC switch. • After LCD lighting, hybrid inverter should be set following Chapter 5.3 at the first time. • When inverter running under normal mode, Running indicator will light up(Ref. to Chapter 5.1). 6.2 Power OFF •... - Page 40 Maintenance&Trouble Shooting Fault Code and Trouble Shooting Type of Fault Code Name Description Recommend Solution • Check PV modules connection PV connection type • Check PV Mode setup Ref. PvConnectFault different from setup Chapter 5.3. • Check PV modules wires, those wires are soaked or damaged, and then carry ISO check among PV out rectification.
- Page 41 Maintenance&Trouble Shooting Type of Fault Code Name Description Recommend Solution PV7ReverseFault PV8ReverseFault PV9ReverseFault PV10ReverseFault PV11ReverseFault PV12ReverseFault Pv1AbnormalFault Pv2AbnormalFault Pv3AbnormalFault Pv4AbnormalFault Pv5AbnormalFault Pv6AbnormalFault Pv7AbnormalFault Pv8AbnormalFault PV Fault Pv9AbnormalFault Pv10AbnormalFault • Check PV modules partial occlusion or Pv11AbnormalFault cells damaged. PV(+) and PV(-) reversed •...
- Page 42 Maintenance&Trouble Shooting Type of Fault Code Name Description Recommend Solution • Check inverters connected battery lines PcsBatOverVoltFault and connectors broken or loose connect. • Carry out rectification if broken or Battery voltage over or PcsBatUnderVoltFault loose. under • Checking battery voltage is abnormal or not, then maintenance or change new PcsBatInsOverVoltFaul battery.
- Page 43 Maintenance&Trouble Shooting Type of Fault Code Name Description Recommend Solution BatPreChaFault BmsBatChgMosFault BmsBatDChgMosFault BMSVolOVFault BMSVolLFault VolLockOpenFault VolLockShortFault ChgRefOVFault • Inverter will restart automatically when the grid return to normal. GridLossFault Grid lost (islanding) • Check inverter connected with grid connectors and cable normal or not. •...
- Page 44 Maintenance&Trouble Shooting Type of Fault Code Name Description Recommend Solution • Reduce loads. • If sometimes overload, it can be ignored, when generation power enough UpsOverPowerFault 0ff-grid load over can be recovery. • If those faults occurs continuously and frequently, please ask help for local distributors.
- Page 45 Maintenance&Trouble Shooting Type of Fault Code Name Description Recommend Solution Pv9SwOverCurrFault Pv10SwOverCurrFault Pv11SwOverCurrFault Pv12SwOverCurrFault Boost1SelfCheck(boost)Fault Boost2SelfCheck(boost)Fault Boost3SelfCheck(boost)Fault Boost4SelfCheck(boost)Fault Boost5SelfCheck(boost)Fault • Power off, then restart (Ref. Chapter8). PV boost circuit abnormal Boost6SelfCheck(boost)Fault • If those faults continuously and when self checking frequently, please ask help for local Boost7SelfCheck(boost)Fault distributors.
- Page 46 Maintenance&Trouble Shooting Type of Fault Code Name Description Recommend Solution • Change fuse. BDCFuseFault BiDC fuse broken • Power off, then restart (Ref. Chapter8). • If those faults continuously and BDCRelayFault BiDC relay abnormal frequently, please ask help for local distributors.
- Page 47 Maintenance&Trouble Shooting Type of Fault Code Name Description Recommend Solution UpsOverVoltFault Off-grid output voltage over or under UpsUnderVoltFault • Power off, then restart (Ref. Chapter8). • If those faults occurs continuously and UpsOverFreqFault AC Fault Off-grid output frequency frequently, please ask help for local over or under distributors.
- Page 48 Maintenance&Trouble Shooting Type of Fault Code Name Description Recommend Solution UpsSCurAdChanFault UpsTCurAdChanFault GenRCurAdChanFault GenSCurAdChanFault GenTCurAdChanFault UpsRDcvAdChanFault UpsSDcvAdChanFault UpsTDcvAdChanFault All temperature sensors TempAdChanFault abnormal The sample value of PV, VoltAdConflictFault battery and BUS voltage • Power off, then restart (Ref. Chapter8). inconsistent •...
- Page 49 Maintenance&Trouble Shooting Type of Fault Code Name Description Recommend Solution EnvirTempAdChan- Warning • The warnings are not matter influence. • Power off, then restart (Ref. Chapter8). Some temperature sensors CoolingTempAdChan- • If those faults occurs continuously and abnormal Warning frequently, please ask help for local distributors.
-
Page 50: Specifications
Specifications 8. Specifications AF1K-SL-1 AF1.5K-SL-1 AF2K-SL-1 AF2.5K-SL-1 AF3K-SL-1 AF3.6K-SL-1 PV Input Max. Input Power (kW) Max. PV Voltage (V) MPPT Range (V) 80 - 500 Full MPPT Range (V) 80 - 500 90 - 500 120 - 500 150 - 500... - Page 51 Specifications AF3K-SL AF3.6K-SL AF4K-SL AF4.6K-SL AF5K-SL AF5.5K-SL AF6K-SL PV Input Max. Input Power (kW) Max. PV Voltage (V) MPPT Range (V) 80 - 500 Full MPPT Range (V) 90 - 500 110 - 500 120 - 500 130 - 500 150 - 500 160 - 500 170 - 500...
Need help?
Do you have a question about the AF1K-SL-1 and is the answer not in the manual?
Questions and answers