Table of Contents
Advertisement
Quick Links
Advertisement
Table of Contents

Related Manuals for Messtechnik SITA science line t60

Summary of Contents for Messtechnik SITA science line t60
- Page 1 S I T A s c i e n c e l i n e t 6 0 - M a n u a l -...
-
Page 2: Table Of Contents
Contents 1 CONTENTS 2 SITA-ONLINE T60 3 TECHNICAL DATA 4 CONNECTORS 5 SETTING UP THE DEVICE 6 INSERTING OR CHANGING THE BATTERY 7 CAPILLARY AND TEMPERATURE SENSOR 8 DRYING AGENT 9 KEYBOARD SITA Messtechnik GmbH... - Page 3 ONTRAST AND RIGHTNESS 12 MODES 12.1 ALIBRATION 12.2 LINE EASUREMENT 12.3 EASUREMENT 12.4 LEANING 13 MEMORY AND DEVICE PARAMETERS 13.1 EMORY 13.2 ETTING THE PTIONS 13.3 EVICE 14 PC-SOFTWARE 15 SURFACE TENSION OF WATER 16 SOFTWARE LICENCE AGREEMENT SITA Messtechnik GmbH...
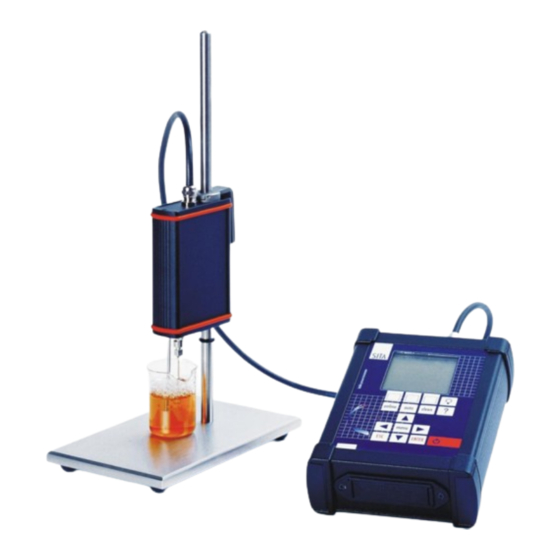
- Page 4 SITA science line t60 SITA science line t60 is a hand hold tensiometer for measuring the dynamic surface tension of liquids up to the semi-static range. The device works by measuring bubble pressure. This is done by pumping air through a capillary with the radius r into the liquid to be analysed.
-
Page 5: Technical Data
Technical Data Device: SITA science line t60-1 / t60-2 Memory: 16 Mbyte, non-volatile (several hundred measurements) Power Supply: (100...240)V / (47...63)Hz bzw. 4 x Mignon (AA) max./min. Ambient Temp. (Storage/Operation): (-20...80)°C / (0...50)°C max. Power Consumption: about 3,5 VA Total Weight... -
Page 6: Connectors
Connectors Drying agent (exchangeable) Socket for pneumatic cable to the sensor head Socket for PC connection Socket for power supply SITA Messtechnik GmbH... -
Page 7: Setting Up The Device
Inserting or Changing the Battery For inserting and changing the batteries (4 x Mignon (AA)) open the bottom of the device by depressing the ends of the battery box. Please take care for the correct polarisation. SITA Messtechnik GmbH... -
Page 8: Capillary And Temperature Sensor
In order to quickly change the capillaries, they come with a Luer Lock connector. For attaching the capillary to the sensor head simply plug it onto the Luer connector and turn to the right. Please, keep the inner seal clean in order to guaranty a sealed system. SITA Messtechnik GmbH... -
Page 9: Drying Agent
When the agent is saturated with moisture it turns pink. The desiccant cartridge should be changed if half of the drying agent has changed colour or if the measurements are getting unstable when measuring in cold liquids. Additional desiccant cartridges can be supplied by the manufacturer. SITA Messtechnik GmbH... -
Page 10: Keyboard
Keyboard SITA Messtechnik GmbH... - Page 11 For turning the device on and off hold down for 1 second Start on-line measurement (2x) Start auto-measurement (2x) Start cleaning-mode Call menu Escape Confirm Cursor keys Display illumination Help button SITA Messtechnik GmbH...
-
Page 12: Turning The On-Line Tensiometer On And Off
The first line shows the title of the current menu. In the second to the last line of the display shows the current measuring mode (online/auto/clean) or error symbols and a bar indicator of the bubble pressure are shown. SITA Messtechnik GmbH... -
Page 13: Adjusting Contrast And Brightness
Save the settings by pressing the software key "save". This takes you back to the "Set-up" menu. Alternatively, you may press the software key "exit" which exits the set-up mode without saving. Press the menu or ESC key to return to the "Main Menu". SITA Messtechnik GmbH... -
Page 14: Modes
. The calibration window will be shown in the display after pressing the ENTER key. You can start the calibration by pressing "start". If a measurement is running at this moment you need to press the left software key ("yes") in order to terminate the measurement. SITA Messtechnik GmbH... -
Page 15: On-Line Measurement
(The first punch takes you to the measuring and display options menu. Here, you may check or change the parameters of the measurement to be started). SITA Messtechnik GmbH... - Page 16 Clear the shown data (diagram or table) by starting a new measurement („on“ / “off“) autosave: Save the shown data (diagram or table) into the device memory after the measurement is finished ("on" / "off"). It is useful to set “auto clr data” on. SITA Messtechnik GmbH...
- Page 17 Parameter: Defines which parameter the readings are to be sorted by: "number", period ("t-period“), "frequency" or bubble lifetime ("t-life“). cursor speed: Sets the cursor speed for navigating in the table: "slow", "medium", "fast". Press the right software key ("return") to exit the "EDIT TABLE“ menu. SITA Messtechnik GmbH...
-
Page 18: Auto-Measurement
"stop". Pressing the left software key "set" takes you to the set- up menu. In order to continue the measurement you need to press the middle software key "go on". SITA Messtechnik GmbH... - Page 19 Save the shown data (diagram or table) into the device memory after the measurement is finished ("on" / "off"). It is useful to set “auto clr data” on. graphic settings... Please, refer to 12.2 "On-line Measurement“. table settings... Please, refer to 12.2 "On-line Measurement“. SITA Messtechnik GmbH...
-
Page 20: Cleaning Mode
The menu “Memory” has the options as follow: save data to mem save the actual measurement (refer to autosave 12.2, 12.3) load saved data show saved measurements clear data clear showed data (diagram or table) clear memory clear all saved measurement SITA Messtechnik GmbH... -
Page 21: Setting The Options
The following events can be indicated with an alarm: rs232: Receiving commands from the PC. key valid: Wrong key pressed. key error: Inactive key pressed (low tone). new value: Measure again. low battery: Battery low. warnings: An error occurred. SITA Messtechnik GmbH... - Page 22 “direct” One bubble will be used for getting one reading. “adapted” In case of lower bubble lifetimes several bubbles will be used for getting one reading. language helptext: Changing the language of the on-line help. SITA Messtechnik GmbH...
- Page 23 An alternative to pressing the ENTER key is to press the "edit" software key. Changes will only be saved if the menu is exited by pressing the middle software key ("save"). All changes will be lost if the ESC key or the "exit" software key is pressed. SITA Messtechnik GmbH...
-
Page 24: Device Info
Symbols that indicate a low battery or temperatures which are too high or too low will also be shown in the status line of the display alternating with the measuring mode. That results in a flashing status line. SITA Messtechnik GmbH... -
Page 25: Pc-Software
Connect the tensiometer to the serial port of your PC using the interface cable. The program automatically detects connected and powered up (i.e. switched on) devices. You can control the tensiometer either from the PC or directly with the device. SITA Messtechnik GmbH... - Page 26 For installing the program, insert the installation disk in the disk drive and start setup.exe. System requirements Intel compatible PC 586 / 133MHz or better, 32MB RAM or more, mouse, operating system: Windows 32-Bit, free serial port (RS232) for connecting the device (FIFO activated!). SITA Messtechnik GmbH...
-
Page 27: Surface Tension Of Water
60,56 73,35 69,39 65,06 60,36 73,20 69,23 64,88 60,16 73,05 69,06 64,70 59,97 72,90 68,89 64,52 59,77 72,74 68,73 64,34 59,57 72,59 68,56 64,15 59,37 72,44 68,39 63,97 59,18 72,28 68,22 63,78 58,98 72,13 68,05 63,60 58,78 SITA Messtechnik GmbH... -
Page 28: Software Licence Agreement
2. OWNERSHIP. The Software, including all pictures, icons, photographs, animation, videos, music and text contained in it, is owned by SITA Messtechnik GmbH or their distributors and is protected under copyright laws and other national laws as well as international treaty provisions. You... - Page 29 Messtechnik GmbH makes no representations or warranties with regard to the Software and documentation, including but not limited to the implied fitness for a particular purpose. SITA Messtechnik GmbH shall not be liable for errors or omissions contained in software or manuals, accuracy...
- Page 30 Rev 5 engl. (09/2012) SITA Messtechnik GmbH...
Need help?
Do you have a question about the SITA science line t60 and is the answer not in the manual?
Questions and answers