
Related Manuals for Makita GCV06


Summary of Contents for Makita GCV06
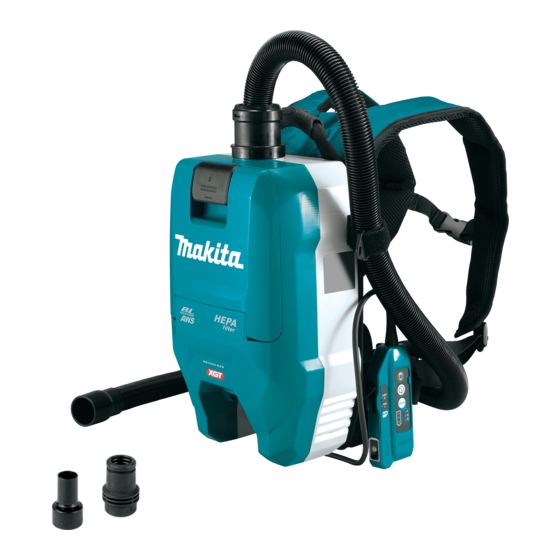
- Page 1 INSTRUCTION MANUAL MANUAL DE INSTRUCCIONES Cordless Backpack Vacuum Cleaner Aspiradora de mochila a batería GCV06 IMPORTANT: Read Before Using. IMPORTANTE: Lea antes de usar.
-
Page 2: Specifications
ENGLISH (Original instructions) SPECIFICATIONS Model: GCV06 Capacity Filter bag 2.0 L (0.53 gal.) Dust bag 1.5 L (0.40 gal.) Maximum air volume 1.9 m /min (67.1 cu.ft/min) Vacuum 18 kPa Dimensions (L x W x H) 233 mm x 150 mm x 375 mm (excluding the harness, with BL4040) (9-1/8″... - Page 3 Do not handle appliance with wet Under abusive conditions, liquid hands. may be ejected from the battery; avoid contact. If contact acciden- Do not put any object into openings. Do tally occurs, flush with water. If liq- not use with any opening blocked; keep uid contacts eyes, additionally seek free of dust, lint, hair, and anything that medical help.
-
Page 4: Additional Safety Rules
ADDITIONAL NOTE: Read the OSHA regulation on silica dust to understand the requirements needed to reduce SAFETY RULES exposure to silica dust at the job- site. Specific rules apply to the drill- Read this instruction manual and ing, demolition cutting and grinding the charger instruction manual care- materials that contain silica. - Page 5 It will shipped, consulting an expert for also void the Makita warranty for the Makita tool and hazardous material is required. charger. Please also observe possibly more Tips for maintaining maximum detailed national regulations.
-
Page 6: Functional Description
26. Do not insert any devices other than Makita Important safety instructions for wireless unit into the slot on the tool. wireless unit 27. Do not use the tool with the lid of the slot dam- aged. Water, dust, and dirt come into the slot may Do not disassemble or tamper with the wire- cause malfunction. - Page 7 To remove the battery cartridge, slide it from the tool Indicating the remaining battery while sliding the button on the front of the cartridge. capacity To install the battery cartridge, align the tongue on the battery cartridge with the groove in the housing and slip it into place.
- Page 8 Fig.6 Let the appliance and battery(ies) cool down. ► 1. Strap 2. Fastener If no improvement can be found by restoring protection system, then contact your local Makita Service Center. Carrying hook Adjusting belts CAUTION: Use the hanging/mounting parts The tightness of the shoulder belts, upper and lower for their intended purposes only.
-
Page 9: Stand-By Switch
Stand-by switch NOTE: You can change the suction power before turning on the cleaner. The stand-by switch is the switch to turn on/off the NOTE: The cleaner starts the operation with the wireless activation function. The vacuum cleaner is in same suction power as the last operation. -
Page 10: Connecting The Tool
Assembling hose NOTE: Always use a suitable front cuff. When using the front cuff 24, attach it to the front cuff 22 that is connected to the hose. Insert the hose cuff into the vacuum cleaner body and turn it clockwise. Fig.15 Fig.12 ►... - Page 11 To remove the bent pipe assembly, loosen the sleeve of The length of the wand can be adjusted. bent pipe assembly from the hose. With pressing the slide button, adjust the wand length. The length is locked when releasing the slide button. Twist and insert the nozzle to the extension wand.
- Page 12 The length of the wand can be adjusted. NOTICE: When the filter bag is already full, Loosen the ring on the wand and adjust the wand replace with new one. When the dust bag is length. Tighten the ring at your desired length. already full, empty it.
-
Page 13: Operation
Insert the filter bag into the slit on the upper side of Align the hole of the filter bag with the hose cuff the room as illustrated. and push the cardboard portion to the end. Make sure that the rubber ring on the filter bag goes over the rim on the hose cuff. - Page 14 Shoulder the vacuum cleaner body and fas- Replace the filter bag when it becomes full. Open ten lower and upper belts. Adjust the tightness as the lid and take out the filter bag. Pull the strip on the necessary. side of the opening to shut the filter bag and dispose of the filter bag in whole.
- Page 15 WIRELESS ACTIVATION NOTE: Wireless activation needs Makita tools equipped with the wireless unit. FUNCTION NOTE: Prior to the initial use of the wireless activa- tion function with each tool, the tool registration is required. Once the registration is finished with the...
- Page 16 Tool registration for the cleaner the lid. When inserting the wireless unit, align the projections NOTE: A Makita tool supporting the wireless activa- with the recessed portions on the slot. tion function is required for the tool registration. NOTE: Finish installing the wireless unit to the tool before starting the tool registration.
- Page 17 If the cleaner and the tool are linked successfully, the Push the wireless activation button on the tool wireless activation lamps will light up in green for 2 briefly. The wireless activation lamp will blink in blue. seconds and start blinking in blue. NOTE: The wireless activation lamps finish blinking in green after 20 seconds elapsed.
- Page 18 Cancelling tool registration for the NOTE: The wireless activation lamps finish blinking in red after 20 seconds elapsed. Press the wireless acti- cleaner vation button on the tool while the wireless activation lamp on the cleaner is blinking. If the wireless acti- Perform the following procedure when cancelling the vation lamp does not blink in red, push the wireless tool registration for the cleaner.
- Page 19 Description of the wireless activation lamp status Fig.45 ► 1. Wireless activation button 2. Wireless activation lamp The wireless activation lamp shows the status of the wireless activation function. Refer to the below table for the meaning of the lamp status. Status Wireless activation lamp Description...
- Page 20 Before asking for repairs, conduct your own inspection first. If you find a problem that is not explained in the manual, do not attempt to dismantle the tool. Instead, ask Makita Authorized Service Centers, always using Makita replace- ment parts for repairs.
-
Page 21: Maintenance
NOTICE: To prevent the HEPA filter from being be performed by Makita Authorized or Factory Service damaged, do not use following tools and similar Centers, always using Makita replacement parts. items for cleaning : —... -
Page 22: Cleaning The Dust Bag
OPTIONAL ACCESSORIES CAUTION: These accessories or attachments are recommended for use with your Makita tool specified in this manual. The use of any other accessories or attachments might present a risk of injury to persons. Only use accessory or attachment for its stated purpose. - Page 23 Disposing of dust Cyclone attachment When dust has accumulated up to the full line of the NOTE: When using the cyclone attachment with this dust case, follow the procedure below and dispose of appliance, the bent pipe is also required. the dust.
- Page 24 Fig.54 ► 1. Mesh filter 2. Hook 3. Port MAKITA LIMITED WARRANTY Please refer to the annexed warranty sheet for the most current warranty terms applicable to this product. If annexed warranty sheet is not available, refer to the warranty details set forth at below website for your respective country.
-
Page 25: Especificaciones
ESPAÑOL (Instrucciones originales) ESPECIFICACIONES Modelo: GCV06 Capacidad Bolsa del filtro 2,0 L (0,53 gal.) Bolsa recolectora de polvo 1,5 L (0,40 gal.) Volumen de aire máximo 1,9 m /min (67,1 cu.ft/min) Vacío 18 kPa Dimensiones (La x An x Al) 233 mm x 150 mm x 375 mm (sin incluir el arnés, con el modelo BL4040) - Page 26 No lo utilice con una batería dañada. Use los aparatos únicamente con Si el aparato no está funcionando los paquetes de baterías designa- como debiera, se ha dejado caer, se dos específicamente para ellos. El ha dañado, se ha dejado a la intem- uso de otros paquetes de baterías perie o ha caído sobre agua, llévelo puede generar riesgo de lesiones e...
-
Page 27: Reglas De Seguridad Adicionales
No modifique ni intente reparar el Polvo fino conductor y solidi- • aparato ni el paquete de baterías ficante (polvo metálico o de salvo como se indique en las ins- carbono) trucciones para el uso y cuidado. Deshumidificador • No use ningún alimentador con Grandes cantidades de polvo •... - Page 28 Este aparato no se destina para Evite cortocircuitar el cartucho de batería: utilizarse por personas (incluyendo No toque las terminales con nin- niños) cuyas capacidades físicas, gún material conductor. sensoriales o mentales sean dife- Evite guardar el cartucho de rentes o estén reducidas o carezcan batería en un cajón junto con de experiencia o de conocimiento, a otros objetos metálicos, tales...
- Page 29 Makita. El uso de baterías no origina- les de Makita, o de baterías alteradas, puede ocasio- nar que las baterías exploten causando un incendio, lesiones personales y daños. Asimismo, esto inva- lidará la garantía de Makita para la herramienta y el cargador Makita. 29 ESPAÑOL...
-
Page 30: Descripción Del Funcionamiento
26. No inserte ningún otro dispositivo que no sea la unidad inalámbrica de Makita en la ranura de la herramienta. 27. No utilice la herramienta si la tapa de la ranura está... - Page 31 Indicación de capacidad restante de PRECAUCIÓN: Introduzca siempre com- la batería pletamente el cartucho de batería hasta que el indicador rojo no pueda verse. Si no, podría accidentalmente salirse de la herramienta y caer al suelo causando una lesión a usted o alguien a su alrededor.
-
Page 32: Protección Contra Sobrecarga
Si no hay ninguna mejora al restaurar el sistema de protec- PRECAUCIÓN: Utilice las partes para col- ción, comuníquese con su centro local de servicio Makita. gado/montaje para sus propósitos pretendidos Ajuste de las correas solamente. El uso para un propósito no pretendido podría ocasionar un accidente o una lesión personal. - Page 33 Usted puede cambiar la potencia de succión de la aspi- Interruptor de modo en espera radora en tres pasos presionando el botón de cambio de potencia de succión. Cada pulsación de este botón El interruptor de modo en espera es el que sirve para repite el modo 1 a 3 en un ciclo.
-
Page 34: Conexión De La Herramienta
El bucle en la correa inferior se puede utilizar para Conexión de la herramienta transportar boquillas, tal como se ilustra. Si el conjunto de tubo curvo está acoplado a la manguera, afloje el manguito del conjunto de tubo curvo y retírelo. Fig.11 ►... - Page 35 Siga los procedimientos a continuación depen- Uso como aspiradora diendo del tipo de tubo de extensión: NOTA: El tubo de extensión de tipo corredera y el Si desea usar este producto como aspiradora, siga los tubo de extensión de tipo anillo no son compatibles procedimientos a continuación.
- Page 36 Gancho de la manguera Para el tubo de extensión de tipo anillo Cárguese al hombro el cuerpo de la aspiradora y a Cuando suspenda la operación, el gancho en el con- continuación inserte girando el tubo de extensión en el junto de tubo curvo puede utilizarse para colgar el tubo conjunto de tubo curvo.
- Page 37 Inserte la bolsa del filtro en la hendidura en la parte superior del compartimiento tal como se ilustra. Fig.25 Fig.23 ► 1. Hendidura 2. Bolsa del filtro Desbloquee la palanca y abra la cubierta de la caja para polvo. Cuando utilice la bolsa recolectora de polvo, inserte su reborde en la hendidura.
-
Page 38: Operación
Alinee el orificio de la bolsa del filtro con la boca Cargue al hombro el cuerpo de la aspiradora y fije de la manguera y empuje la parte de cartón hasta el las correas inferior y superior. Ajuste lo apretado según tope. - Page 39 Reemplace la bolsa del filtro cuando esté llena. FUNCIÓN DE Abra la tapa y extraiga la bolsa del filtro. Jale la tira en el lado de la abertura para cerrar la bolsa del filtro y ACTIVACIÓN desechar la bolsa del filtro completa. INALÁMBRICA Lo que puede hacer con la función de activación inalámbrica...
- Page 40 NOTA: La activación inalámbrica requiere que la cierre la tapa. unidad inalámbrica esté equipada con herramientas Makita. Cuando inserte la unidad inalámbrica, alinee las partes salientes con las partes cóncavas en la ranura. NOTA: Antes de usar por primera vez la función de activación inalámbrica con cada herramienta, es...
- Page 41 NOTA: Para el registro de la herramienta, se requiere una herramienta Makita compatible con la función de activación inalámbrica. NOTA: Termine de instalar la unidad inalámbrica en la herramienta antes de comenzar con el registro de la herramienta.
- Page 42 Después de registrar una herramienta en la aspiradora, Encienda la herramienta. Compruebe si la esta última se activará automáticamente junto con el aspiradora funciona mientras la herramienta está en interruptor de activación de la herramienta. funcionamiento. Instale las unidades inalámbricas en la aspiradora PRECAUCIÓN: Verifique siempre que fun- y en la herramienta respectivamente.
- Page 43 Oprima el botón de activación inalámbrica en la Borrado de todos los registros de aspiradora durante 6 segundos. La luz indicadora de herramientas activación inalámbrica parpadeará en verde y luego se pondrá en rojo. Después de eso, oprima el botón de Usted puede borrar todos los registros de herramientas activación inalámbrica en la herramienta de la misma de la aspiradora como se indica a continuación.
- Page 44 Descripción del estado de la luz indicadora de activación inalámbrica Fig.45 ► 1. Botón de activación inalámbrica 2. Luz indica- dora de activación inalámbrica La luz indicadora de activación inalámbrica muestra el estado de la función de activación inalámbrica. Consulte la tabla a continuación para ver qué...
- Page 45 Antes de solicitar alguna reparación, primero realice una inspección por su cuenta. Si detecta algún problema que no esté explicado en el manual, no intente desensamblar la herramienta. En vez de esto, solicite la reparación a un centro de servicio autorizado de Makita, usando siempre piezas de repuesto Makita. Estado de la anomalía Causa probable (avería)
- Page 46 Estado de la anomalía Causa probable (avería) Remedio La aspiradora no funciona junto con La unidad inalámbrica no está instalada Instale la unidad inalámbrica correctamente. el interruptor de activación de la en la aspiradora y/o la herramienta. herramienta. La unidad inalámbrica está instalada incorrectamente en la aspiradora y/o la herramienta.
-
Page 47: Mantenimiento
Para mantener la SEGURIDAD y FIABILIDAD del pro- ducto, las reparaciones, y cualquier otra tarea de man- tenimiento o ajuste deberán ser realizadas en centros de servicio autorizados o de fábrica Makita, empleando siempre repuestos Makita. Limpieza del filtro HEPA PRECAUCIÓN:... -
Page 48: Accesorios Opcionales
Estos accesorios o aditamen- uso es algo sencillo. tos están recomendados para utilizarse con su PRECAUCIÓN: herramienta Makita especificada en este manual. Asegúrese siempre de que la El empleo de cualquier otro accesorio o aditamento herramienta esté apagada y el cartucho de batería puede conllevar el riesgo de lesiones personales. - Page 49 Eliminación del polvo Limpieza Cuando se haya acumulado el polvo hasta la línea de Cuando la caja para polvo se ensucia o el filtro de malla llenado completo de la caja para polvo, siga el procedi- se obstruye, quítelos y lávelos con agua. (Consulte la miento a continuación y deseche el polvo.
- Page 50 Fig.54 ► 1. Filtro de malla 2. Gancho 3. Puerto GARANTÍA LIMITADA DE MAKITA Ésta Garantía no aplica para México Consulte la hoja de la garantía anexa para ver los términos más vigentes de la garantía aplicable a este producto.
- Page 52 Para reducir la exposición a estos productos químicos: trabaje en un área bien ventilada y póngase el equipo de seguridad indicado, tal como las máscaras contra polvo que están especialmente diseñadas para filtrar partículas microscópicas. Makita Corporation 3-11-8, Sumiyoshi-cho, Anjo, Aichi 446-8502 Japan 885949A940...