Table of Contents

Related Manuals for Shure Microflex MXN5W-C


Summary of Contents for Shure Microflex MXN5W-C
- Page 1 MXN5-C ™ Microflex Networked Ceiling Loudspeaker Shure networked ceiling loudspeaker user guide (MXN5W-C). Learn how to install and control this PoE-powered loudspeaker. Control it with other Shure devices in Designer. Version: 6.5 (2022-E)
-
Page 2: Table Of Contents
What's in the Box Encryption Using Designer's Optimize Workflow AES67 Installing the Ceiling Loudspeaker Sending Audio from a Shure Device Connecting to Power Receiving Audio from a Device Using a Different Audio Network Protocol Status LED Behavior Painting the Grille... -
Page 3: Mxn5-C Microflex™ Networked Ceiling Loudspeaker
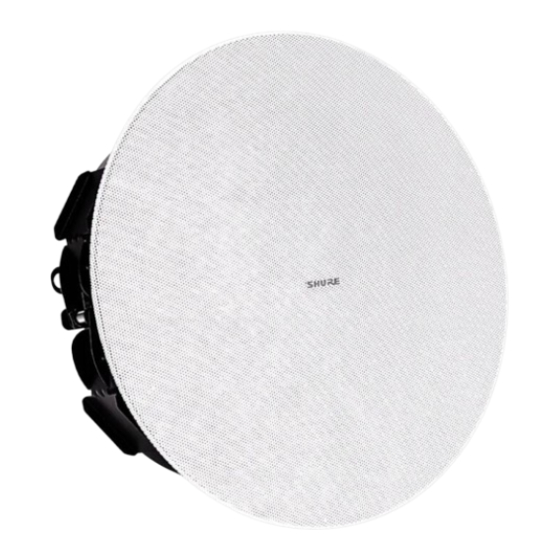
MXN5-C ™ Microflex Networked Ceiling Loudspeaker General Description The Shure MXN5-C Microflex Networked Ceiling Loudspeaker provides high-quality speech reproduction for A/V conferencing applications. With a low-profile design optimized for easy installation in drop ceiling configurations, the MXN5 integrates seam- lessly with other Shure networked PoE-enabled audio devices using the Dante audio networking protocol. Features Loudspeaker technical elements •... -
Page 4: Mxn5-C Loudspeaker Parts
Off = No network link On = Network link established Flashing = Network link active Screws for mounting arms Post for grille safety restraint Power LED Reset button What's in the Box • Loudspeaker • Magnetic grille with removable Shure logo 4/26... -
Page 5: Using Designer's Optimize Workflow
Shure Incorporated • Flexible conduit clamp • Cover plate Using Designer's Optimize Workflow Designer's Optimize workflow speeds up the process of connecting systems with at least 1 microphone and 1 audio processor. Optimize also creates mute control routes in rooms with MXA network mute buttons. When you select Optimize in a room, De- signer does the following: •... - Page 6 Shure Incorporated • Screwdriver or drill • Braided metal cable or other high-strength wire for secondary attachment point (not included) • Tile bridge for ceiling tile installations (not included) • Pre-construction bracket for other types of ceilings (not included) Tile Ceilings Use the loudspeaker packaging or the tile bridge to mark a cutout in the tile.
- Page 7 Shure Incorporated Attach the cover plate with the screwdriver. If using conduit, push the conduit connector into the knockout. Attach cable to the loudspeaker's secondary attachment point and to an attachment point in the ceiling. This cable pro- vides additional mounting security. 7/26...
- Page 8 Shure Incorporated 4. Place the loudspeaker in the mounting hole. Tighten the screw on each side of the loudspeaker until each mounting arm fully expands to the secure the loudspeaker. Do not over-tighten the screws. 8/26...
- Page 9 Shure Incorporated 5. Slide to attach the grille safety restraint to the post on the loudspeaker. Do not unscrew the screw to attach the re- straint. 9/26...
-
Page 10: Connecting To Power
Shure Incorporated Attach the magnetic grille to the loudspeaker. The Shure logo is also magnetic, so you can reposition or remove it if necessary. Connecting to Power This device requires Power over Ethernet Plus (PoE+) or PoE to power it. -
Page 11: Painting The Grille
There are 2 hardware reset options: Network reset (press button for 4-8 seconds) Resets all Shure control and audio network IP settings to factory defaults. Power LED flashes green. Full factory reset (press button for longer than 8 seconds) Resets all network and Designer settings to the factory defaults. Power LED flashes green, then solid green after 8 sec- onds. -
Page 12: How To Update Firmware Using Designer
The firmware of all devices has the form of MAJOR.MINOR.PATCH (e.g., 1.2.14). At a minimum, all devices on the network, must have the same MAJOR and MINOR firmware version numbers (e.g., 1.2.x). SystemOn Compatibility You can monitor and manage this device using Shure SystemOn software. Install SystemOn to: • Remotely monitor Shure devices across networks •... -
Page 13: Using The Dante Inputs
Sends a post-DSP signal to the Dante output. Use this option to send the loudspeaker's signal to an AEC reference channel on an MXA910. Routing Signals to the Loudspeaker To route audio to the loudspeakers, you can use Shure Designer software or Dante Controller software. In Designer, create a room that has all loudspeakers and any Dante audio sources. ◦... -
Page 14: Routing To Each Loudspeaker Individually
Routing Signals from Loudspeaker to Loudspeaker Use this method when: • Signal comes from device with Ultimo chip transmitting in unicast, such as Shure ANI Learn more about Dante flows in our FAQs or from Audinate. If you encounter unicast Dante flow limits, route from one loudspeaker to another using the Dante output channel. -
Page 15: Setting Device Height And Listener Height
Shure Incorporated In Designer, put all of the loudspeakers and other devices you want to route to in the same room. Route the signal to the first loudspeaker. Open the first loudspeaker's configuration window in Designer. Choose Pre-DSP in the Dante output signal menu. This prevents DSP blocks from stacking on top of each other in the signal chain. -
Page 16: Dsp Settings
Shure Incorporated EASE files are available at shure.com. DSP Settings Parametric Equalizer (PEQ) Maximize the loudspeaker's audio quality by adjusting the frequency response with the parametric equalizer (PEQ). Common equalizer applications: • Improve speech intelligibility • Reduce room irregularities •... - Page 17 Shure Incorporated 4-Band Equalizers Filter Types: Parametric: Attenuates or boosts the signal within a customizable frequency range. Low Cut: Rolls off the audio signal below the selected frequency. Low Shelf: Attenuates or boosts the audio signal below the selected frequency.
-
Page 18: Delay
Shure Incorporated Delay If you're installing loudspeakers in a large area, you may need to time-align some speakers using delay. This ensures that the signal arrives to all parts of the room at the same time for even coverage. MXN5-C delay range: 0-160 ms Limiter Use the limiter to prevent output signals from clipping or distorting. -
Page 19: Encryption
Important: For encryption to work: • Encryption must be universally enabled or disabled on all connected Shure devices in the same room. • AES67 must be disabled in Dante Controller to turn encryption on or off. AES67 encryption is currently not supported. -
Page 20: Sending Audio From A Shure Device
AES67 flow, the AES67 session ID and IP address are required. Shure devices: The transmitting device must support SAP. In Dante Controller, a transmit device (appears as an IP address) can be routed like any other Dante device. -
Page 21: Dante Flows For Shure Devices
Every Dante device has a specific number of transmit flows and receive flows. The number of flows is determined by Dante platform capabilities. Unicast and multicast transmission settings also affect the number of Dante flows a device can send or receive. Using multi- cast transmission can help overcome unicast flow limitations. Shure devices use different Dante platforms: Shure Devices Using Plat- Unicast Transmit Flow Dante Platform... -
Page 22: Ease Files Available Online
Dante audio. EASE Files Available Online EASE files are available for this device at shure.com. Using Command Strings This device receives logic commands over the network. Many parameters controlled through Designer can be controlled using a third-party control system, using the appropriate command string. -
Page 23: Specifications
Shure Incorporated Specifications Connector Type RJ45 Power Requirements Power over Ethernet (PoE) Class 0 or PoE Plus Class 4 Power Consumption Power over Ethernet (PoE) 12 W maximum (11 W typical) PoE Plus 24 W maximum (23 W typical) Weight 6.5 lbs (2.95 kg) -
Page 24: Optional Accessories And Replacement Parts
Not including Dante latency 1.5 ms Optional Accessories and Replacement Parts Tile bridge A-MXN5-TB New construction bracket A-MXN5-NCB Magnetic grille and Shure logo RPMXN5-G Clamp cover conduit RPMXN5-C Contact Customer Support Didn't find what you need? Contact our customer support to get help. -
Page 25: Important Product Information
The equipment is intended to be used in professional audio applications. Note: This device is not intended to be connected directly to a public internet network. Changes or modifications not expressly approved by Shure Incorporated could void your authority to operate this equipment. CAN ICES-003 (B)/NMB-003(B) This Class B digital apparatus complies with Canadian ICES-003. - Page 26 This product meets the Essential Requirements of all relevant European directives and is eligible for CE marking. The CE Declaration of Conformity can be obtained from Shure Incorporated or any of its European representatives. For contact information please visit www.shure.com...
Need help?
Do you have a question about the Microflex MXN5W-C and is the answer not in the manual?
Questions and answers